
I’m not one to indulge in desserts too often, my sweet tooth is… lacking, but Flan is one of the few desserts I can’t keep my hands away from. Which means, I make it as infrequently as possible to keep that heart attack at bay.
I’m always reading about variations to flan, adding chocolate, pumpkin, coconut, it goes on and on. So, I thought of trying my own little tropical variation: Nance.

This is a very interesting little fruit, and it IS little, anywhere between the size of a blueberry and a cherry. In fact, they are known as yellow cherries in English. The fruit has some fat and is tart and becomes sweeter after picking. It grows on a tree and when they’re ready, they fall to the ground, collected, rinsed and thrown in a bottle with water for a few days. This allows them to ripen fully and develop its sweetness.
In order to get the pulp, you either have to use your hands and squish them or put them in the blender, liquid and all, and pulse them a few times to loosen the pulp. In this case, since the nance was sold in the frozen section of my grocers’, I thawed them and whirled them about in the blender with enough water to keep them moving. Strain and you’re ready to make a chicha–Panama’s pumped up fruit drinks, pesada or this to-die-for flan.

Flan de Nance
For the caramel sauce:
1-1/4 cp sugar
For the flan:
6 whole eggs
4 oz cream cheese
1-1/2 cps nance pulp
1/2 tsp almond extract
1 tsp vanilla extract
1/2 cp granulated (white) sugar
1/4 tsp sea salt (bit less if using regular salt)
1-1/2 cps whole milk
Preheat oven to 350°. Prepare a Bain-Marie: you will need a baking pan that is large enough to hold the dish you’re baking the flan in. Add hot water to the large pan and place in the oven.
To make the caramel, following the directions I gave you before for a cheese flan; here’s the link.
Making the flan: Put all the ingredients except for the milk in a blender glass and whisk until smooth. To avoid foaming the eggs, do this by pulsating instead of letting the blender go for a long time. It shouldn’t take more than 5-6 pulses.
In the meantime, use the same saucepan you used to make caramel to scald the milk. There will probably be some caramel stuck to the pot. That’s fine, just add the milk and simmer until you see bubbles beginning to form around the edges. Turn off and remove from the heat.
You will now incorporate the hot milk into the egg mixture, because the milk is pretty hot, start the blender on low and slowly drizzle in the milk/sugar mix. As soon as all the milk is added, turn off the blender. Pour the custard into the carameled baking dish. Place the dish with the custard into the pan with water.
If you bake it in a 9-inch dish, it will probably be in the oven for close to 45 minutes. You’ll know it is ready when the top is golden and it begins to separate from the sides, but there’s still a jiggle at the center. Remove from the oven and allow it to cool at room temperature for about 30 minutes, then put it in the fridge to cool it all the way through.

When you’re ready to serve, run a table knife around the edge to help loosen the cooled flan. Then invert it onto your serving dish. Make sure you invert over your sink, you’ll be amazed at how much of that caramel melts away onto your serving dish and continues running down your arm and on the clean floors.

Cookingly yours,
Anamaris
 This week Foodalogue’s Culinary Tour will take us to the Republic of Turkey. Do you have your passport? It’s ok, you don’t really need it, I can get you through. We’re going to Turkey this week. Not the bird, the country. Turkey calls Bulgaria, Greece and Syria neighbors–among others. Turkey is a relatively young country, established in 1923 after the defeat of the Ottoman empire. I’ve never been, but I hear it is simply breathtaking and exciting.
I can’t say I am intimately familiar with Turkish cuisine, but Google is my friend and I know more about it today than I did yesterday. Since Turkey was ruled by the Ottomans for a while, you will notice their cuisine harmonizes with that of Central Asia, the Middle East and the Balkans. As with most countries, the cuisine will vary from region to region, but there are still some common ingredients, such as eggplant, green peppers, lentils, pistachios and a number of herbs.
There is also an emphasis on desserts. Turns out, baklava is a Turkish specialty! Yes, I know. I always thought this was a Greek specialty, just as I thought it was always made with honey. How did I ever survive without the Internet, I will never know. What I do know is that baklava has strong ties to Turkey, that there are other desserts similar to it and they don’t have to include honey!!! A definite win in my book.
Wikipedia provided a very detailed compilation of Turkish desserts. The list started off with baklava and then mentioned other similar treats. Enter Sobiyet. I’m going to say that Sobiyet is the baklava’s uppity cousin. Or the fat one. Just like baklava, Sobiyet starts off with layers upon layers of buttery pastry, but it is then crowned with a creamy filling. I found an excellent recipe here.

Following Joan’s Culinary Tour, I have a choice as to how I honor the destination. I can:
- go traditional: make one of the country’s national or traditional dishes.
- choose a contemporary approach: take a traditional recipe and contemporize it.
- or go for a wild card and use the flavors and techniques of the country we are visiting, and create my own recipe.
This time I opted for a contemporary approach and tweaked the traditional Turkish recipe by substituting with my Latin stuff. Actually, I Panamanianized it, as the substitutions are very common ingredients in Panama. I added cashews, instead of using regular sugar or honey, I went for raspadura–unrefined sugar cane and I also added orange peel, cinnamon sticks and cloves for aromatics.

Cashew & Pistachio Sobiyet
I came across a delicious recipe by Mercedes over at Dessert Candy and followed it pretty closely except for the following changes:
For the custard filling: I allowed the milk to steep with a few cloves and a cinnamon stick, which I strained before adding the semolina. Once the custard had thickened, I added a bit of nutmeg and pureed raw cashews.
For the syrup: I replaced the sugar with raspadura, added the zest and of an orange, and a bit of vanilla extract.
For the assembly: I sprinkled chopped cashews and pistachios over the custard. Also, when I had 2 or 3 sheets left, I topped the layer with more pistachios, I wanted the color to show through the top. I finished with more buttery phyllo.

I kinda free-formed it into a round; once all the layers were in place, I used the last 2 layers to tuck all the edges under.

The result was a crisp, moist, sticky pastry that was (still is, there are a few pieces left) just sweet enough. The raspadura gave it a taste of caramel that seems to be perfumed with anise. It makes me think of toffee. Well, there are a lot more shots, if you care to look here.

This was an exciting destination, be sure to stop by and visit with my fellow travelers. Joan made a sinful looking dish with eggplant and my dear Norma made a 2-layer rice pudding. Join us at the next destination, Japan.
Cookingly yours,
Anamaris
Sopa de Gloria is one of the desserts you will find at every significant event/celebration in Panama. Sopa de Gloria would loosely translate to ‘Glorious Soup’, it is a rum-y, creamy trifle. My mom would make the syrup with raisins and prunes and would then add port wine, dark and light rum. As far as the cream goes, it usually includes ground almonds, which makes the flavors all the more delicate.

I took the basic Sopa de Gloria and tweaked it with the flavors of Thanksgiving by omitting the almonds and adding pumpkin puree and seeds. The results… Phenomenal! This is the Jimmy Choo of desserts! The syrup and cream both benefit from being made at least one day in advance. This dessert is best served cold.
Pumpkin Sopa de Gloria
8-10 servings
For the raisin syrup:
1 cp sugar
1-1/2 cps water
2-3 cinnamon sticks
5 whole cloves
1/2 vanilla bean, split lengthwise
2/3 cp raisins
1/2 cp dark rum (Myer’s is great)
Combine all the ingredients except the raisins in a small saucepan and bring to a slow boil for about 5 minutes. Add the raisins and continue to simmer until the raisins are plump. Turn off the heat and add the rum. Allow it cool and keep at room temperature.
For the pumpkin cream:
1/2 can condensed milk (7 ozs)
1 can evaporated milk (14 ozs)
1-1/4 cp pumpkin puree
1/8 tsp mace
1 tsp vanilla
1/2 cp dark rum or bourbon
In a small pan, combine the condensed and evaporated milks, heat them over medium temperature until you begin to see bubbles around the edges. Do stir frequently, to avoid it from sticking to the bottom of the pan. Whisk in the pumpkin puree, mace and vanilla, simmer at medium-low for another 10 minutes, again, stirring continuously. Allow it to cool and refrigerate.
In addition to the above, you will need about 1/2 cp of toasted and chopped pumpkin seeds, as well as a sponge cake, you can find an easy recipe here.

Put it together:
I made individual triffles, but usually this is served in one large punch bowl, you can’t go wrong either way. Start with a layer of cubed sponge cake, followed by a drizzle of the syrup and raisins, then topped with cream that is topped with pumpkin seeds. Repeat. And serve cold.
Check out this post to see the rest of this meal or click here for the photostream.
Cookingly yours,
Anamaris
Aside: Something weird happened this morning and it explains why this post is just coming now. See, I dutifully woke up around 5:45 am, put the post together and hit ‘Publish’. When I was at work, I checked in and noticed there was no new post. I looked and looked to no avail and, because The Man has decided is time for me to earn my keep, I couldn’t do anything about it. The long and short of it is, I have a ‘test’ blog, I accidentally clicked on that and THAT’s where this post was. All day, all by its lonesome. So here you go. Pretend its 6am.
—-
Yes, of course I’m looking back at more Thanksgiving goodies. In the weeks to come, I’ll share some new recipes for the meal of excess, but I wanted to remind you of what I shared with you last year. My blogging was in its infancy, but I can assure you my cooking was not.
Maybe you’d like to offer a little appetizer to your guests as they arrive. I love this little recipe which I submitted for a Pepperidge Farm contest. It says Autumn and it says eat me.
Aaaah, yes. The Meal. This one chronicles all the eating. Oh my. I’m so ready for a repeat.
No meal is complete without dessert, right? Especially when it addresses my love affair with Honeycrisp apples.
Thanksgiving meal
Sweet Potato pastries
Apple Squares
Fear not, my bloggies. There will be pie. Or something, but there will be plenty more.
Cookingly yours,
Anamaris
Sometimes I feel guilty about what I share with you, rather, what I don’t share. See, I don’t have much of a sweet tooth, which is unusual when you consider desserts are my family’s business. Maybe it’s because I could smell the scent of baked goods wafting through the house almost every day of my life since age 12 or so. Or maybe I just didn’t get that gene, I don’t know. What I do know, is that I don’t share desserts with you guys very often.

I will try to pay more attention to your sweet tooth, starting with this post. It’s cake time. It’s really good cake time. This is again my mom’s basic recipe for vanilla cake, this time, though, I added some guayaba paste (known stateside as guava paste) and a frosting that includes Nutella. What else could you ask for?
Whenever I go back home to Panama I make a grocery store run, picking up all the goodies I cannot find in the US. On this last trip, I found some guayaba preserve that came in a pouch. I was transfixed by the sight of the magical, colorful pouch. Pourable guayaba preserve? Oh my.
If you have purchased this delicious paste in the US, you’ve likely found it in a round tub or a long brick. The consistency of it would’ve been pretty thick, sticky and solid. Nothing wrong with that one, it is the one I’ve purchased most of my life. But being able to pour it out… Think of how you felt the first time you saw mayo in those new squeeze bottles. Heaaaavennnn.
OK, back to the guayaba business. If you are dealing with the tub or brick of guayaba paste, all you’ll need to do for this recipe, is dissolve the paste so it is liquid. I used some of the paste so I could give you some guidance. For about 1-1/2 cps of cubed guava paste, add 1/4 cp of pineapple juice, melt it over medium heat, stirring occasionally. Let it cool.

Pastel de Guayaba con Glaseado de Nutella
1-1/2 cps butter (3 sticks), softened
1-1/2 cps sugar
4 eggs, room temperature
1 cp pineapple juice
1 tsp vanilla
1/2 tsp almond extract
1/2 tsp nutmeg
3 cps flour
3 tsps baking powder
1 cp guayaba paste, melted
Preheat oven to 350°. Prepare a 9×13 baking pan: use the butter wrappers to grease the cake pan, then add a bit of flour to coat. Set aside. Combine the milk, vanilla and almond extracts. In a separate bowl, combine the flour, baking powder and nutmeg. Set aside.
Combine the butter and sugar in a mixer bowl and beat until the sugar grains are dissolved and the mixture is smooth and light in color. If the butter is at room temperature, this will take about 10 minutes. Add the eggs one at a time, making sure to beat each one in completely.
Add 1/3 of the flour and mix until incorporated, then alternate with 1/2 of the juice. Then another 1/3 of the flour, followed by the rest of the juice and end with flour. Take care not to overbeat, just mix long enough to get all the flour evenly incorporated.

Spread half of the batter on the bottom of the baking pan. Then drizzle half of the the guayaba and top with the rest of the batter. Drizzle the rest of the guayaba paste over the top, going in the opposite direction you did the first time.

Use a knife or spatula to swirl the guayaba into the batter. Try not to push all the way to the bottom of the pan, otherwise you’ll have problems unmolding it. Pop it in the oven and bake for about 25 minutes or until a toothpick comes out clean when you pierce the center of the cake.
Allow it to cool for a few minutes, while you make the frosting. See recipe below. Unmold the cake onto a platter and spread on the frosting while it is still warm.

Nutella Buttercream Frosting
1/4 cp butter, softened
1-1/2 cps powdered sugar
3 tbsp cocoa powder
1/3 cp heavy cream
1/2 tsp vanilla extract
1/2 tsp almond extract
1/2 tub Nutella, approx 1-1/2 cps
In a large bowl, cream the butter, sugar, cocoa and extracts until smooth. Add the Nutella and mix until smooth and completely incorporated.
Add enough cream to thin out the frosting, it should be about the consistency of yogurt or sour cream. Not runny, just thin enough to smooth it easily over the cake.

You’ll need a glass of milk to go with this one.
Cookingly yours,
Anamaris
I hope I’ve tantalized your tastes buds with my previous posts about this lovely root. #1, #2
I hope it has made you curious enough to go forth and find some in your grocery store or market.
I hope you’ve scoured the web looking for more yuca recipes.
I hope you are ecstatic to find out it works for desserts too.
Those are a few of my hopes where yuca is concerned. Well, no. I really REALLY hope you’ll give it a try. Really.

Now, let’s talk about Enyucado, or as any good Panamanian would say it ‘Enyucao’. I’m not sure I’ll be able to adequately describe the delicious piece of earthly goodness. As I mentioned, it is a dessert. It has yuca and coconut and butter. Not just butter, but buttah! It is sweet and gooey. See, yuca is very starchy. In fact, its starch is used to make tapioca, I think that starchiness contributes to the gooeyness of the dessert. Then the buttah and sugar make the edges caramelize and it all becomes a mess of sticky goodness.

For the Enyucado, the yuca and coconut are shredded, which means there’s a bit of effort that goes into the dessert, but that is it. Once you have that part taken care of, the rest is a zinch. I promise. And it is oh so good!
Enyucado (Yuca Cake)
2 cps yuca, shredded
2 cps fresh coconut, shredded
1-1/2 cps sugar
1/2 cp butter, melted
1 tsp vanilla essence
1/2 tsp cinnamon
1/4 tsp nutmeg
2/3 cp raisins
2 tbsp anise liqueur or extract (I used Galliano)

Preheat oven to 350° and generously butter a 9×13 baking pan; set aside. Combine all the ingredients and stir until the sugar has dissolved and everything is well incorporated. Pour into the baking pan and pop it in the oven. It will bake for 30-40 minutes, or until golden brown on top.

Allow it to cool before slicing into squares. For more shots, check out the set here, and to figure out how to shell a coconut, click here.
Cookingly yours,
Anamaris
I can’t stop thinking about mangoes. I always crave them, lust after them, so when they’re plentiful at the market, I go bananas! (and that’s saying something seeing as how I dislike bananas). I’ve cooked with mango. I’ve moussed it, but I still want more mango ways. I started thinking about a pie, wondering how it would turn out. So I went for it. Secure in the fact that The Hubbz and B-Boy would dispose of it had it not met my high mango criteria.

As luck would have it, they did eat it up. I only had a small morsel of it because I ended up with one of those tummy bugs. By the time I was better, the pie had moved on to a better life. Boys will be boys. But the piece I had was to die for.
Originally I thought about serving it with vanilla ice cream, but The Hubbz, being addicted to whipped cream, insisted on that alternative. The results were perfect. The pie is a bit robust, so the lightness of the cream made for the best combo ever.
Let’s talk crusts. Do you have a favorite, no fail recipe (easy)? I’ve tried the one by Melissa d’Arabian from Food Network and I find it to be delicious and super easy, but please share yours. I’m always looking for a better crust. And now, without further ado, I bring you some Mango Tango Pie!
Melissa d’Arabian Pie Crust
Yield: 2 (9-inch) pie crusts
1 cup butter (2 sticks), cubed and chilled
2 1/4 cups all-purpose flour
1 teaspoon salt
8 to 10 tablespoons ice water
Put the butter, flour, and salt in the food processor, and pulse lightly just until the mixture resembles wet sand. Add the water, 1 tablespoon at a time, pulsing briefly after each spoonful of water. Keep adding water until the dough just begins to gather into larger clumps.
Transfer equal amounts of the dough into 2 resealable plastic bags and pat each into a disk. Let rest in the refrigerator for at least 30 minutes.
For the filling:
4 cps of ripe mango, sliced against the grain
3 tbsp sugar
1 tbsp flour
Pinch of salt
Juice of 1/2 lime (or lemon)
2 tbsp chilled butter, cubed
1 egg, beaten

Prepare the mango: peel and slice. Because mango is a very fibrous fruit, make sure to slice it against its natural grain, this way you’ll avoid having a stringy filling.

When the mango is ripe, it will be juicier. Once you have removed most of the meat, squeeze what’s left on the pit to extract some of the juice. Place the meat and juice in a medium-sized bowl and add the sugar, flour, lime, salt stirring it well, but with care.

Preheat oven to 325°. Remove 1 of the dough disks from the bag to a lightly floured surface. Using a rolling-pin, roll the dough out to a 10-inch round. Gently fit the rolled dough into a 9-inch pie pan and add the filling. It is best if it seems like you have too much filling. Dot it with the cubes of butter, before rolling out the 2nd disk of dough.

Brush the edges with the egg before placing the second crust over the top, then trim any excess dough and crimp the edges together. Lightly brush with the egg. Cut a few holes on the top, this will allow the steam to vent without any oozing filling along the sides.

Bake for 40 to 50 minutes, checking it after 30 minutes or so. I like to cover the edges with foil paper after a while to keep them from browning too much.

Once golden brown, allow it to cool before serving.

Cookingly yours,
Anamaris

Oooooh mango-time! The one time I don’t complain about Houston’s increasing temps and humidity is when I find beautiful mangoes at my local grocery store. Even better when they’re in the season and, thus, affordable. Can you say win-win?!!
I can eat mangoes like nobody’s business, but I can’t write a valuable post with that as the subject. So I’ve kept my thinking cap on, trying to find ways to incorporate them into a recipe. That’s how this little treat came to be.
Have you been watching the new Cooking channel? I hope you have. I’m loving it and found a few new chefs that have quickly moved into my DVR’s record list. This recipe comes as the result of adapting a recipe from the show French Food at Home. Laura Calder is a French chef bringing that fancy cuisine into normal people’s homes. On one of her episodes, she made a pumpkin mousse, the perfect platform for a mango coup.
She served it with a chocolate sauce, but not being a chocolate fiend and knowing I would need some texture, I opted for some crumbled ginger snaps. It’s easier too.
Mango Mousse with Gingersnap Crumble
3 cps ripe mango, peeled & chopped
2-inches fresh ginger, peeled (optional)
1 pkt unflavored gelatin
1 tablespoon rum or bourbon (water works too)
2 cps heavy cream
1 tsp vanilla extract
1/4 cp sugar
Gingersnap cookies
First, you will need to turn that mango into puree. Place the mango in a medium saucepan, add the ginger, 2 tbsp sugar and 1/2 cp water. Bring it to a boil over medium high heat, reduce heat to medium and allow it cook down until the mango softens–about 10-15 minutes.
Stir the rum/bourbon and gelatine together in a cup, and let soften 5 minutes. Add a third of the cream and the vanilla to the saucepan with the mango syrup. Stir in the dissolved gelatin and the rest of the sugar to dissolve. Remove the ginger pieces and the mango mixture to cool just a bit before running it through the blender or food processor to puree. You’ll need to strain the puree, mango is very fibrous; set aside to cool and cover tightly with plastic wrap. Refrigerate until chilled and starting to get thick.

Whip the remaining cream and fold it into the chilled mango mixture. Chill at least 4 hours before serving. Spoon into individual serving dishes or goblets topping with crushed gingersnap cookies.
This was delicious and the crunch from the ginger cookies added a much needed textural dimension. Tell me, how do YOU eat your mangoes?

Cookingly yours,
Anamaris
NYC is one of my favorite cities. EVER. I love everything about that place. I was lucky enough to have friends who lived in and around the city, so I got visit quite often. Each time I went, I would be in search of the ‘best of…’ something. One year, for a NYE visit, it was the best whiskey sour. Don’t know, don’t ask. I was younger then. Another trip was the best pizza. And another it was the best cheesecake. You get the drift.
I love cheesecake. Not the fancified, flavorfied kind. Just the basic NY cheesecake with either cherries or strawberries on top. I don’t remember where I had the best cheesecake on that particular trip. Probably because the memory was banished with all the brain cells I killed with alcohol that weekend. Nonetheless, cheesecake continues to be one of my guilty pleasures.

Years ago I realized that Cheesecake Factory cheesecake met my needs. I like their cheesecake. It is dense but not too heavy, sweet without being overpowering. I don’t always want to get dressed for cheesecake, though. And the only CF location here in Houston is ensconced in the Galleria mall, a destination omitted from my ‘must go’ list.
Here’s a recipe I’ve made over and over, I got it from one of the morning shows years ago. It is super easy and even more delicious. If you love cheesecake, you’re gonna love this one.
As Good As Cheesecake Factory Cheesecake
For the crust:
3 cps cookie crumbs (whichever ones you like)
¼ teaspoon ground cinnamon
1/2 cp (1 stick) softened butter
Preheat oven to 475°. You will need a 9-inch spring form pan and another pan large enough for the springform pan to fit inside to use as a water bath. Fill the large pan with about ½-inch of water, and place it in the oven while it preheats.
Line the bottom of the springform pan with parchment or wax paper and wrap a large piece of foil around the bottom (outside of the pan) This will keep any water from seeping through while the cheesecake is in the oven.

Combine the cookie crumbs and cinnamon in a medium bowl, before working in the softened butter.Press the crumb mixture into the bottom of the pan and sides of the springform pan. You can use something flat, like bottom of a glass to press it evenly. Place the crust in the freezer until the filling is done.
For the filling:
4 8-oz pkgs. cream cheese
1-¼ cps granulated sugar
½ cp sour cream
1 tsp vanilla extract
1 tsp almond extract
5 eggs

Use a mixer or food processor to combine the cream cheese, sugar, sour cream, and extracts. Scrape down the sides of the bowl and continue to blend until these ingredients are smooth. Add the eggs one at a time, making sure they are well mixed into the batter before adding another. Pour the filling into the cooled crust.

Place the cheesecake in the water bath, be careful not to burn yourself, but also not make sure you don’t splash water onto the cheesecake. Bake at 475° for 1o minutes before lowering the temperature to 350°. Continue to bake for 50 to 60 minutes or until the top of the cheesecake turns a light brown or tan color. Remove the cheesecake from the oven and water bath and allow it to cool for about an hour.

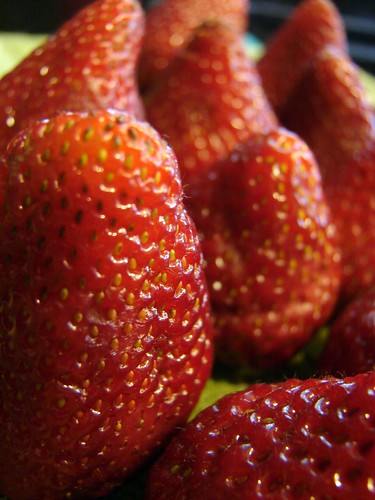
Cover and chill the cheesecake in the refrigerator for at least 6 hours, preferably overnight. Serve with your favorite fruit topping or just whipped cream. Strawberries are in season, so I made a bit of coulis and spread it over the top of the chilled cheesecake before covering with sliced berries. This recipe is enough for 12 generous servings.

Enjoy!

Cookingly yours,
Anamaris
I can’t tell you when was the first time I had a taste of this magical dessert, but I CAN tell you it’s been one of my favorites ever since. And when I realized how simple it is to make, it was all over. I don’t make it often. Not because I don’t want to, it’s because I would require a crane to leave home IF ever I did. “When” I do make this thing, I eat most of it all.by.myself. And I reserve the right to begrudge anyone who dares have some.

The debate over the origins of this little treat will likely continue ’til kingdom come. And why not? I would totally claim it as my own! I mean, this thing is perfection on a spoon or fork. In any case, rumor has it the dessert originated in Nicaragua, so that’s the story I’m sticking to. It is possible that the recipe was featured on the label of Nestle’s evaporated and condensed milks in the early 1900s. A clever marketing move that may be responsible for one of the most coveted desserts around.
Let me count the ways I love theeez here dessert. It’s super moist. Light and dense all at once. It is served cool. It isn’t overly sweet (depending on the baker’s preference). And the cream can be flavored with almost anything you’d like. Me myself, I prefer the basic vanilla-ey recipe. Call me a prude if you must, but I like what I like. I’ve tried variations of it flavored with chocolate. I’ve heard of adding coconut milk (that one intrigues me), but I’ve not made either of those. I do, from time to time, add a bit of alcohol–bourbon, Amaretto, rum. I also prefer to flavor the sponge cake with almond extract instead of lemon extract.
Ok, I’ll shut up now and give you my version of it. Most recipes will suggest equal amounts of milk, but I find that ends in a very sweet cake. I’ll still eat it, but I can eat a LOT more of it when the sugar content is toned down, so I add more of the evaporated milk and heavy cream. Also, even though I’m a big proponent of generic brands, I must admit that when I make this one, I go for a well-known brand name. It may be in my head, but I won’t take any chances when it comes to my tres leches.
Pastel de Tres Leches
For the sponge cake:
6 eggs, separated
1 cp all-purpose flour
¼ tsp salt
1 cp extra fine sugar
1-1/2 tsp vanilla extract
1 tsp almond extract
Preheat oven to 350°. Separate eggs and place the yolks in the bowl of your mixer. Beat the yolks until they change to a creamy yellow and are the consistency of yogurt. While the yolks are beating, sift the flour and salt together and set it aside.

Remove the yolks from the bowl and set aside. Make sure to wash the bowl and beaters very well before adding the egg whites; this is important because if there’s any residue of the yolk, the whites will not stiffen into a meringue. Beat the whites until they form soft peaks, adding the sugar a couple of tablespoons at a time. Add the almond and vanilla extract.

Fold in the egg yolks until evenly incorporated. The purpose behind folding egg whites into a batter, is to end up with a batter that is airy and light. This is a good how-to link.
Once the eggs are incorporated, fold in flour a bit at a time. Make sure to check the bottom of the bowl for any flour that may have found it’s way to the bottom.
I used a generously buttered (not floured) 9-1/2×14″ Pyrex to bake this. It makes it convenient, it bakes and works as a serving dish to keep all that milky goodness in place. Bake at 350° for 20-30 minutes or until a knife/toothpick comes out clean when inserted in the center. While the cake is baking, prepare the milk bath.
For the milk bath:
1 can (12 oz) evaporated milk
1 can (14oz) sweetened condensed milk
2-1/4 cps evaporated milk
2-1/2 cps heavy (or whipping) cream
1 tsp vanilla extract
2 tbsp bourbon (or your preferred liquor) optional
Combine the evaporated milk, condensed milk, cream, vanilla and alcohol in a mixing bowl. Whisk until well blended; the condensed milk will tend to hang out at the bottom of the mixing bowl.

Once the sponge comes out of the oven, pierce holes all around the top. Give it about 10 minutes to cool then invert it onto a tray lined with wax paper, pierce holes on the bottom cake. You can use a fork or a small knife for this task. Before returning the cake to the baking dish, use a paper towel to wipe any butter that may have dried while baking. Pour half of the milk bath into the baking dish, then place the warm cake bake into the dish. Pour the rest of the milk bath over it. At this point you may have to wait a few minutes to allow the cake to soak all of the milk before adding any more.

Once all the milk has been added, cover loosely with plastic wrap and refrigerate for at least 3 hours or overnight. IMHO, the longer you allow it to cool, the more enjoyable tres leches becomes.
Note: If you have a deep-lipped serving dish, you can use it to add the milk bath and as your serving vessel. I usually leave my tres leches in the container I use to bake the sponge cake.

If you wish to top it with a frosting of sorts, you can opt for a plain meringue–this seems to be the traditional topping. I don’t like it. Instead I whip more heavy cream, about (1-1/2cps) and fold in 2-3 tbsps of condensed milk. You could add sugar, 2-3 tbsps if you don’t have any condensed milk left. Spread the topping over the cooled cake. Serve and wait for the sounds of pure enjoyment.
Cookingly yours,
Anamaris