Every now and again I find myself enjoying what I describe as a gastronomical religious experience. I’m a food snob, I admit it. I love good food, the rest isn’t worth the calories. I recently had one of those meals in Austin, Texas.
Do you know who Tyson Cole is? Only the latest recipient of the James Beard Award for Best Chef in the Southwest, an honor that celebrates how he expresses his genius on plate after plate at Uchi and its little sister dining room, Uchiko.
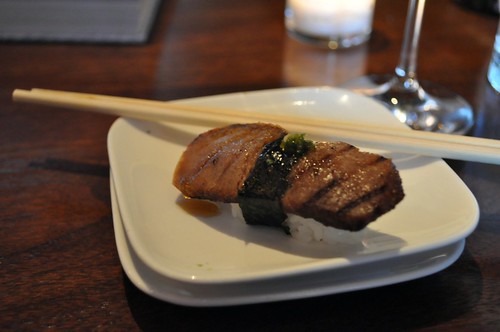
On the recommendation of a local, I had a meal at Uchiko my last night in town. You can read all about it over at Eating Our Words. I thumbed through their cookbook while I ate my Fried Milk dessert, immediately knew I had to own a copy. Armed with the cookbook featuring fantastic cooking techniques and my lingering Uchiko-buzz, I attempted a new dish inspired by Cole and his cookbook (by the way, you really should a copy of it). You can click on this link to see more of the Uchiko food porn shots.
I came across a recipe for tuna steak coupled with compressed watermelon and other fancy accoutrements I chose to skip. I don’t really have a recipe for this, I’ll simply walk you through the method. This was very easy and quick to put together. I decided to allow the tuna steaks to marinate for about an hour and at the same time this allowed me time to dehydrate the watermelon slices.
Tuna Steaks with Dehydrated Watermelon
serves 2
For the steaks:
2 tuna steaks, marinated
Marinade:
2 tbsps extra virgin olive oil
Crushed black pepper
Sea salt

Dehydrated Watermelon
4 watermelon slices (about 1/2-in thick)
Fish sauce
Cooling rack
Remove any seeds and sprinkle each side of the watermelon slices with a couple drops of the fish sauce. Then place them on the cooling rack over a cookie sheet and allow some of the liquid to drain out of the watermelon.

Peach & Habanero Sauce
2-3 ripe peaches, peeled & diced
Water
Pinch of salt
Habanero sauce, to taste
Throw everything, except the water, into a small saucepan. Add enough water just to come to the tops of the peach cubes, bring it to a slow boil/heavy simmer and cook until the peaches have softened to mush. Keep warm.
Sear the steaks in a nonstick skillet, we like ours medium rare, but cook it to your preference. Lay 2 slices of watermelon, spread a bit of the peach sauce and top with the seared tuna steaks.
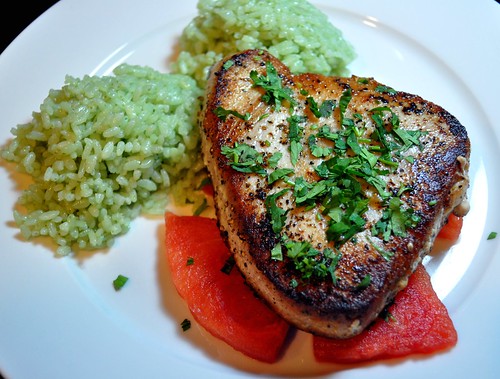
I know this combination of ingredients may sound odd, but it really works. The tuna steaks were simply flavored, so you can really appreciate their flavor. The watermelon, which is always just mildly sweet, is accented by the complex saltiness of the fish sauce and all of this balanced out by the fresh sweetness and spiciness of the peach sauce. It was a perfectly harmonized dish.
Enjoy!
Cookingly yours,
Anamaris
I’m not one to indulge in desserts too often, my sweet tooth is… lacking, but Flan is one of the few desserts I can’t keep my hands away from. Which means, I make it as infrequently as possible to keep that heart attack at bay.
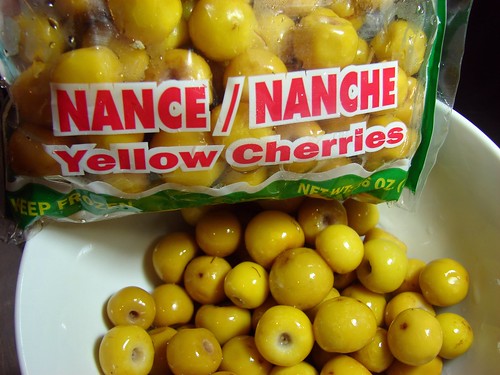
I’m always reading about variations to flan, adding chocolate, pumpkin, coconut, it goes on and on. So, I thought of trying my own little tropical variation: Nance.
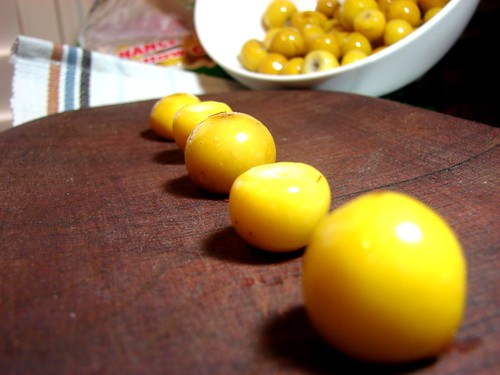
This is a very interesting little fruit, and it IS little, anywhere between the size of a blueberry and a cherry. In fact, they are known as yellow cherries in English. The fruit has some fat and is tart and becomes sweeter after picking. It grows on a tree and when they’re ready, they fall to the ground, collected, rinsed and thrown in a bottle with water for a few days. This allows them to ripen fully and develop its sweetness.
In order to get the pulp, you either have to use your hands and squish them or put them in the blender, liquid and all, and pulse them a few times to loosen the pulp. In this case, since the nance was sold in the frozen section of my grocers’, I thawed them and whirled them about in the blender with enough water to keep them moving. Strain and you’re ready to make a chicha–Panama’s pumped up fruit drinks, pesada or this to-die-for flan.
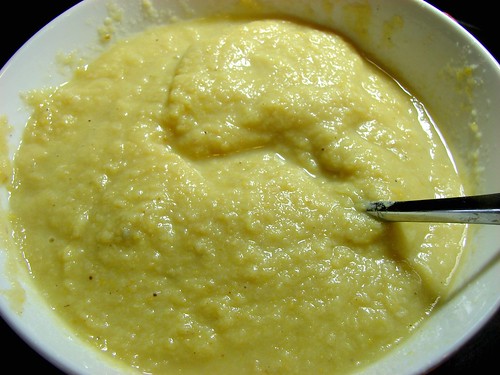
Flan de Nance
For the caramel sauce:
1-1/4 cp sugar
For the flan:
6 whole eggs
4 oz cream cheese
1-1/2 cps nance pulp
1/2 tsp almond extract
1 tsp vanilla extract
1/2 cp granulated (white) sugar
1/4 tsp sea salt (bit less if using regular salt)
1-1/2 cps whole milk
Preheat oven to 350°. Prepare a Bain-Marie: you will need a baking pan that is large enough to hold the dish you’re baking the flan in. Add hot water to the large pan and place in the oven.
To make the caramel, following the directions I gave you before for a cheese flan; here’s the link.
Making the flan: Put all the ingredients except for the milk in a blender glass and whisk until smooth. To avoid foaming the eggs, do this by pulsating instead of letting the blender go for a long time. It shouldn’t take more than 5-6 pulses.
In the meantime, use the same saucepan you used to make caramel to scald the milk. There will probably be some caramel stuck to the pot. That’s fine, just add the milk and simmer until you see bubbles beginning to form around the edges. Turn off and remove from the heat.
You will now incorporate the hot milk into the egg mixture, because the milk is pretty hot, start the blender on low and slowly drizzle in the milk/sugar mix. As soon as all the milk is added, turn off the blender. Pour the custard into the carameled baking dish. Place the dish with the custard into the pan with water.
If you bake it in a 9-inch dish, it will probably be in the oven for close to 45 minutes. You’ll know it is ready when the top is golden and it begins to separate from the sides, but there’s still a jiggle at the center. Remove from the oven and allow it to cool at room temperature for about 30 minutes, then put it in the fridge to cool it all the way through.
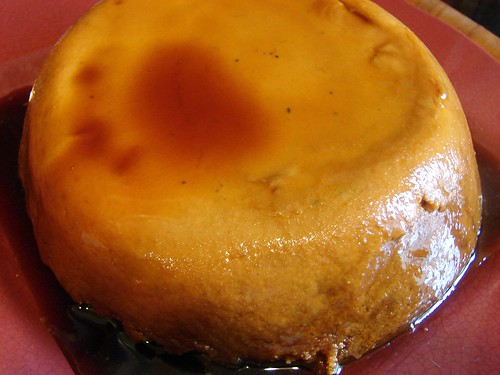
When you’re ready to serve, run a table knife around the edge to help loosen the cooled flan. Then invert it onto your serving dish. Make sure you invert over your sink, you’ll be amazed at how much of that caramel melts away onto your serving dish and continues running down your arm and on the clean floors.
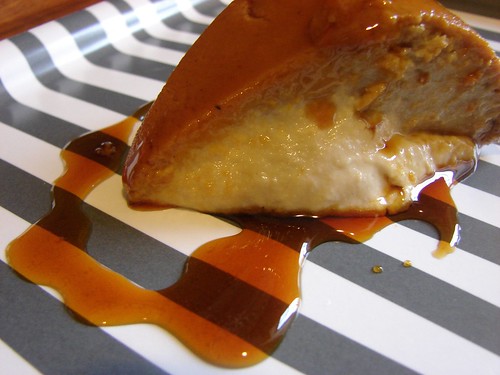
Cookingly yours,
Anamaris
I just realized I haven’t done one of these in months! My apologies. I like sharing the tips and tricks I’ve picked up along my cooking journey. We’ve covered how to pick and prep tubers like yuca and otoe, we’ve made plantains less daunting, Latin cooking basics, even some of the fancy sounding cooking methods such as coulis. This time will be all about the mighty coconut.
Earlier this week, one of my friends commented, or lamented, on Facebook about how difficult it was to find fellow coconut lovers. Her status generated a great deal of comments listing the pros and cons of this fruit. Here’s what I had to say on the subject.
As foods seem to break across more and more borders, ‘exotic items’ become more readily available. That’s wonderful, but it also means we may not utilize them simply because we don’t understand them. So let me introduce you to Mr. Coconut or Señor Coco as it is known in my world.
This fruit goes through a few different stages and is edible throughout most of them. Once it grows to a decent size, the young/green coconut can be harvested, cracked open and the water in it can be consumed. The water is slightly sweet and incredibly refreshing. In Panama and many other Central American countries, you’ll find them chilled and sold at corner stores.
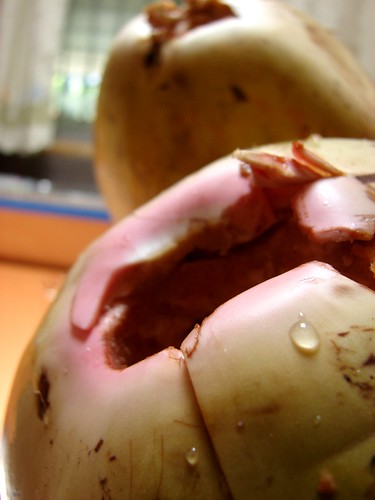
As the fruit matures, the meat will become more and more dense. First you will find a gelatinous meat that has to be eaten with a spoon. At this stage, the meat tastes much like the coconut water, only sweeter.
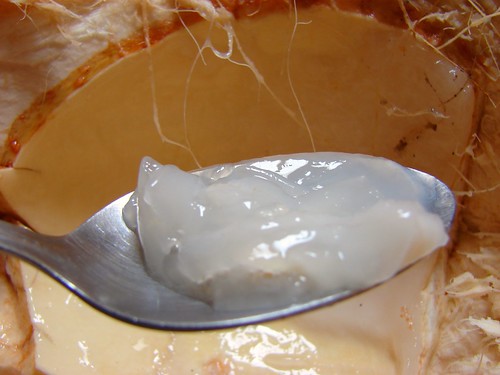
The more mature the coconut, the more dense the meat, until you arrive at the very thick and milky meat that is usually shredded into foods.
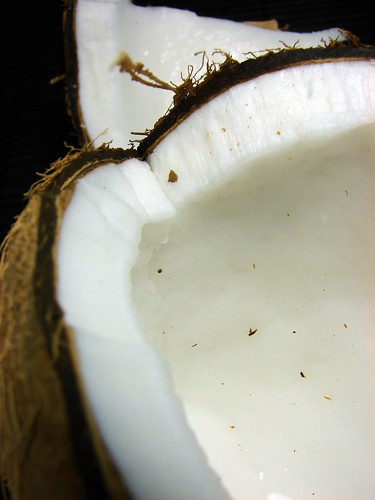
So how do you crack it? Let’s get to that.
I like using a hammer to crack the outer shell enough to drain the water out.
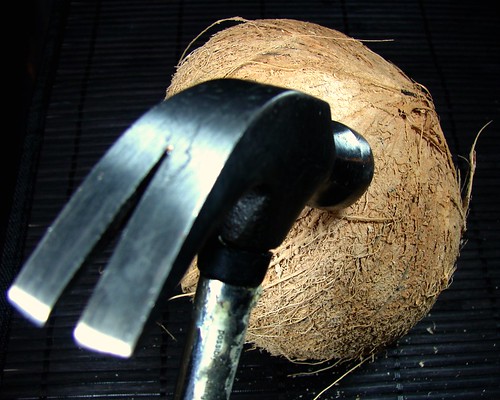
Once drained and the water has been reserved, I continue hitting it with the hammer to break into manageable pieces.
Then begins the ‘peeling’. Use the tip of a knife to separate the meat from the hard shell. Gently push the knife through, and the meat will pop right out of the shell.
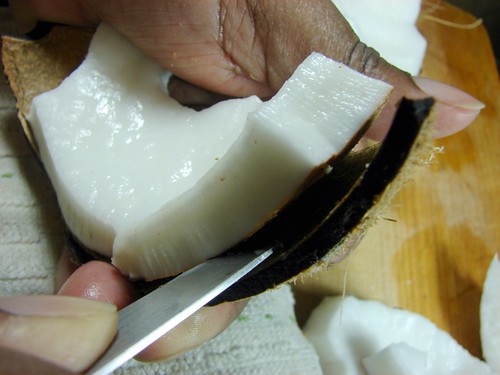
That really is all there is to it. Discard the shell, rinse the coconut pieces and use them at will! Check out the step-by-step shots here.
Cookingly yours,
Anamaris
I can’t stop thinking about mangoes. I always crave them, lust after them, so when they’re plentiful at the market, I go bananas! (and that’s saying something seeing as how I dislike bananas). I’ve cooked with mango. I’ve moussed it, but I still want more mango ways. I started thinking about a pie, wondering how it would turn out. So I went for it. Secure in the fact that The Hubbz and B-Boy would dispose of it had it not met my high mango criteria.
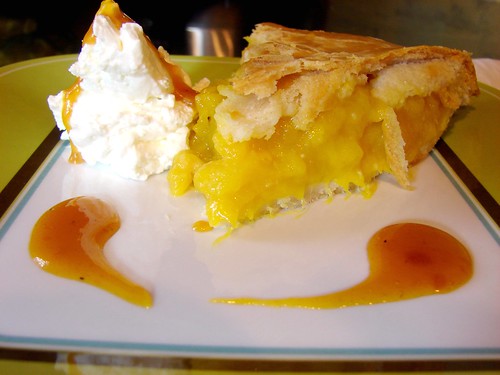
As luck would have it, they did eat it up. I only had a small morsel of it because I ended up with one of those tummy bugs. By the time I was better, the pie had moved on to a better life. Boys will be boys. But the piece I had was to die for.
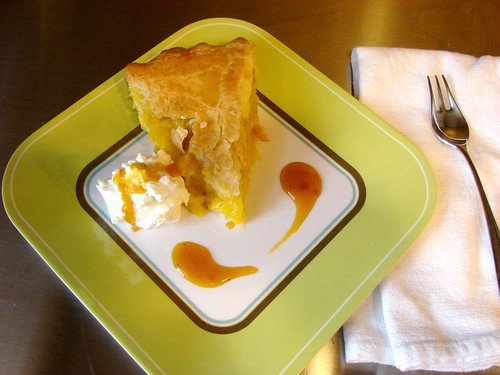
Originally I thought about serving it with vanilla ice cream, but The Hubbz, being addicted to whipped cream, insisted on that alternative. The results were perfect. The pie is a bit robust, so the lightness of the cream made for the best combo ever.
Let’s talk crusts. Do you have a favorite, no fail recipe (easy)? I’ve tried the one by Melissa d’Arabian from Food Network and I find it to be delicious and super easy, but please share yours. I’m always looking for a better crust. And now, without further ado, I bring you some Mango Tango Pie!
Melissa d’Arabian Pie Crust
Yield: 2 (9-inch) pie crusts
1 cup butter (2 sticks), cubed and chilled
2 1/4 cups all-purpose flour
1 teaspoon salt
8 to 10 tablespoons ice water
Put the butter, flour, and salt in the food processor, and pulse lightly just until the mixture resembles wet sand. Add the water, 1 tablespoon at a time, pulsing briefly after each spoonful of water. Keep adding water until the dough just begins to gather into larger clumps.
Transfer equal amounts of the dough into 2 resealable plastic bags and pat each into a disk. Let rest in the refrigerator for at least 30 minutes.
For the filling:
4 cps of ripe mango, sliced against the grain
3 tbsp sugar
1 tbsp flour
Pinch of salt
Juice of 1/2 lime (or lemon)
2 tbsp chilled butter, cubed
1 egg, beaten
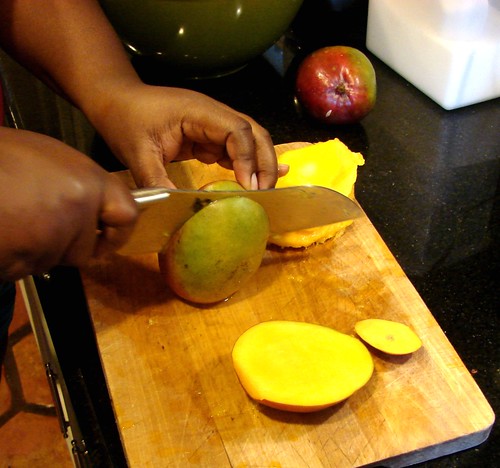
Prepare the mango: peel and slice. Because mango is a very fibrous fruit, make sure to slice it against its natural grain, this way you’ll avoid having a stringy filling.
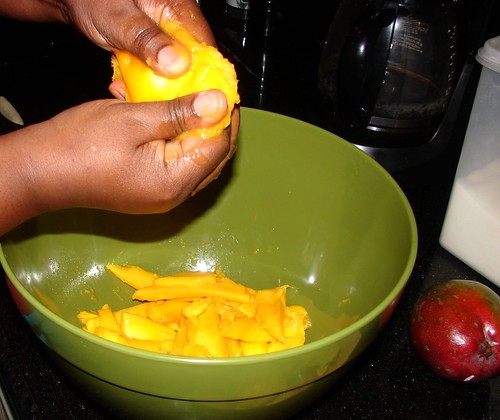
When the mango is ripe, it will be juicier. Once you have removed most of the meat, squeeze what’s left on the pit to extract some of the juice. Place the meat and juice in a medium-sized bowl and add the sugar, flour, lime, salt stirring it well, but with care.
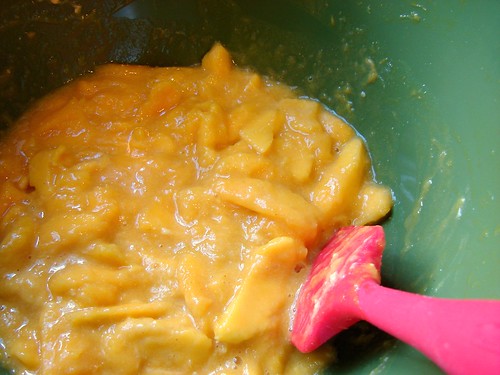
Preheat oven to 325°. Remove 1 of the dough disks from the bag to a lightly floured surface. Using a rolling-pin, roll the dough out to a 10-inch round. Gently fit the rolled dough into a 9-inch pie pan and add the filling. It is best if it seems like you have too much filling. Dot it with the cubes of butter, before rolling out the 2nd disk of dough.
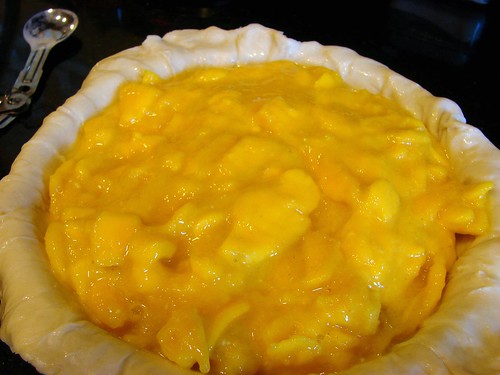
Brush the edges with the egg before placing the second crust over the top, then trim any excess dough and crimp the edges together. Lightly brush with the egg. Cut a few holes on the top, this will allow the steam to vent without any oozing filling along the sides.
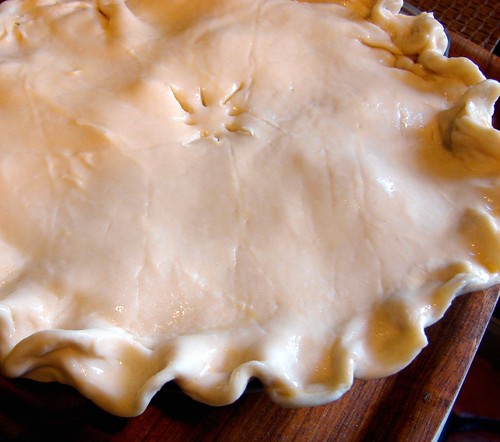
Bake for 40 to 50 minutes, checking it after 30 minutes or so. I like to cover the edges with foil paper after a while to keep them from browning too much.

Once golden brown, allow it to cool before serving.
Cookingly yours,
Anamaris
Oooooh mango-time! The one time I don’t complain about Houston’s increasing temps and humidity is when I find beautiful mangoes at my local grocery store. Even better when they’re in the season and, thus, affordable. Can you say win-win?!!
I can eat mangoes like nobody’s business, but I can’t write a valuable post with that as the subject. So I’ve kept my thinking cap on, trying to find ways to incorporate them into a recipe. That’s how this little treat came to be.
Have you been watching the new Cooking channel? I hope you have. I’m loving it and found a few new chefs that have quickly moved into my DVR’s record list. This recipe comes as the result of adapting a recipe from the show French Food at Home. Laura Calder is a French chef bringing that fancy cuisine into normal people’s homes. On one of her episodes, she made a pumpkin mousse, the perfect platform for a mango coup.
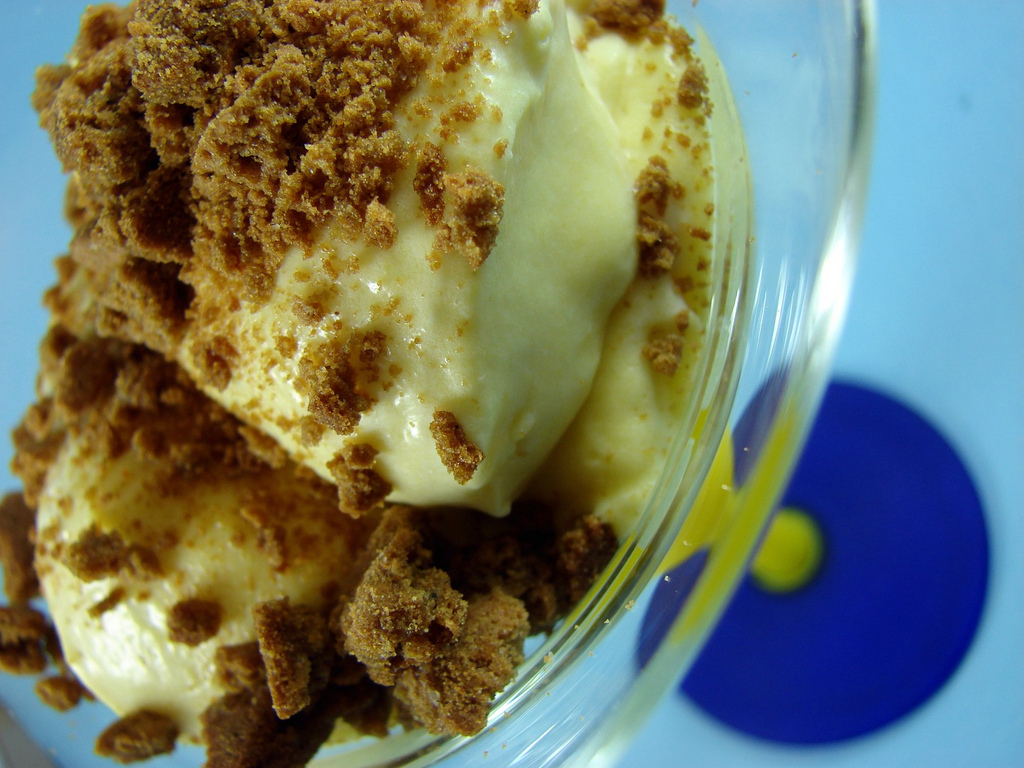
She served it with a chocolate sauce, but not being a chocolate fiend and knowing I would need some texture, I opted for some crumbled ginger snaps. It’s easier too.
Mango Mousse with Gingersnap Crumble
3 cps ripe mango, peeled & chopped
2-inches fresh ginger, peeled (optional)
1 pkt unflavored gelatin
1 tablespoon rum or bourbon (water works too)
2 cps heavy cream
1 tsp vanilla extract
1/4 cp sugar
Gingersnap cookies
First, you will need to turn that mango into puree. Place the mango in a medium saucepan, add the ginger, 2 tbsp sugar and 1/2 cp water. Bring it to a boil over medium high heat, reduce heat to medium and allow it cook down until the mango softens–about 10-15 minutes.
Stir the rum/bourbon and gelatine together in a cup, and let soften 5 minutes. Add a third of the cream and the vanilla to the saucepan with the mango syrup. Stir in the dissolved gelatin and the rest of the sugar to dissolve. Remove the ginger pieces and the mango mixture to cool just a bit before running it through the blender or food processor to puree. You’ll need to strain the puree, mango is very fibrous; set aside to cool and cover tightly with plastic wrap. Refrigerate until chilled and starting to get thick.
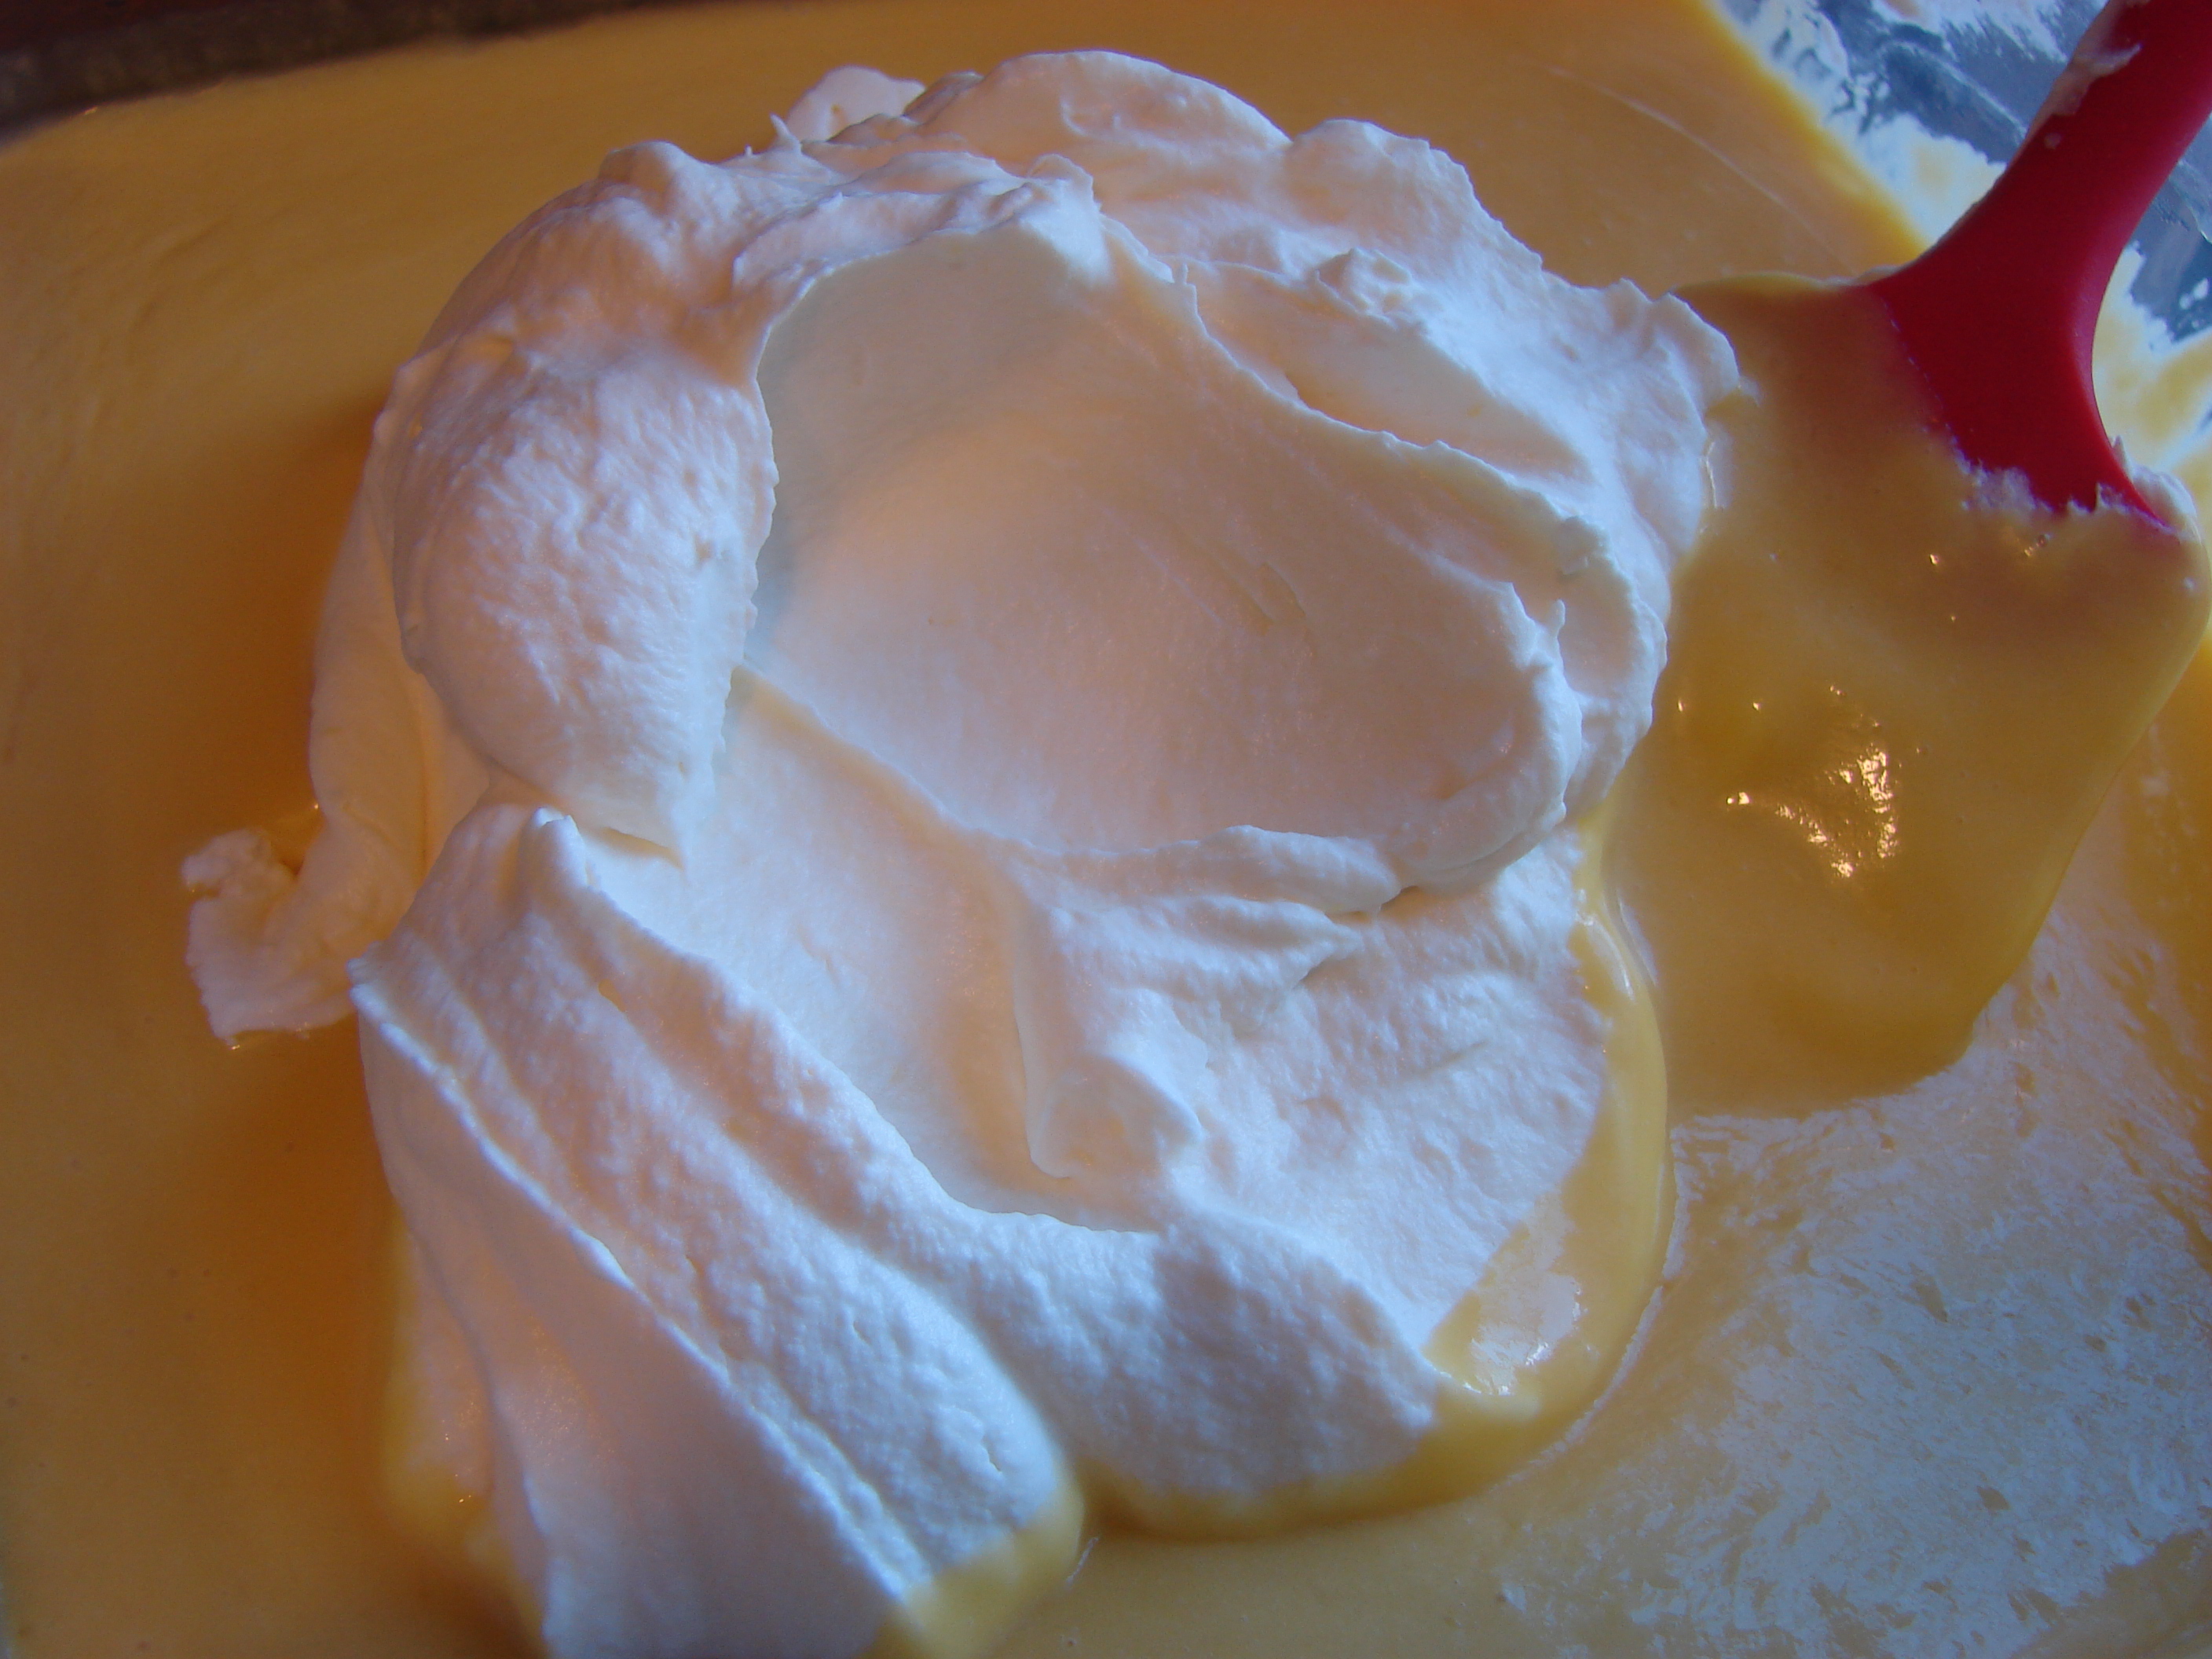
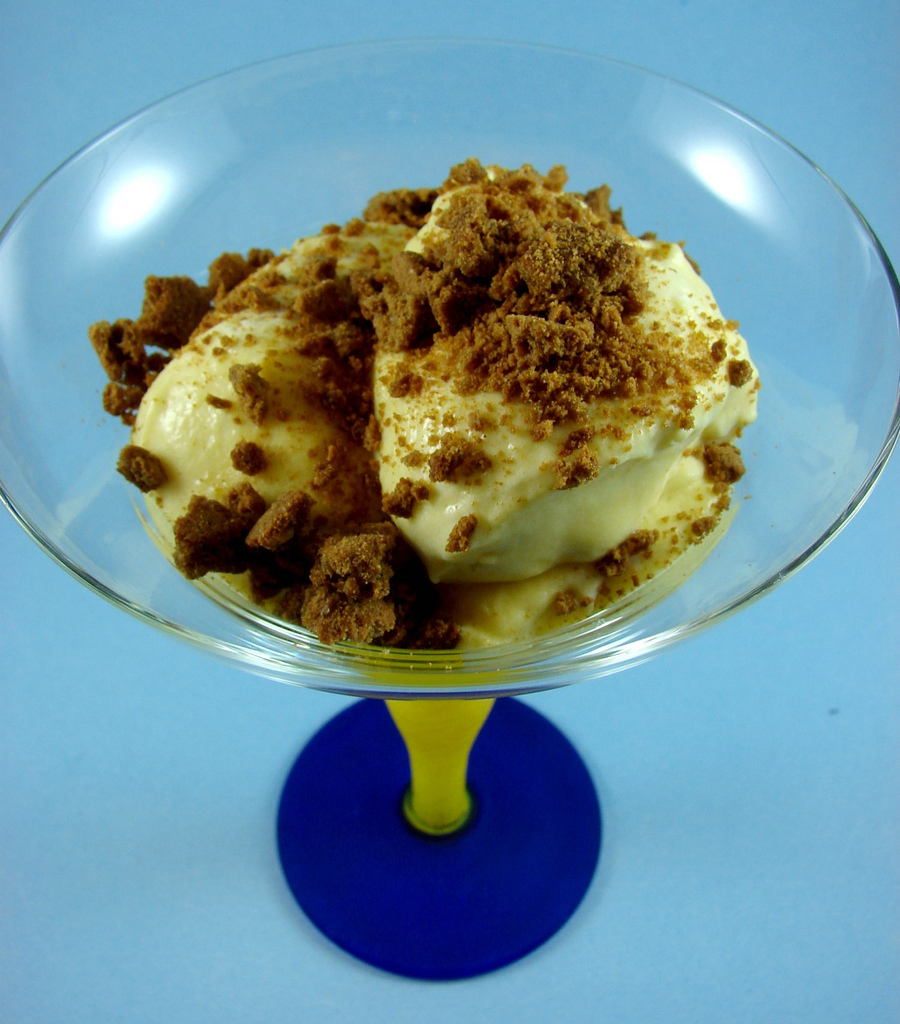
Whip the remaining cream and fold it into the chilled mango mixture. Chill at least 4 hours before serving. Spoon into individual serving dishes or goblets topping with crushed gingersnap cookies.
This was delicious and the crunch from the ginger cookies added a much needed textural dimension. Tell me, how do YOU eat your mangoes?
Cookingly yours,
Anamaris
Just before we get into that business, why is it called a pineapple? It looks nothing like an apple, thought I guess it is pokey like a pine cone… OK, that’s over, back to the fruit at hand.
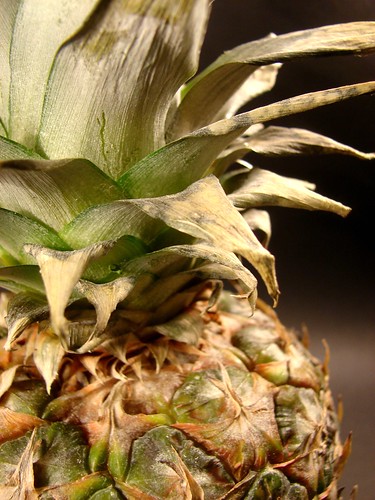
With Summer heating things up, the grocers and markets are filled with delicious fruits, particularly those from more tropical climates. Pineapple happens to be one of my favorite fruits. Love, love, love IT! Love it! Believe me, once you’ve had a taste of fresh pineapple, you’ll snicker at the canned stuff. I want to make sure you eat as many of these fresh babies as possible, so I’ll give you some pointers to help you break it down.
Picking Pineapples: Put your senses to work.
See: It should be a bright yellow, maybe a bit of green here and there. As with any other fruit, make sure there are no visible blemishes–brown or black spots. If you can only find them with very green peel, then take it home and allow the sugars to mature over a few days.
Touch: It should be firm to the touch, but not hard. It should give a little
Smell: Go ahead, put your nose to it. Pay special attention to the bottom, it’ll be the most fragrant area. It should smell sweet with a hint of tartness.
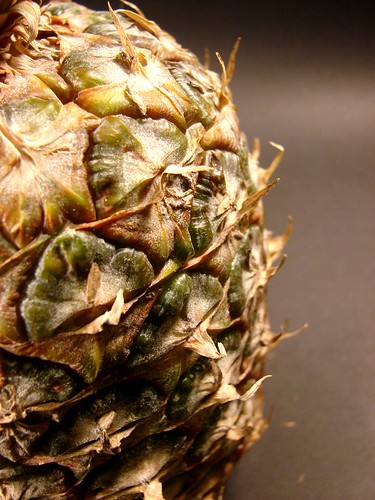
Pineapples can be prickly, if you have sensitive hands, you may want to use something to protect them. Now for the fun part, this is how we breakdown a pineapple in Panama.
Remove both ends. You can break off the leafy top or just use a knife to cut about 1/2-inch off the top and bottom of the pineapple. This serves 2 purposes: it will stabilize the fruit and make it easier when removing the peel with a knife.

Stand the pineapple on one end (use a cutting board) and with the knife, begin cutting off the peel of the pineapple. Move in a downward motion, always away from you. Give it a clockwise turn and repeat until you have removed all of the peel.
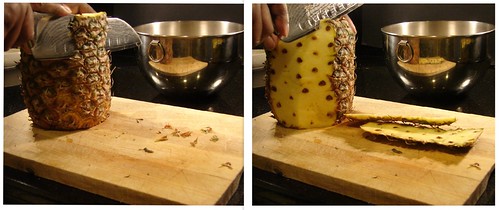
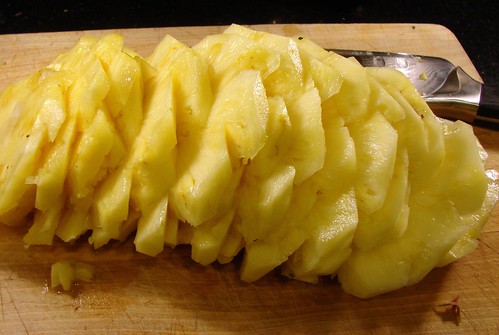
Remove the eyes. Cut the flesh in a shallow diagonal cuts on either sides of each row–you’ll probably be able to cut across 3-4 at a time. Remove the cut outs and repeat.

The pineapple will end up looking like a spiral. Kinda cool!

Now it is ready to slice and eat. One last thing, though. You want to make sure not to eat the core, it tends to be tough and it has an enzyme that causes your tongue to feel stiff and weird. It makes my lips feel itchy. Just stay clear of it.
Eating fresh chunks of pineapple is great, but check out this cocktail. That’s what I’m talking about!
Cookingly yours,
Anamaris
Fresh pineapples rock. They’re delicious, satisfying, refreshing and good for you. They’re pretty too! They make for a healthy snack, but that’s not the only way The Hubbz and I enjoy our pineapple(s). Sometimes we make a few drinks.
We had lots of fresh fruit juices on our trip to Panama, we also had lots of cocktails made with Seco and fresh fruit juices. Seco Herrerano is one of the liquors made in Panama. It is distilled from sugar cane, has a faint sweetness but is overall tasteless, much like vodka. Incidentally, you probably can’t find it outside of Panama, vodka or light rum would be a perfect substitute.
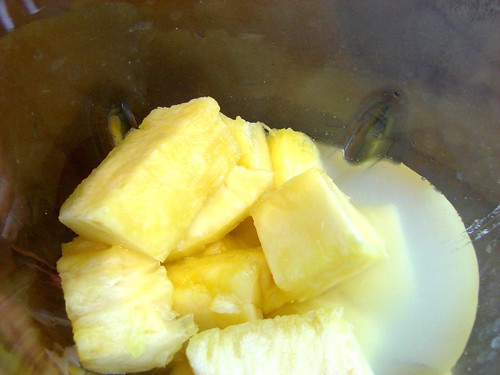
Seco is usually served with fresh fruit juices, my favorites being passion fruit and pineapple. The Hubbz was sold with the very first one we had upon arriving in Panama. Fresh passion fruit that was slightly frothy, almost like a smoothie. But it wasn’t until we made it to Bocas del Toro and saw the bartender mixing our drinks that we realized what was going on. She took the peel off the pineapple, removed the core and dumped the meat into a juicer. Then poured it into ice-filled glasses and topped it, quite generously, with Seco. OH.MY.
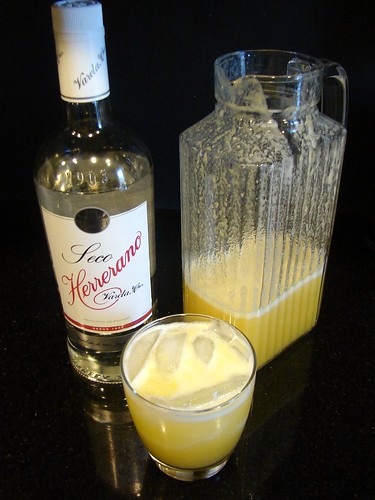
I don’t have a juicer, but a blender works just as well. No need for a formula here. Glass. Ice. Light liquor. Juice. Stir. Drink. Repeat (the most important step). I really think I just wanted to brag about Seco Herrerano. 
Gulp, gulp,
Anamaris
Some crazy deliciousnes is what happens. I bought some mangoes, they were supposed to be organic, but they kinda sucked. Outraged, I peeled and chopped them and threw them in a pot determined to make them useful citizens of society. I’m happy to report that this rehabilitation effort was a success. The mangoes proved to be a great addition to their community, the Price Household.
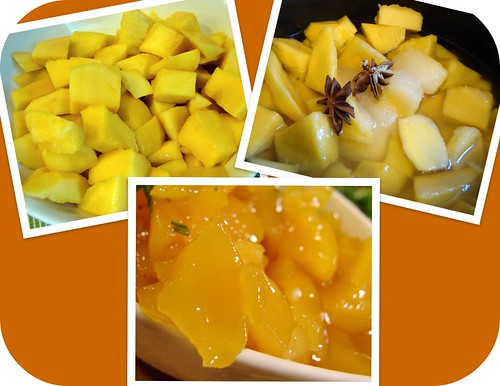
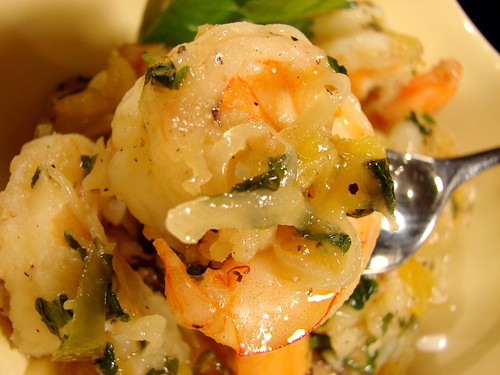
This was the first I had integrated mango to a savory dish, come to think about it, this was the first time I had done anything with mango except for my usual peel & eat and the occasional lassi. I was a bit nervous. I mean, I had about 1lb of gorgeous, fresh LARGE shrimp and I hate messing up shrimp. But I showed it no fear, never let an ex-con see you sweat…, right? Onward!
There’s no real recipe here, just add things at will. Also, if you don’t have mangoes, don’t fret. You can substitute with any caramelized/syruped fruit, like peaches, pineapple. Anything you like, really. And you can just get it from your local grocer. Don’t sweat it. Feel free to add more or completely eliminate the chili pepper, though I must admit it makes for a really nice contrast: sweet & tangy combined with fiery spicy. But that’s just me. On with the cooking.
Spicy & Tangy Shrimp with Mango
Start with about 1lb of peeled and deveined shrimp. Season them with 2-3 cloves of crushed garlic, 2 tsps sea salt (less if using regular), ground black pepper and about 1-2 tsps of olive oil. Mix it in and set aside while you prepare the veggies.

Slice 1 onion, 1-2 serrano peppers, 1 cp of mangoes, drained and about 1/2 cp of chopped cilantro.

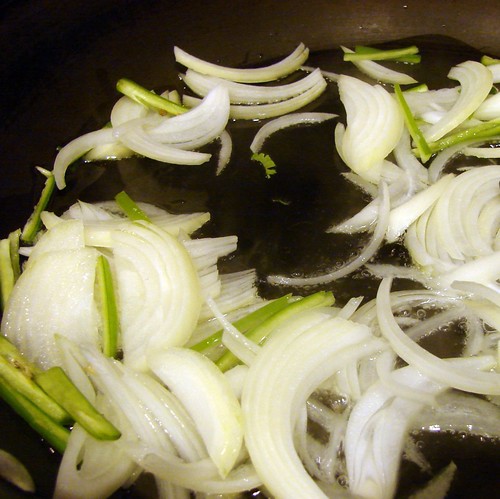
Heat a medium-sized skillet over medium-high and add about 1 tbsp of olive oil. Add the onions and peppers and cook until the onions are translucent.
Add the shrimp and toss them after 2 minutes or so, allowing them to cook for another 2 minutes on the opposite side.
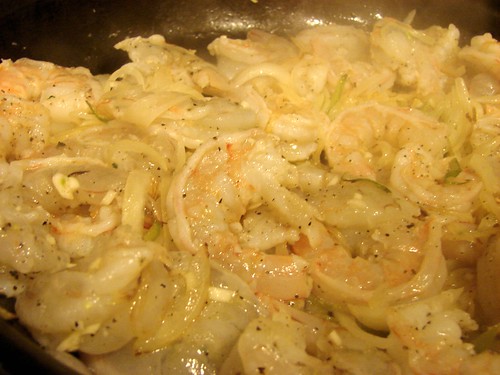
Add the mango and cilantro, stirring them into the rest of the ingredients. Cover tightly with a lid and turn off the heat, allowing the contents to finish cooking in the steam. Serve over rice or pasta or with your favorite vegetable.
Enjoy!
Cookingly yours,
Anamaris
Mangoes are my favorite fruit. I wouldn’t want to live life without them. Mangoes are deliciously versatile and excellent for you. Mangoes are pretty. They’re pretty when green. They’re pretty when ripe. Mangoes are pretty with or without peel. Doesn’t that sound like an essay submitted by an 8-yr-old? That’s how mangoes make me feel. Like a kid looking forward to a full life. I love mangoes, I simply do!
I don’t know how many varieties there are, but I do know that I can think of at least 10 different types available in Panama. Some are extraordinary, while others are considered poor quality and snubbed. Now that I live in Houston, I cherish EVERY mango I can get my mango-eating hands on.
It also occurs to me that as common as they are to me, they are still exotic to a lot of people. With that i mind, I thought I would give you a quick how-to peel a mango post. No mad scientist skills required, to tell you the truth, I’m worried you’ll find this unnecessary and patronizing. But really, I’m coming from a place of helpfulness.
First, don’t buy your mangoes soft/ripe already. Instead, opt for the ones that still have quite a bit of green in them. It’s best to let them ripen under your watchful eye. Just leave them out on your counter for a few days and allow nature to do its thing. Sniff it, squeeze, but not too hard. When it smells sweet and honey-ey, its ready. The outside will be a mottled orange-red, depending on the varietal you get.
There are 2 routes I know of. The first one is how I used to do it back in the homeland, Panama–did I mention I’ll be there in 3 weeks? I digress. This is your basic peel a fruit route.
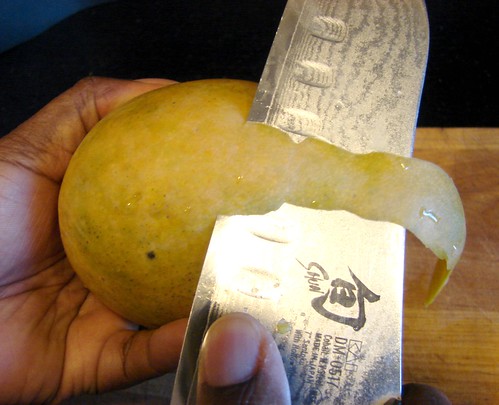
See? You knew how to do that.
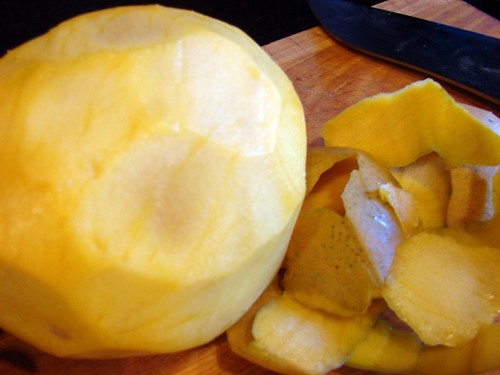
Now it’s ready to eat or chop at will. The other method I learned after moving here. I think it looks fancy and pretty.
First, remember there’s a large pit right in the middle of the mango. One side of the mango is rounded and the other end has a slight point/end. Trim the rounded side so you have a flat surface on the mango, stabilize to avoid cooking injuries.
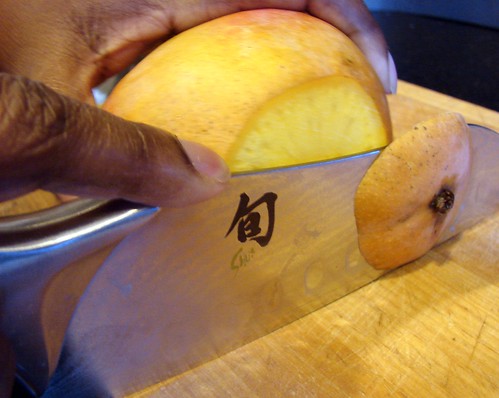
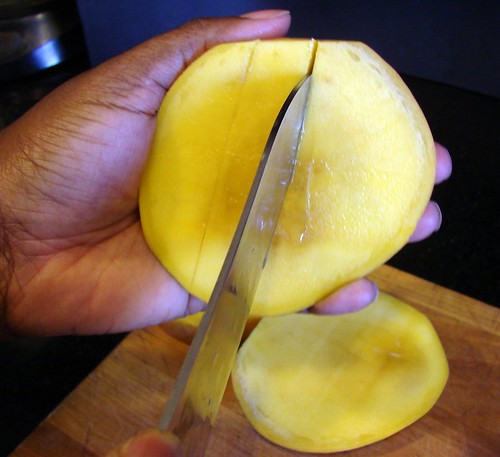
Lay it on the trimmed end and place the knife on either side of the pointy end and work it down. Then do the same to the other side.

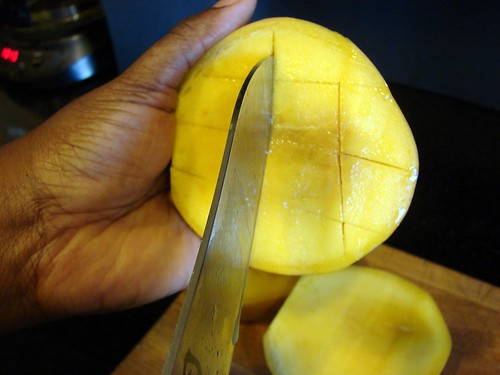
Once you have 2 halves, score them across. Be careful not to cut too deeply, you don’t want your knife to cut through the peel.
Flip it and score it in the opposite direction. Again, mind the peel.
Now the fun and making pretty part comes in. Hold the halves with both hands and push from the bottom/skin side in.
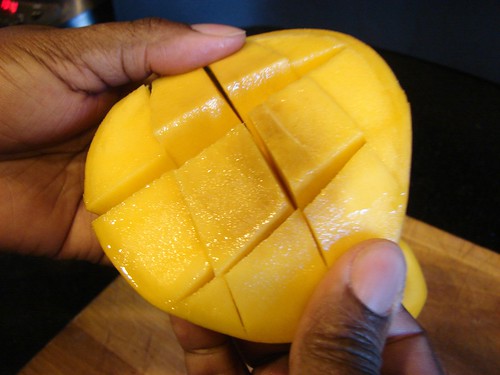
Once it’s flipped, it looks like this.

You can cut the cubes with the knife or you can tear them off with your fingers. Then peel the section with the pit, there’s a lot of meat there too. It’s ready to eat.

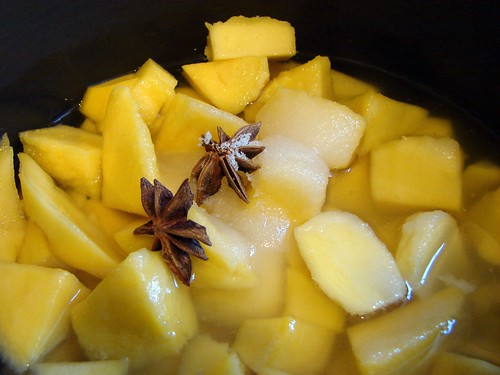
As it turned out, these weren’t the best mangoes, so I didn’t eat them like this. Instead, I added some sugar, water, star anise and salt and simmered it down until the mango was softened and used it to jazz up other meals.
Cookingly yours,
Anamaris
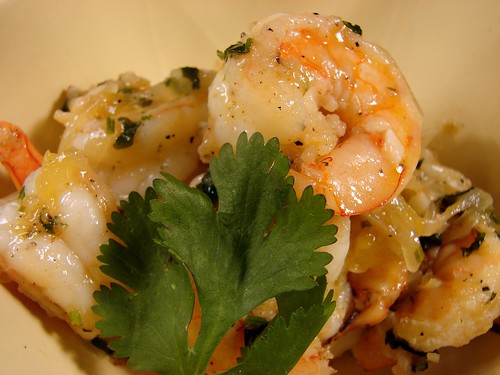
And this is one of the meals I created with the caramelized mangoes. Tangy & Spicy Shrimp and Mango. Yum, no?
Once I won a ToastMasters Impromptu Award for sharing my dislike of bananas. They still call me the Banana Lady at work. I have a banana mental block: its smell, the way it looks when exposed to air, the texture. Believe me, I have banana issues. Big ones, but I won’t bore you with them. HOWEVER, there are 2 things I like banana hints in: banana bread and banana fritters. The fritters are another goody my mom used to make when I was growing up.
I’ve been thinking about banana fritters for a while now, so when I bought a share of produce from a local farmers market association-group-co op thing and it included bananas, I knew the time had come. I stared at them for days waiting for them to ripen enough to make these fritters. Then they were ready, so here you go:
Banana Fritters
About 10 fritters
2 very ripe bananas
1 egg, beaten
2 tbsp sugar
1 cp flour
2 tsp baking powder
2 tbsp milk
1 tbsp butter, melted
1/4 tsp grated nutmeg
1/4 tsp sea salt
Oil for deep-frying
Mash the bananas, it’s ok to have a few lumps. Stir in the egg, then the rest of the ingredients, until you end up with a pretty thick batter.
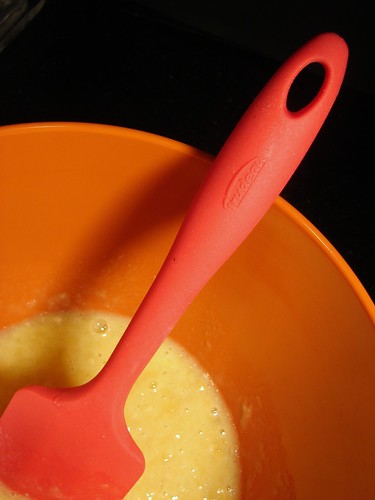
Preheat the oil over medium temperature; you don’t want to fry them too hot, otherwise they will brown while remaining raw in the center. Use a large soup spoon to pour the batter. Here’s a trick: dip the spoon in oil before scooping batter from the bowl, this will keep the batter from sticking to the spoon.

Drop the batter into the oil and spoon some of the hot oil over the fritters. This helps seal the top and makes it easier to flip. Fry for about 2 minutes per side until lightly brown and crisp on the edges. Once you flip them, give them a little squeeze, this helps to cook through the middle.

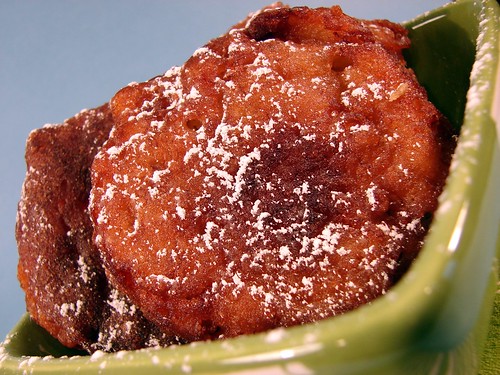
Drain on paper towel and serve dusted with powdered sugar.
THEN…
I REALLY went bananas. *I*, Anamaris of Chef It Yourself, the same person who unloves bananas and who cringes at the sight of banana splits, went for the chocolate. I did. I don’t know what happened.
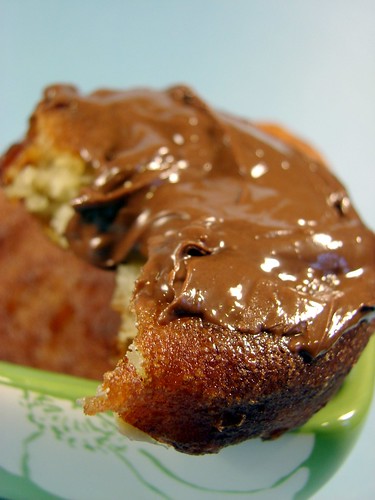
I don’t know why I did it. Well, I think I do know why I did it. It’s become apparent to me that my palate is growing up, expanding, refining, becoming more flexible.
I gave it a try, and OH.MY.GAWD!

Just a light smear of it will do. There was something magical about the combination. The fritters are slightly sweet with just a hint of banana, they develop a nice crisp edge, while they’re goey doughy inside. The Nutella teases you with its light chocolate taste.

Now I must leave you so I can come to terms with this choco-banana turn.
Enjoy!
Cookingly yours,
Anamaris


