Off to the Press: Spindletop
I had not been back to this spot in eons. It was nice to find it redecorated and still as unforgettable as it was the first time. Follow this link to Eating Our Words for my full post.

Anamaris!
I had not been back to this spot in eons. It was nice to find it redecorated and still as unforgettable as it was the first time. Follow this link to Eating Our Words for my full post.
Anamaris!
Around the holidays, I made some Mexican tamales, those were oh so good, we’re still eating on them. But I had a bit of the corn masa leftover… oh, what to do? What to do? The Hubbz loves Salvadorian pupusas and has been asking me to try my hand at them for a while. Leftover masa? Perfect opportunity.

White corn is very popular throughout all of Central America, except for Panama. In my little country, yellow corn is king, the white variety wasn’t really known until recent years.
Pupusas, a funny name for the Spanish speakers, but a seriously delicious treat. Salvadorian pupusas are similar to Venezuelan arepas and Mexican gorditas, except that pupusas are filled, then grilled. A sort of round corn empanada, really. Most commonly, you’ll find these filled with chicharrón (fatty, crisp pork), cheese and black beans. However, fillings are only limited by the cook’s imagination.

I opted to go for the cheese and chicharrón filling. Since I had rendered some pork fat, I was in possession of some choice pork cracklings and there’s ALWAYS queso fresco in da’ house! Check it out:
Pork & Cheese Pupusas
I mixed some of the fresh masa with a bit of pork lard and seasoned it with salt. It isn’t necessary to add either of those things, but I find the corn masa to be bland and dry and I wanted a flavorful, moist pupusa. If you’re using dry masa, simply follow the packaging instructions and add enough water to have a somewhat soft and pliable dough, season or not as you prefer. Shape the masa into balls.

Then flatten and begin adding the filling. I’ve seen this done from a single ball that is stuffed and flattened, but I found it a lot easier to use 2 flatten balls, put the filling on top of one and top with the other half. Seal the edges by pinching them together.

If you have a comal or a cast iron skillet, that’s the best way to grill these. If not, any non-stick skillet will work. Brown on each side over medium temperature. You want to make sure the dough cooks through and the filling is warmed up, so watch the temperature. They should sound kinda hollow when you thump them, that’s how I know they’re cooked through.

Typically, these are served with curtido, a pickled cabbage salad. I’m not a cabbage fan, but I did have pickled carrots and I made a dipping sauce with crema fresca and homemade salsa. Yum!

Here’s more pupusa action here.
Cookingly yours,
Anamaris

At the corner or Richmond and Mid Lane sits an unassuming establishment called Nielsens Deli. I had driven by this place countless times since moving to Houston, but never thought about stopping by, I imagined it was just a deli selling deli meats. Recently, a good friend invited me out for a quick lunch promising me I would have the best potato salad and deviled eggs EVAH! Off to Nielsens we went.
As you walk into the stand-alone building, you’ll come into a long narrow room, the deli counter will be just a couple of feet and directly across from the front door, that’s where you place your order, unless you’ve called it in. Turn right and to the opposite end of the room, pick up some chips and pay for your order. If you’re dining in, you can grab one of the stools lined up against the storefront glass. If you’re feeling particularly playful, tease the incoming customers as they come up to the counter.

Ok, this is a food blog, right? Let’s talk shop. First, I was tickled by the lingo I heard as I approached the counter. The customers, regulars no doubt, have learned how to properly order their meals: ‘a Jr Corned beef, extra spread on rye and a pixie potato salad‘. It made me think of a kinder, gentler soup Nazi.
I’m not a big sandwich person, it just doesn’t seem like a meal, but these sandwiches are awesome! I had the corned beef on white with extra spread (they make their own mayo…OHMY!), an egg and a pixie of egg salad. Let me tell you, this corned beef was good and piled high on the homemade bread. No skimping here.

Anni had the turkey on white, extra spread an egg and a pixie of potato salad. I had a bite of her turkey and was surprised by how flavorful it was. They’ve been roasting their own turkey breasts since the deli opened in 1952, I think they have it down.

Now. For the really exciting part. Those sides. I love potato salad, but not the mustardy kind and not with a bunch of stuff in it. KISS (keep it simple, sweetie) is my motto. And KISS it they do. Loads of their amazing homemade mayo, piled with eggs and celery for some crunch, this potato salad ROCKS! It is so good that years ago Gourmet magazine sent a letter requesting their recipe!
Then we go into the deviled egg territory. Insanity, that is all I can say about it. Next time I go, I will have the chicken salad sandwich, apparently it is incredible. And I believe it, because I had a pixie of the egg salad… it was as if they just chopped the deviled eggs and stirred it all up.

If you’re from Houston, you should definitely visit this Houston institution, do it soon! It’s just inside the loop at Richmond. If you’re coming to Houston for a visit, put this one on the list.
Nielsen’s Deli (daily from 8:00 a.m. to 4:00 p.m)
4500 Richmond Avenue
713.963.8005
Eating around,
Anamaris
Wondering whatever you will do with all that leftover turkey? I know I am! I mean, as much as I enjoy the whole meal, I get tired of the original spread after a day of leftovers. I know lots of people enjoy making their leftover turkey into sandwiches, I’m not a big sandwich fan. Can’t tell you why, just not a fan. However, every now and then… something happens and I want one.

Medianoche literally means midnight in Spanish and that is the name given to this Cuban specialty. They say these came about as a snack offered to night club patrons in the wee hours of partying. I totally understand that. When I’m out late drinking and dancing (not that it has happened in a while), a need a little nibble of something. And, believe me, when you’re on the sofa watching a good movie later on, you’ll be so glad to see this beauty toasting up.
No recipe again, just the ingredients. I should mention that the Medianoche is pretty much the same thing as a Cuban sandwich, except for the type of bread used. If you have a bread that is eggy and slightly sweet, you’ll end up with a Medianoche. On the other hand, if you only have something like a baguette, it’ll be a Cuban sandwich. I used Hawaiian sweet rolls in lieu of a brioche, which aren’t readily available in Houston. The ham is a Boars Head Sweet ham, it wasn’t as sweet as the honey-roasted and worked beautifully. As for cheese, I went with a full-blood Swiss, I wanted to taste it in the sandwich.
Medianoche Sandwich
Bread
Turkey slices, thick slices
Sweet ham
Swiss cheese
Pickles
Butter
Butter the bread slices, then layer with cheese, turkey, ham, pickles, and top with cheese. Put the other half on top.

If, like me, you don’t have a Panini press, add a bit of butter to a skillet and heat over medium low temperature. Place the layered sandwich in the skillet, then press down with another pan, weighing it down, if necessary.

Allow the sandwich to toast for about 3 minutes per side. Make sure the heat isn’t too high or you’ll end up with burnt toast.
Slice the sandwich in half diagonally before serving. For more shots, follow the link to the photostream.

Cookingly yours,
Anamaris
Every meal should have a beginning, a middle and end, just like a good story. The appetizer sets the mood and expectations for what’s to come. Consider it foreplay. You want it to make an impression, to tease but not overshadow.
When I thought about the components for this meal, I knew I wanted to incorporate the ‘traditional’ Thanksgiving ingredients. I also knew I would need to befriend the sweet potato, it’s not one of my favorites. You may recall another post where sweet potato was the star, but dressed in different wardrobe. That’s how I trick myself into liking it.
When I thought about a starter for this meal and considered using sweet potatoes, I wanted to remove most of that barely there sweetness and stay away from the common spices paired with it. The addition of chorizo made this soup even more savory and hearty. This soup is delicious! AND light AND easy. You should definitely try it. You can make the components for the cream ahead of time, then reheat and put it together just before serving.

Sweet Potato Cream with Chorizo
serves 6-8
3-4 medium sweet potatoes
1 bay leaf
2 cloves garlic, peeled
Chicken stock or water
Sea salt
1 tsp cumin
Crema fresca or creme fraiche
For the chorizo:
1 large onion, chopped
1 tbsp extra virgin olive oil
2 tsps balsamic vinegar
1 tbsp sherry or wine
8 ozs Mexican chorizo
Sea salt
Sugar
Black pepper
Peel and chop the potatoes before putting them in a medium saucepan with the stock/water, bay leaf, garlic and salt. Boil and cook until tender. Allow them to cool in the boiling liquid before running through a blender. The sweet potatoes will be very dense, you may need to add additional water in order to puree.
To prepare the chorizo: cook the onions in the oil over medium high heat until softened and the onions begin to turn golden. Add the balsamic vinegar and sherry, cook until it evaporates.

Add the chorizo into the onion mixture, making sure to break it apart so it is a crumble. Chorizo should be thoroughly cooked, but keep the temperature at medium to avoid burning it. Add a couple tablespoons of water and cover with a tight-fitting lid, lower the temperature and allow it to cook for about 10 minutes. Adjust the seasonings as necessary, if you find it to be too tart, add a pinch of sugar. Allow it to cool. Remove the excess fat once it cools down.
To assemble: Pour the hot soup into a bowl, drizzle with cream, then drop a dollop of chorizo in the center.

Enjoy! Check out the rest of this meal here.
Cookingly yours,
Anamaris
I told you before I would make a pre-turkey day dinner for your benefit, but I lied. Don’t get me wrong, you do benefit from this, but I didn’t make this dinner just because of you. The truth is, I love turkey and would eat it year-round, so when this time of the year comes and the turkeys are plentiful… I eat and eat and, well, eat.
So, I set out to put together a Thanksgiving meal that spoke to my Latin roots while still honoring the traditional ingredients. With a little push from The Hubbz and an abandonment of safety nets, I came with what I believe is an incredible menu.

yep, that's the beginning of the menu
Pay attention, this is where you benefit: I’m about to share all of it with you! The menu. The thought process. The planning. The execution. I’m sharing it all with you in the hopes that you’ll be encouraged to recreate one or more of the dishes or that you’ll through caution to the wind and try something you’ve been thinking about for while.
The Thought Process:
Cocktails: I didn’t want anything too heavy or pumpkiny, but I still wanted to keep Thanksgiving colors in mind. I knew it needed to be spicy/flavorful.
Appetizer: I went for a soup, but wanted to keep it light while flavorful and I wanted to work sweet potatoes in the menu.
Turkey: Moist is always my first priority, so I knew I would brine it. I wanted to pick up on subtle Latin flavors without fussing too much over the bird.
Gravy: It’s like the chicken & the egg. Can’t have one without the other.
Accompanientment: Usually cranberry and, I’m sorry but I have to admit I love the canned stuff, but I needed to kick up a notch. I immediately thought guayaba! Or guava as its known stateside.
Dressing: Cornbread dressing is my absolute favorite even if traditional. My thoughts were to have corn patties topped with the extras usually found in dressing. I wanted to recreate a sophisticated version of a Panamanian tortilla.
Vegetables: Indispensable, and these pickled ones help cut through the heavy meal.
Dessert: A traditional dessert found at weddings in Panama. This is pumpkin brought to Jimmy Choo levels.
The Menu

Sweet Potato Cream with Chorizo Garnish

Achiote & Herbs Turkey
-Garlic Butter Gravy
-Guayaba Compote

Polenta Tortillas with Sausage & Chicharron Picadillo

Green Bean & Carrots Escabeche

The Planning
Putting a big meal together, particularly when you have to stick to a schedule or a set dinnertime can be overwhelming. Lists make it easier. It doesn’t matter what type of project I’m working on, a list always makes me feel at ease, like I can get it done. When I just think of the big picture or the end product I can’t help but feel a bit of anxiety, like I’m going to forget something or that I don’t have enough time to finish. Lists are good. Lists are your friend.
After I had finalized the menu, I wrote down each dish and broke it down by steps. I then prioritized the order in which to execute each step.

pardon my handwriting...
The Execution - for the recipes, click on the links.
Gobble, gobble!
Cookingly yours,
Anamaris
Aside: Something weird happened this morning and it explains why this post is just coming now. See, I dutifully woke up around 5:45 am, put the post together and hit ‘Publish’. When I was at work, I checked in and noticed there was no new post. I looked and looked to no avail and, because The Man has decided is time for me to earn my keep, I couldn’t do anything about it. The long and short of it is, I have a ‘test’ blog, I accidentally clicked on that and THAT’s where this post was. All day, all by its lonesome. So here you go. Pretend its 6am.
—-
Yes, of course I’m looking back at more Thanksgiving goodies. In the weeks to come, I’ll share some new recipes for the meal of excess, but I wanted to remind you of what I shared with you last year. My blogging was in its infancy, but I can assure you my cooking was not.
Maybe you’d like to offer a little appetizer to your guests as they arrive. I love this little recipe which I submitted for a Pepperidge Farm contest. It says Autumn and it says eat me.
Aaaah, yes. The Meal. This one chronicles all the eating. Oh my. I’m so ready for a repeat.
No meal is complete without dessert, right? Especially when it addresses my love affair with Honeycrisp apples.
Thanksgiving meal
Sweet Potato pastries
Apple Squares
Fear not, my bloggies. There will be pie. Or something, but there will be plenty more.
Cookingly yours,
Anamaris
I thought I would trick you into reading this one. It’s not so much tricking as it is deceiving. The truth is, yuca is the Latin Americans’ potato. Both are tubers. They have similar textures, although yuca is more fibrous. And they could probably be swapped out in most dishes.
Today I’m going to share with you two variations in the way we prepare yuca throughout Latin America. First, let me redirect you to a post from months ago. It walks you through the process of choosing, peeling and cooking yuca. Once you have that part done, then you can move on to one of these methods. Yuca con mojo is essentially a garlicky plate of yuca. Mojo is Latin-Caribbean sauce/dressing that is spooned over foods in Cuba and Puerto Rico, especially. The other variation would be Yuca Fries with Spicy Mayo-Ketchup dipping sauce. No real recipes here, just a bit of this and a pinch of that.
Yuca con Mojo
1 lb yuca, cooked and chopped
3 cloves garlic, minced
1 tsp garlic puree
Sea salt
Juice of 1 lime
2/3 cp olive oil
1/2 cp fresh Italian parsley, finely chopped
Keep the yuca warm or prepare the mojo while they cook. Heat up a small pan over medium temperature and add the minced garlic, make sure to stir it constantly to avoid burning it. Once that garlic softens, add the garlic puree and lime juice. Stir until well blended and cook for about 5 minutes over medium low temperature. Add half of the parsley and season with salt. Remove it from the heat.

Drizzle over the warm yuca and serve with another sprinkling of parsley. YUM!
Yuca Fries with Spicy Mayo-Ketchup
1 lb yuca, parboiled and cut into thick fries
Vegetable oil for frying
Sea salt
1 cp real mayonnaise
1/4 cp Ketchup
1/2 tsp garlic powder
1-2 tsps habanero hot sauce
1 tsp sugar
Fry the yuca in enough oil to cover them, make sure the yuca has had a chance to cool before frying. It will take about 5 minutes to fry them to a golden brown. In the meantime, combine the rest of the ingredients and whisk them together. Check the seasoning and add a bit of salt IF necessary. Don’t forget you’ll salt the yuca after it has fried.

Serve as dipping sauce for the fries. By the way, both of these sauces/dips go incredibly well with potatoes and plantains. You can see more hunger-inducing shots here.
Cookingly yours,
Anamaris

Ok, I know that title does nothing for you except maybe tell you there’s a post about ceviche coming up. But right now, as I type these words, at this very moment, I keep hearing Tequila! You know the little tune by The Champs everyone does the Conga line to at weddings? I do realize how this dates me, but hey, the song is stuck in my head and I hope it is now stuck in yours.
Anydoooo, I made ceviche. I made shrimp and scallops ceviche. I made ceviche for the very first time. EVER. It was so good and so easy and did I mention how good it was? Because it really, really was. See, ceviche is on every menu in Panama. Makes sense when you consider how readily available fresh seafood is. They make it out of pretty much anything that swims or floats. As common as it is in my motherland, I’ve always been intimidated by the process.

I served it with corn tortilla strips and platanitos (thinly sliced and fried green plantains). For some reason, the tortilla strips go really well with the shrimp bits, while the plantain compliments the scallops’ smooth texture and sweetness. I think you should give it a try, let me tell you what I did.
Ceviche de camarones y conchuelas (Shrimp & Scallops ceviche)
Adapted from Bertha de Pelaez
1 lb medium shrimp, peeled & deveined
1 lb small scallops
1 Garlic clove
1 Bay leaf
Sea salt
2/3 cp fresh lime juice
1/3 cp fresh orange juice
2 tsps Dijon mustard
1 tsp habanero paste
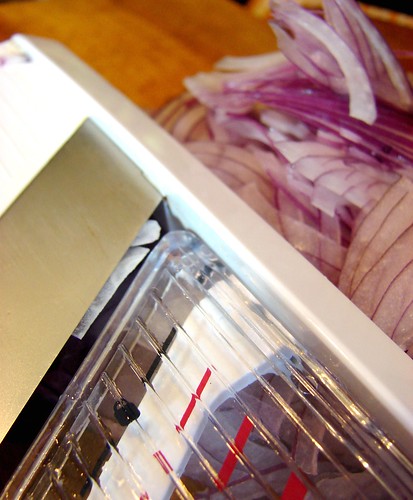
1 red onion thinly sliced
1 avocado, cubed
First, get the pickling juice ready. In a glass or plastic bowl, combine the fruit juices, mustard, habanero, salt to taste and add the onions. I sliced mine with a mandolin to make sure they were very thin, but if you like raw onions, you need not worry about thickness. Set aside
Step 2: blanch the seafood. Fill a large pan with water, add the garlic and bay leaf and a bit of salt. Bring the water to a slow boil for about 5 minutes, to allow the aromatics to flavor the water. Drop the seafood in, turn off the heat and allow the shrimp and scallops to remain in the water for 3 minutes or so. Long enough for the shrimp to begin to pink.

Have a bowl of iced water at the ready. Remove the seafood from the hot water, drain then plunge into the cold water. Leave the seafood in the cold water long enough to stop the cooking.
Now add the seafood to the pickling mix, making sure there’s enough liquid to cover most of the seafood, if not all. Since the seafood is partially cooked already, it will only take about 2 hours for all the flavors to meld, but if you can make it hours ahead, the flavor will only improve. Just give it a stir every now and then to make sure the seafood is pickling evenly.

Add the avocado cubes just before serving cold with chips. Enjoy!

Cookingly yours,
Anamaris
There is a post I’ve been wanting to bump to the front. It was one I did on the very early days of Chef It Yourself. It was kinda funny to go back and look at the way it was formatted. I’ve come a long way, baby.
Anydoo. There are several things about that post that I was, and still am, quite proud of. Good pictures, good content, good how-to directions for one of the most popular bites of Latin Caribbean cuisine. A staple really. Can be found all along the Caribbean islands, on to Panama, Colombia, Venezuela and Ecuador. As incredibly delicious and easy to make as these are, they seem daunting and intimidating if you’re not familiar with the main ingredient.
Since I’m not savvy enough to figure out how to bring that original post into this screen, I’m going to ask you to follow the link. The original post was titled Cut & Smash. I really hope you’ll like it as much as I do. I give you….drum-roll….. PATACONES!
Again.

Go forth and smash!
Cookingly yours,
Anamaris

