Well, you know what they say. That statement is definitely accurate when it refers to plantains. Yes, you heard me right. Plantains. More specifically, ripe plantains. The darker the skin on the plantain, the sweeter it will be.

If you were to purchase plantains and allow them to ripen at home, it would take about 7-9 days to get them to that dark dar stage. Now, mind you, you don’t want them to be mushy. They should feel the same way a ripe avocado does. Soft and springy, not mushy. When you fry up plantains into tajadas using very ripe ones, you end up with this kind of caramelization. Heavenly!

Plantains are very versatile. And this recipe may be just the thing you’ve been looking for to spice up your Thanksgiving table. Side dishes around the world can be similar, even when prepared with very different ingredients. Plátanos en Tentación (loosely translates to tempting plantains) are a popular side dish in Panama, present on every party and holiday table.
If you’re bored with traditional sweet potatoes or just want to introduce your loved ones to something exotic, you should bring home the tropics with this traditional dish.

Plátanos en tentación (Glazed plantains)
2 ripe plantains (best if peel is dark brown-to black)
1/3 cup granulated sugar
1/2 teaspoon ground cinnamon
1/8 teaspoon salt
1/2 teaspoon vanilla extract
2 tablespoons butter
Water
Peel the plantains and slice them in half, lengthwise. Then cut the halves into pieces about 2-inches long.

Place the plantain pieces into a medium-sized skillet (about 12-inches), then sprinkle the sugar, cinnamon, salt over the plantains.
Divide the butter into 4 pieces and drop it in the skillet. Cover the plantains with water, this will take about 2 cups of water, add the vanilla.

Bring it to a soft boil over medium-high heat, stirring occasionally to make sure the sugar dissolves. Allow it to cook until the water evaporates, about 20 minutes.

Once the water has dried, the plantains will begin to caramelize in the residual syrup. Reduce the temperature to low, and turn the plantain pieces a few times to make sure they brown evenly. Serve warm. These can be made ahead and reheated before serving.

For additional delicious shots, click here.
Cookingly yours,
Anamaris

Ok, I know that title does nothing for you except maybe tell you there’s a post about ceviche coming up. But right now, as I type these words, at this very moment, I keep hearing Tequila! You know the little tune by The Champs everyone does the Conga line to at weddings? I do realize how this dates me, but hey, the song is stuck in my head and I hope it is now stuck in yours.
Anydoooo, I made ceviche. I made shrimp and scallops ceviche. I made ceviche for the very first time. EVER. It was so good and so easy and did I mention how good it was? Because it really, really was. See, ceviche is on every menu in Panama. Makes sense when you consider how readily available fresh seafood is. They make it out of pretty much anything that swims or floats. As common as it is in my motherland, I’ve always been intimidated by the process.

I served it with corn tortilla strips and platanitos (thinly sliced and fried green plantains). For some reason, the tortilla strips go really well with the shrimp bits, while the plantain compliments the scallops’ smooth texture and sweetness. I think you should give it a try, let me tell you what I did.
Ceviche de camarones y conchuelas (Shrimp & Scallops ceviche)
Adapted from Bertha de Pelaez
1 lb medium shrimp, peeled & deveined
1 lb small scallops
1 Garlic clove
1 Bay leaf
Sea salt
2/3 cp fresh lime juice
1/3 cp fresh orange juice
2 tsps Dijon mustard
1 tsp habanero paste
1 red onion thinly sliced
1 avocado, cubed
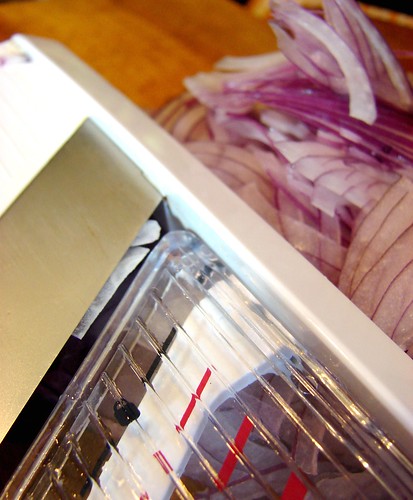
First, get the pickling juice ready. In a glass or plastic bowl, combine the fruit juices, mustard, habanero, salt to taste and add the onions. I sliced mine with a mandolin to make sure they were very thin, but if you like raw onions, you need not worry about thickness. Set aside

Step 2: blanch the seafood. Fill a large pan with water, add the garlic and bay leaf and a bit of salt. Bring the water to a slow boil for about 5 minutes, to allow the aromatics to flavor the water. Drop the seafood in, turn off the heat and allow the shrimp and scallops to remain in the water for 3 minutes or so. Long enough for the shrimp to begin to pink.

Have a bowl of iced water at the ready. Remove the seafood from the hot water, drain then plunge into the cold water. Leave the seafood in the cold water long enough to stop the cooking.
Now add the seafood to the pickling mix, making sure there’s enough liquid to cover most of the seafood, if not all. Since the seafood is partially cooked already, it will only take about 2 hours for all the flavors to meld, but if you can make it hours ahead, the flavor will only improve. Just give it a stir every now and then to make sure the seafood is pickling evenly.

Add the avocado cubes just before serving cold with chips. Enjoy!

Cookingly yours,
Anamaris
For some beer!

OK, I have to admit I don’t quite get the chicken jokes. Or the knock-knock ones, must have something to do with cultural differences, but I had to give it a try. I’m supposed to always use a catchy title, not that I think this one was, but I’m trying.
A few days ago, Tyler Florence was making the ultimate Coq au Vin and it looked amazing as most of his ultimate dishes do. So I started thinking how I could bring it to Latin territory and this is what I came up with. Coq au Biere: Chicken in beer. This was oh so delicioso! It got better day after day; day 1 was awesome, but day 3 was beyond words.
I really liked the way the beer just mellowed out and became earthy, smoky and slightly sweet as it cooked into the sauce. I originally served it with very ripe, fried plantains or tajadas. I wanted to compliment the flavors of the chicken and beer with the sweetness of the plantains. On days 2 & 3 I served it with white rice to really benefit from the flavors in the sauce. I hope you will give this one a try, it is pretty easy to put together.
Chicken in Beer
8-10 chicken thighs
All purpose flour (for dredging)
2 tsp sea salt
1-1/2 tsp black pepper
2 cloves garlic, pureed
2 tbsp vegetable oil
3-4 Spaish chorizo links, sliced (or bacon)
2 cps onions, chopped
2 cps mushrooms
2 cps carrots, chopped
1/4 cp sherry or white wine
1 bottle medium dark ale (like Negra Modelo, Shiner)
2 cps fresh cilantro, chopped
1 tsp herbs de Provence

Season the chicken with salt, pepper and garlic puree, set aside. Combine flour with a pinch of salt and pepper and use it to coat/dredge the chicken pieces. Reserve 1-2 tbsp of the flour. Meanwhile, heat the oil in a large, heavy skillet over medium high heat and brown the chicken pieces on both sides. Set aside.

Remove the excess oil and cook the chorizo in the same skillet. Then add the onions, cooking until softened. Add the mushrooms and carrots, and allow to cook until the vegetables have softened. Add the cilantro and Herbs d’Provence, once mixed in, add the reserved flour and allow it to cook for a couple of minutes.

Pour the sherry and allow it to cook down over high heat. Then stir in the beer and broth.

When the beer is well blended, add the chicken pieces and any juices that drained from the chicken. Cover and simmer for about 1 hour. Remove the lid and continue to simmer for 15 minutes to allow the sauce to reduce a bit.

That’s it! Serve with fried tajadas and or rice.

Cookingly yours,
Anamaris

There is a post I’ve been wanting to bump to the front. It was one I did on the very early days of Chef It Yourself. It was kinda funny to go back and look at the way it was formatted. I’ve come a long way, baby.
Anydoo. There are several things about that post that I was, and still am, quite proud of. Good pictures, good content, good how-to directions for one of the most popular bites of Latin Caribbean cuisine. A staple really. Can be found all along the Caribbean islands, on to Panama, Colombia, Venezuela and Ecuador. As incredibly delicious and easy to make as these are, they seem daunting and intimidating if you’re not familiar with the main ingredient.
Since I’m not savvy enough to figure out how to bring that original post into this screen, I’m going to ask you to follow the link. The original post was titled Cut & Smash. I really hope you’ll like it as much as I do. I give you….drum-roll….. PATACONES!
Again.

Go forth and smash!
Cookingly yours,
Anamaris
This is a popular dish in Panama, you’ll often see it served for breakfast with a fried egg–then it becomes Bistec a Caballo. Caballo is a horse and I have NO idea why the mention of a horse is necessary, but I don’t make up the names, I just eat the food.

The beef used for this is a cheap cut, no fancy meats and it is then drizzled with pan juices. For breakfast, this will be accompanied by hojaldas or tortillas, otherwise, white rice and tajadas are the right companions.
I’ve improved the dish by cooking the beef a to medium rare and because The Hubbz needs a bit of gravy/sauce, I added pureed tomatoes to maximize the pan juices. This is not a recipe, there’s no need for one, what I’m offering is a step-by-step guide. Adjust as necessary.
Bistec Encebollado
You will need:
About 1 lb beef round tip
Sea salt
Black pepper
Onions
Crushed garlic
Oregano
Olive oil
Fresh tomatoes
Crushed tomatoes
I used slices of round tip, about 1 lb of filets 1/2-inch thick. I took a mallet to them to make the slices uniform and to tenderize it a bit. I ended up with slices that were about 1/4-inch thick and cut them into medallions that were about the size of my palm.

Season with salt, black pepper, crushed garlic, oregano and olive oil. Set aside while you prepare the rest of the ingredients.
Slice 2-3 medium onions, if you like onions, you can’t have too many. Slice them into rings about 1/4-inch thick. You will also need 1/2 a red bell pepper diced. Substitute with green pepper if you can’t get your hands on red or skip it all together. Remove the seeds from a Roma tomatoes and dice finely.

In a large skillet, heat about 3 tbsp of olive oil and add the onions, cooking them until they start to become translucent, then add the bell peppers. Cook for a couple of minutes before adding the tomatoes and 1-2 tsps of white vinegar. Cover and cook for another 3-5 minutes. Allow the oil to drain, remove from the skillet.

Heat the skillet and oil, brown the medallions in batches. Make sure not to crowd them or you’ll end up boiling them instead of searing. Cook them to the desired doneness, remove and keep warm until all the beef is browned.

Return the onion mixture to the skillet, add a bit of liquid (wine, sherry, beer, stock, water) to loosen the bits before adding about 1 cp of crushed tomatoes. Adjust seasoning, allow it to cook for about 3 minutes, then add the slices of beef turning them into the sauce. Turn off the heat.

Serve with rice and tajadas.
Enjoy!

Cookingly yours,
Anamaris

That’s what these are. Tajada translates to slice, and these are, inded, sweet slices. Slices of ripened plantains. The standard dinner plate in Panama consists of rice, some sort of meat, kidney beans or lentils and these: Tajadas.

The plantain range
This continues my love affair with plantains. Your plantains need to be quite ripe, but not too ripe. You’re looking for a deep yellow tone and a few black spots. When you squeeze them, they should be soft without being mushy.
One average-sized plantain will yield about 12-15 slices or tajadas. It is difficult for me to say how many that feeds, as I can and have eaten an entire plantain fried this way on.my.own. But, I guess you can serve 3 or 4 generously. If you must.
Unlike green plantains, the ripe ones are easy to peel. Simply cut both ends off, cut 2 slits along the length of the plantain and peel. See the pictures below for the step-by-step moves.

First trim both ends.

Second, slit the plantain lengthwise

- Third, peel it
Now that you’ve peeled the plantains, you will slice them. Cut the plantain in half, then slice each half at an angle. You want to cut slices that are about 1/4-inch wide. See the pictures below.

Next you will need a frying pan with vegetable oil that is about 1-inch deep–this generally means about 2 cps in a 9″ skillet. Heat it over medium high fire. Once hot, add the plantain slices to fill the bottom, but still in a single layer. Fry until golden brown, then turn and brown the other side.

They’re ready to serve. For more plantain yummies, follow these links:
Pastelon
Patacones
Plantain Chips
~~~


When was the last time you completed a task you were looking forward to only to find out it was a dud, then you miraculously managed to save the day? Have you ever taken a shot of something you loved only to realize you were out of focus? Then as you look at the digital image you find something in that same shot that is completely interesting? Or, have you gotten directions to a new restaurant and once there realize there’s a 2-hour wait, so you just walk down the block to a little hole-in-the-wall which has now become your fave place?
Well, I did something of the sort. Actually, I’ve done all of the above, but most recently I hit a total dud on a dish that I had been thinking about for DAYS, weeks even. Then somehow I was able to repurpose it the next day and wound up with a great save. There’s no real original recipe here, just some slight modifications to a standard.
For weeks, I had been thinking about carnitas: tender fatty pork pieces cooked in their own fat. I have made these successfully before but wanted to document it AND wanted to try out this new Le Creuset-like dutch oven I just won on Ebay. Well, between random pieces of pork, defects on the enamel of my new used pot and a battle with allergy-induced bronchitis, my carnitas were disappointing. Nothing especially wrong with them; taste was ok (though I won’t try that combination of spices again), the texture was a different story.

Yeah, no love at first sight here
Some of it got stuck to the bottom of the dutch oven, it kinda crumbled and broke into weird little strands, and I wasn’t able to get the golden brown color I love. But I wasn’t about to dunk all that meat when there wasn’t anything ‘really’ wrong with it.
What is a disappointed girl to do? I asked myself. Off to work I went, the carnitas fiasco heavily looming over me. When I was back, I remembered I had plantains that had ripened too much to use as tajadas, that’s when the foodie lightbulb hit me between coughing attacks! Have you ever heard of pastelon? It is a Latin dish which varies slightly from country to country, but its basically a shepherd’s pie prepared with easily accessible produce. Most commonly, you will find it prepared with ripe plantains instead of potatoes and ground beef rather than lamb as is customary in England.
Sorry, I just realized how long this tale got. Bottom line is this. If you have some leftover meat of any kind you can use it for this; dont be shy. It could be chicken, turkey, beef, anything you have hanging around your fridge will work. Here’s what I did:
For the topping:
3 very ripe plantains
1/4 tsp salt
2 slices bacon, diced
Trim the ends of the plantains and peel. Once peeled, cut them into thirds, then slice each third lenghtwise and cut to 1/4-inch cubes. Put the cubed plantains in a medium saucepan, add the salt and cover with water. Bring the water to a boil, then reduce the heat to medium (to a slow simmer). Cook them for 4 minutes then drain and set aside.
In that same saucepan, cook the bacon until lightly brown; remove from the heat. Add the drained plantains to the bacon. You want to stir it in, incorporating the bacon bits and fat. The plantains will be mashed. Set aside.
Ingredients for the meat filling:
1 medium onion, chopped
2 tbsp olive oil
1/4 cp ea Italian parsley and cilantro, chopped
1-2 cloves garlic, crushed (1 tsp garlic puree)
1/4 cp white wine (vermouth)
3 cps leftover meat, diced or shreded
2 tbsp ketchup
Habanero sauce, to taste (optional)
1/2 cp water
Heat the oil in a frying pan over medium high heat, add the onion and cook until translucent. Add the garlic, cilantro and parsley stir to combine. Add the wine and flame it (optional) to cook the alcohol out, it will reduce a bit. Add the habanero, ketchup and water; mix well. Finally add the meat you will use. Stir it well and cover. Turn off the heat and set aside.

Preheat oven to 375°. Rub a bit of oil around the sides of a baking dish; I used a 9-inch pie pyrex for this recipe. Put all of the meat mixture on the bottom of the pan, then top with the plantain mash. Place in the middle rack of your oven and bake for 20 minutes. At the end of that time, turn on the broiler and allow it to brown a bit on top. Pull it out of the oven and allow it to rest for 10 minutes before serving.
Done! Hope you like it as much as we did.

Cookingly yours,
Anamaris
Yes, this is another post about green plantains. I wasn’t lying when I said there are many ways to prepare them. This method leaves you with beautiful plantain chips that can be eaten plain or with the dip of your choice. I made a nice Guava Chimichurri to go with these; just follow that link for that recipe.
Now for the business at hand, let’s make some plantain chips.
Preping the plantains – Give them a scrub under running water. Plantains have a milky sap that leaks once they’re harvested. I find that this sap attracts dust and debris, so take a sponge to them.
Once you’ve rinsed them, trim the ends and score the plaintain lengthwise following its ridges. You want to have about 4-5 lines going from top to bottom.
Trim both ends of the plantain.
Score the plantain top to bottom about 4-5 times
After scoring, soak them in water. I usually fill one side of the kitchen sink halfway with cool tap water. Allow them to soak for 30 minutes or so. This makes peeling them a breeze! While they soak, preheat a deep fryer to 350°.
Next, peel the suckers!
Once you’re done peeling, you can move on to slicing them. I use a handheld mandolin. It’s a gift from hubby and ILOVEIT! I place it on level 2, which pops out paper-thin slices. This is ideal for the chips that resemble potato chips. I’ve also had them a tad thicker, which is still enjoyable, but less addictive…hmm, maybe I should switch to #3.
In the absence of a mandolin, you could use the wide side of a grater, though I think the slices may be a bit thicker, closer to level 3. These are still delicious, just not as crispy.
They’re ready to fry! The thinner they are, the faster they’ll brown, so keep an eye on them. Also, you may want to drop them into the oil as close to individually as possible. They have a tendency to clump together, so drop, stir and shake your basket. Season them with salt as soon as they come out. Drain them on paper towels (if you can keep yourself from devouring them) and serve. They keep nicely for a day or two in a sealed bag.
What measures between 8-10 in., is available in a variety of colors, is good for you and makes you happy and is best warm? A PLANTAIN! I hope your mind didn’t go too far in the gutter, well, I hope it did, at least a little. This side dish is so good it makes you feel naughty when you eat it.
This time I’m writing about the green ones. Sometimes referred to as machos, plantains are cousins to the banana. Unlike their cousins, plantains need to be cooked before eating and are considerably starchier. Just like a banana, a plantain starts off green and ripens over a period of about 1 week. It is a staple in Latin American and Caribbean cuisines at any stage of ripeness.
When green, you’ll see them used as chips and patacones (tostones depending on the country), as they ripen and become sweet they may be served as tajadas and even used for desserts. Believe me, there are many possibilities for this fruit and I will visit a few of them. For now, it’s time for patacones!

I will do my best to walk you through this process and I want to tell you up front, it is an easy dish BUT, it does have a number of steps to follow. It is a food of care, I won’t say love because it isn’t that involved. Think of these as making twice fried fries. Ready? Let’s do it.
Preping the plantains. I wish I had known about this method when I started making these in my teens. You get the benefit of this trick I picked up from a cooking show. I’d love to give credit where it’s due, but I can’t remember which show it was. I digress.
Ingredients
2 large green plantains
sea salt
vegetable/canola oil
You will need wax paper, a deep fryer or a pot that will hold about 4 cps of oil (you want to cook them in oil that is at least 3-in deep), something to smash them–the bottom of a glass, the flat side of a meat cleaver.
Preping the plantains (for real this time). Give them a scrub under running water. Plantains have a milky sap that leaks once they’re harvested. I find that this sap attracts dust and debris, so take a sponge to them.
Once you’ve rinsed them, trim the ends and score the plaintain lengthwise following its ridges. You want to have about 4-5 lines going from top to bottom.
- Trim both ends of the plantain

Score the plantain top to bottom about 4-5 times
After scoring, soak them in water. I usually fill one side of the kitchen sink halfway with cool tap water. Allow them to soak for 30 minutes or so. This makes peeling them a breeze!
Preheat the oil to 350°

Remove them from the water and peel the plantains beginning from one of the ends. If you can’t catch the skin, take a paring knife and pry the skin up at the corner, then peel like you would a banana.
Once the thick skin has been removed, check the plantain for any silk left behind. Sometimes the skin will separate and remain stuck to the plantain, you have to remove it all before cooking.
Cooking the plantain ~ 1st fry. Cut the plantain into rounds about 1-1/2 inches wide. You’ll get about 6-8 rounds from a regular size plantain. Toss them in a bowl with 1 tsp sea salt; you will salt them before each frying. Once you’ve salted them, drop them into the preheated oil. You’ll want to move them around to make sure they’re cooking evenly. Make sure the oil isn’t too hot, this first step is about cooking the plantain, not browning it. It will take about 10-15 minutes to get them cooked through.

I now use the flat side of my cleaver for patacones, but the bottom of a glass will do
While they’re frying, get your assembly line ready to smash them. You will need 2 sheets of wax paper and whatever you’ll use to smash them. The wax paper isn’t a must, but it makes life super easy when squishing these. The faster you smash and put them back in the oil, the flakier the patacones will be.

Remove the patacones from oil and drain. Raise the oil’s temperature to 400°. Salt the patacones and toss. See hubby’s moves.

Now the fun begins or the release of the day’s tensions, whichever you need that day. After you’ve salted them, line up these puppies on one of the sheets of wax paper then cover them with the other sheet. Using a glass or another flat surface, smash them to about 1/4 inch thickness.

2nd fry – As I mentioned, you’ll want to do this as quickly as possible. Put them back in the oil, which should now be up to 400º, and fry them for the 2nd time. This time you’re looking to add some color, depending on the heat and how many are in, this will take another 5 minutes or so.
Drain and eat. They’re best pipping hot.

My dad says Panama will be the next world power. I know that’s wishful thinking, but we do have some pretty cool stuff going on. Beautiful beaches on 2 oceans, fun-loving people, great music, and let’s not forget what brings you here. The food.
“Puente del mundo y corazon del universo“. This phrase roughly translates to ‘bridge of the world and heart of the universe’ and it is a common phrase amongst Panamanians. Our own private slogan of sorts happens to be true in so many aspects. I think it was originally intended as a reference to the country’s geographical position, but because it is a bridge to the world, you can see the proof in its people and how they do the vodoo they do.
Melting pot doesn’t even begin to describe what’s going on with the people of Panama. This influx of cultures, ethnicities and races is most palpable and pallatable in our foods. When you eat the food there, you’ll quickly pick up on Caribbean, Spanish, Italian, Indian–influences from the world over.
Panama’s favorite, and most readily available fish seems to be the Corvina ~ Stripped Bass. Its perfect white meat, mild taste and abundance is a hit with most everyone. By no means is this dish exclusive to my little gem of the world, but it is something you will find on most every local menu. .

Feast your eyes and your palate. I bring you Corvina Apanada con Patacones (Breaded Stripped Bass with…, well, Patacones). I served the fish with an Escabeche sauce and green fried plantains known as patacones in Panama or tostones in Puerto Rico. Look for that recipe in a separate post.
The sauce is tangy, garlicky and slightly sweet, usually used as a sort of marinade for fish and allowed to macerate overnight. I took the same ingredients and made it into a quick sauce. Don’t worry, you don’t have to fry the whole fish. A couple of breaded fillets will do just fine, but if you’re in the mood for adventure, you may want to give it a whirl.
 Corvina Frita
in a Ziploc bag, combine:
2 medium stripped bass OR 2 large fillets
2 garlic cloves, crushed
2 tsps sea salt
1 tsp black pepper
If you’re using the whole fish, cut 2 or 3 slits along both sides, this will help cook the flesh when it’s fried. Toss it around to coat the fish and let rest for at least 30 minutes.
Escabeche Sauce
While the fish marinates, you can prepare the sauce.
1 large yellow onion, sliced
1 large red bell pepper, sliced
3 garlic cloves, finely chopped
2/3 cp extra virgin olive oil
1/4 cp white vinegar
3/4 tsp sea salt, to taste
1 tsp sugar
1/2 tsp habanero, crushed (optional)
Put the oil into a skillet and put over medium heat. Add onions, garlic and bell peppers, cook until tender, about 5 minutes. Once the onions are translucent, stir in the habanero then the vinegar, salt and sugar. Bring to a boil, then reduce heat to allow it to simmer for about 15 minutes. Set aside.
Frying the fish
2 cps flour
Oil for deep frying
 I like using wax paper or plastic store bags for this part. For the whole fish, just add the flour in the bag and dump the fish in and shake it like crazy. Make sure you get flour into the belly area. Heat up your oil to about 325 degrees, gently drop the fish into the oil. Don’t move it around, allow it to brown for about 5 minutes per side. Pull it out and allow it to rest for a few minutes. Serve with limes and drizzle the escabeche sauce over it. Enjoy!


