I think its funny how there are months for everything, but I’m not going to lie and say I don’t enjoy the ones devoted to food. Well, unless it happens to be a food I don’t enjoy, like bananas. A little birdie told me October is National Chili month; I have to guess it’s due to the first visages of Fall (for most of the US states), temperatures begin to drop and people begin to crave hearty stews. Again, my guess.

Living in Houston, I’ve come to understand people here and all over the state of Texas are big on the whole chili thing. There are festivals and cook-offs celebrated throughout the Fall, aimed at finding the best recipe. There are as may variations to chili recipes as there are people in Texas, but one thing I’ve come to learn is that real Texas chili does not include beans.
MY chili isn’t so much chili as it is Chile con Carne. Not Texan, probably not Mexican, but the variation I learned from my mom. Another difference here, is that more often than not, in Texas chili is served with cornbread. My version tastes best atop a heap of perfectly cooked white rice. I made it for The Hubbz not long ago and he loved it AND he’s a native Houstonian! So there must be something good there.
As with all stews, aging is a virtue. The taste will improve and intensify every day after you make it. So why not give it a whirl?
Mi Chile con Carne
2 lbs ground chuck (80/20)
2 cps white onion, diced
Fresh serrano peppers, finely diced
2 cloves garlic, crushed
1 tsp cumin powder
1-1/2 tsp Italian seasoning
3 cps red or pinto beans, cooked
2-3 cps beef broth
Sea salt & black pepper
Notes:
- I don’t use a very lean ground beef for this, you won’t add any fat and you need some to cook the onions and develop some flavor.
- If I have the time and/or forethought, I will cook my own beans with 1 clove garlic and bay leaf, then use the cooking liquid instead of adding broth. I have used canned beans as often as I’ve used fresh, but I do rinse my canned beans and discard the canned liquid.
- You decide how hot you want it, add as many or as few serranos as you’d like.

Heat a large pan over high temperature and add the beef, breaking it apart as you drop it. You can leave it in marble-sized clumps as it cooks; add the garlic, cumin and Italian seasoning at this time. The liquid from the beef will sweat out, as it evaporates, the fat will be left behind and you’ll be able to brown the beef.
Lower the temperature to medium high and add the onions and serrano peppers. Continue cooking until the onions have softened and become translucent.
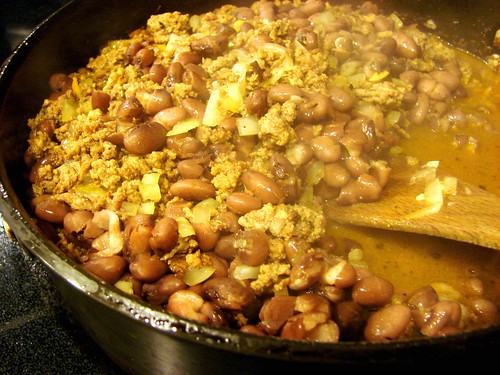
Add the beans and scrape off the goodness stuck to the bottom of the pan. Then add the broth or liquid from the beans, enough to cover the beef. Adjust seasoning with salt & pepper as necessary, but keep in mind that the saltiness will intensify as it simmers. Lower the temperature to low, cover and allow it to simmer for about 40 minutes, stirring it every so often.
Serve over white rice and top with sour cream and/or cheese.
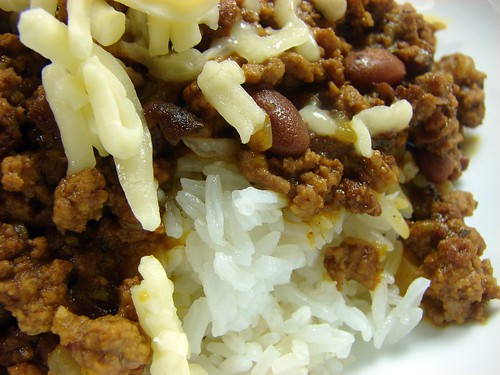
¡Buen provecho!
Cookingly yours,
Anamaris
I live in Houston, also known as Tex-Mex country. You can’t drive 2 blocks without spotting some sort of Mexican restaurant. I’ll admit I may be exaggerating A BIT, but I promise you, not much.
I will also admit I’m not Mexican, though I did play one for a while. See, my ex was born in Mexico and his family moved to Houston when he was 3 or 4 years old. His mother was an excellent cook and would throw down with some off the hook, authentic Mexican fo-shizzle. I was spoiled. By her, but that’s a different and boring story.
I was lucky enough to be able to spend some time with her in the kitchen as she put meals together. To this day I’ve not been able to find any Mexican tamales that can even hold the husk, not to mention a candle to hers, but I’ll keep trying them. I learned to cook Mexican food the way she did it, so even though I wasn’t Mexican at birth, I got a pretty good education in their cuisine for about 11 years.
That said, I’m going to share with you one of the dishes she made. These are chicken enchiladas with a red sauce, sometimes called ‘salsa ranchera’. I’m sharing the easier version here–meaning you won’t need to steep the chipotle peppers and all that goes with that. We’re going to use the canned stuff, believe me, it works. The other shortcut we’ll take is using a roast chicken or any leftover chicken meat you may have. Pay attention, this is gonna go pretty fast.
Enchiladas de Pollo a la Ranchera
For the Ranchera Sauce:
1 medium onion, chopped
2 cloves garlic, chopped
2-3 tomatoes, seeded and chopped
1/2 cp cilantro, chopped
1 can chipotle peppers
Vegetable oil
Salt & black pepper
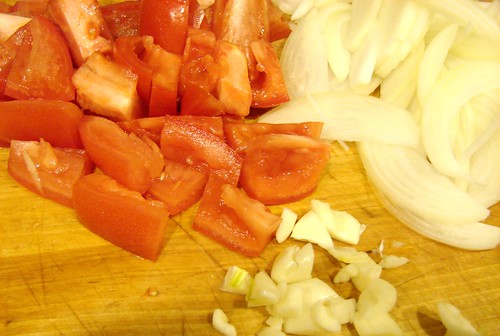
For the enchiladas:
12-15 corn tortillas
2-3 cps chicken meat, cooked and shredded
3/4 cp cheddar cheese, shredded
3/4 cp queso quesadilla, Oaxaca or Jack, shredded
2 cps ranchera sauce, approx
Vegetable oil

Preparing the sauce: In a medium pan heat 1-2 tbsp of oil. Add the onions and cook them over medium high heat until they have soften. Add the garlic, tomatoes, cilantro and about 1 cp of water. Allow this to cook for about 10-15 minutes until the tomatoes begin to soften and disintegrate and the liquid has reduced. Allow this to cool for a few minutes before running it through the blender with the can of chipotle peppers. Puree until smooth, set aside while you roll the enchiladas.

Preparing the enchiladas: Preheat oven to 375°. Heat a medium skillet over medium heat and add about 1/3 cp of oil. Once the oil is hot, cook the tortillas one at a time.

The goal here is to soften the tortillas enough to be able to roll them without breaking. As they hit the oil, they will bubble up a bit; cook them for about 1 minute on either side before removing them to paper towels to drain. Continue this process until you have softened all the tortillas. Set aside.

Prepare your assembly line: Lay out the shredded chicken, the cheeses and the tortillas. Spread enough of the sauce on the bottom of an oven-safe pan. For this I used a pie Pyrex pan and spread about 3/4 cp of sauce. Just enough to serve as a bed for the enchiladas.
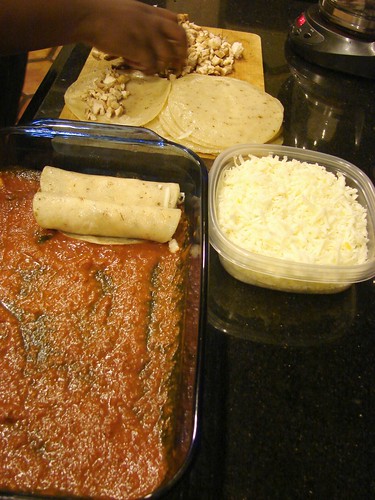
Place a bit of chicken and a bit of cheese on one end of a tortilla and carefully roll the tortilla so you end up with a fat cigar. Don’t put too much filling or you’ll have a hard time managing these babies. Once rolled, place the enchilada seam-side down in the sauced baking pan. Repeat until you’ve used all the tortillas and/or chicken.
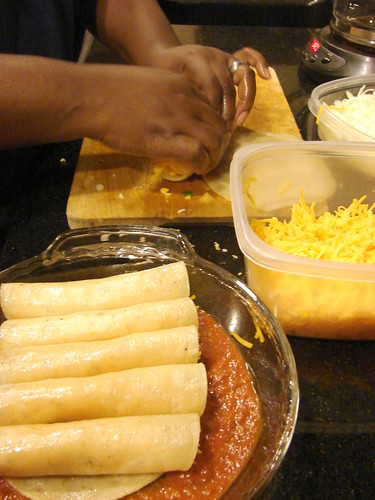
If you happen to have some chicken left, sprinkle it over the top of the enchiladas just before topping them with more of the sauce. About 1 more cup. Then top with cheese and put them in the oven for 15-20 minutes.
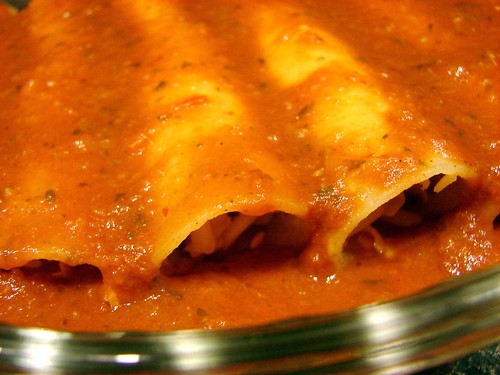
They will be bubbly and the cheese will be completely melted. If you want to brown the cheese, switch the oven to broil and brown for 2-3 minutes. Remove from the oven and allow to cool for a few minutes before serving.

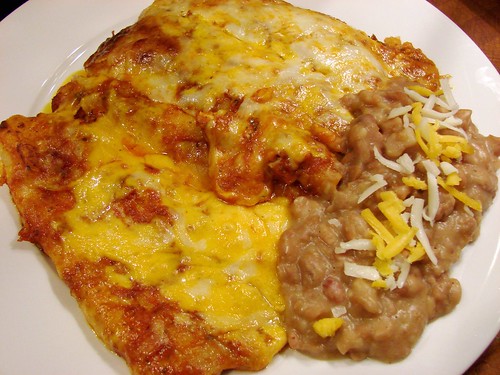
Slap them on a plate with some good refried beans and have a margarita to wash it down and you’re golden!
Cookingly yours,
Anamaris
Well, not really, but they are yummy beans. I have to begin by telling you that I’m not intimately acquainted with white or navy beans. We just don’t have these in Panama, at least *I* didn’t have them. We have the prepared cans of pork & beans, which I believe are made with these, but that’s it.
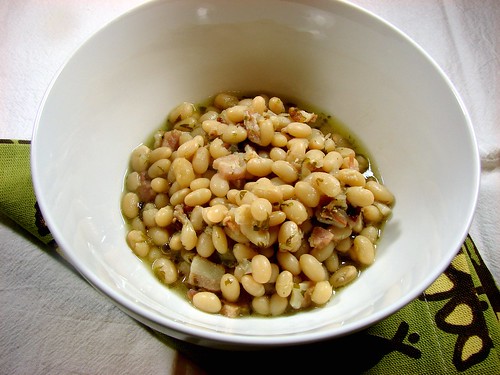
I had never really seen them until I saw Martha Stewart cook them down and add mussels to it. I was so intrigued by the recipe that I had to try it and ended up loving the beans. I’ve made them since, but rarely, and always as a base for something seafood, such as this delicious Salt Cod & Clam Stew.
Considering how much I’ve enjoyed these little beans, I’ve been trying to add them more and more often to my repertoire. Hence this pot o’beans. I made them the same way I make all my beans, and WOW. Why did I wait so long?!
No need for a recipe here, let the beans move you.
White Beans a la Latina
White / Navy beans
Garlic
Bay leaves
Bacon, diced
Onions, finely chopped
Cilantro, finely chopped
Sea salt & black pepper
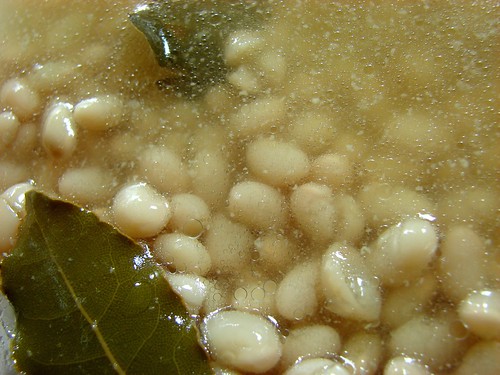
Rinse and soak the beans in hot water for about 30 minutes. Drain and rinse again before putting them into a medium size pan. Add 1-2 whole cloves of garlic, peel and all, and 1-2 bay leaves and 1-2 slices of bacon. Cover with water and bring it to a boil, then reduce the heat until the water comes to a hard simmer. Cook for about an hour, or until the beans are fork tender.
*Note: Do not add salt to your beans before they soften, season them after they are tender.
In a small skillet, cook the bacon to render the fat, it doesn’t have to be crisp. Add the onions and cilantro, cook them until the onions have soften and are translucent.

Once the beans have cooked, drain some of the liquid reserving just enough to see some just under the top of the beans. Depending on the amount of beans you cooked, this would be close to 1 cup of liquid. Discard the bay leaves and add the bacon & onion mixture. Bring it to a simmer, check the seasoning and adjust with salt & pepper. Simmer it for another 10 minutes or so before serving.

We served these alongside some lamb & rice.
I hope you enjoy it too!
Cookingly yours,
Anamaris
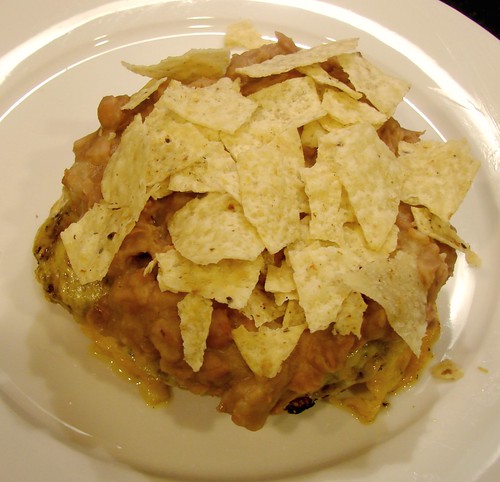
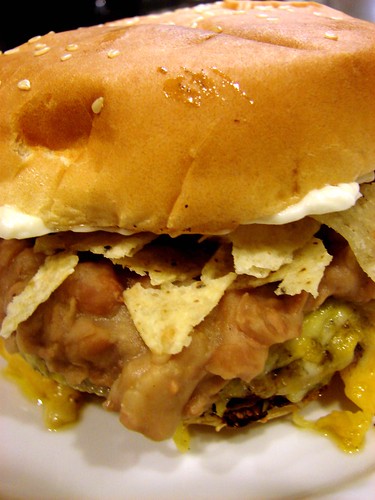
Disclaimer: These aren’t pretty pictures. Sorry. Did I mention we eat every dish you see on this blog? Well, we do, and these babies weren’t waiting for a photo shoot. Allz I can say is, these are incredibly delicious and messy, the way a good burger should be. Better pictures another day. Maybe.
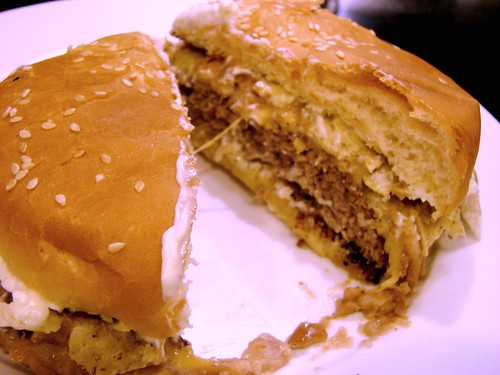
The first time I had these burgers was on my first visit to San Antonio, TX. This was eons ago, close to 15 years or so. Friends took us to this little hole in the wall grill promising the best burgers we’d ever had. They were right and continue to be. Chris Madrid has been around and expanded since then. This burger, and I have to say ‘this burger’ because I don’t think I’ve ever ordered anything else; this burger has remained the same. Consistently. Deliciously. Wackily good.
These burgers are so good and coveted by my friend Dodo and I, that we have made the 3-ish hour drive, had our burgers and turned around heading back to Houston. Yep. We have driven 6 hours for this burger. What? Like you wouldn’t?
Let me tell you about this little jewel. The Tostada Burger is dressed with mayo, refried pinto beans, tortilla chips, sweet onions, and an obscene sea of melted cheddar. Real cheddar. Melted. Real melted cheddar, I still don’t know how they achieve that feat. When they throw that burger at you, you can’t see the bun or the patty because they’re both covered by cheddar. OH. MY. GAWD. !!!.
Here’s my attempt at a Chris Madrid Tostada Burger.
2 cps pinto beans, cooked
5 bacon strips, diced
1 clove garlic, crushed
1 medium sweet onion, coarsely chopped
8 slices sharp cheddar cheese
1-1/2 lb ground chuck
Fajita seasoning
Tortilla chips, coarsely broken
4 hamburger buns
For the Onions: This is a step you can skip if you don’t mind raw onions, but I do, so I cook’em in bacon fat. Cuz bacon…, you know, makes everything bettah! Render the fat from the bacon and cook until it is lightly browned. Remove the bacon from the fat and add the chopped onions. Cook the onions until slightly softened. Once the onions have softened, remove them from the fat and set aside to drain.

For the Refried Beans: I started off with dry beans, but I have made this with whole canned beans. Do make sure you drain and rinse the canned beans before using them.
In the remaining bacon fat, add the beans, garlic and bacon together with about 1 cp of the bean cooking liquid, (if using canned beans add water or broth). Smash the beans into a chunky paste, it’s ok if you have beans that are just slightly mashed. Check the seasoning, adjusting the salt and pepper.
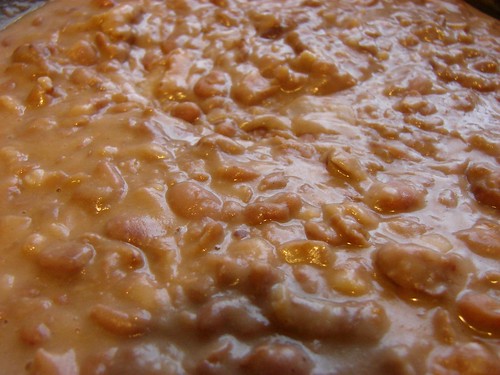
The beans should be loose, you don’t want them to be too thick. They will thicken as they sit around. Keep warm.
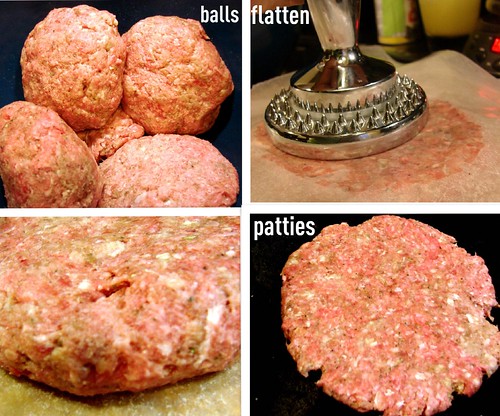
For the burger: Season the ground chuck liberally with fajita seasoning, try not to handle the beef too much. Once you have integrated the seasoning, divide it into 4 balls. Once divided, flatten into patties.
To cook, heat a flat skillet, preferably cast iron, over high heat and place the patties on the very hot pan. Cook to your preferred doneness, flipping them after a few minutes. In the meantime, preheat the broiler.
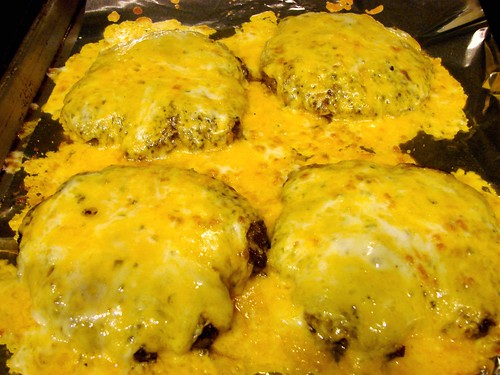
Once the burgers are done, top each with a couple of slices of cheddar and pop it under the broiler. Watch them through the little window, just wait until the cheese melts and is bubbly and beginning to brown.
To assemble: I toasted the buns in a bit of butter, your choice to do so or not. Spread some mayo on the buns, don’t be shy. Set the cheesy patty on the bottom half, top with a couple tablespoons of refried beans. Top the beans with the crushed tortilla chips and finally, the onions. Put the other half of the bun on top and go at it. You. Will. Lose. Your. Mind. I guarantee it!
Cookingly yours,
Anamaris
PS: Make sure you have plenty of napkins.
Because I was under the weather, I had not had an opportunity to finish posting all the recipes for the 24, 24, 24 event I hosted a bit over 2 weeks ago. It was an ambitious menu, to say the least. Every dish was better than the next, I would really have a tough time picking one as my hands down favorite.
This one came representing the New England region and I must admit I was surprised by the use of salt cod. I couldn’t tell you why exactly, because as I think about it, it makes perfect sense. But it still caught me by surprise. The other thing I liked about it was the way the cod was used. As a native Panamanian I’m used to seeing cod in more ‘creole’ presentations. So this was different a change, and one that I enjoyed thoroughly.
I found the recipe on Chow.com. I prepared it as instructed for the night of the event, but we had some of the cod and bean base leftover and I revisited and tweaked the recipe a few days later. So here’s my final rendition of it.
This is a 2-day dish: on day 1 you’ll soak/rehydrate the cod and beans, on day 2 you can put it all together. Plan ahead. *Also, the recipe called for Manila clams which I didn’t find and substituted with Little Necks.

1/2 lb salt cod
2 cps dried white beans (such as Great Northern or cannellini beans)
2 cloves garlic, whole
1 tbsp kosher salt
4 cps whole milk
1 tbsp whole black peppercorns
2 bay leaves
1/3 cp bacon or salt pork, chopped
2 tsp garlic, minced (about 2 cloves)
1/2 cp carrot, diced (about 1 large carrot)
1 1/2 cps leeks, chopped
1 tbsp fresh thyme, chopped
1 lb Manila clams, scrubbed*
1 1/2 cps dry white wine
1/2 tsp lemon zest, grated
3 tbsp Italian parsley, finely chopped
Extra-virgin olive oil, for drizzling
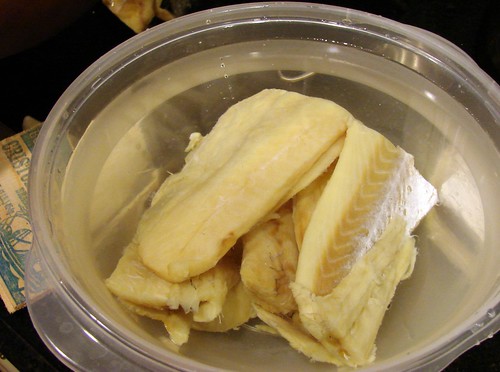
The day before, rinse the salt cod under cool water, then place it in a large glass or plastic mixing bowl with enough cold water to cover and soak overnight in the refrigerator, changing the water 2 or 3 times. Put beans in another bowl, sort and rinse them, then cover them with cold water, and let soak for 24 hours in the refrigerator.
The next day, drain and rinse beans. Transfer them to a medium saucepan and add the whole garlic cloves and fresh cold water to cover. Bring to a simmer and cook gently, being mindful not to boil them. It will take about 40 minutes for them to be cooked through. Once the beans have softened, season them with sea salt & pepper. Remove the garlic cloves and strain the beans but reserve about 1-2 cps of the cooking liquid.
To prep the cod: drain the water it’s been soaking in and transfer to a saucepan. Add milk, peppercorns, and bay leaves and simmer over medium-low heat until fish is soft and flaky, about 20 minutes. Remove from heat, strain fish from the pan, and place in a bowl. Use a fork to flake cod into bite-size pieces. Discard milk and seasonings.

Rinse the saucepan and heat it over medium heat. Add the bacon and cook just long enough to render some of its fat, you don’t want to brown it. Then add the garlic, carrots, leeks, and thyme and cook for 3 minutes, stirring occasionally.
Deglaze the pan with some of the wine, making sure to release all the drippings stuck at the bottom. Add the rest of the wine, cod, veggies and beans and allow it come to a slow boil. Add clams and wine, stir, and cover. Cook just until clams open, about 7 to 10 minutes. (Discard any clams that do not open.)

After all the clams have opened, add the lemon zest and parsley and stir; add some of the bean-cooking liquid if the stew seems too thick. Ladle stew into small bowls, drizzle with olive oil, and serve with crusty bread.
At this time I would like to direct your attention to the not so distant past. I’ve been adding recipes here for almost 3 months now. Some of you have been here from the beginning, but I’m guessing most of you have not.
I’ve mentioned before that my cooking palette is pretty diverse thanks to my mom’s influence. Most often, though, you will see a Latin-Caribbean undertone to what I prepare. Mexican touches are probably the next most common variation, then Indian and the rest of the world.
Allow me to point you back to some of my personal favorites. I hope they’ll end up on your cooking playlist. Let’s take a look.
This one is not so much about cooking, but rather about having a few things handy and ready beforehand. I ALWAYS have both of these items at hand. Crushed garlic & habanero paste.
Hubby’s favorite dish. Or at least one of the top 5.

Shrimp is one of those things I can eat whenever. This is my absolute favorite way to prepare it.

And you can’t have shrimp al ajillo without good rice.

And because I love legumes, I bring you lentils!

I’m a pork lover, I probably cook some cut of it at least 3-4 times a month.

The last 2 recipes are very dear to my heart, but may fall within the ‘acquired taste’ realm. Nonetheless, to love me is to know what I love.
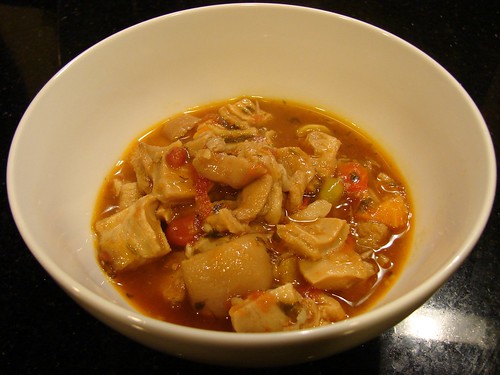
Here you have a delicious bowl of mondongo.
And behind door #2, Corvina frita, baby!

I hope you enjoyed this little trip down memory lane.
Cookingly yours,
Anamaris
Is it cold where you are? It seems to be freezing almost everywhere in the US. Today in Houston the high was 32°! That’s definitely cold by Houston standards.
I’m not complaining, though. I LOVE it cold. I don’t know why, but I do. Cold makes me happy. Being able to say I’m cold makes me happier. It’s weird, I know, but it’s my thing. And I like my thing.
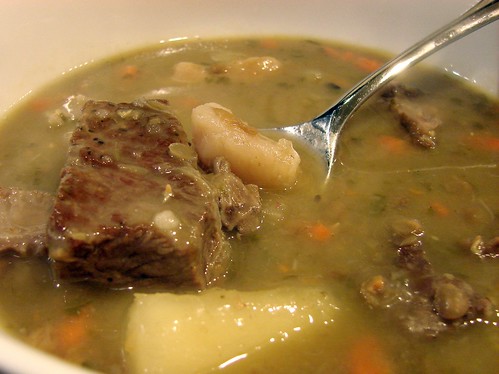
In any case, this kind of weather makes me think of hearty soups. I made a batch of my all time fave last night. Sopa de lentejas or lentil soup; Panamanian style, of course. This one is made rich with yuca and malanga (we call it otoe in Panama).
A bit about the ingredients:
 Yuca or cassava is a tuber with dark brown, thick peel and milky white flesh when raw. Once cooked–and it can be prepared many different ways, including as dessert–the flesh turns a yellowish cream, becomes quite translucent around the edges. It is quite a bit more dense than a potato and has a slight sweetness.
Malanga is also a tuber, but its peel is barely thicker than that of a potato.  There are a couple of varietals, some will have white flesh, while others have a beautiful purplish pink flesh. Both of them are speckled by little brown dots that look like pepper. The texture of malanga when cooked is very similar to a potato.
Beef: as with any soup, bones add a great deal of flavor to the broth. In this case I opted for short ribs to take advantage of those great bones. I also used some chuck roast to ensure we had plenty of meaty bites. I suggest browning the beef before starting the soup, this will also add another dimension of taste.
Vegetables/tubers: I recommend cooking the tubers in stages. I add 1/2 of them when I start the beef and lentils, and add the rest on the last 40 minutes of cooking.
OK, let’s do it!
Sopa de Lentejas (Lentil Soup)
1 lb chuck roast, cubed
4 beef short ribs (about 1lb)
2 cps dry lentils
2 lbs yuca (about 3 cps)
1 lb malanga (about 1-11/2 cps)
2 medium carrots
1/2 whole head garlic
1 cp cilantro, leaves and stems
2 cubes beef boullion
Water
Oil
Preparation – about 30 minutes:
Beef: Liberally season the beef and ribs with salt and pepper, set it aside while you get the other ingredients ready.
Lentils: Remove any damaged lentils or debris and rinse in cool water. Add enough water to cover and allow them to soak. Set aside.
Peel the vegetables:
Yuca-as I mentioned, the peel is quite thick and I’ve noticed that here in the US they cover it with a waxy film. Cut the yuca into sections about 2-inches long.  Using a sharp knife, slit the peel of each section. You should know that the peel has 2 layers; the top layer is dark brown and not too thick. The 2nd layer is pinkish and this is the tougher one. Make sure you slit through the 2nd layer until you hit the fleshy part.
At this point, use the sharp edge of the knife and push through the 2nd layer. Rinse and cut into 1-inch pieces.
Malanga-peel using a potato peeler. Use some caution, as it tends to have a bit of slickness once the peel is removed. Rinse and cut into 1-inch pieces.
Carrots-peel and cut into rounds.
For the soup: Heat up a large stockpot and add about 1 tsp of oil, smear it around. Brown the beef and ribs on both sides. Once all the beef is browned, drain and add the lentils, 1/2 of the yuca and malanga, all the carrots, the stemmy end of the cilantro, and the boullion. Fill the pot with water, about 12-15 cps or so.
Allow it to come to a boil, and remove the foam that forms at the top when it boils. Lower the temperature to medium and allow it to come to a strong simmer. Stir it every few minutes, you want to make sure the lentils are not sticking to the bottom of the pan as that would cause the soup to scorch.
Allow it to simmer slowly for about 1-1/2 hrs for the beef to soften. At that time, remove the head of garlic, then add the rest of the tubers and cilantro. Check the seasoning and adjust at will. Allow it to cook for another 30 minutes or so. If you used boned short ribs, you can pull those out to remove the bones and cut the meat to bite-size portions.
Serve with white rice and enjoy!
Cookingly yours,
Anamaris


If beans aren’t on your regular menu, they should be. They’re good for you, y’know. They have all that iron and fiber. They’re naturally low-fat (not by the time I’m done with them, though). They’re filling and stttttttretch, which makes them economical. Every variety has its own particular taste, so you never feel like you’re eating the same thing twice.
Any way, here’s how I cook up a pot of pinto beans, come to think about it, I cook kidney beans the same way. I should mention I started with dry beans, but you can sub those for canned if you’re looking to cut some time.
Listos?
2 cps dry pinto beans
2 cloves garlic, unpeeled
2 slices bacon or 1/4 cp salt pork
Remove any unwanted, damaged or broken beans, put them in a bowl and rinse, changing the water a couple of times. If you want to, soak in them in hot tap water for about 30-45 minutes, but this isn’t necessary.
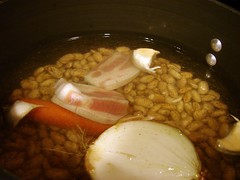 Drain the water and put the beans, garlic and bacon in a medium pan and cover it with cool water. You’ll probably want to add about 8 cups of water, bring it to a boil over high heat, then reduce the temperature to medium and cook for about one hour or until the beans are tender. You will notice that the water will evaporate considerably. Turn off the heat and set aside.
You can remove the beans from the pan and cook the following ingredients
3 slices bacon or 1/2 cp salt pork
 1 medium onion, chopped
1 garlic clove, minced
1/2 cp cilantro, chopped
Cook the bacon until lightly brown, then add the onions and garlic. When the onions are translucent, add the cilantro. Now add the back the beans, including any liquid still left and turn the heat to medium high. At this point season the lentils with salt or chicken bouillon and black pepper. Once this comes to a boil, lower the temperature to medium low and simmer for another 20-30 minutes.
That’s it, they’re ready to be eaten. I promise you will love them
Cookingly yours, Anamaris

Do you like beans? How often do you eat them? Panamanians LOVE beans. We eat lots of them and on a daily basis. There are always beans next to your rice; it’s just the perfect marriage. I’m going to show you how I cook beans, sometimes in a traditional Panamanian style, sometimes with a Mexican flair and sometimes in the American way.

This post is for Lentils, possibly my favorite of all legumes. Lentils are creamy and mild, easy and quick to cook. They’re also quite versatile; you’ll find recipes to use them in soups, combined with rice, sometimes served slightly dry. They’re just delicious. If you haven’t, you should definitely give them a try. They cook quickly without an inordinate amount of soaking.
 Lentejas (Lentils)
2 cps dry lentils
2 cloves garlic, unpeeled
2 slices bacon or 1/4 cp salt pork
Inspect your lentils, you’ll want to get rid of any damaged or broken beans, and also check for stones or leftover husks. Once cleaned, put them in a bowl and rinse them, changing the water a couple of times. If you want, you can allow them to soak in hot tap water for about 30 minutes, but this isn’t necessary.
After soaking, drain the water and put the lentils, garlic and bacon in a medium pan. Add cool water to the pot, covering the lentils about twice over. You don’t want to add any salt before the lentils are cooked, otherwise the bean won’t break open. Bring it to a boil over high heat, then reduce the temperature to medium and cook for about one hour or until the lentils are tender. The water will cook into the beans and will evaporate considerably. Turn off the heat and set aside.

While the lentils cook, chop:
3 slices bacon or 1/2 cp salt pork
 1 medium onion
1 garlic clove
1/2 cp cilantro
Cook the bacon to render some of the fat, it doesn’t need to be browned, then add the onions and garlic. Cook until the onions are translucent before adding the cilantro. Stir it in until the cilantro wilts then add this to the lentils and turn the heat to medium high. At this point season the lentils with salt or chicken bouillion and black pepper. Once this comes to a boil, lower the temperature to medium low and simmer for another 20-30 minutes.

You’re done! Serve with rice.




 Drain the water and put the beans, garlic and bacon in a medium pan and cover it with cool water. You’ll probably want to add about 8 cups of water, bring it to a boil over high heat, then reduce the temperature to medium and cook for about one hour or until the beans are tender. You will notice that the water will evaporate considerably. Turn off the heat and set aside.


