The Hubbz hates the use of the word ‘juxtapose’, he says it has become all trendy and overused. I laugh every time I hear the word and look at the disgust on his face as he rolls his little blue eyes. That said, this dish is a perfect juxtaposition of flavors. Creamy, tart, spicy, hot, and a cooling sweetness. Perfect! Just pair it with a Margarita and you have the makings of an excellent 5 de mayo celebration.

Puerco en Salsa Verde (pork in green sauce) is a very popular Mexican dish that marries chiles and tomatillos with pork meat, usually the shoulder. You’ll find a few variations, with or without corn and at various degrees of heat = picante. One element that is always present, is that zingy tang of the tomatillos.
To contrast, or juxtapose, the tang, I added a radish and red pepper raita–of sorts. Raita is an Indian or Pakistani sauce or condiment, usually prepared with yogurt, cucumbers and various herbs. My version, with a Latin flavor, used crema fresca instead of the yogurt and some colorful Easter radishes and red peppers. This made for a deliciously fresh, cool and ever so slightly sweet topping for the tomatillo and chile sauce. It is juxtaposition perfection and tastes GOOD!
Pork in Green Sauce with Radish and Crema Fresca Raita
For the pork:
1 lb pork shoulder or butt, cubed
3 tbsp vegetable oil
1 large onion, sliced
3 garlic cloves, whole
6-8 tomatillos
1-2 serrano peppers (to taste)
1 tbsp cumin, ground
1 tbsp oregano
1 tsp salt
1 tsp black pepper
1 cp onion, chopped
2 cps fresh corn, shucked
1/2 cp cilantro, chopped
I like roasting tomatillos, this intensifies their flavors and brings out more rounded aspects of the fruit. Spread them on a baking sheet with the onion slices, serranos and garlic cloves, and broil them for 15 to 20 minutes, turning them as they brown.
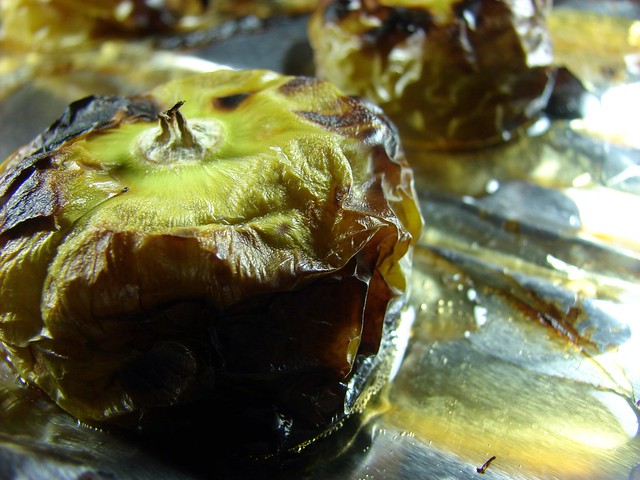
Once browned, dump the whole thing (there will be plenty of juices from the tomatillos) into a blender vessel and puree with the cumin, oregano, salt & pepper. Set aside.
In the meantime, season the pork with salt & pepper; in a medium-sized pan, heat the oil and then brown the pork pieces. Remove the excess fat from the pan, leaving enough to saute the extra cup of onions. Once the onions become translucent, add the pork, followed by the pureed tomatillo & pepper sauce.
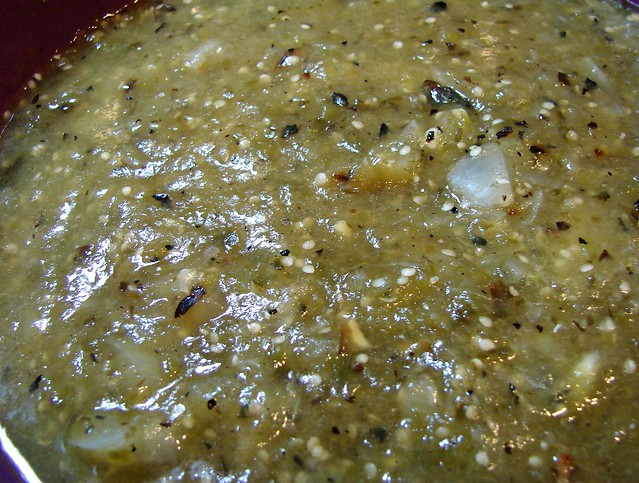
If necessary, add enough water to ensure there’s enough liquid to cover the pork. Once it comes to a boil, bring the temperature to low, just so it is slowly simmering. Put a lid over it and allow it to simmer for about an hour or until the pork is tender.
Once the pork is fork tender, add the corn and cilantro, check the seasoning and adjust as necessary. Allow it to cook for another 5 minutes or so, just long enough for the corn to soften. To serve, top with some radish raita and enjoy!

For the Radish and Red Pepper Raita
1 cp radishes, julienned
1/4 cp red bell pepper, chopped
1/2 cp crema fresca (creme fraiche)
Salt & pepper to taste
2 tbsp cilantro, finely chopped
Combine all the ingredients and keep cool until ready to serve.
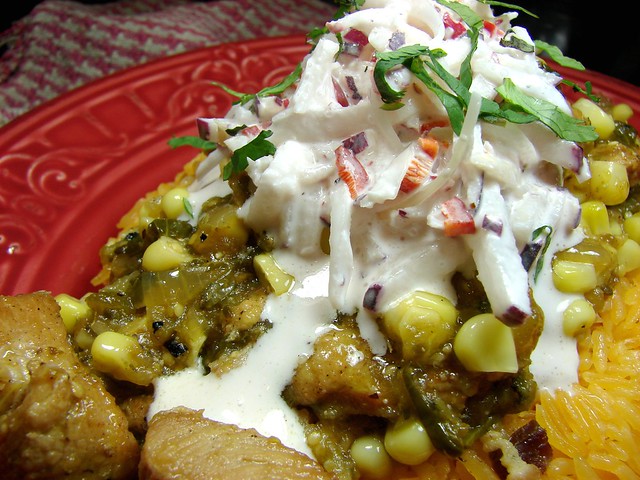
Where’s my Margarita?!!
Cookingly yours,
Anamaris

Do you ever want to do so much you end up doing nothing at all? Constantly adding items to a mental to-do list that never comes to fruition? Meaning to share some wonderful experience, but never actually picking up the phone or sit before the keyboard? I hope I’m not alone in this crazy little world, but that’s where or what’s been going on with me. Work is crazy busy, they’re REALLY making me work for my money. Add to that new business responsibilities and last minute travel and you end up with a MIA blogger.
I’ve missed my times with you guys, I hope you’ve missed my updates too. Even The Hubbz finally said to me ‘Blog, baby, blog!’ Honey, this one’s for you.
I went to Portland for a bit over a week to attend a conference and I had so much good food and beer. I’ve been dying to tell you all about it, but I also wanted to share the pictures I shot of the scenery so I haven’t. Why you ask? Because I have about 600 shots to review and select the good ones before I can share them with you. That means that I haven’t finish picking, but then I haven’t posted anything else because I keep wanting to share the pictures! Do you see how this crazy cycle has been spinning? So, I decided to go back to what I promised you from day one. Food. I will talk to you about a few dishes I’ve put together in the past few weeks, a few dishes that will rock your world really hard. Promise.
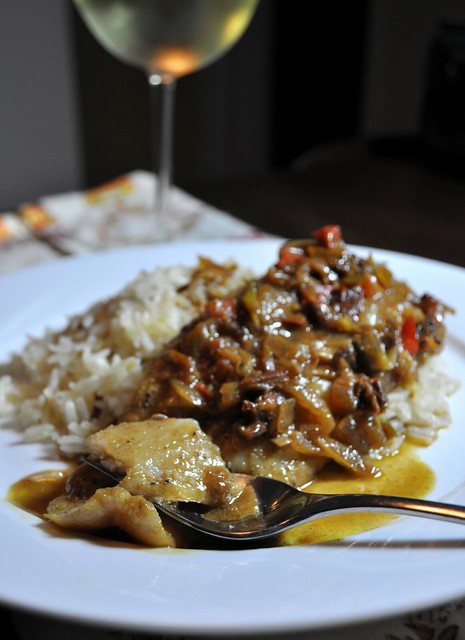
Fish. I don’t know what to call this one, but I’ll tell you how it came about. Have you heard of fish a la Veracruzana? Usually snapper. It is a Mexican recipe, hailing from the province of Veracruz. It is fish cooked in a tangy and flavorful sauce that features tomato, herbs, olives, capers and spices. I had some fillets in the freezer and started out thinking I would prepare them that way.
As the day progressed, I kept thinking about how to Caribbeanize the recipe. A bit of curry came to mind, a bit of serranos for spice. What the heck, let’s make it creamy and add a bit of coconut milk. Yep. That’s what I did, and let me tell you, The Hubbz and I ate more than we needed to AND fought over the leftovers… I won. I’m such a lucky girl! Wanna know the details? Yes you do!
Pescado a la Caribeña (Caribbean Fish)
1 lb fish fillets
2 tbsp extra virgin olive oil
1 onion, chopped
1/2 red bell pepper, chopped
1 serrano pepper, diced
2 cloves garlic, crushed
1 tomato, chopped
1/3 cp sundried tomatoes, chopped
1/2 cp sherry or white wine
1 tsp curry powder
1/4 tsp anise seeds
1/2 tsp cinnamon
1 cp coconut milk
Water
Fajita seasoning
Salt & pepper to taste
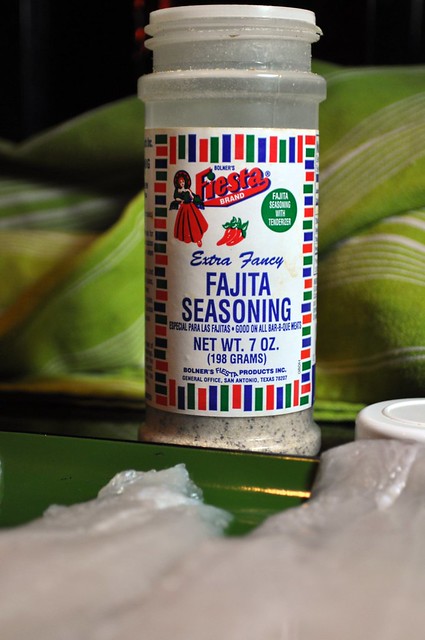
Season the fillets with a sprinkling of fajita seasoning, if not available, salt & pepper works just fine; set aside. In a large saucepan, heat up the oil and add the onions and bell pepper, cooking them until softened. Once the onions are translucent, add the serrano, garlic and continue to cook for a minute or so, just make sure the garlic doesn’t burn.
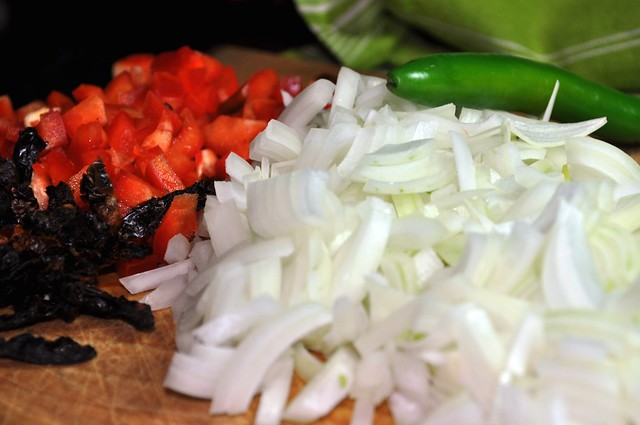
Lower the temperature to about medium and add the sundried and fresh tomatoes, curry, anise and cinnamon. Use the sherry to deglaze the pan and remove any bits that may have gotten stuck to the bottom of the pan. Allow the sherry/wine to evaporate before adding the coconut milk and water. Season as necessary.
This sauce will cook down for about 20-30 minutes to allow all the flavors to meld together, so you want enough liquid in the pan to allow the fillets to cook. I would say that by the time it cooks down you’ll want to have about 1/2-inch of liquid. I added about 1 cp of water in addition to the coconut milk.
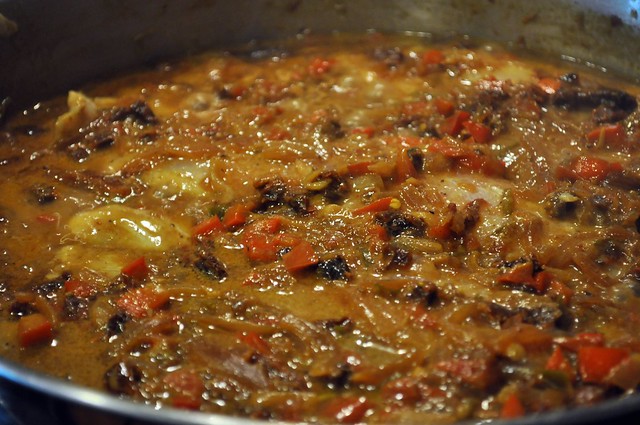
Once this sauce cooks down, simply drop in the fillets, making sure to pour some of the sauce over each one. Cover the pan with a lid and cook the fish for about 5 minutes or until the fillets flake nicely. Serve over rice and wait until you have that first bite, YOU.WILL.NOT.BELIEVE.THE.AWESOME.
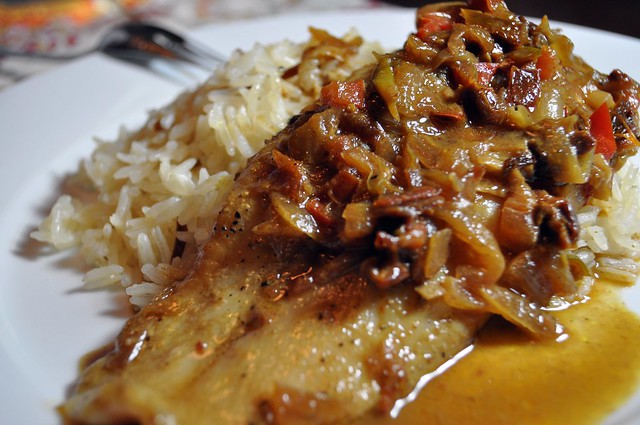
Did I mention I got a new camera? I’m still learning it, but here are a few more shots.
Cookingly yours,
Anamaris
UPDATE:
What I really want to do is bounce around with a placard yelling EXTRA! EXTRA! READ ALL ABOUT IT! But this will have to do.
Santa Marx has opened the polls for voting, so if you missed the elections, get you fix there. Click on this link to go to Marx’ post and choose your favorite use of the secret ingredients. I will tell you there are 25 fabulous entries, yes, I’m including mine. Go check’em out and vote for me your favorite one. It’s one vote per IP address, so be choosy when you imagine me spending those $200 on Marx goodies.
~~~~~~~~~~
Just before Thanksgiving madness started, I mentioned I had thrown my apron into the Iron Foodie contest hosted by Marx Foods (aka Santa Marx) and Foodie Blogroll. It was too tempting to pass it up. The challenge was set up a la Iron Chef / Chopped; we would receive mystery ingredients that we would then incorporate into an original creation.
 Let me tell you, there was all kinds of excitement at home for about a week. It all started out with the Iron Foodie contest. I had to submit the application post and wait a few days (read: eons) to learn if I had been selected. Once selected, I waited another few
 eons days to receive the mystery box. We knew we would receive a total of 8 items and had to use at least 3 in the recipe.
The waiting was killing me, so in the meantime I decided to torture myself with the offerings on the Marx site. That’s when it happened. I found their blog… and another opportunity for freebies. I tell you what, I was like a crack addict. Every time I saw the UPS or FedEx or USPS trucks I would start pacing around, hoping for that hit, I mean knock on my door. And when I received all my deliveries, I yearned and longed for the knock again. OK, sorry.
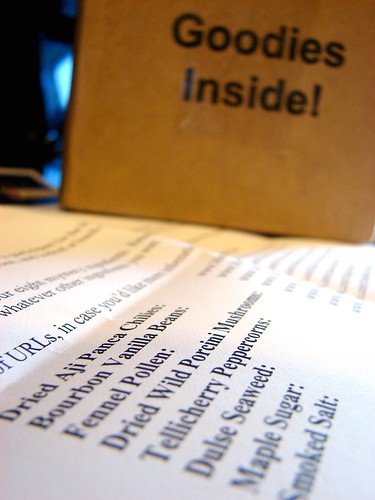
This post is about what I did with the mystery ingredients. Once I had the hot little box in hand and discovered what was in it, I went from giddy with excitement to totally freaked out in about 2.2 seconds. Some of the ingredients left me dumbfounded i.e., Dulse Seaweed???? Others, I had heard of but never tried before: Fennel Polen, Maple Sugar. At first I wanted to try making something sweet because I don’t seem to offer you enough desserts, but the sweets just don’t speak to me.
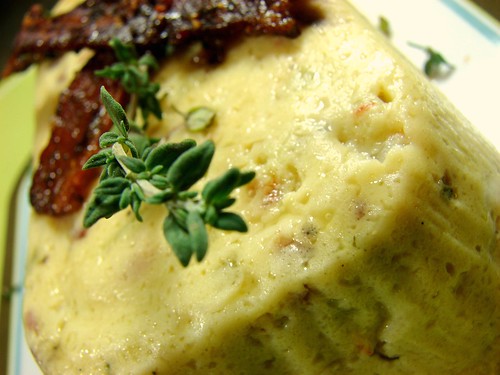
I will tell you that I made an earlier attempt which included the seaweed, chile panca, vanilla bean and peppercorns. I kept thinking about a savory flan and because the seaweed is, well, from the sea, I went with shrimp. I incorporated the maple sugar and Telicherry peppercorns in the bacon. It was good, but I should’ve made a sauce for it and, overall, I didn’t see myself making that dish ever again. Back to the drawing board I went.
I had planned on a dessert and I WILL make it in the next few days, but then I was struck by a thought or a memory or something. I love Chinese Salt & Pepper Shrimp or Calamari. I’ve never made it, but I loooooove it. So I thought, I could make that with the Smoked Salt and Tellicherry peppercorns! That’s how this came to be. Instead of deep-frying, I pan-fried. Instead of shrimp or calamari, SALMON! I finished it up with a creamy sauce incorporating the chile panca and fennel polen. YUM!
Salt & Pepper Salmon with Fennel & Panca Cream
Salmon fillets, skinless
Smoked salt
Telicherry Peppercorns
Extra virgin olive oil
1/2 cp heavy cream
1 small chile panca, finely chopped
1 tsp fennel polen
Smoked salt
Telecherry pepper
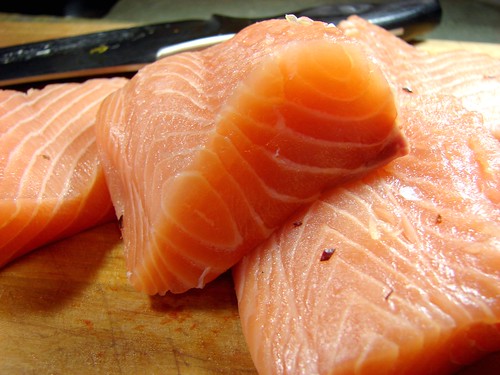
Though I love salmon skin, I chose to have it removed for this application. I started out with 2 fillets cut from the thick part of the fish, those fillets were then halved into 2-inch sections (approximately).
Grind the peppercorns; if you don’t have a spice grinder (like me), place them in a baggie, put the bag over a towel and use a rolling pin to break the peppercorns. Another alternative is to use a mortar and pestle. Combine about 1 tablespoon smoked salt and pepper.
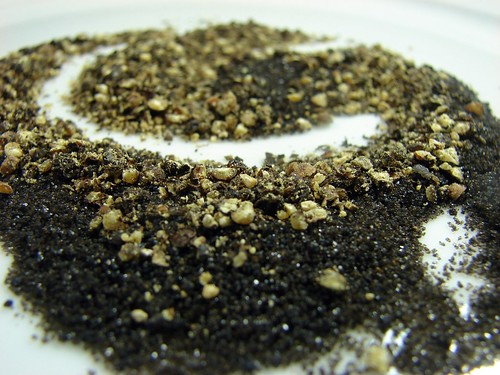
Dip the salmon pieces in the salt/pepper mixture (top and bottom).
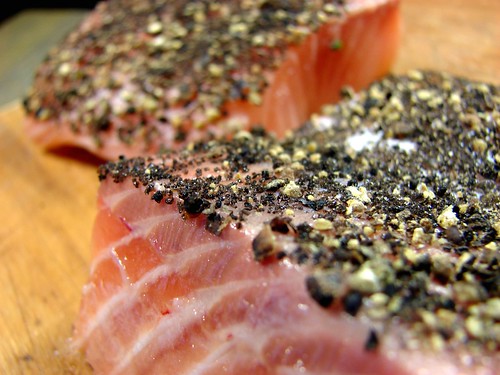
Heat a nonstick skillet over high heat, add a swirl of olive oil and sear the salmon pieces on both sides–about 2 to 3 minutes per side depending on thickness and how done you like it. Set aside and keep warm.
Rinse out the skillet, heat over medium and add a bit of olive oil. I removed the seeds from the chili before chopping, I wasn’t looking for heat, just the fruity flavor.
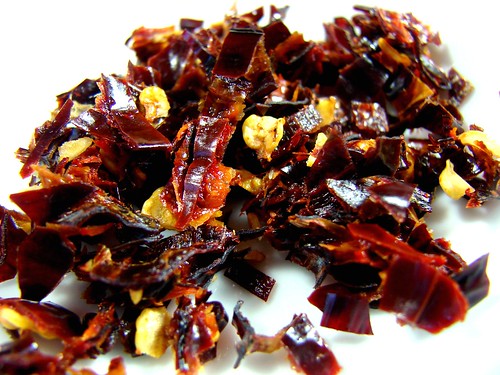
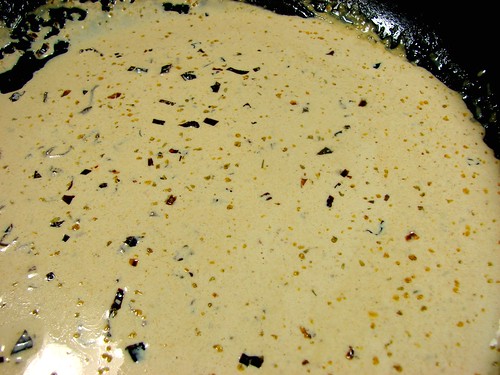
Add the panca chili, stirring constantly. Add the cream and fennel polen, season with smoked salt and ground pepper. Remember the salmon will be heavily seasoned, so don’t add too much salt to the sauce. Allow it to come to a soft boil for a minute or two. Run through a blender before serving.
I grilled a few asparagus spears, poured the cream on the bottom of the plate, then came the asparagus and salmon over that. This salt is incredibly flavorful, the salmon tasted as though it had been smoked. And the peppercorns are strong! They really wake up your palate.
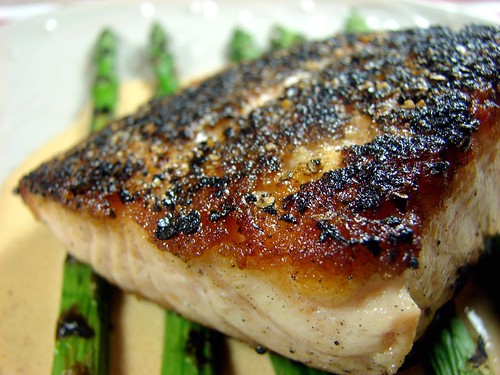
Finally, the creamy sauce brought it all together. It was silky, rich with a hint of sweetness from the fennel, but not at all overpowering. This one goes in the archives and you, you should really try it.

For more shots, click here.
Cookingly yours,
Anamaris
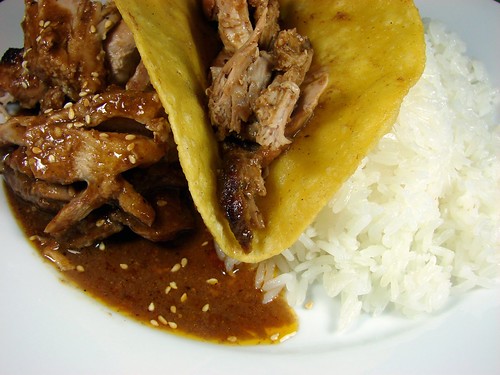
You can find the original recipe to this delicious mole on Rick Bayless’ site or, as I did, on this cookbook. The full version of the recipe includes all the peppers that need to be roasted, rehydrated and blended. I took a shortcut here. Instead of using the various peppers (chiles), I went for a prepared, store-bought mole under the assumption that it would include said peppers. I know. There are a few Mexican grandmothers turning in their graves as I type this. My only hope is that they don’t read English and maybe won’t understand the extent of my trespass. Move on.
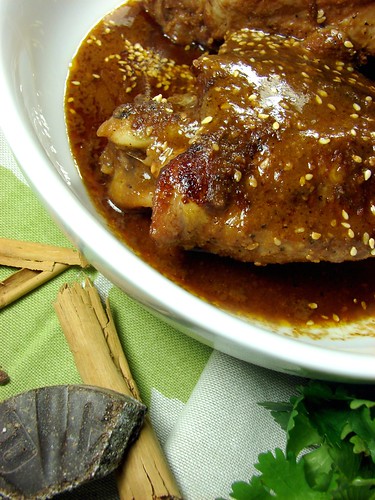
I suppose my shortcut doesn’t allow me to judge the true tastes of the original recipe, but I can tell you that shortcut or no, this recipe rocks! This stuff is so delicious, I considered bathing in it. OK, I know you don’t need that graphic ingrained to your brain. My bad. Anyway, this would be awesome on chicken, pork, seafood, coffee, cookies, eh er…
Turkey in Red Mole Sauce (adapted from Mexico – One Plate at a Time)
makes about 10-12 cups of sauce
5 medium tomatillos, husked and rinsed
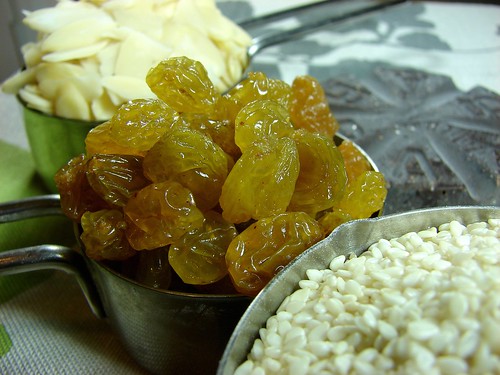
1/2 cp sesame seeds
1/2 cp rich pork lard or vegetable oil (I used bacon fat)
4 garlic cloves, peeled
1/2 cp unskinned almonds
1/2 cp raisins
1/2 tsp cinnamon, (use ground Mexican canela if available)
1/4 tsp black pepper, freshly ground
1/4 tsp anise
1/8 tsp cloves
1 cp pre-packaged mole sauce
1 slice firm white bread, darkly toasted and broken into several pieces
1 oz (about 1/3 of a 3.3-ounce tablet) Mexican chocolate, roughly chopped
Salt
4 – 5 tbsp sugar
4 turkey thighs with skin & bones (approx 4lbs)
And now, for the steps:
Roast the tomatillos under a very hot broiler until splotchy black and thoroughly soft, about 5 minutes per side. Scrape into a large bowl.

In a dry skillet over medium heat, toast the sesame seeds, stirring nearly constantly, until golden, about 5 minutes. Scrape half of them in with the tomatillos. Reserve the remainder for sprinkling on the turkey.
In a heavy-bottom pot or dutch over or Mexican cazuela, if you have one of those, heat the bacon fat over medium heat and fry the garlic and almonds, stirring regularly, until browned (the garlic should be soft), about 5 minutes. With a slotted spoon, remove to the tomatillo bowl, draining as much fat as possible back into the pot.
Add the raisins to the hot pot. Stir for 20 or 30 seconds, until they’ve puffed and browned slightly. Scoop them out, draining as much fat as possible back into the pot, and add to the tomatillos. Set the pan aside off the heat.
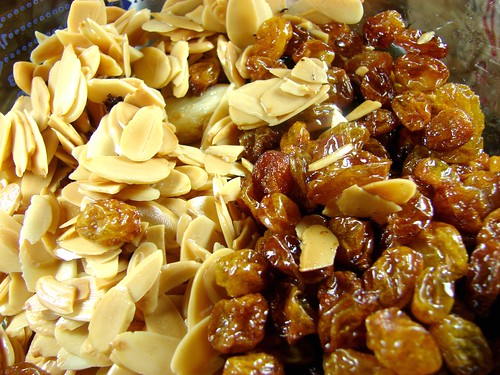
To the tomatillo mixture, add the cinnamon, black pepper, anise, cloves, bread, mole sauce and chocolate. Add 2 cups water and stir to combine.
In two batches, blend the tomatillo mixture as smoothly as possible (you may need an extra 1/2 cup water to keep everything moving through the blades), then strain it into a bowl and set aside.
If you’re using uncooked turkey, this is when you will season the turkey with salt & pepper. Raise the temperature on the pan to medium-high and brown the thighs on all sides, this will take about 10 minutes. If you make the mole sauce ahead, you can move on to braising the thighs in the sauce. If you are still working on the sauce, go ahead and put the turkey in the fridge while the sauce gets ready.
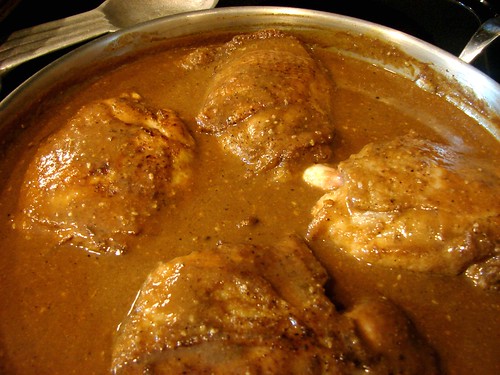
Pour out any excess fat, you only need enough to leave a film on the bottom of the pan. Add the blended tomatillo mixture and cook, stirring every few minutes until considerably darker and thicker, 15 to 20 minutes. You’re looking for the sauce to become the consistency of tomato paste. A word to the wise, use a spatter screen, this mole business is very spitty.
Add 6 cups of water to the pot and briskly simmer the mixture over medium to medium-low heat for 45 minutes for all the flavors to come together and mellow. If the mole has thickened beyond the consistency of a cream soup, stir in a little water. Taste and season with salt and sugar.
Heat the oven to 325°. Lay the turkey in the mole, cover with a lid or foil and place in the oven. Cook until the thighs internal temperature registers 150, this will take about 40-55 minutes. Remove the turkey from the sauce and allow it to rest for a few minutes. Serve with generous amounts of mole sauce.
Check out the green mole here and for the rest of the mole porn shots, click here.
Cookingly yours,
Anamaris
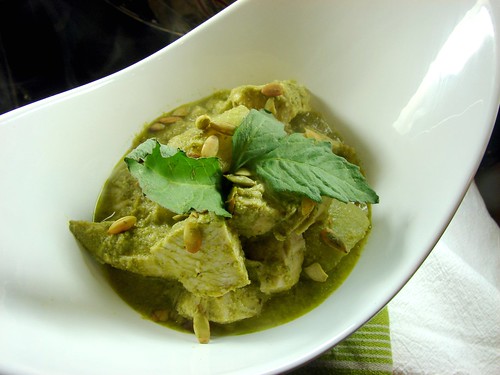
This is the fresh mole, that’s what I’m calling it because of A tangy, tomatillo-based sauce, thickened with toasted pumpkin seeds, it’s served with everything from chicken to fish and seafood.
Again, the recipe is based on Rick Bayless’ book, Mexico-One Plate at a Time, I only substituted turkey for chicken. The recipe is pretty straightforward, though there are a few steps to follow. As with the recipe for red mole, you can substitute uncooked turkey with your cooked leftovers. Simply prepare the sauce to completion, then add the cooked meat to heat through.
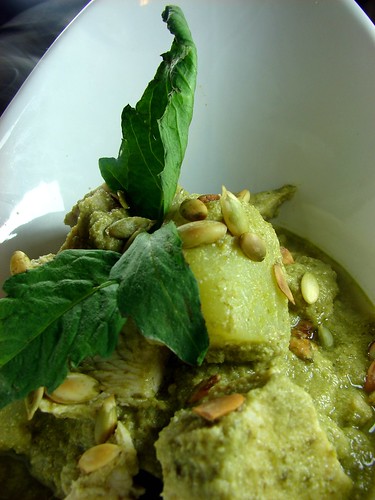
Pavo en Pipián Verde
1 turkey breast or 4 thighs (about 4lbs)
1 small white onion, sliced, divided use
4 garlic cloves, peeled and halved, divided use
1/2 tsp each dried marjoram and thyme
3 bay leaves
Salt to taste
1-1/4 cps hulled, untoasted pumpkin seeds
5-6 medium tomatillos, husked, rinsed and roughly chopped
2 large romaine lettuce leaves, torn into large pieces
2 serranos or 1 jalapeño, stemmed, roughly chopped
Leaves from a small sprig of epazote, plus an additional sprig for garnish
1/2 cp loosely packed chopped cilantro, plus a few sprigs for garnish
1-1/2 tbsp vegetable oil or olive oil
2 medium chayotes
2 medium zucchini
Poach the turkey: In a stock pan, add 10 cups water, half onion, 2 garlic cloves, marjoram, thyme, bay leaves and about 1-1/2 teaspoons salt. Bring to boil. Add the turkey, reduce heat to simmer. Simmer uncovered over medium heat for 20 minutes. Cover pot and let stand off heat for another 30 minutes. Remove turkey from pot. Strain broth and skim off fat that rises to top (can be done 1 day ahead).
Prepare sauce: In a saucepan, Dutch oven or cazuela (a traditional Mexican earthenware casserole with a lid), dry-toast pumpkin seeds. Set pot over medium heat, add the seeds and, when the first seed pops, stir constantly until all have popped from flat to round, about 5 minutes. Don’t let them darken past golden or the sauce will be brownish and slightly bitter. Cool. Set aside 3 tablespoons for garnish and transfer rest to blender.
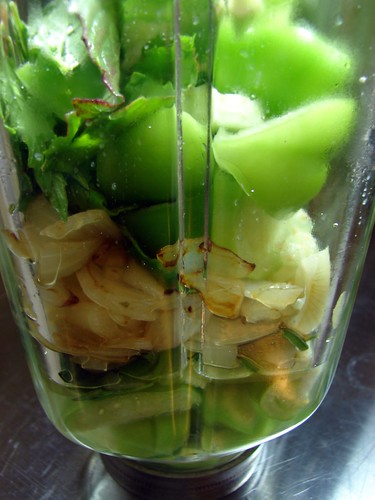
Add remaining onion and garlic to blender, along with tomatillos, lettuce, chiles, epazote leaves and chopped cilantro. Pour in 1 cup of strained broth; cover and blend to smooth puree (can be done 1 day ahead).
 In In the same pot you toasted the seeds, heat oil over medium-high heat. When hot enough to make a drop of puree sizzle sharply, add it all at once. Stir as mixture darkens slightly and thickens considerably, about 10 minutes. Stir in 2 more cups broth, reduce heat to medium-low and simmer about 20 minutes for flavors to mellow and sauce to thicken to medium consistency (it should coat spoon). Be careful, this is another spitty sauce.
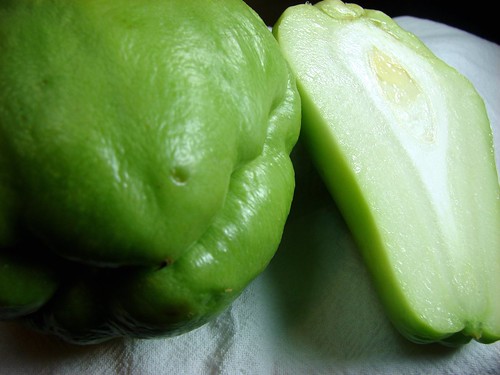
While sauce is simmering, prepare the veggies. Peel the chayote and remove the seed. You may want to do this under running water as chayote has a sap that will stick to your hands and make them turn black. Cube the chayote after peeled, then blanch the vegetables in salted boiling water, cooking chayote about 3 minutes, then adding zucchini for 1 minute. Drain and spread vegetables on plate to stop cooking.
When sauce has simmered 20 minutes, it will likely look coarse. Smooth it to a velvety texture by reblending it in small batches (loosely covered to avoid blender explosions). Return sauce to pan, taste and season with salt, if needed, about 3/4 teaspoon. If sauce has thickened beyond a light cream-sauce consistency, thin it with a little remaining broth.
Remove skin from cooked turkey, if desired, cube and slip into sauce, then add cooked vegetables. Simmer over medium heat just long enough to heat everything, about 5 minutes, then spoon turkey, vegetables and sauce out onto warm serving platter. Sprinkle with reserved pumpkin seeds (you may want to crush them), decorate with sprigs of epazote and cilantro.
For the full mole action, check out the photostream.
Cookingly yours,
Anamaris
I’ve never made mole before. Not really. I wanted to share these recipes with you so you’d have something to work with for Turkey’s Day After. It’s impossible to avoid having 100 lbs of leftover turkey and you can only eat so many sandwiches.
Let me try to describe the flavors of these dishes to you and do them justice. I’ll start by saying they’re similar in the complexity of flavors, at once surprising and familiar. Yet, they’re also in perfect contrast to each other.
Red mole seemed to have an inherent nuttiness that reminded me of peanut butter and the slightly bitter sweetness of chocolate. There’s smokiness that makes you wonder if this is a sauce that was developed from an old roux. It is rich and spicy, not in term of heat but flavor. Yet, it doesn’t taste like 5 different spices, they’re not individually identifiable, but you can tell they’ve come together to bring out the best in each other.

On the other hand, the pipián sauce or green mole tasted light and vibrant, with a nice pungent bite. The lightness of it seeming to fight against the creaminess of the sauce. I’m not sure how to explain it, other than to say it tasted as though we were eating something rich and decadent, while knowing nothing heavy or rich was added.

I’m not going to lie and say these are easy recipes, but they were not too difficult either. Scratch that. They’re not difficult at all, what they are is involved. Lots of steps, which is why I cheated a bit. We have 2 versions of the traditional Mexican sauce: Turkey in Mole Rojo and Turkey in Pipián Verde (green mole).
These recipes come from Bayless’ cookbook, Mexico – One Plate At A Time, and you’ll notice there is at least one other post in the last few days that was inspired by the book. Check out the Green Beans & Carrots in Escabeche. They are incredibly delicious.
A couple of side notes:
- The website recipe is for a very large batch, it’s actually doubled the one in the book. I don’t think you’re feeding a small army, so I’m offering the book version. I had enough sauce to save about 4-6 cps for later use.
- Bayless calls for a whole boneless turkey breast (uncooked). Since I’m not a breast fan, I went with thighs and kept the bones in the mix.
- If you are making this with leftover turkey, simply add the cooked meat once the sauce has reduced.
- I have an old, kick-ass blender that can puree almost anything to a pulp. This is to say I skipped the straining part, you may need to strain it if your blender doesn’t do as well and/or if you have issues with tidbits of sesame seeds.
- Use an oven-safe pan or dutch oven. You will cook on the stove and finish it in the oven.
Are you ready for this? Check out the recipe posts, Turkey in Red Mole and Turkey in Pumpkin Seed Sauce.
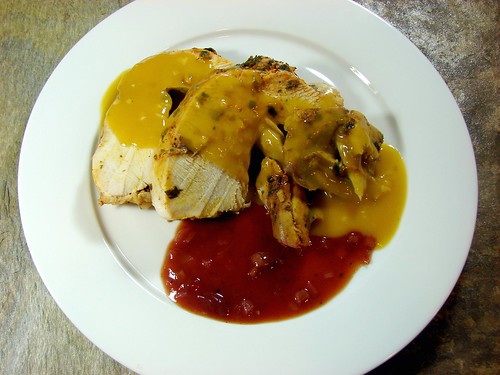
Oh yeah. It’s time to talk about the bird. And this is a very special friend. This has to be my best turkey to date. I’m sorry to gloat, but this turned out perfectly. As I’ve mentioned before, I’m a firm believer in brining turkey. It keeps it moist and juicy and adds a lot of flavor while cooking.
Different from what I’ve done before, I rubbed in an herbed butter before roasting this bird. And since I was going for that Latin flavor, I added achiote paste too. Let me tell you how this all came together.
Achiote & Herbs Turkey with Garlic Butter Gravy
First, the brine. I added a large onion, garlic cloves, bay leaves, celery, Jugo Maggi, salt, sugar and some spices to a large pot of water and brought it to a boil. Allowed it to simmer for about 15 minutes, to infuse the flavors in the water. I then allowed that to cool completely before pouring it into a cooler. Followed by the turkey (giblets removed), then filled with cool water and topped it with plenty of ice to keep it cold overnight.
If you go back a few months, you’ll remember a post I shared for roast chicken, I followed the same principles for the turkey. Incidentally, I want to give a shout out to Noelle over at Portland Palattes, she sent me a note after she followed the same post and ended up with a delicious chicken.

Back to the turkey. I combined 2 sticks of butter (I know!) with achiote paste, garlic, parsley, green onions, orange zest, salt and pepper. After draining and drying the turkey, I then squished the butter under the skin while the oven preheated to 475°. I filled the cavity with whole garlic cloves, quartered orange, celery and carrots, and threw some more at the bottom of the roasting pan.

After inserting the electronic thermometer (love that thing!) I placed the whole thing in the oven for 15 minutes, then lowered the temperature to 325° and roasted it, undisturbed until the internal temp read 185°–about 3 extra hours. No basting, no turning, no nothing. Once it was done, it got a foil blanket and took a little nap for about 30 minutes before I began carving.
The fact that *I* had to do the carving this time explains why there are no pictures of that part. Sorry, I was in a panic at the thought of it. I didn’t do too badly. Look at these shots and tell me you don’t want some turkey like NOW!
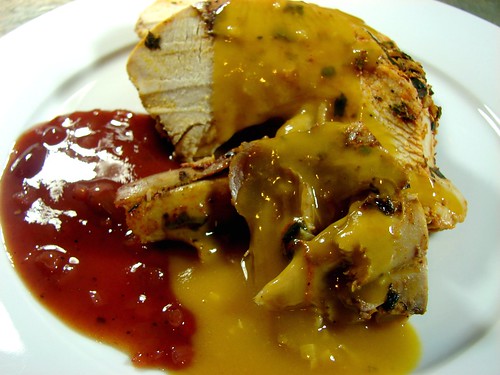
Gravy. You see that pretty gravy? Of course, you can’t have turkey without some gravy, so gravy I made. I poured the cooking liquid out of the roasting pan. Once the fat raised to the top, I scooped out about 4 tablespoons of it and heated it in a saucepan. To that I added 2 cloves of garlic finely diced, cooked them for a couple of minutes before adding 4 tablespoons of flour, stirred it in and allowed it to cook for about 5 minutes stirring constantly.
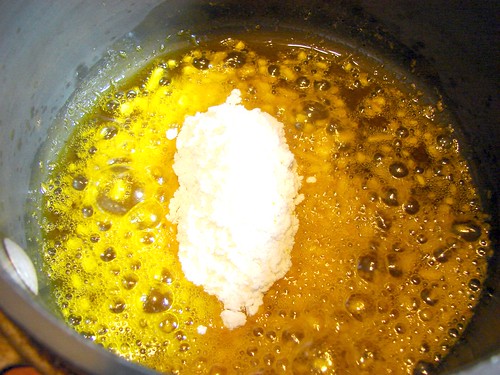
Add the reserved liquid (not the fat), be sure to keep stirring or you’ll end up with lumps and bumps. Once it boils, it will begin to thicken. At this point you can adjust the seasoning as necessary. Keep warm and pour over the sliced turkey.
And here it is. I always always always have cranberry with my turkey. Straight out of the can, I love the stuff. But, this is a Latin Thanksgiving, so no cranberries for you. Instead…
Guayaba Sauce
Guayaba, or guava as it’s known in the US, is similar in color and temperament to cranberry. By temperament I mean they have very similar flavor profiles, they’re both sweet and tart, though guayaba doesn’t have that tangy bite cranberries do. This sauce was easy to make and DELICIOUS with the turkey.
I combined about 6 ozs of guayaba paste with the juice of 2 oranges and the zest of 1 and 1 diced shallot, brought it all to a boil and seasoned with a dash of salt just before serving. That’s it!
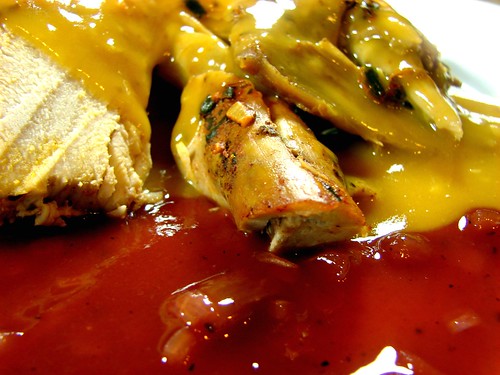
To see the recipes for the rest of this incredible meal, follow this link. To see the other food porn shots, click here.
Gobble gobble!
Cookingly yours,
Anamaris
I told you before I would make a pre-turkey day dinner for your benefit, but I lied. Don’t get me wrong, you do benefit from this, but I didn’t make this dinner just because of you. The truth is, I love turkey and would eat it year-round, so when this time of the year comes and the turkeys are plentiful… I eat and eat and, well, eat.
So, I set out to put together a Thanksgiving meal that spoke to my Latin roots while still honoring the traditional ingredients. With a little push from The Hubbz and an abandonment of safety nets, I came with what I believe is an incredible menu.

yep, that's the beginning of the menu
Pay attention, this is where you benefit: I’m about to share all of it with you! The menu. The thought process. The planning. The execution. I’m sharing it all with you in the hopes that you’ll be encouraged to recreate one or more of the dishes or that you’ll through caution to the wind and try something you’ve been thinking about for while.
The Thought Process:
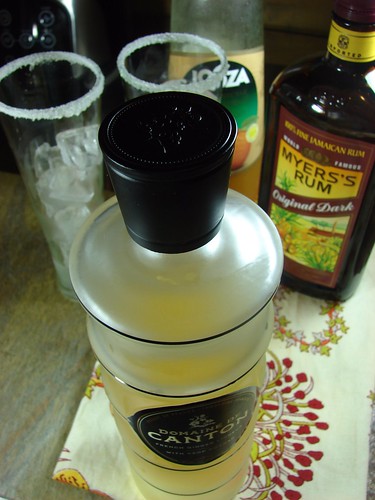
Cocktails: I didn’t want anything too heavy or pumpkiny, but I still wanted to keep Thanksgiving colors in mind. I knew it needed to be spicy/flavorful.
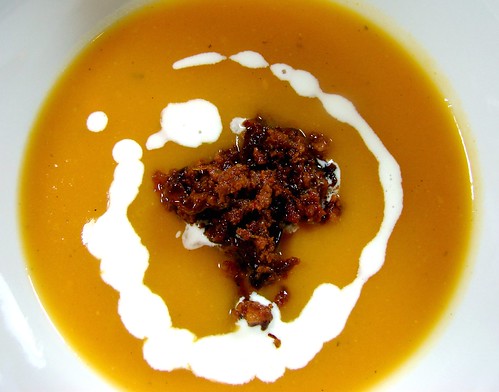
Appetizer: I went for a soup, but wanted to keep it light while flavorful and I wanted to work sweet potatoes in the menu.
Turkey: Moist is always my first priority, so I knew I would brine it. I wanted to pick up on subtle Latin flavors without fussing too much over the bird.
Gravy: It’s like the chicken & the egg. Can’t have one without the other.
Accompanientment: Usually cranberry and, I’m sorry but I have to admit I love the canned stuff, but I needed to kick up a notch. I immediately thought guayaba! Or guava as its known stateside.
Dressing: Cornbread dressing is my absolute favorite even if traditional. My thoughts were to have corn patties topped with the extras usually found in dressing. I wanted to recreate a sophisticated version of a Panamanian tortilla.
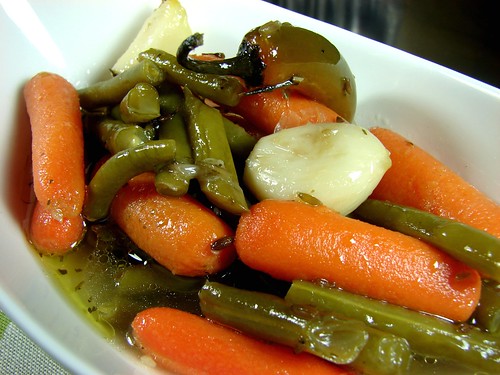
Vegetables: Indispensable, and these pickled ones help cut through the heavy meal.
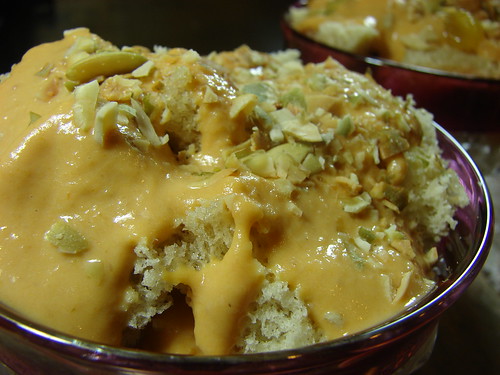
Dessert: A traditional dessert found at weddings in Panama. This is pumpkin brought to Jimmy Choo levels.
The Menu
Apricot Gingersnap Cocktail
Sweet Potato Cream with Chorizo Garnish
Achiote & Herbs Turkey
-Garlic Butter Gravy
-Guayaba Compote

Polenta Tortillas with Sausage & Chicharron Picadillo

Green Bean & Carrots Escabeche
Pumpkin Sopa de Gloria
The Planning
Putting a big meal together, particularly when you have to stick to a schedule or a set dinnertime can be overwhelming. Lists make it easier. It doesn’t matter what type of project I’m working on, a list always makes me feel at ease, like I can get it done. When I just think of the big picture or the end product I can’t help but feel a bit of anxiety, like I’m going to forget something or that I don’t have enough time to finish. Lists are good. Lists are your friend.
After I had finalized the menu, I wrote down each dish and broke it down by steps. I then prioritized the order in which to execute each step.
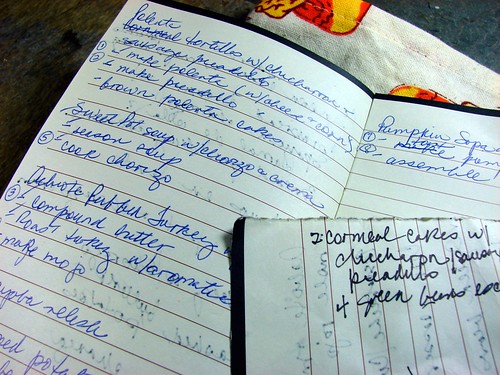
pardon my handwriting...
The Execution - for the recipes, click on the links.
Gobble, gobble!
Cookingly yours,
Anamaris
Panamá, being the proverbial melting pot, has an incredibly abundant Chinese presence. You can’t walk more than a few yards before stumbling into a Chinese restaurant or a corner tienda, a little neighborhood store where you can buy everything from fresh bread to pigs feet and a hammer. That means Chinese food has been influenced by the local’s taste buds and available produce. Chinese food in Panama is completely different from Chinese food in Houston and Houston’s is nothing like Chinese food in NYC. Adaptability. I often wonder if I would enjoy Chinese food in China. But I digress.
I’ve shared with you a recipe for roast chicken very popular in Latin America. This is pretty much the same thing with a few changes and the addition of this ketchupy sauce added to chicken in Panamá. I don’t know what it is about this simple sauce, but it would probably fall under the Chino-Latino category. Almost every Chinese restaurant in Panama will offer some version of this rotisserie chicken and BBQ pork, which is absolutely divine.
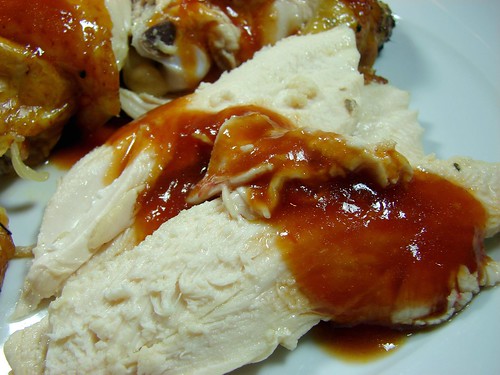
The chicken is seasoned pretty much the same, then roasted to golden perfection and served with the yummy sauce all over it. To ensure the chicken is super juicy, I brined it for just over an hour, ideally, I would’ve allowed it to brine longer, but it was still delicious. It occurs to me that this would also work brilliantly with turkey, I may just give it a try. Here’s what you’re looking for.
Pollo Panamá
1 whole chicken, approx 4-6 lbs
For the brine:
2 Sazón packets
4 garlic cloves, crushed
4 tbsp soy sauce
2 tsp sea salt
2 tbsp Italian seasoning
2 tbsp sugar
Water
Chino-Latino Ketchup
1/2 cp ketchup
1-1/2 tbsp soy sauce
1-2 tsp sugar
1/4 cp water
Habanero hot sauce, to taste
1 garlic clove, halved
2 tsp extra virgin olive oil
For the chicken: Heat about 1/2 cp of water and add the garlic, salt, Italian seasoning and sugar for the brine, allow it to come to a quick boil, then turn off and transfer to a bowl large enough to submerge the chicken. Or you can use a large ziploc bag. Give it just a couple of minutes to cool, then add the rest of the brine ingredients.
In the meantime, remove the giblets from the chicken’s cavity and rinse the chicken under cool water. Drain and place the chicken in the bowl with the brine concentrate and fill the bowl with enough water to submerge the chicken. Allow the chicken to marinate in the brine for about an hour, longer if you have the time.
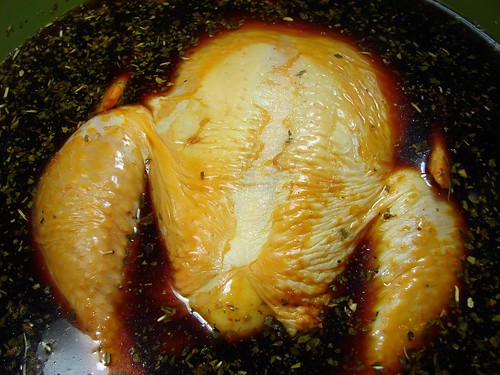
Preheat oven to 350°. Prepare a roasting pan and rack large enough to hold the chicken. Drain the chicken and pat it dry. Rub it with extra virgin olive oil and place on the rack breast side down. I prefer to roast whole chickens and turkeys with the breast down to make sure it is juicy, since breast isn’t my favorite meat. If you’d rather have pretty skin on the breast, then roast it breast side up. Place the chicken in the preheated oven and allow it to roast for about 20 minutes per pound, for a 5-pounder, you’re looking at just under 2 hours.
Note: I will usually roast the chicken or turkey at 375° for about 10 minutes, then lower the temperature to 350° for the remainder of the roasting time, but I was being very lazy with this chickie. You know what? It was still perfect!
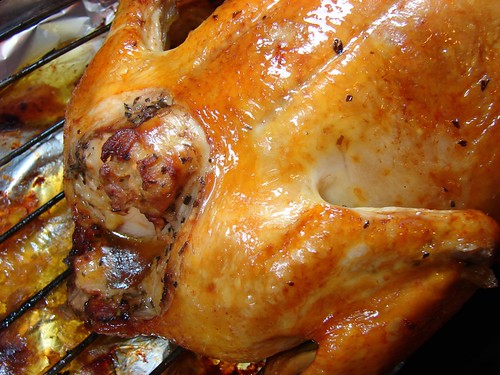
Once the internal temperature reads somewhere around 180°-185°, remove the chicken from the oven and cover loosely with foil. Allow it to rest to allow the juices to redistribute and make Ms. Chickie very happy. This is a good time to put the sauce together if you haven’t already.
In a small saucepan, heat a bit of olive oil and add the garlic halves allowing them to permeate the oil for a minute or two. Add the rest of the ingredients, tasting it after the first teaspoon of sugar, this should be to your taste. Adjust the seasoning with salt, if necessary, but the soy should take care of it. Bring it to a slow simmer for 5 minutes or so, keep it warm and spoon over the chicken to plate.
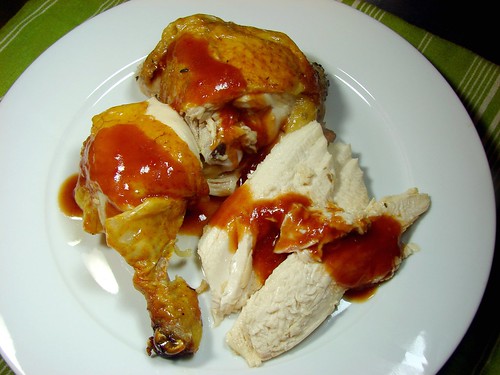
Check out the photo set for more juicy shots.
Cookingly yours,
Anamaris
Here it is again. Pork. Pig. Porky. Oink. I know, I know. I cook a lot of pork. But it IS the other white meat, remember? Besides, I find that it is incredibly easy to cook and almost impossible to mess up. It is also inexpensive, but can still look impressive. So why not abuse it?!

Pork butt or shoulder roasts are very versatile. You can get them boneless or with the bone in. You decide whether you want to cook it whole or in pieces. It’s all up to you. For this recipe, I went with a whole boneless piece. I’ve posted other roasts, some stuffed, some traditionally roasted, and some belly love, this time it was rubbed and roasted with a different set of spices.
The truth is, you can use pretty much any spice and herb combination you love. That’s the beauty of pork, it is very forgiving and not at all prissy. I hope you love this one as much as we did, I think you will, particularly because it is so easy to put together. Make sure to give at least 2 hours to marinate in the spices, it will enhance the flavor a great deal.
Roast Shoulder with Orange and Spices
Pork butt/shoulder roast, approx 4-5 lbs
Juice and zest from 1 orange
2 tsps cumin powder
2 tsps thyme
2 tsps Spanish paprika
2 tsps sea salt
2 tsps black pepper
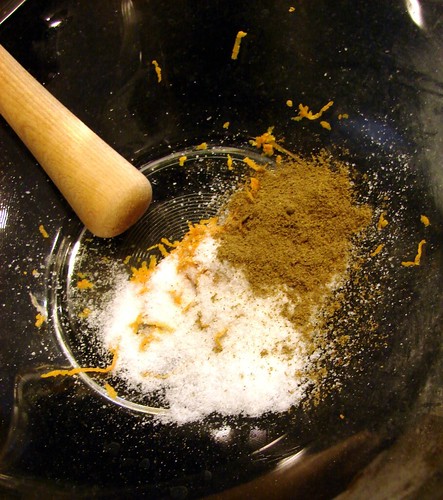
Combine all the spices and juice together and rub it all over the roast. Allow it to marinate for no more than 4 hours, but at least 2.
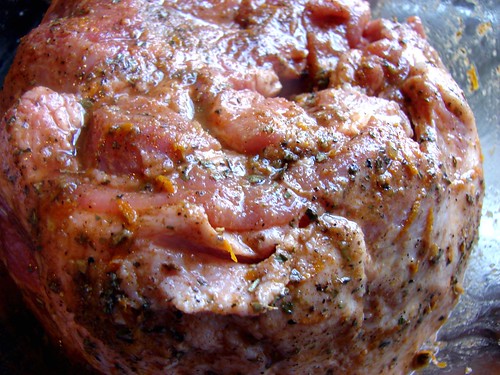
Preheat oven to 325°. Place roast on a roasting pan, make sure the fattier side is on top. I would usually put it on a roasting rack, but this time I wanted to make sure the juices didn’t evaporate, so I used the roasting pan that came with my oven. The kind that looks like 2 shallow pans and fit over each other: one is flat with slats and the bottom one is about 1-inch deep.
Roast it for approximately 2-1/2 hours or until the internal temperature reads between 160° and 170° depending on the level of doneness you prefer. Once done, cover it loosely with foil and allow it to rest for at least 15 minutes to give the juices a chance to redistribute.
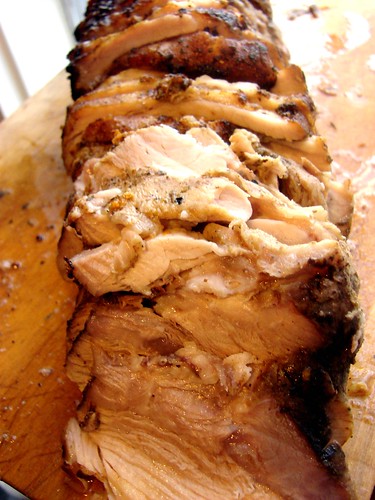
In the meantime, drain the cooking juices into a small saucepan to make a quick sauce. Add the juice of 1 orange and bring it to a soft boil before adding 1/4 cup of Sherry. You can flame it or allow it to boil briskly to cook off the alcohol. Adjust the seasoning as needed, but more than likely, it will be perfectly salted already because of the drippings. Turn off the heat and stir in 2 tbsp of cold butter.
Slice the roast and serve it with the sauce over top or on the side. This went beautifully with some Arroz con Coco!
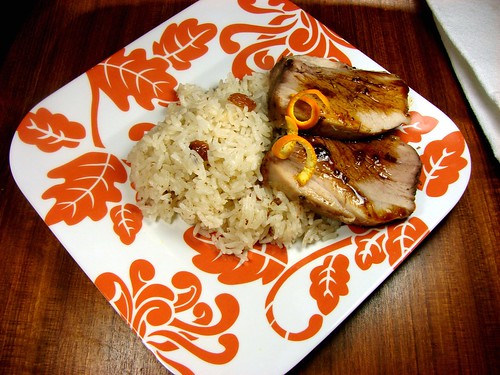
If you’d like to see the rest of the pictures, follow this link.
Cookingly yours,
Anamaris


