As I browse through my blog, I can’t help but notice how often rice seems to come up. I really can’t help it, I have a love affair with that little grain. My only hope is that I offer some variety for you. That said, this is a rice post. Yep. Mas arroz.
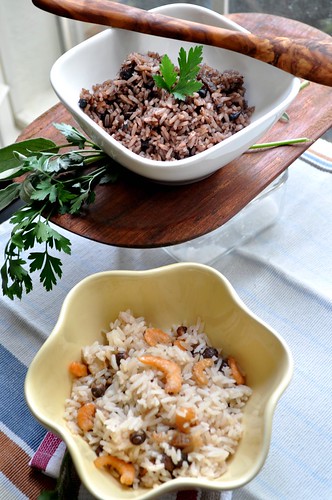
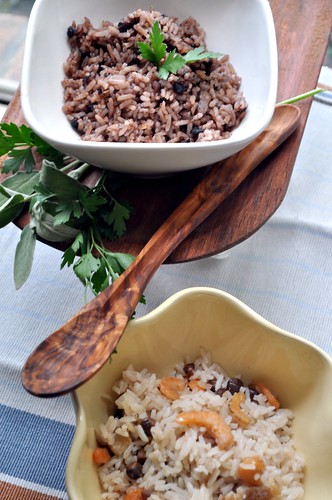
In Panama, we prepare rice in many different ways; sometimes with coconut milk, or various beans and peas. Anything you want, really. Two of my favorites are Arroz con Frijoles Negros (rice with black beans) and Arroz con Camarones Secos (rice with dried shrimp).
They’re both easy to make and follow the same process as the recipe for Arroz con Guandú. For the black beans, I used dried beans and cooked them in the coconut milk, as detailed in the recipe below, but you can use canned beans . For the one with the dried shrimp and guandú, I cooked both of those in the coconut milk first, then followed the recipe.
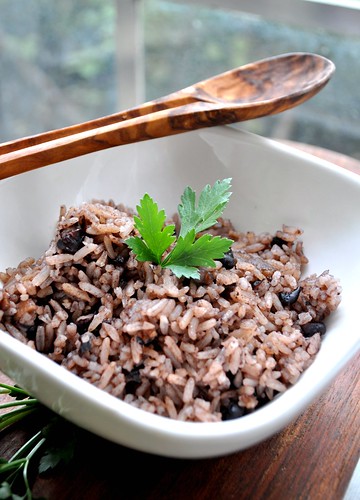
For the Arroz con Coco y Frijoles Negros (Black beans & rice)
2 cps rice
1/2 cp dry black beans
2 cps coconut milk
3 cps water
1/3 cp salt pork or bacon
1 tbsp vegetable oil
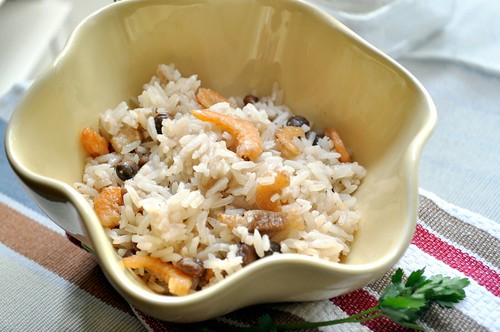
For the Arroz con Camaroncitos Secos y Guandú (Rice w/dried shrimp & pigeon peas)
2 cps rice
1 cp frozen guandú (pigeon peas)
1/2 cp dried shrimp
2 cps coconut milk
3 cps water
1/3 cp salt pork or bacon
1 tbsp vegetable oil
Method for both versions:
In a pot with a tight-fitting lid, brown the salt pork/bacon rendering some of its fat. Add the guandúes (pigeon peas), coconut milk. Bring it to a boil, then reduce the heat until it simmers. Cook it until the peas are tender, about 40 minutes. Strain the liquid and measure, add enough water to make 3-1/3 cps of liquid, set aside.
This recipe uses the frozen peas, however, if you are using the canned variety, just skip the step above. Instead, drain, rinse and strain the beans, then add coconut milk and water to measure 3-1/3 cups. Fry the salt pork or bacon just before adding the rinsed rice.
Add oil to the pan with the peas, rinse the rice and add it to the pot stirring all the ingredients. Add the liquid, check the salt, stir this well. Make sure you remove any drippings that may have been stuck to the bottom of the pan. Bring it to a slow boil; once the liquid boils do not stir it again. Keep the temperature on medium high.
Once the liquid is almost completely evaporated, bring the temperature to low and cover with the lid. Allow to steam undisturbed for 40 minutes. When you remove the lid, all the peas will be at the top, go ahead and stir them into the rice. You’re done!
Note: The flavor of the coconut milk will intensify with time. You can cook the peas a day ahead to allow the flavors to meld together.

With Spring almost over and Summer staring me right in the face and its heat chasing me around Houston, I’ve had no choice but to start thinking about lighter, cooler meals. I’m also supposed to be making an effort to eat healthier, which is always a battle for me, but I’m trying–get off my back already!
So, since I’m not the biggest salad fan, I have to find ways to get them in, but they have to be interesting. That’s how this one came about. For some reason I found thoughts of sofrito running around my head; I guess that’s not so unusual, since that is the base to almost every Latin/Caribbean dish. Onions, bell peppers, garlic, tomatoes, culantro and sometimes carrots –standards in most sofritos. Then the lightbulb moment happened: I bet that would make for a good salad! Add some cheese, a vinaigrette, oooooh roast the veggies…YUM!
And so it happened. And, let me tell you. Oh.eM.Gee! This turned out so amazingly delicious! I roasted everything in the oven for a few minutes to bring out the natural sweetness of the ingredients and to tame the zing of the onion and garlic. You can opt to use them fresh, uncooked, but I do hope you take a few minutes to roast them, because, well, its just heavenly. No real recipe here, just a bit of this and that. Make it! Do it today!
Roasted Sofrito Salad
Sweet or red onion
Red & orange bell peppers
Garlic, whole
Baby carrots
I sliced the onion and peppers into 1/4-in or so pieces, not too big, not too small. Left the garlic and baby carrots whole. If you go for regular-sized carrots, then cut them into sticks. You want the veggies to still have a bite to them after roasting.
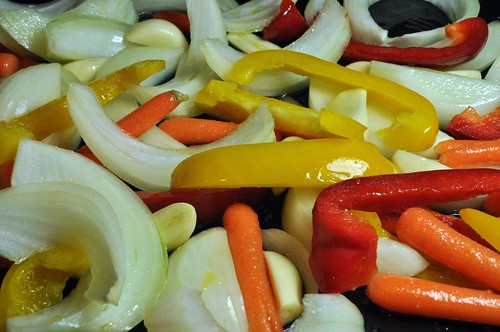
I threw it all onto a lined baking sheet, drizzled about 1-2 tbsp of extra virgin olive oil, a sprinkling of salt & pepper and popped it all under the broiler. I tossed the veggies around after 5 minutes or so, when they starting caramelizing, I didn’t want them to burn. 10 minutes was enough. Allow them to cool, while you work on the vinaigrette.
Culantro Vinaigrette
Culantro/cilantro, chopped
Extra virgin olive oil
White wine vinegar
Salt & fresh black pepper
Blend the culantro into the oil to puree. Remove from blender, add vinegar, then slowly drizzle in the culantro oil until creamy. Adjust seasoning as necessary.
Plating
Iceberg lettuce wedges, very cold
Tomatoes, wedges
Culantro vinaigrette
Queso Cotija or Fresco
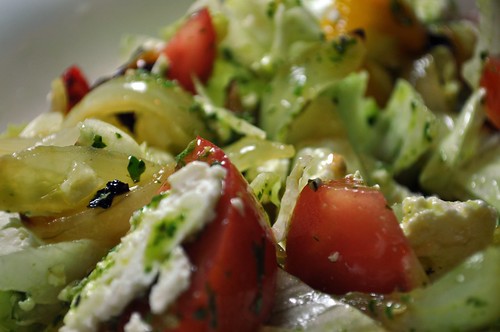
Combine the roasted veggies with the lettuce, add tomato wedges and dress with the vinaigrette. Serve with crumbled Cotija or Queso Fresco. Ay, que rico!
Freshly yours,
Anamaris

My dear friend Shun, as I affectionately call her, shared this dish with me many moons ago, and I was hooked after my first try. Fideos (noodles) are a simple symphony of spicy, smoky and fresh flavors. It is sometimes called sopa de fideos, which translates to dry noodle soup.
It makes for a great side dish, but I often eat it as a main course. Traditionally, it is served with crema fresca (creme fraiche), queso fresco and avocado. A great option for a meat-free menu, and delicious to boot. Another plus, it is prepared in a jiffy or rápidito! I made this batch at the last minute to take to a party and was unable to find tomatoes that were ripe enough, so I opted for good canned ones. Likewise, I had no luck in the avocado front, so no avocados for me! You decide how much heat you want and adjust the number of serranos accordingly, you may also remove the seeds, this will further reduce the heat level.
Fideos a la Shun
12 oz fideo pasta or angel hair
4 tbsp olive oil
1 medium onion
2 garlic cloves, whole
1 or 2 serrano peppers, to taste
5 fresh Roma tomatoes, ripened OR
1 can (15 oz.) stewed tomatoes
2 tbsp chicken flavor bouillon (like Knorr or Maggi)
Water
1/2 tsp dried oregano
1/2 tsp cumin powder
Salt and pepper to taste
For plating:
Queso fresco, crumbled
Crema fresca
Avocado slices or small cubes
I would suggested getting the sauce ready first. Shun’s recipe calls for the onion, garlic, serranos and fresh tomatoes to be roasted first. You can skip this step, but it does add an intensity and complexity to the dish, so if you have the time–about 10-15 extra minutes–you should do it.
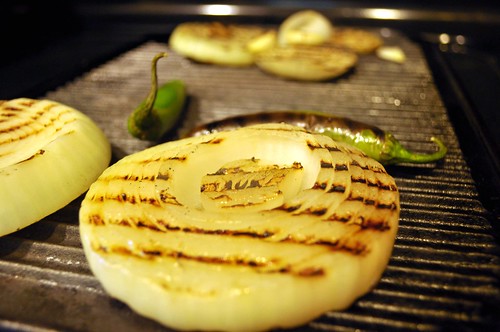
I use my comal or grill pan for this, getting it nice and hot, then sear the sliced onion, whole serranos, garlic and tomatoes (fresh). Once seared, dump the whole thing into your blender or food processor, adding the chicken bouillon, cumin, oregano, salt & pepper and enough water to get things moving. Set aside.
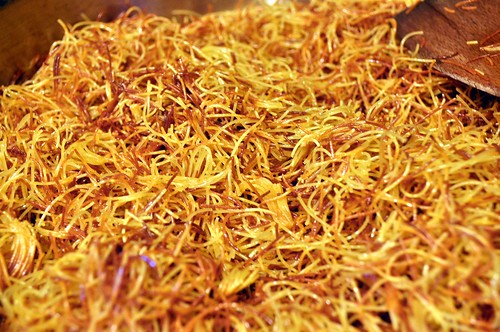
Heat a large saute pan over high heat add the oil and break the pasta into it, the purpose of this step is to toast the pasta, but don’t walk away, it burns rather quickly and that will ruin the flavor of the dish. The noodles will change color and turn golden brown.
Carefully, VERY carefully add the pureed sauce and watch yourself! It becomes the evil spitty monster at this point, add enough water to ensure the noodles are submerged in liquid. Lower the heat so it simmers gently, check the seasoning and adjust as necessary.
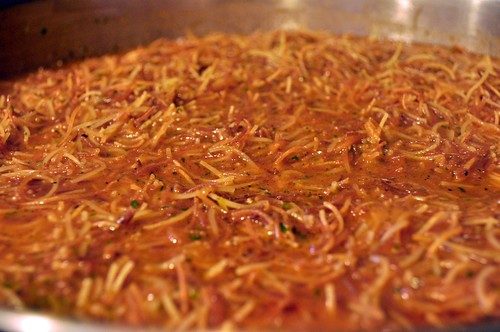
The noodles should be al dente, when done. It will take about 20 minutes for the pasta to cook and you may need to add more water as it cooks down. To plate: spoon some noodles onto a plate, top with crema, avocado and the crumbled cheese. Pull up a chair and enjoy!

To see more of the step-by-step process, click here.
Cookingly yours,
Anamaris
PS: Thanks, Shuni!
The Hubbz hates the use of the word ‘juxtapose’, he says it has become all trendy and overused. I laugh every time I hear the word and look at the disgust on his face as he rolls his little blue eyes. That said, this dish is a perfect juxtaposition of flavors. Creamy, tart, spicy, hot, and a cooling sweetness. Perfect! Just pair it with a Margarita and you have the makings of an excellent 5 de mayo celebration.

Puerco en Salsa Verde (pork in green sauce) is a very popular Mexican dish that marries chiles and tomatillos with pork meat, usually the shoulder. You’ll find a few variations, with or without corn and at various degrees of heat = picante. One element that is always present, is that zingy tang of the tomatillos.
To contrast, or juxtapose, the tang, I added a radish and red pepper raita–of sorts. Raita is an Indian or Pakistani sauce or condiment, usually prepared with yogurt, cucumbers and various herbs. My version, with a Latin flavor, used crema fresca instead of the yogurt and some colorful Easter radishes and red peppers. This made for a deliciously fresh, cool and ever so slightly sweet topping for the tomatillo and chile sauce. It is juxtaposition perfection and tastes GOOD!
Pork in Green Sauce with Radish and Crema Fresca Raita
For the pork:
1 lb pork shoulder or butt, cubed
3 tbsp vegetable oil
1 large onion, sliced
3 garlic cloves, whole
6-8 tomatillos
1-2 serrano peppers (to taste)
1 tbsp cumin, ground
1 tbsp oregano
1 tsp salt
1 tsp black pepper
1 cp onion, chopped
2 cps fresh corn, shucked
1/2 cp cilantro, chopped
I like roasting tomatillos, this intensifies their flavors and brings out more rounded aspects of the fruit. Spread them on a baking sheet with the onion slices, serranos and garlic cloves, and broil them for 15 to 20 minutes, turning them as they brown.
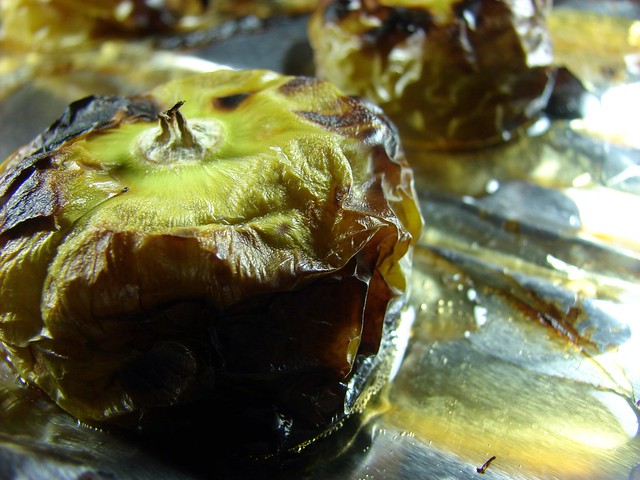
Once browned, dump the whole thing (there will be plenty of juices from the tomatillos) into a blender vessel and puree with the cumin, oregano, salt & pepper. Set aside.
In the meantime, season the pork with salt & pepper; in a medium-sized pan, heat the oil and then brown the pork pieces. Remove the excess fat from the pan, leaving enough to saute the extra cup of onions. Once the onions become translucent, add the pork, followed by the pureed tomatillo & pepper sauce.
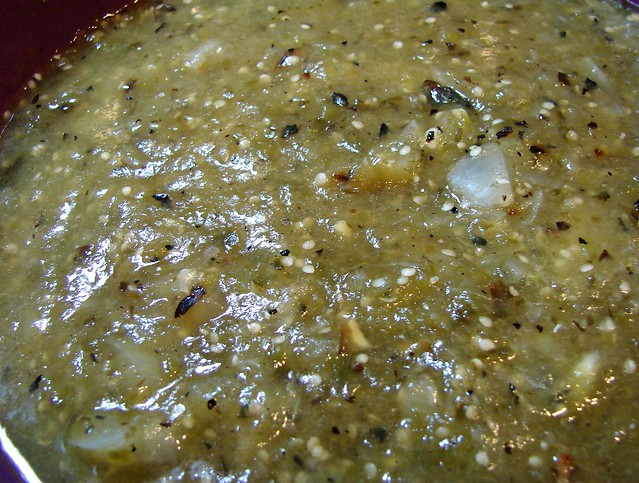
If necessary, add enough water to ensure there’s enough liquid to cover the pork. Once it comes to a boil, bring the temperature to low, just so it is slowly simmering. Put a lid over it and allow it to simmer for about an hour or until the pork is tender.
Once the pork is fork tender, add the corn and cilantro, check the seasoning and adjust as necessary. Allow it to cook for another 5 minutes or so, just long enough for the corn to soften. To serve, top with some radish raita and enjoy!

For the Radish and Red Pepper Raita
1 cp radishes, julienned
1/4 cp red bell pepper, chopped
1/2 cp crema fresca (creme fraiche)
Salt & pepper to taste
2 tbsp cilantro, finely chopped
Combine all the ingredients and keep cool until ready to serve.
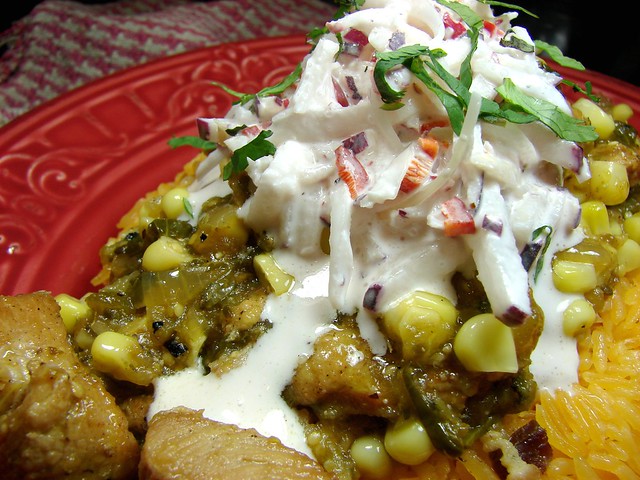
Where’s my Margarita?!!
Cookingly yours,
Anamaris
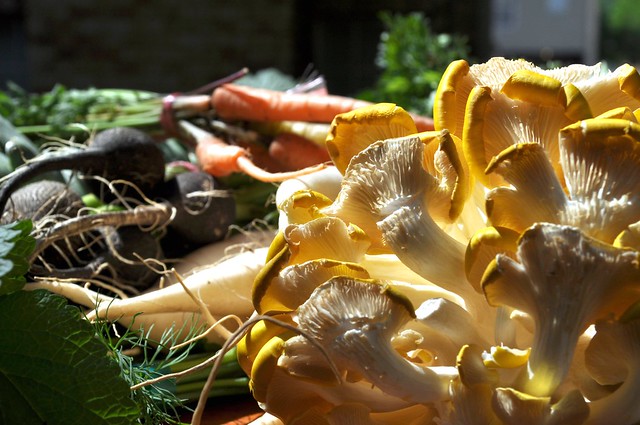
I love that Houston has been promoting local farmers more and more these days. I love getting up Saturday morning and driving out to see what goodies are available that week.
The other really neat benefit, is to be able to speak with the farmers themselves and see the pride in their eyes as they offer you their crops and are always happy to answer questions about what to do with the produce and how to do it best.
It also gives me an opportunity to see products I’ve never heard of before and it encourages me to expand my foodie repertoire. For instance, I’ve never seen yellow oyster mushrooms before, have you?

What about black radish?

I’ll share my impressions as I use these finds. I already went through the artichokes, rainbow carrots, yellow oyster mushrooms, dill, lemon balm and fresh flounder. I should’ve documented the flounder & oyster mushroom beauty, but I didn’t. My bad.
My hubby filleted the flounder, I dusted them with a bit of flour (we kept the skin on) before giving them a quick pan-fry. I topped them with the oyster mushrooms, which I sautéed in EVOO, garlic then deglazed with a bit of sherry, added a bit of cream because The Hubbz loves to have a sauce. Just before serving I added a bit of the lemon balm and we proceeded to devour the whole thing. It was very quiet in the room.
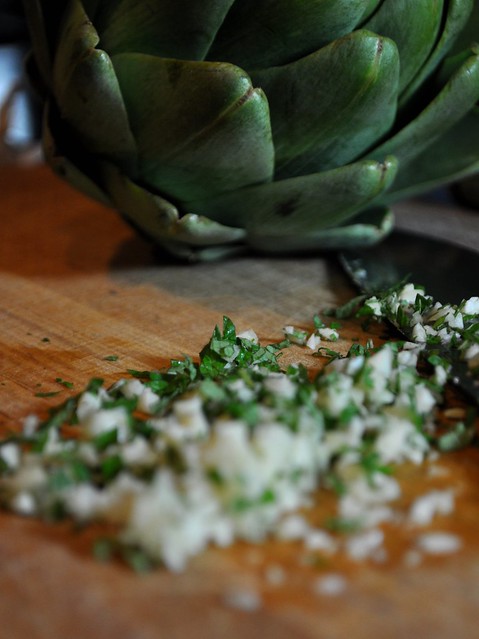
We also had some roasted artichokes. After trimming the leaves and cutting them in half, I drizzled a ‘marinade’ of olive oil, balsamic vinegar syrup, garlic, lemon balm, salt & pepper. Popped them in the oven for about 15 minutes before serving.

While the artichokes roasted, I turned my attention to the multicolored baby carrots. I trimmed the stems, then added some butter, chopped garlic and about 1 tsp of habanero hot sauce to a pan and cooked the garlic for about 1 minute.
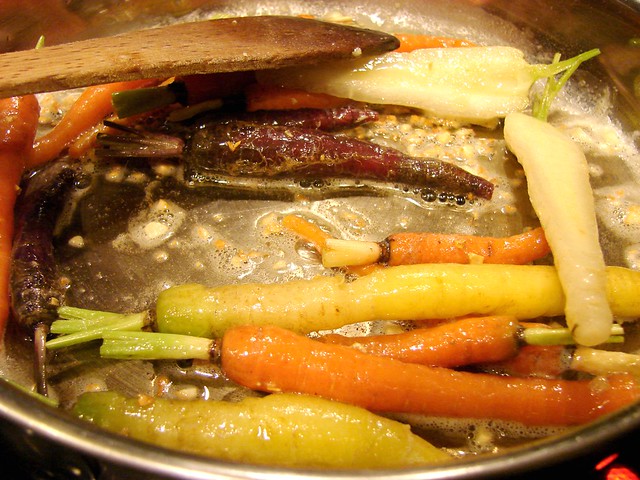
Then added the trimmed carrots and sautéed them a bit before adding about 1/2 cp of sherry to the pan. Lowered the temperature to medium low and added 1 tbsp of coconut sugar (brown sugar will work just as well), put a lid on and allowed it to steam for about 10-12 minutes.
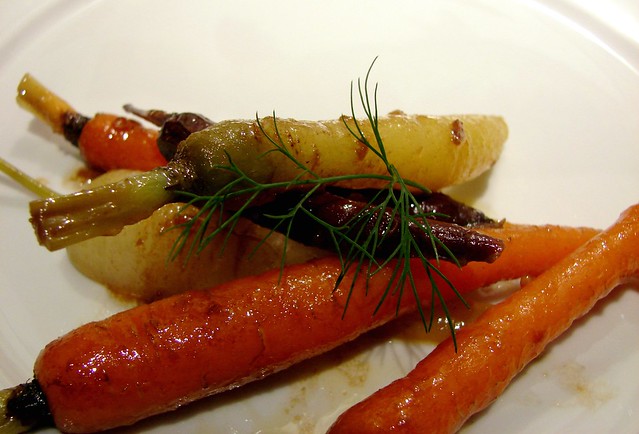
It was the perfect balance of spicy and sweet. Aaahh, Spring. Even if it really feels like Summer already. Food is good.
For more Farmers’ Market shots, follow this link.
Cookingly yours,
Anamaris

At the corner or Richmond and Mid Lane sits an unassuming establishment called Nielsens Deli. I had driven by this place countless times since moving to Houston, but never thought about stopping by, I imagined it was just a deli selling deli meats. Recently, a good friend invited me out for a quick lunch promising me I would have the best potato salad and deviled eggs EVAH! Off to Nielsens we went.
As you walk into the stand-alone building, you’ll come into a long narrow room, the deli counter will be just a couple of feet and directly across from the front door, that’s where you place your order, unless you’ve called it in. Turn right and to the opposite end of the room, pick up some chips and pay for your order. If you’re dining in, you can grab one of the stools lined up against the storefront glass. If you’re feeling particularly playful, tease the incoming customers as they come up to the counter.

Ok, this is a food blog, right? Let’s talk shop. First, I was tickled by the lingo I heard as I approached the counter. The customers, regulars no doubt, have learned how to properly order their meals: ‘a Jr Corned beef, extra spread on rye and a pixie potato salad‘. It made me think of a kinder, gentler soup Nazi.
I’m not a big sandwich person, it just doesn’t seem like a meal, but these sandwiches are awesome! I had the corned beef on white with extra spread (they make their own mayo…OHMY!), an egg and a pixie of egg salad. Let me tell you, this corned beef was good and piled high on the homemade bread. No skimping here.
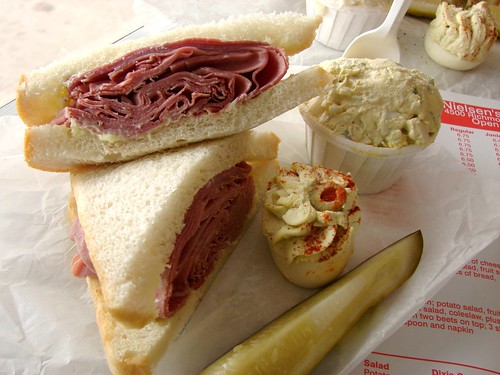
Anni had the turkey on white, extra spread an egg and a pixie of potato salad. I had a bite of her turkey and was surprised by how flavorful it was. They’ve been roasting their own turkey breasts since the deli opened in 1952, I think they have it down.
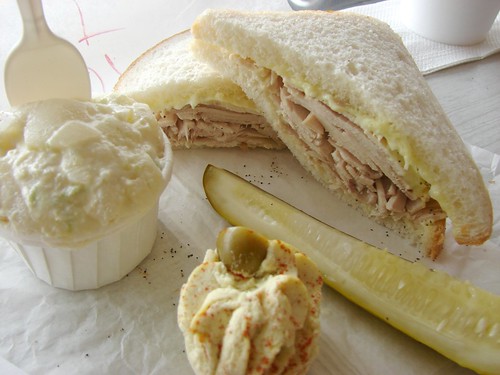
Now. For the really exciting part. Those sides. I love potato salad, but not the mustardy kind and not with a bunch of stuff in it. KISS (keep it simple, sweetie) is my motto. And KISS it they do. Loads of their amazing homemade mayo, piled with eggs and celery for some crunch, this potato salad ROCKS! It is so good that years ago Gourmet magazine sent a letter requesting their recipe!
Then we go into the deviled egg territory. Insanity, that is all I can say about it. Next time I go, I will have the chicken salad sandwich, apparently it is incredible. And I believe it, because I had a pixie of the egg salad… it was as if they just chopped the deviled eggs and stirred it all up.
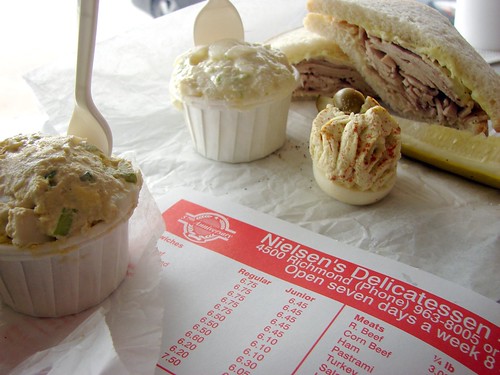
If you’re from Houston, you should definitely visit this Houston institution, do it soon! It’s just inside the loop at Richmond. If you’re coming to Houston for a visit, put this one on the list.
Nielsen’s Deli (daily from 8:00 a.m. to 4:00 p.m)
4500 Richmond Avenue
713.963.8005
Eating around,
Anamaris
The Back Story:
I’ve recently learned about a foodie site that is every foodie’s wet dream. I’m sorry, I’ve had that thought from the first day I landed on the site (Iron Foodie), but was trying to avoid being crass. The truth is, its fantasy land! I just saw they have an entry-level position open, I’m considering it. Not really, but if I had no responsibilities I totally would.
So, I’ve been glued to the website, reading old posts and such and then I found it. A post about no ordinary pork or pig. A post about sublime cured meat. A post asserting this ham was touted as the MacDaddy of hams. A post offering to share some of this goodness if one asked for it. So, I begged for it. And you know what? My Mami was right, if you don’t ask, you don’t get. And I GOT. I got it good! Shoulder is what I got.
The Mangalitsa Experience:
A few days later, I received my happy box in the mail. And this is what I saw after opening it. Ain’t she a beauty?
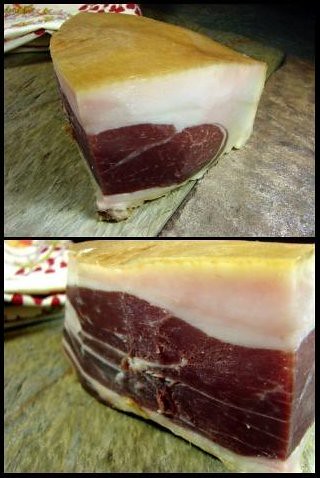
Let me tell you, they ain’t lyin’. This ham is sinfully delicious. I’ve had Jamón Ibérico and Prosciutto and I love them both, though I do prefer Ibérico over its Italian counterpart. But this baby. This baby’s got some mad skillz! Hold on, let me slice another nibble so I can properly describe it.
Very smoky. Salty with a mild sweetness. The meat is firm, like you would find in bacon and that fat. Oh boy. That’s where it is. It’s no wonder the fatty bits were considered the best sacrificial offerings.
Cooking with Mangalitsa:
Now I was tasked with cooking up a dish featuring the ham. So, as I reinvented turkey related meals, I kept thinking about this little piggy too. I had several thoughts, and I will bring at least one other one to fruition, but this one was incredibly simple AND delicious. And here it is.

Mangalitsa Crusted Halibut with Melted Cabbage & Fennel
For the Mangalitsa Crusted Halibut:
Thin slices of mangalitsa ham
2 halibut steaks
Sea salt
Freshly ground pepper
Powdered garlic
Extra virgin olive oil
Dry sherry
Butter
Note on substitutions: If you can’t get your hands on Mangalitsa, Ibérico would be a wonderful sub, in its absence, prosciutto would work, but try to find a fatty one. As for the fish, I wanted a meaty fish, cod or even tuna would work beautifully here.
Season the halibut steaks with salt, pepper and garlic. Wrap the mangalitsa around the steaks, try to keep the fatty parts on the surface–you don’t want the meaty sections to dry out while pan-frying.

Heat a saute pan over medium-high heat, until it smokes. Add a swirl of olive oil to the bottom of the pan and gently place the halibut into the pan to begin crisping the ham and cooking the fish.
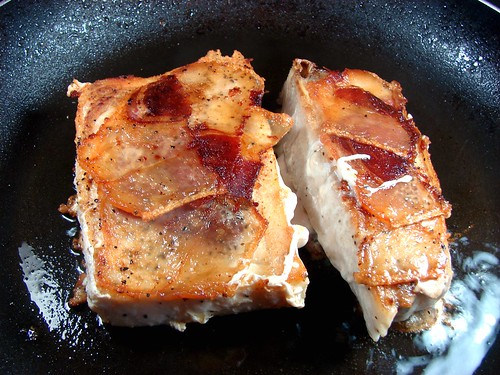
After about 3-4 minutes, depending on the thickness of the fish, flip them over to brown the other side. Cook them for another 3 minutes, then add about 3 tablespoons of sherry, let it bubble up and cover for about 2 minutes. Remove the lid and turn off the heat, then drop 1 tablespoon of cold butter. Swirl it around until it melts, drizzle over the fish when serving.
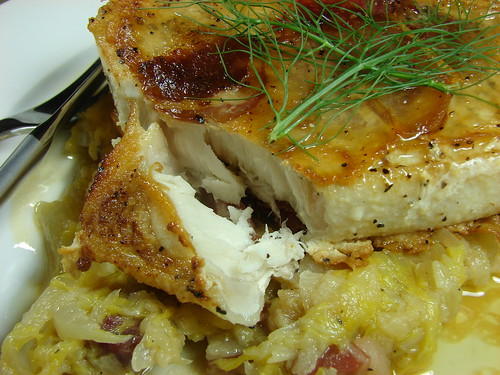
Melted Cabbage & Fennel:
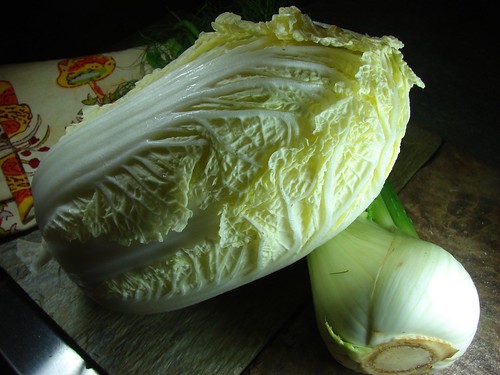
1 Savoy cabbage, thinly sliced
1 fennel bulb, thinly sliced
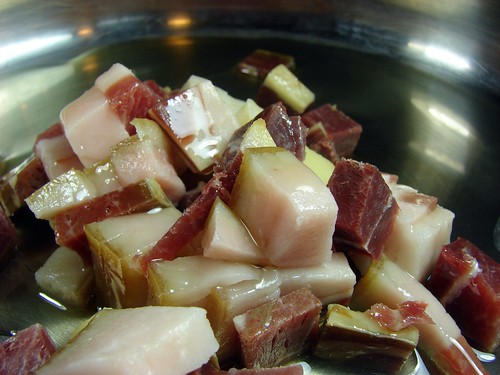
1/2 cp Mangalitsa ham, diced
Extra virgin olive oil
Butter
Sea salt
Freshly ground black pepper
In a medium skillet, heat up about 2 tablespoons of olive oil, then add the ham to brown and render some fat. Cook for about 5 minutes, making sure to stir it to avoid burning.
Add the sliced cabbage and fennel right over the ham. Cover for a few minutes to give them chance to wilt down. Once it wilts, it will be easier to stir into the ham. Continue cooking over medium-low heat until the cabbage and fennel seem to disintegrate, about 15 minutes.
Adjust the seasoning with salt & pepper, add 1 tablespoon of butter and serve under the fish.

To see more Mangalitsa love shots, follow this link to my photostream. Cookingly yours,
Anamaris
 I know what you’re thinking. That doesn’t look like dressing and you’d be right. I was going for a non-traditional dressing-like dressing and this is what I came up with. Looks good, no? Let me tell you, it tastes better than it looks, seriously. I don’t know that I would call this a deconstructed dressing, but it does have all the elements of a dressing presented individually.
In Panama we eat corn tortillas for breakfast, they’re usually served with some sort of saucy protein. As you can see, our tortillas are different from what most people think of when they hear the word. Ours are made with yellow corn, not white and they’re thick, about 1/2-inch. These discs are then deep-fried until crisp on the outside while they remain nice and creamy inside.
So, with that idea in mind, I set off looking for a way to imitate my tortillas, but I didn’t want to find dry corn, cook it, grind it, shape it, etcetera, etcetera. Instead, I used polenta that I cooked in about 6 minutes then cooled and cut into discs. Frying them just before serving, provided a much needed textural contrast. Beware, polenta is feisty when being fried, because of the water content, it is very spitty!
For the topping my mind went straight to picadillo, the kind we make in Panama with olives and raisins. Instead of ground beef, I went for a traditional Thanksgiving ingredient: breakfast sausage. And I cooked fatty bacon to a crisp to have a similar texture to chicharrón. And, just like that, Polenta Tortillas with Sausage & Chicharrón Picadillo was born!

Polenta Tortillas with Sausage & Chicharrón Picadillo
serves 8-10
For the Polenta Tortillas:
5-6 cps water
1-1/2 cps dry polenta or coarse cornmeal
1 tsp salt
1 tbsp butter
1 ear of corn, shucked
1/2 cp queso fresco, shredded
Extra virgin olive oil for the pan and frying
Grease a 9×13 pan with olive oil and set aside. Bring the water to a boil in a medium saucepan, add the salt then whisk in the polenta. You’ll want to whisk briskly until the grounds have incorporated. You will continue to cook it over medium-low heat for about 5 minutes or so, stirring constantly with a wooden spoon. Turn off the heat and stir in the butter, corn and cheese.
Pour the polenta into the prepared pan and spread it out evenly. Allow it to cool and set. You can make this ahead of time. When ready to serve, unmold the polenta and cut into squares or with a round biscuit cutter or a glass.
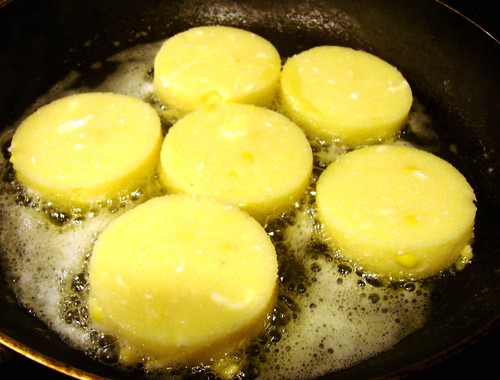
Heat some butter and oil in a frying pan, and fry the polenta disks until golden brown on each side. Set on paper towels to catch the excess fat. Set aside and keep warm until ready to serve.
For the Sausage & Chicharrón Picadillo:
1 cp fatty bacon, diced
1 cp breakfast sausage (about 1/2 of a Jimmy Dean package)
1 cp red onion, diced
1/2 cp carrots, diced
3 green onions, finely chopped
1/4 cp Italian parsley, finely chopped
1/2 cp ripe tomato, finely chopped
2 tbsps ketchup
1/4 cp green olives, finely chopped
1/2 cp seedless raisins
Cook the bacon until golden and crisp, remove from the pan and pour out the excess fat, reserve. In the same pan, crumble the sausage and cook for a few minutes until it isn’t red anymore.

Add the red onion and carrots and cook until the onions have softened, then add the tomato, green onions, parsley, olives and ketchup, stir all the ingredients and allow them to cook for about 5 minutes. Add the raisins and also about 1/4 cp of water, stir and allow to simmer covered for another 5 minutes or so. Keep warm.
To assemble the dish: place the fried polenta at the bottom, top with 1 tablespoon of picadillo, and top that with a bit of the bacon chicharron.
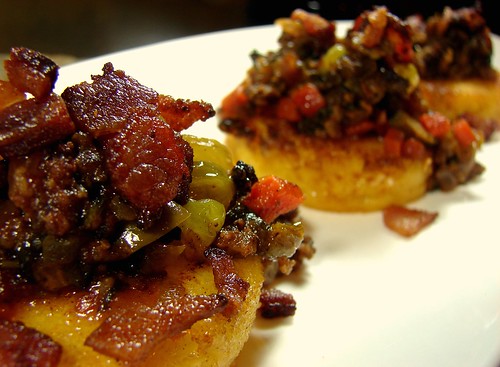
For the rest of this meal, follow the link and visit the photostream for all the shots.
Cookingly yours,
Anamaris
I told you before I would make a pre-turkey day dinner for your benefit, but I lied. Don’t get me wrong, you do benefit from this, but I didn’t make this dinner just because of you. The truth is, I love turkey and would eat it year-round, so when this time of the year comes and the turkeys are plentiful… I eat and eat and, well, eat.
So, I set out to put together a Thanksgiving meal that spoke to my Latin roots while still honoring the traditional ingredients. With a little push from The Hubbz and an abandonment of safety nets, I came with what I believe is an incredible menu.

yep, that's the beginning of the menu
Pay attention, this is where you benefit: I’m about to share all of it with you! The menu. The thought process. The planning. The execution. I’m sharing it all with you in the hopes that you’ll be encouraged to recreate one or more of the dishes or that you’ll through caution to the wind and try something you’ve been thinking about for while.
The Thought Process:
Cocktails: I didn’t want anything too heavy or pumpkiny, but I still wanted to keep Thanksgiving colors in mind. I knew it needed to be spicy/flavorful.
Appetizer: I went for a soup, but wanted to keep it light while flavorful and I wanted to work sweet potatoes in the menu.
Turkey: Moist is always my first priority, so I knew I would brine it. I wanted to pick up on subtle Latin flavors without fussing too much over the bird.
Gravy: It’s like the chicken & the egg. Can’t have one without the other.
Accompanientment: Usually cranberry and, I’m sorry but I have to admit I love the canned stuff, but I needed to kick up a notch. I immediately thought guayaba! Or guava as its known stateside.
Dressing: Cornbread dressing is my absolute favorite even if traditional. My thoughts were to have corn patties topped with the extras usually found in dressing. I wanted to recreate a sophisticated version of a Panamanian tortilla.
Vegetables: Indispensable, and these pickled ones help cut through the heavy meal.
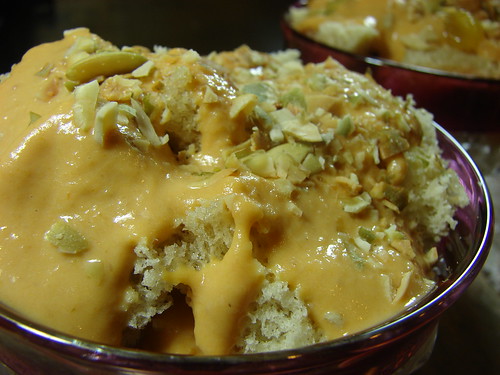
Dessert: A traditional dessert found at weddings in Panama. This is pumpkin brought to Jimmy Choo levels.
The Menu
Apricot Gingersnap Cocktail
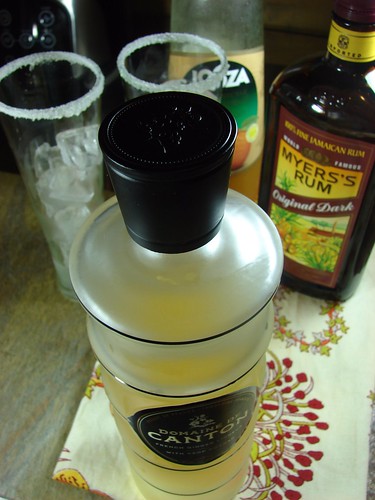
Sweet Potato Cream with Chorizo Garnish

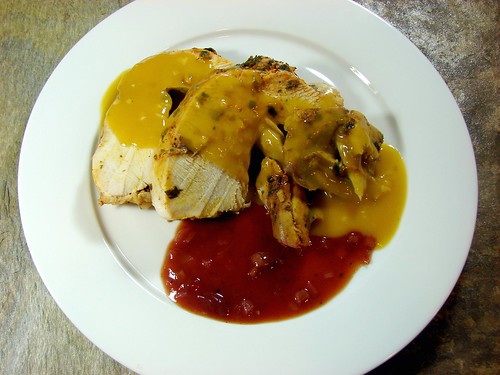
Achiote & Herbs Turkey
-Garlic Butter Gravy
-Guayaba Compote
Polenta Tortillas with Sausage & Chicharron Picadillo

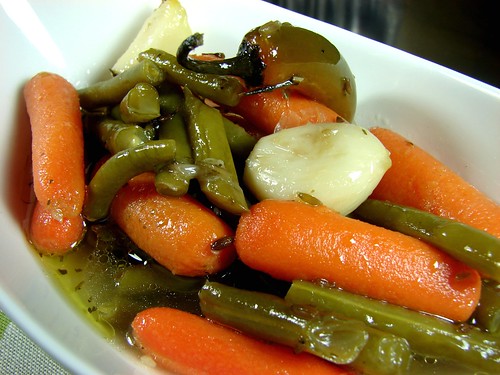
Green Bean & Carrots Escabeche
Pumpkin Sopa de Gloria
The Planning
Putting a big meal together, particularly when you have to stick to a schedule or a set dinnertime can be overwhelming. Lists make it easier. It doesn’t matter what type of project I’m working on, a list always makes me feel at ease, like I can get it done. When I just think of the big picture or the end product I can’t help but feel a bit of anxiety, like I’m going to forget something or that I don’t have enough time to finish. Lists are good. Lists are your friend.
After I had finalized the menu, I wrote down each dish and broke it down by steps. I then prioritized the order in which to execute each step.

pardon my handwriting...
The Execution - for the recipes, click on the links.
Gobble, gobble!
Cookingly yours,
Anamaris
I wanted to bring you more side dishes. Don’t get me wrong, there’s nothing wrong with the traditional stuff, believe you me, but sometimes change is good. At the very least, you should explore your possibilities. I’m just sayin’.
Let’s talk green beans. I love me some of that creamy green bean casserole. I look forward to it every year. But here are a couple of other ways to have the green things, and to make it even better, these can be made ahead. AND, they got that sabor latino going on. As a matter of fact, they’re improved by resting.

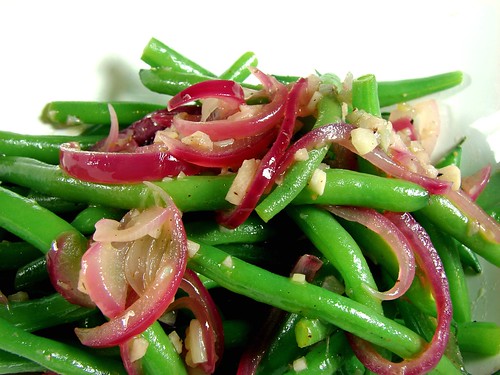
I’ll start you off with an adaptation of Rick Bayless’ recipe for Jalapeños en Escabeche. This one definitely needs to be made at least 1 day before you need to serve it. This will allow the vinegar to mellow and all the flavors to mellow.
Green Beans and Carrots Escabeche (Pickled Green Beans and Carrots)
adapted from Rick Bayless’ Mexico One Plate at a Time
1/3 cp oil (I combined extra virgin olive & vegetable)
10 cloves garlic, peeled
2 cps baby carrots
2 cps fresh green beans
4-8 serrano peppers, whole
1-1/2 cps cider vinegar
3 bay leaves
1 tsp Herbs d’Provence
1 tsp dry lavender
Sea salt
Freshly ground black pepper
Sugar

In a skillet, heat the oil over medium heat, then add the garlic. Allow the garlic to cook for about 3 minutes, making sure to turn them occasionally so they don’t turn brown. Next, add the carrots, green beans (I cut the beans to 2-inch pieces) and peppers. Keep stirring to coat the veggies and allow them to begin softening for about 5 minutes.
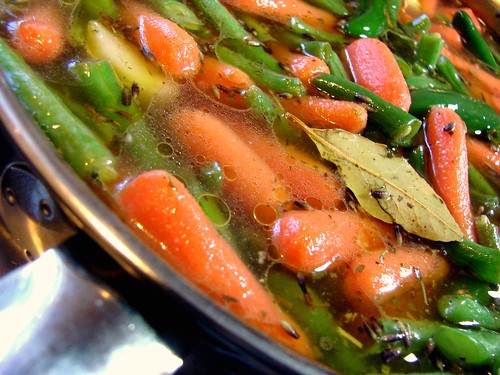
Stir in the vinegar, bay leaves, Herbs d’Provence, lavender, about 1 teaspoon salt, 1 tsp sugar, ground pepper and about 1-1/2 cps water. Allow it to come to a soft simmer, before loosely covering the pot. Simmer for about 10 minutes. Allow it cool before transferring to a non-aluminum container to refrigerate overnight.

As long as you keep them chilled, these will keep for well over a month.
Next, we are revisiting the Mojo. No, not the Austin Powers mojo, but Mojo Criollo. A few weeks ago I shared a recipe to use on yuca or potatoes. This time we’re following the basic recipe and adding some onions. Check it out.
Green Beans with Mojo Criollo
2/3 cp olive oil
3 cloves garlic, minced
1/2 cp red onions, sliced
Juice of 1 lime
2 tbsp white vinegar
Sea salt
1 tsp sugar
Fresh green beans, trimmed & blanched
To blanch the green beans: bring a pot of salted water to a boil, drop the green beans in the boiling water and allow them to cook for about 3-4 minutes. Drain and plunge the green beans in ice-cold water. This will stop them from cooking and will preserve the pretty green color.
Next, prepare the mojo. Heat up a small pan over medium temperature and add the minced garlic, make sure to stir it constantly to avoid burning it, about 1-2 minutes. Add the onions and cook until softened.
Once the onions have softened, add the lime juice and vinegar. Stir until well blended, then season with a bit of salt, black pepper and sugar. Allow it to cook for about 5 minutes over medium low temperature. Add the green beans and remove it from the heat.
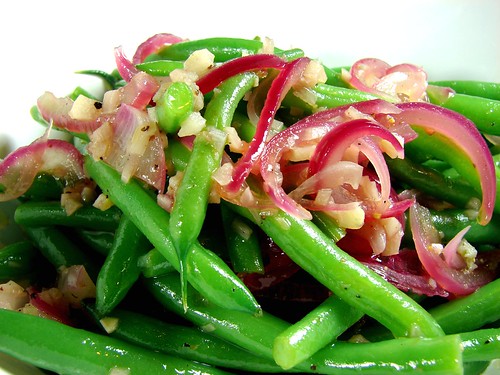
You’re done. This one will work if made a day in advance. You can make the mojo the day before, then blanch the green beans just before serving. Or, you can make the whole thing the day before and just reheat when it’s dinner time.
For more food porn shots, click the link.
Cookingly yours,
Anamaris


