I’ve always found that to be an odd expression. The phrase itself sounds innocuous to me, but the meaning behind it makes sense. To share, to open one’s home and/or heart to another, to be welcoming. Philosophically, the idea of breaking bread is a great one. In reality, the idea of having to share my bread with someone, elicits murderous thoughts. No. Really. Don’t touch my bread!
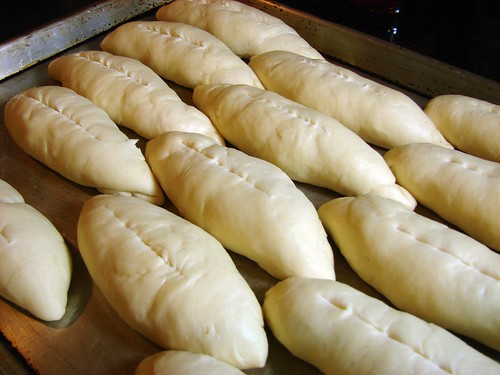
Luckily, when I bake bread, the recipe results in enough of it that I’m able to, even if begrudgingly, share it with one or two people. Tops. You get the picture. So, a few weeks ago I made some bread. Panamanian bread, something we call Pan Micha.
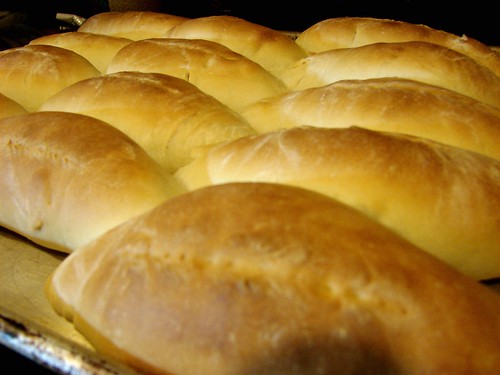
Rumor has it, this recipe was brought to my homeland by the French when they attempted building the Canal. I have no verification for that story, but I do recognize some similarities with French miche bread. Thin, golden crust and soft, light inside. What I do know for sure, if that you will find michitas anywhere there is a bakery in Panama.
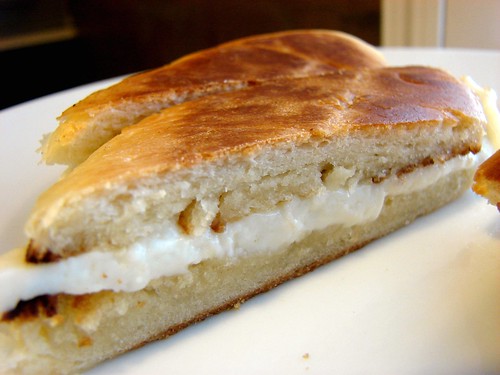
I remember walking to school and stopping by the corner bakery–the aroma of freshly baked bread wafting in the air–and ordering ‘una michita con queso blanco y mantequilla‘ (a buttered michita stuffed with white cheese). Aaaaah, the bread would still be warm, the butter and local cheese melting into the center. Heavenly.
I found a recipe for it here, so I won’t retype it, just follow the link. What I want to tell you about, is how we ate them, after all, eating them is the best part.
You know I’m a traditionalist, so mine had butter and Queso Fresco. Nothing else needed. I did toast them a bit.
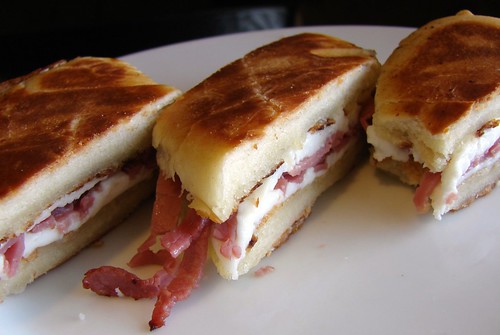
The Hubbz is a different story. He’s a man of excess, so he added some roast beef we had in the fridge. In Panama, we would’ve used ham or chorizo.
The bread was good, but not as light and airy as I remember michitas being, my quest for the perfect recipe continues.
Cookingly yours,
Anamaris
Around the holidays, I made some Mexican tamales, those were oh so good, we’re still eating on them. But I had a bit of the corn masa leftover… oh, what to do? What to do? The Hubbz loves Salvadorian pupusas and has been asking me to try my hand at them for a while. Leftover masa? Perfect opportunity.

White corn is very popular throughout all of Central America, except for Panama. In my little country, yellow corn is king, the white variety wasn’t really known until recent years.
Pupusas, a funny name for the Spanish speakers, but a seriously delicious treat. Salvadorian pupusas are similar to Venezuelan arepas and Mexican gorditas, except that pupusas are filled, then grilled. A sort of round corn empanada, really. Most commonly, you’ll find these filled with chicharrón (fatty, crisp pork), cheese and black beans. However, fillings are only limited by the cook’s imagination.

I opted to go for the cheese and chicharrón filling. Since I had rendered some pork fat, I was in possession of some choice pork cracklings and there’s ALWAYS queso fresco in da’ house! Check it out:
Pork & Cheese Pupusas
I mixed some of the fresh masa with a bit of pork lard and seasoned it with salt. It isn’t necessary to add either of those things, but I find the corn masa to be bland and dry and I wanted a flavorful, moist pupusa. If you’re using dry masa, simply follow the packaging instructions and add enough water to have a somewhat soft and pliable dough, season or not as you prefer. Shape the masa into balls.
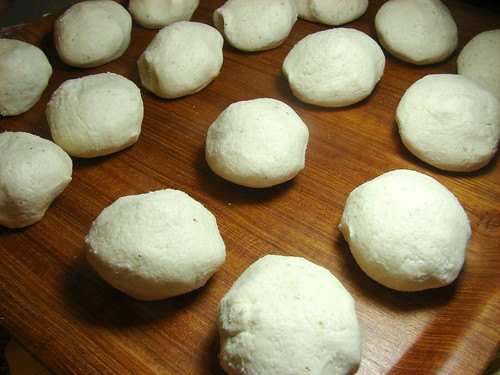
Then flatten and begin adding the filling. I’ve seen this done from a single ball that is stuffed and flattened, but I found it a lot easier to use 2 flatten balls, put the filling on top of one and top with the other half. Seal the edges by pinching them together.
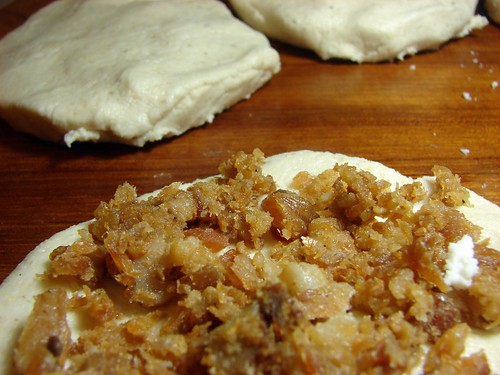
If you have a comal or a cast iron skillet, that’s the best way to grill these. If not, any non-stick skillet will work. Brown on each side over medium temperature. You want to make sure the dough cooks through and the filling is warmed up, so watch the temperature. They should sound kinda hollow when you thump them, that’s how I know they’re cooked through.

Typically, these are served with curtido, a pickled cabbage salad. I’m not a cabbage fan, but I did have pickled carrots and I made a dipping sauce with crema fresca and homemade salsa. Yum!

Here’s more pupusa action here.
Cookingly yours,
Anamaris
 What? Haven’t you heard about YAWYEOR? All the cool kids are doing it! You Are What You Eat Or Reheat is Katie O’s pride and joy and the first bloggy friend I made once I started blogging. She’s funny, talented and obssessed with aprons.
Katie combines cooking, photography and general living madness and shares all of this with a flair of whimsy. She has a weekly feature called White Trash Wednesdays, it’s all about food, y’know, white trashy food. I had to check it out and so should you! Take it away, Katie!
What is the elevator pitch for your blog?
Nothing more than the musings of a wannabe foodie.
Why and when did you decide to become a blogger?
I’ve actually been blogging since July 27th, 2004. My friends and I decided it would be a clever way to keep up with one another’s lives by posting the goings on on a blog. Of course, I’m the one who pushed everyone into it…
What’s next for your blog?
Yikes. Scary question. I’m actually considering scaling back a bit. I used to blog daily, but the daily grind of life has put a real kink in my schedule. I’m considering gearing the whole things towards the White Trash Wednesday recipes…
Would you rather be a Walton, one of the Brady kids or live on the little house on the prairie?
I never got the appeal of the Waltons. The Brady kids shared one bathroom. And as much as I totally wanted to be Laura Ingalls, I enjoy tv too much. Can I vote for being one of the kids on Family Ties? I was always itching to be one of the Keatons! (Or at least look like Mallory?)
Who is the most interesting man in the world?
I’m pretty sure I should come up with some profound answer, but I’ll go with Harry Potter.
You’re comfortably watching TV one night after eating all your delivery pizza, when surprise guests knock on your door. As the consummate hostess, you quickly whip up a batch of…
glasses of wine….or beer.
What’s the last bad habit you broke?
yeah, umm, what?
I’m sure Katy is happy not to look like Mallory today. She went nutso with the plastic surgeries. Not. Good.
I also asked Katie to share one of her posts with us. Appropriately, she chose one of her White Trash Wednesday meals. Breakfast, to be exact. She says she loves the pictures on this one and I agree. These look scrumptious! Click on the picture for the recipe. I think you should make these for the Thanksgiving weekend, you’d be a hit!
Black & Blue Pancakes
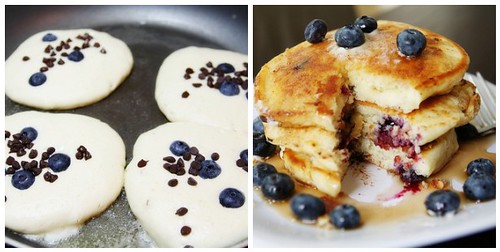
“The pictures are some of my favorites and this was one of the few WTW dishes I’ve actually made! ACK!”
katie o.
So there you have it. Another faboo blogger you must add to your favorites.
You can check the foodie action at you are what you eat…or reheat.com, once your tummy growls insanely, go look at the pretty pictures over at www.daytodayphotos.com.
Go already!
Anamaris
 Another month, another group bake. This month the Mellow Bakers are working on pizzas, among other breads. I love pizza, well, I love pizza crust. But it is tough to find one that love. There’s a pizza place that’s been around for ages, Antonio’s Flying Pizza has, quite possibly, the best pizza in Houston. Hand-tossed, with a crisp, thin center and pillowy, chewy edges. They also have an awesome sauce and DO NOT overuse it. OHMY!
Well, thanks to Mr. Hamelman, I’ve found the 2nd best pizza crust. It’s on page 273 of his book Bread. I thought this was a good opportunity to have a few friends over and see what would happen when I tried my hand at pizza-making. Let me tell you, it went VERY well. I’ll walk you through it.
The dough starts off a day in advance with the fermentation of a biga. A biga is a pre-ferment. This produces organic acids which significantly contribute to the structure and development of the dough and, ultimately, the rise and flavor of the bread.
In this case, the biga needs to develop for at least 12 hours, mine went for a little over 16. I have to confess, though, this biga was quite different from the ones I’ve made thus far. It actually freaked me out! First, it was a VERY tough dough, the pre-ferments I’ve done before were anywhere from runny to medium-stiffness. Second, it rose like gangbusters! Within 3 hours it had tripled in size. Previous ferments developed very slowly. To avoid what I thought might’ve ended up being over-development, I put it in the fridge overnight and removed it a couple of hours before I was ready to make the full dough.
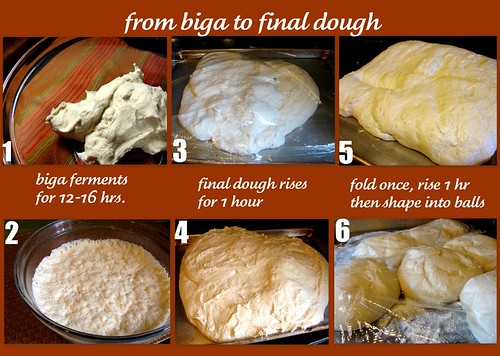
Crisis averted, I began working on the final dough about 3-4 hours before my friends were to arrive. Per the formula (that’s what they call bread recipes, how very scientific!), the dough needed to rise for about 2-1/2 hours before baking. Friends were due at 8ish, I began the dough around 3ish.
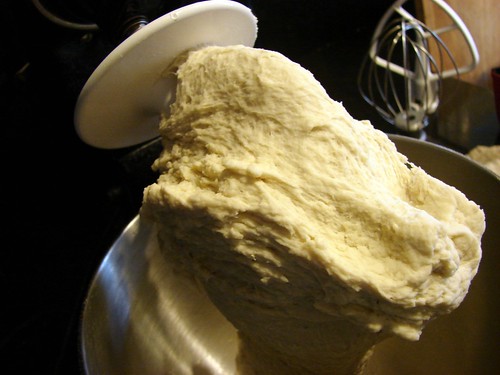
I opted to half the baker’s recipe, so I ended up with 5lbs of completed dough, which was then divided into 13 balls weighing approximately 6.5 oz each to make small personal pizzas. The collage shows the steps necessary prior to adding toppings and baking.
The oven is preheated to its maximum, 550° in mine, with the baking stone/pan left in the oven so it is smoking hot before the pizza goes on. A fellow Mellow Baker indicated they used the back of a cast iron skillet. This was a genius suggestion because we only have a medium sized pizza stone, but I do have large cast iron grill. And that’s what I used to bake these babies. Sprinkled some semolina on the stone and grill, then slid the topped pizzas over top.
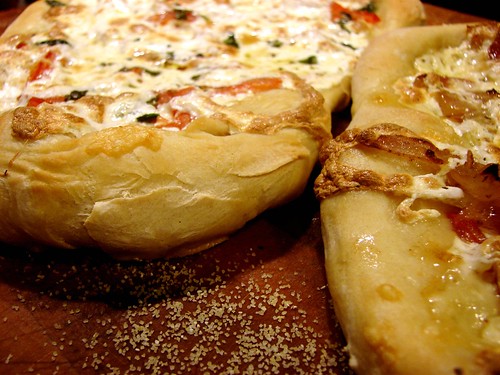
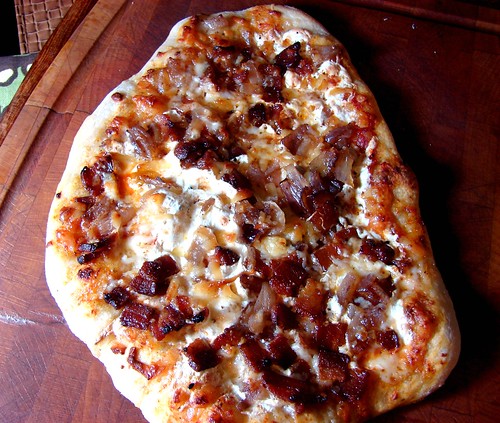
They baked for about 10-15 minutes and were perfectly delicious. Check’em out.

Cookingly yours,
Anamaris
I like bagels. I won’t say I love them, because it’s not that intense between us. I don’t eat a lot of bagels because I have a tough time finding bagels that balance chewiness with the necessary crust. But when the Mellow Bakers added bagels to April’s lineup, I knew I was gonna try them.
Yes, I’m behind on this submission. I’ve been busy traveling. The good news is, this is a relaxed baking group, hence the name, Mellow Bakers. I had to order things I’d never heard of such as diastatic malt powder and syrup. I also got some of that coveted high gluten flour because I’m pretending to be serious about this bread making business.
I started the dough yesterday and was immediately struck by the scent of yeast. I’ve decided it is one of my favorite smells now. Slightly sweet, with an underlying pungency. Filled with the promise of glorious bread. Yep, I’m digging the breading.
I followed most of Mr. Hamelman’s instructions for the home batch, but added a bit more salt because I use sea salt instead of the regular stuff and about 1-2 tbsps more water to keep the dough pliable. I also allowed the dough to ferment a bit longer before shaping, an extra hour to be exact.
This is the first time I weighed dough before shaping. Hamelman suggested making each bagel with 4 ozs of dough, but I wanted mine just slightly smaller, so I weighed to 3ozs and ended up with 22 bagels.
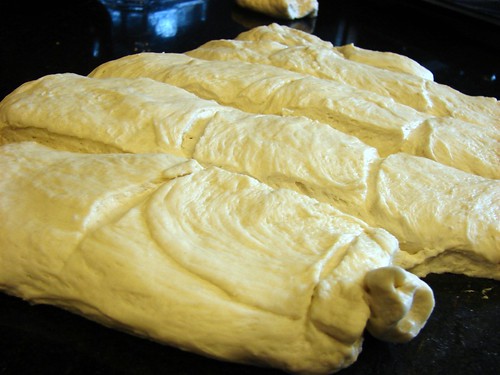
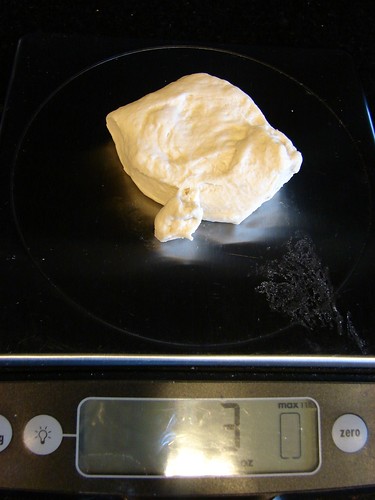
When it came time to shape them, I tried both methods: rolling and poking.
Rolling and wrapping: roll each piece of dough to about 6-8 inches long, then wrap it around the broadest part of your hand slightly overlapping the ends. Roll your hand back and forth on the counter to seal the ends together.
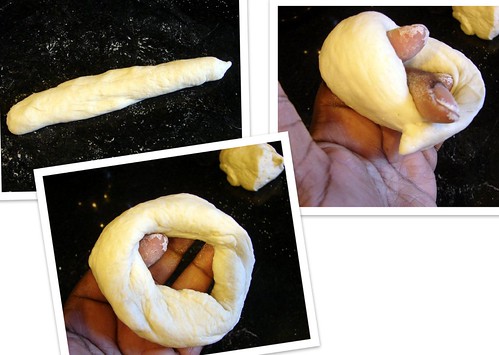
Poking: shape the dough pieces into tight balls, poke a hole in the center with your thumb. From the center gently pull until you have a nice size hole in the center.

Place the finished bagels on a sheet pan that has been sprinkled with cornmeal. Cover with plastic wrap, they’re now ready to be stashed in the fridge overnight or at least for 6 hours.
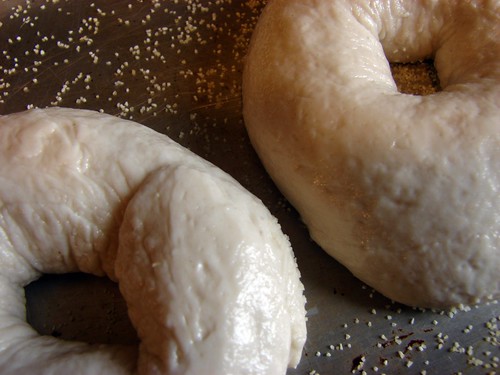
The next day when you’re ready to bake, preheat the oven. The book suggested taking it to 500°F, but I’ve noticed that when I heat the oven that high, it browns my breads too quickly, so I went for 475° and placed my baking stone on the first rack.
First step requires the bagels to be boiled. I added malt syrup to a large stockpan filled with water and brought it to a boil. I used enough syrup to make the water look like strong tea. The idea behind this step is to reactivate the yeast since it has been refrigerated for a while. The other benefit of this step is to gelatinize the starch on the surface so you end up with beautifully chewy bagels.
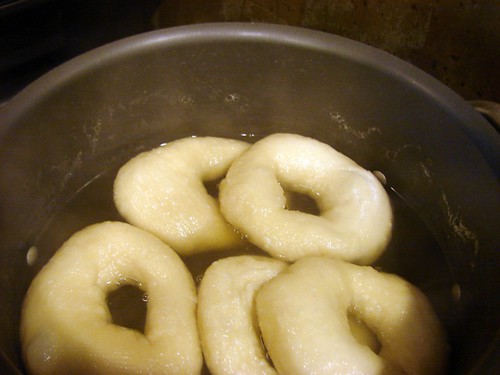
I had the benefit of reading the comments from other bakers before I began my bagel process, so I learned from some of their challenges and took some precautions or made some changes. The first change was to pull the bagels out of the fridge and allow them to slowly come to room temperature. This wasn’t intentional, but I noticed that the bagels I boiled & baked last were a lot puffier than the first batch. Since I didn’t have a bagel board, I boiled & baked in batches of 5-7 bagels at a time.
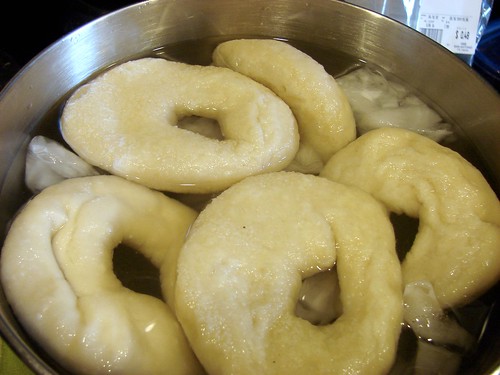
Also, instead of leaving them in the water for 45 seconds as suggested in the book, I allowed them to stay in for a few minutes until *I* noticed that they were swelling. Then I removed from the water and placed them in an ice bath as instructed for 3 or 4 minutes. Transfer them to a baking sheet/stone that has been sprinkled with cornmeal.
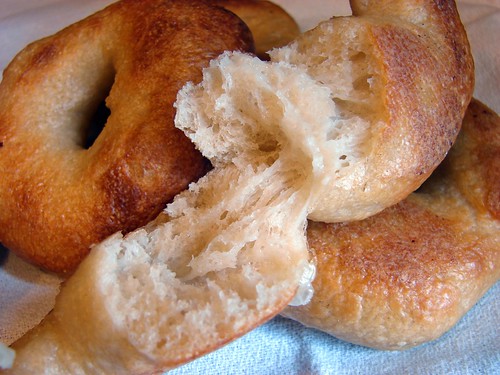
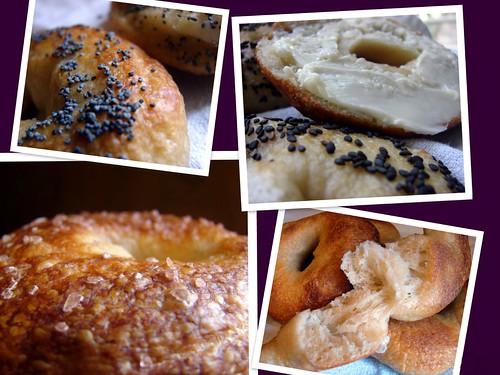
The first batch I made was plain, no toppings. For the second batch, I followed the same steps: boiling, icing, draining, but before placing them on the stone press one side into a plate of sesame seeds, poppy seeds, onion flakes, or seeds of your choice, then put them on the stone or sheet pan.
The instructions were to put the seeded side down and then flip the bagels halfway through baking. As a matter of fact, the instructions are to flip them regardless of topping or not. I didn’t like the way the looked after flipping, they seemed flat and distorted. I’m probably doing something wrong, but I liked them best left alone. I baked the topped ones with the topping on top and simply rotated the stone at 5 minute intervals. They baked for a total of 15 minutes or so.
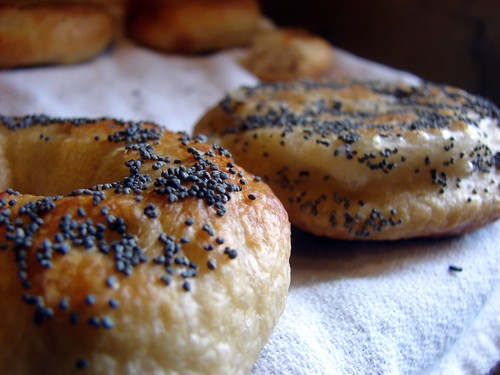
In the end, the bagels were chewy and crusty, just the way I like them. On the last batch, I noticed that while boiling, some of the surface gets very thin–gelatinous and it can burst allowing water to hide inside. In those cases, the center was a bit doughy. I caught on the very last batch and made sure to drain that water out before putting the bagel on the stone.
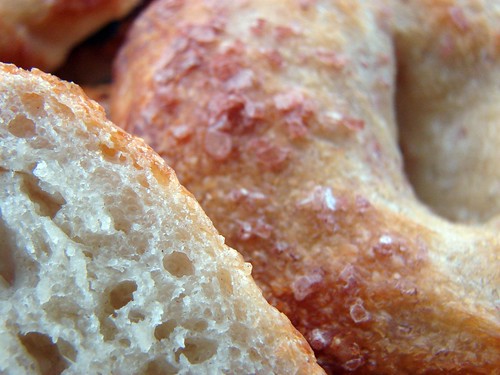
I’m so glad I tried these. I’m a happy bagel camper and if you’d like to check out the bagels by some of my other mellow cohorts, follow this link to the bagel gallery.
Cookingly yours,
Anamaris

Don’t you just love it when 2+2=4? When things just don’t seem to be lining up and then they just all come together? Cooking and baking should be fun, stress free, an opportunity to wing it. Baking is scientific, so you do need to follow a recipe’s measurements, but that doesn’t mean you can’t make substitutions.
 A couple of weeks ago, Andrea from Family&Food invited me to participate in a new bread baking group: Mellow Bakers. Much like the BBA, they plan on following recipes from a specific cookbook, Bread by Jeffrey Hamelman. What drew me to this group is the idea of baking at a mellow pace. I love bread, but I’m trying to stay away from it AND I don’t really want to feel pressured to making a bread a week. So this group suits me just fine.
Paul from Yumarama is the group’s hallway monitor, he suggested we bake a bread a month, further, you can bake the chosen recipe or try a different one if that one doesn’t speak to you. See? Mellow. So the first bread was picked: Traditional English Hot Cross Buns.
I tweaked this recipe out of necessity, and also desire. Let me tell you about my complications. I don’t like lemon peel, from the go I knew I wouldn’t use that. As I thought about it, I knew I wanted to use candied ginger instead. And currants are ok, but I had these gorgeous Sultanas in my pantry… no way I was going to ignore them and purchase currants in their stead. Then…, I had car issues and never made it to the store to purchase the candied ginger AND I ran out of granulated sugar!!! Thankfully, I had brown sugar.
To deal with the lack of candied ginger, and since the recipe calls for simple syrup, I minced fresh ginger and added it when I made the brown sugar simple syrup. The result? Little flecks of sweet gingery goodness that perfumed the buns and a flavorful glaze to brush the tops. SCORE!

Hot Cross Buns
makes 13 buns
For the sponge:
1/4 cp bread flour
7/8 oz milk, warm
1/2 tbsp sugar
2-1/4 tsp dry yeast
This is the runniest sponge I’ve ever made, out of like 5 so far. It was easy to mix by hand. Warm the milk, it just needs to be tepid and mix the yeast into it. In a separate bowl, combine the flour and sugar, then add the yeasty milk and whisk until well incorporated.
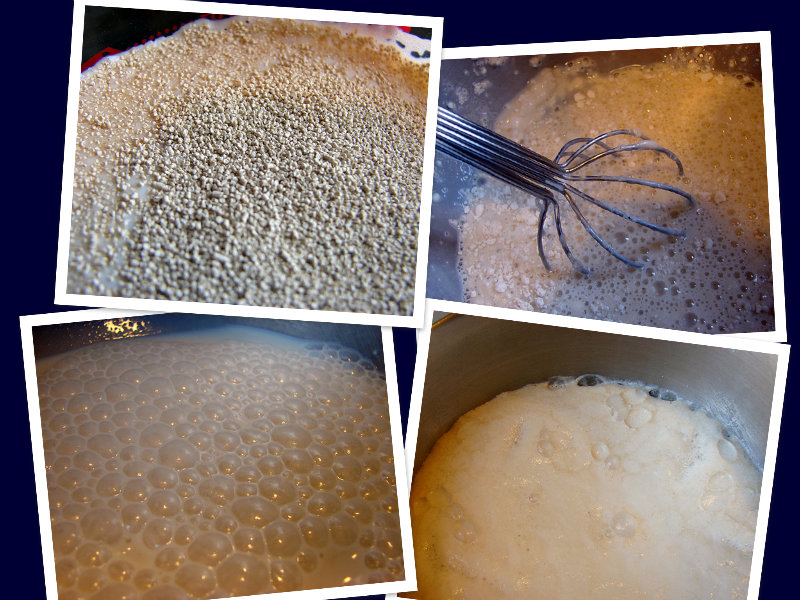
Set aside, cover with plastic wrap and allow it to rise for about 45 minutes. Although it may seem unlikely, it will double in size and hold its shape quite nicely. It looked like a souffle!
If you plan to follow my recipe as I prepared it, then this is a good time to make the simple syrup. However, if you opted for ready-made candied ginger, then you can make the syrup later.
For the syrup and ginger:
1/4 cp ginger, finely minced (approx)
1/2 cp brown sugar
1/2 cp water
Combine all ingredients in a small saucepan and bring to a boil over medium heat. Allow it simmer until the sugar is completely dissolved and the syrup begins to thicken. It took about 15-20 minutes. Remove the ginger bits and set the syrup aside to cool.
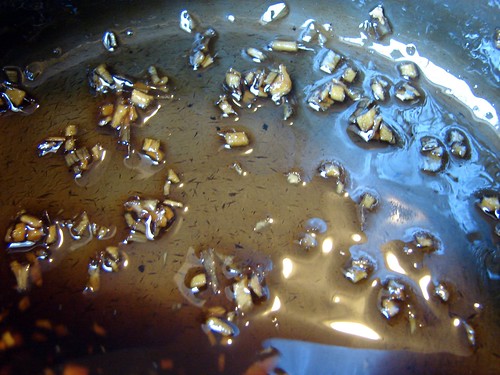
Combine the ginger with the raisins.
 For the dough:
2-3/4 cps bread flour
4 tbsp butter, softened
1 egg, at room temperature
1/4 cp sugar
3/4 tsp sea salt (a bit less if using regular salt)
1-1/2 tbsp allspice
3/4 cp golden raisins
2 tbsp candied ginger, finely minced
In your mixer’s bowl, combine the flour, sugar, salt and allspice then mix in the butter. Mix until the butter has dispersed evenly into the flour.
Mix in the egg, then add the sponge and continue mixing for about 3 minutes to develop the gluten.
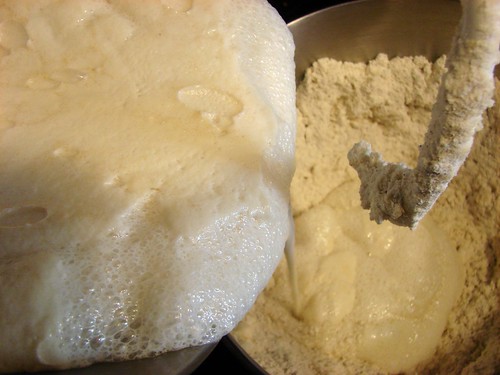
Add the raisins and ginger mixture and beat until evenly incorporated. Scrape the sides and cover the bowl with plastic wrap, set aside and allow it rise for 1 to 2 hours.
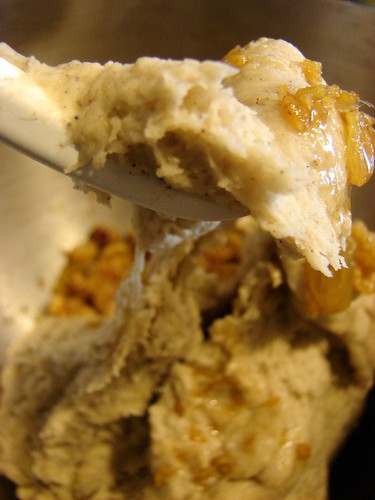
After it has doubled in size, turn the dough onto your countertop and divide it into 12 (or so) even pieces. I got 13 pieces slightly larger than a golf ball. Time to shape the pretty buns.
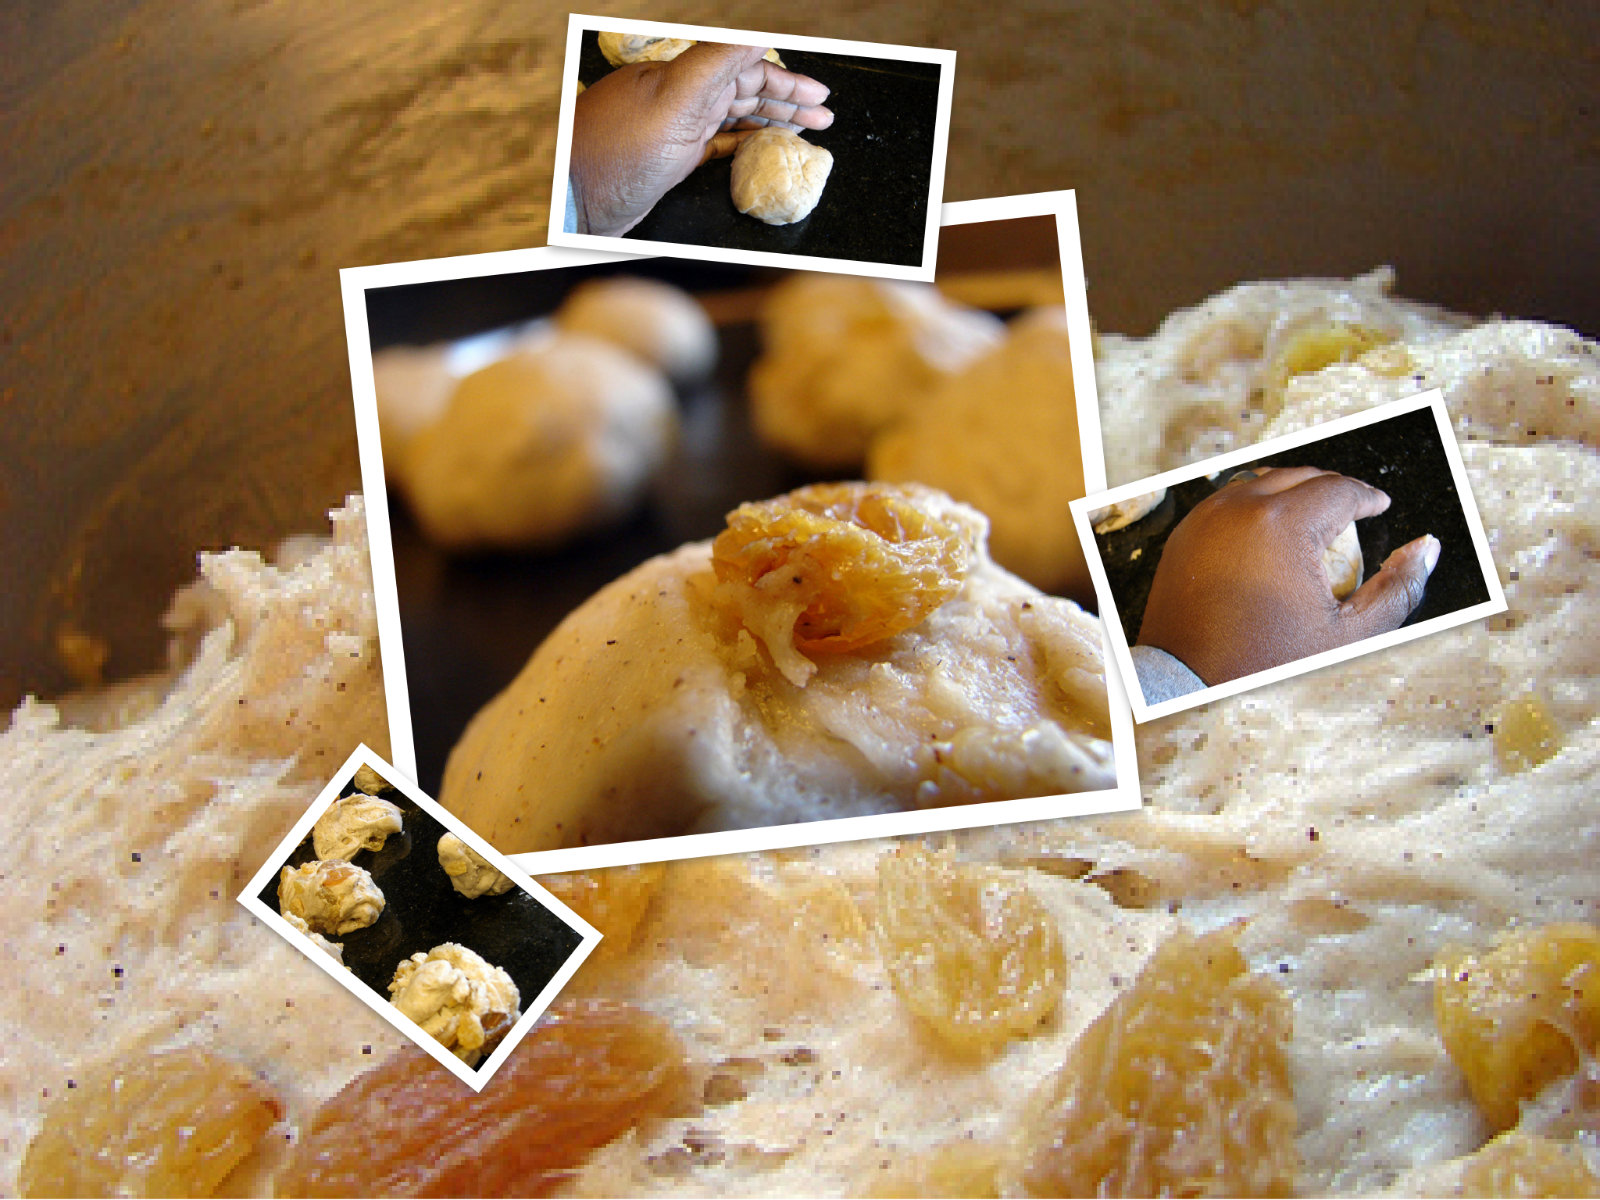
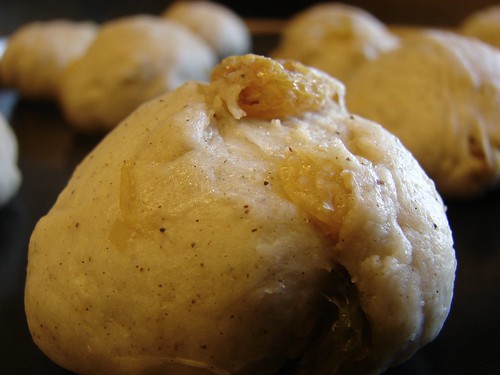
Take each piece and roll into a ball by cupping your hand over it and rolling it on the countertop. You may have a seam, make sure you keep it at the bottom when you transfer the buns to a baking sheet prepared with silpat or parchment paper. Repeat until all buns are done.
Cover the buns with plastic wrap and allow them to double in size for another hour. While they rise, prepare the crossing paste and simple syrup, if you haven’t yet.
For the crossing paste:
In a small bowl combine 1 cp all purpose flour, 3 tbsp oil, about 1/2 cp water. Add water a bit at a time, you want the paste to be smooth and thick, about the consistency of ketchup… Keep in mind that this will need to go through a piping bag, you don’t want it to be too thick or too thin.
Once the buns have risen to twice their original size, preheat the oven to 440. Dump the paste into a piping bag fitted with a medium size round tip. I only had a star tip, that’s what I used. Pipe a line across the middle of the buns going in one direction, then rotate the sheet 90 degrees and pipe lines transecting the first ones, forming a cross.

Pop the tray in the oven for 12-15 minutes or until the tops are golden brown. As soon as they come out of the oven, brush the tops with the cooled syrup.
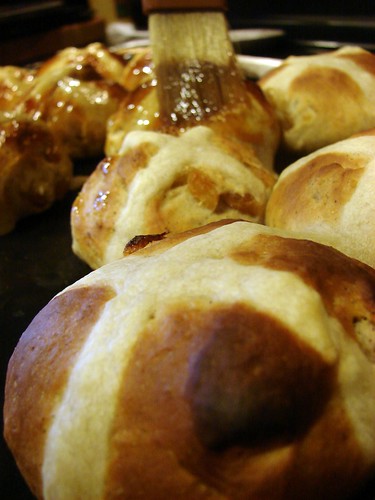
These are delicious fresh out of the oven, with a dab of butter.
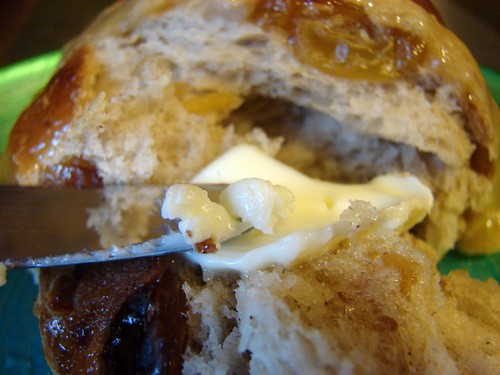
The other option is to eat them Caribbean style. See, as I read this recipe, I realized these sounded a lot like ‘bon‘ I used to eat in Panama. Bon is a cross between a bun and a fruitcake. These seem lighter than I remember bons being, and I like that, but the taste is pretty close.

In Panama, they will serve you a slice of bon, it is buttered and topped with American cheese. So I sliced my buns, toasted them on a skillet with plenty of butter and topped them with sliced cheddar.

You be the judge.

Cookingly yours,
Anamaris
Once I won a ToastMasters Impromptu Award for sharing my dislike of bananas. They still call me the Banana Lady at work. I have a banana mental block: its smell, the way it looks when exposed to air, the texture. Believe me, I have banana issues. Big ones, but I won’t bore you with them. HOWEVER, there are 2 things I like banana hints in: banana bread and banana fritters. The fritters are another goody my mom used to make when I was growing up.
I’ve been thinking about banana fritters for a while now, so when I bought a share of produce from a local farmers market association-group-co op thing and it included bananas, I knew the time had come. I stared at them for days waiting for them to ripen enough to make these fritters. Then they were ready, so here you go:
Banana Fritters
About 10 fritters
2 very ripe bananas
1 egg, beaten
2 tbsp sugar
1 cp flour
2 tsp baking powder
2 tbsp milk
1 tbsp butter, melted
1/4 tsp grated nutmeg
1/4 tsp sea salt
Oil for deep-frying
Mash the bananas, it’s ok to have a few lumps. Stir in the egg, then the rest of the ingredients, until you end up with a pretty thick batter.
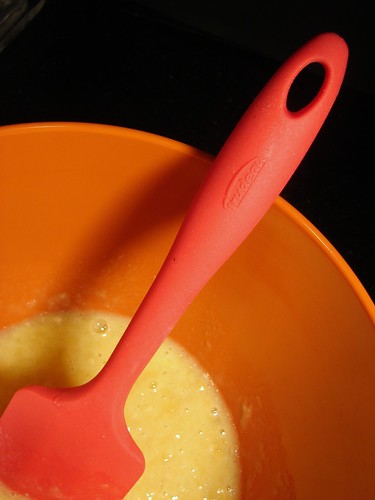
Preheat the oil over medium temperature; you don’t want to fry them too hot, otherwise they will brown while remaining raw in the center. Use a large soup spoon to pour the batter. Here’s a trick: dip the spoon in oil before scooping batter from the bowl, this will keep the batter from sticking to the spoon.

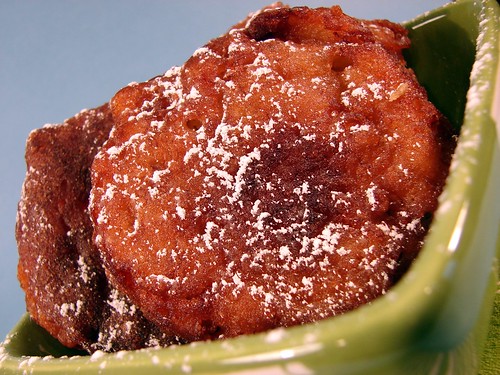
Drop the batter into the oil and spoon some of the hot oil over the fritters. This helps seal the top and makes it easier to flip. Fry for about 2 minutes per side until lightly brown and crisp on the edges. Once you flip them, give them a little squeeze, this helps to cook through the middle.

Drain on paper towel and serve dusted with powdered sugar.
THEN…
I REALLY went bananas. *I*, Anamaris of Chef It Yourself, the same person who unloves bananas and who cringes at the sight of banana splits, went for the chocolate. I did. I don’t know what happened.
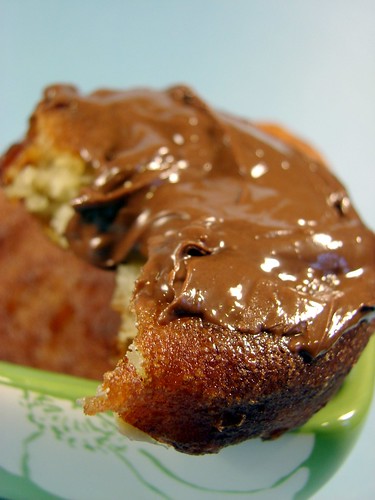
I don’t know why I did it. Well, I think I do know why I did it. It’s become apparent to me that my palate is growing up, expanding, refining, becoming more flexible.
I gave it a try, and OH.MY.GAWD!

Just a light smear of it will do. There was something magical about the combination. The fritters are slightly sweet with just a hint of banana, they develop a nice crisp edge, while they’re goey doughy inside. The Nutella teases you with its light chocolate taste.

Now I must leave you so I can come to terms with this choco-banana turn.
Enjoy!
Cookingly yours,
Anamaris
I’ve been bitten by the bread making bug. I mean a BIG bite. I’ve always shied away from bread making because I’ve not been successful at it. I either killed the yeast, used too much of it, added too much flour, forced the dough to bloom. Issues. I just faced a million issues when I tried making bread. I was sure my mom hadn’t shared that particular gene with me, because she’s an AWESOME baker.
Then I came across instructions for ciabatta and realized that I just had to try again. I’ve been stalking the guys over at the
BBA for months now, and though I’m not participating in their challenge, I am baking as a result of it. I must admit I’m loving Reinhart’s approach to baking and may have found a new passion in my life. But I digress.
There is another challenge I’ve been trying to participate in, but kept missing the deadlines. Joan over at
Foodalogue has a Culinary World Tour challenge. This round was all about Latin America and the Caribbean. Yep, right up my alley. And yes, I missed it every week except for the last one. Hence, this post.
This week they’re visiting Puerto Rico and enjoying its wonderful cuisine. As luck would have it, I have the inside track on Puerto Rico. You see, I’ve been there a couple of times, my bestie’s hubby is a native and Puertorrican food is pretty similar to Panamanian food. Yeah, I’m in.
Originally I was thinking about pastelón or something along those lines, but with my new baking infatuation, I opted for Pan de Mallorca. A slightly sweet, creamy, egg-based bread that is traditionally served for breakfast on the island. If you go to La Bombonera, they will slice, butter and toast it for you, and serve it alongside a café con leche. Or you can have it as a sandwich stuffed with cheese, ham, eggs, bacon, anything you love. So here’s my submission for Puerto Rico:
Pan de Mallorca
Because I’m so into Reinhart’s poolish method, I decided to implement it for this recipe as well. To get that poolish going you will need:
1 tsp dry yeast
1 cp warm water
1 cp bread flour
Dissolve the yeast in the water–I’ve been using warm water straight from the tap, it’s barely tepid. Add the flour to your mixer’s bowl, then add the yeast/water and mix until the batter looks smooth. About 3-4 minutes. Scrape the sides, cover with plastic wrap and allow it to sit on the counter for about an hour before you put it in the fridge overnight.
Next day, when you’re ready to finish the dough, remove the poolish from the fridge and allow it to sit at room temperature for at least 1 hour before mixing the rest of the ingredients.
1-1/4 tsp dry yeast
1 cp whole milk, warm
¾ cp sugar
4 cps flour
3/4 tsp sea salt
6 egg yolks, lightly beaten
1 stick butter, melted
1 stick butter, melted to brush on top
Powdered sugar
First, warm the milk, just enough to take the chill off it and dissolve the yeast into it; set aside. Into the bowl with the poolish, add the sugar, salt, yolks, milk and 1 cup of the flour and mix it until well incorporated. Then add 1 stick of the melted butter and mix evenly. Now you can start adding the rest of the flour.
Make sure you mix it well and that the dough looks smooth. It will probably need to be mixed for 4-5 minutes, the dough will begin to separate from the sides, but it will still be a very moist dough. Set aside and allow the dough to rise for about an hour or so.
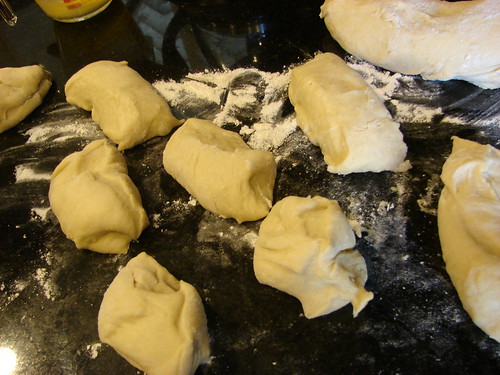
Lightly dust the countertop where you will work the dough. Make sure the second stick of butter is ready to go, you will also need a pastry brush. Turn the dough onto the countertop and divide it into 15 portions.

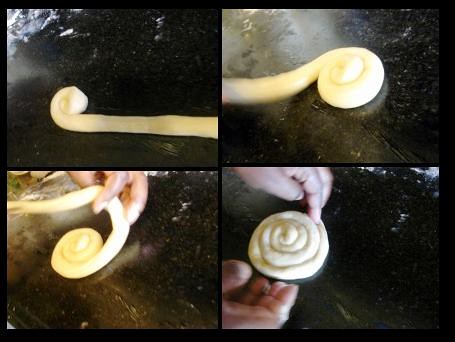
Roll each portion under your hands making it into long strip–channel your inner kindergartener and have some fun. Once you have a long strip, brush it with butter and roll into a coil.
I found that the best method is to roll in one end, then pick up the length of the strip and roll it around the center. This kept the coils nice and flat. Make sure you tuck the end under the coiled dough and transfer to a greased baking sheet or one lined with silpat/parchment paper. Brush the tops with more butter and continue rolling the rest of the dough.
Set the tray aside and allow them to rise again until they have doubled in size. It took about 30-40 minutes for that to happen.
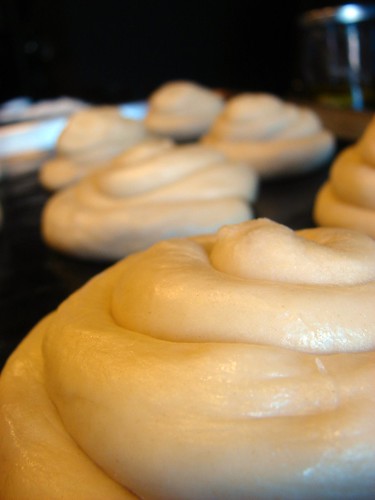
In the meantime, preheat the oven to 375°. Bake them for 8 minutes and rotate the tray, then bake for another 8-10 minutes.
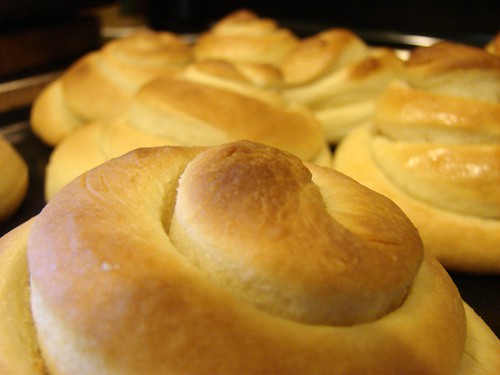
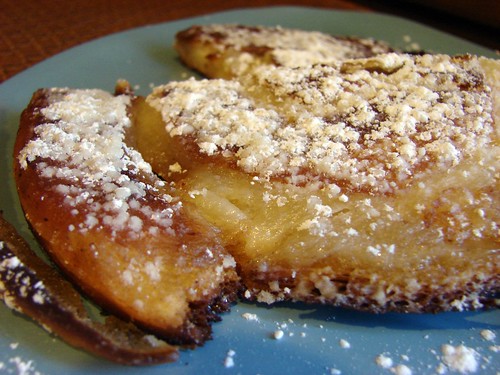
When they come out of the oven, brush the tops with a bit more butter before transferring them to a cooling rack. Dust them with powdered sugar before eating.
Now, for your personal edification, I will toast one and serve it as it is served at La Bombonera. I must admit to you, this is NOT skinny toasty bread. It IS all about the butter. Lots of it. What they do in Puerto Rico is slice ‘em in half, slather them with butter, put them together again and press them on a giant Panini press type thing. Since I don’t have a Panini, I use a more… rustic method.
After slicing and buttering ‘em I put them in a skillet that already has MORE butter melted and ready for ‘em. I keep the heat on medium low to avoid toasting it too much. Also, place the Mallorca in the butter, then flip it right away, this way you pick up butter on both sides of it. Then cover it with piece of foil and put a heavy pan over it. Press down to flatten the Mallorca.
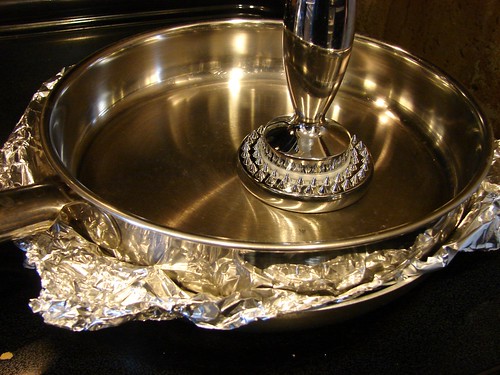
The foil creates a bit of steam in there and this allows the butter to melt through the dough. The result is almost like a cake, the bready dough gets soft and goey and oh so yummy. Make sure you flip it halfway through cooking.
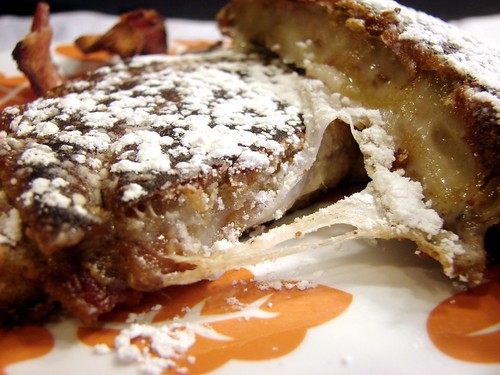
Remove from the skillet and GENEROUSLY dust it with powdered sugar. But wait, there’s more! You didn’t think I would leave it at that, now did ya? This bread makes awesome sandwiches. I didn’t have the traditional ham & cheese, but I made do with:
 Queso Oaxaca:
 Mexico’s take on a melty mozzarella
and… bacon!!!
Just make a grilled cheese sandwich: slice the mallorca in half, butter each side. Be generous, now. Layer your filling, I laid down a slice of cheese, then bacon, then more cheese. Top it with the other half of the mallorca. Into the skillet with melted butter, cover with foil, press down and toast. Listo!
And it comes out looking like this:
I know it sounds weird, but top it with powdered sugar. I don’t know what it is, but it makes it really really REALLY YUM!
Cookingly yours,
Anamaris
Ooops! I did it again. I’ve been seduced and I succumbed. Bread baking has my heart all pitter-patter. I even committed to a proper bottle of yeast! No little throw away packets for this girl. No! I’m an honest bread baker now.
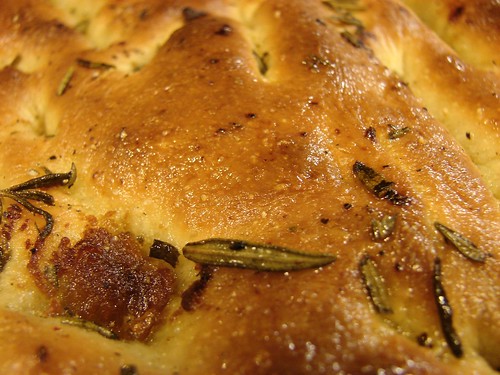
This time it was Focaccia. I needed some for a salad, so I looked at a million recipes and made a choice. Well, I settled on 2 separate versions: one is by Peter Reinhart and the other is a much simpler method by Suzanne Dunway. I really like Reinhart’s use of a poolish; I’m convinced that is the reason the bread tastes so good and not overly yeasty. He’s a bit of a Martha, though. His method is definitely on the elaborate side of things, not that there’s anything wrong with that. But, I am a novice bread maker and find myself intimidated quite easily. That’s probably why the ‘No Need To Knead’ method offered by Dunway is so appealing.
Because I was using a poolish, I followed Reinhart’s recipe and ‘day before’ preparations. Let’s get to it, shall we?
For the Poolish:
Combine
1-1/2 cps barely warm water (I measured it from the kitchen’s tap)
1/4 tsp dry yeast (like ActiveRise)
Mix in the yeast until it has dissolved and set aside for a few minutes. In the meantime, measure out
2-1/2 cps bread flour
and dump it into your mixer’s bowl. Now add the yeasty water and mix this using the paddle attachment until it is fully incorporated and smooth. You’ll probably want to beat it for about 3-4 minutes. Give it a scrape around and cover with plastic wrap. The dough will be very smooth and elastic.

Allow it to rest at room temperature for an hour or so before putting it in the fridge overnight (or longer, if you’d like).
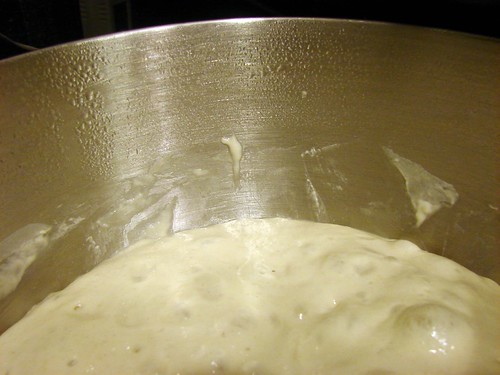
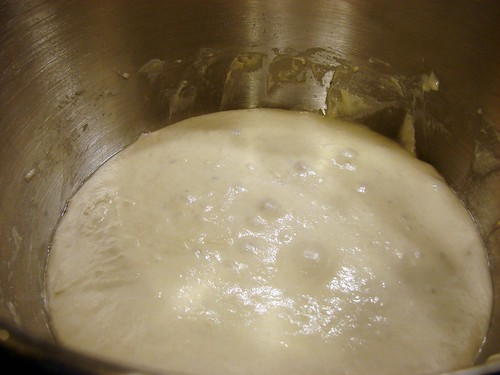
The next day or when you’re ready to bake the focaccia, remove the poolish from the refrigerator and allow it to come to room temperature at least an hour before using it. You will notice that it is bubbly and that it has expanded. This is what mine looked like after fermenting overnight.
While the poolish comes to room temperature, work on the herb oil. Here’s what you’ll need:
For the Herb Oil: in a small saucepan combine 1 cp olive oil with about 1/2 cp fresh or 2-3 tbsp dried herbs of your choice. Heat it over medium low temperature for about 20-30 minutes, you want to make sure it doesn’t get hot enough to scorch the herbs. All you’re trying to achieve is to perfume the oil.
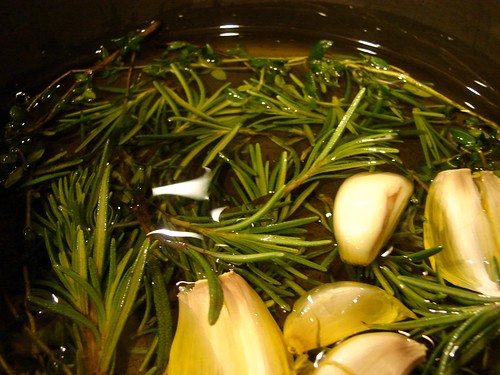
For mine I used rosemary, garlic cloves that I didn’t peel but just cut in half, and roasted garlic. Feel free to use any herbs you love, or you can add olives, sun-dried tomatoes, onions—there are no limits.
Now is time to finish the dough, for the Focaccia:
1-1/2 tsp dry yeast
3/4 cp warm water
1-1/2 tsp sugar
2-2/3 cps bread flour
3-1/2 tsp sea salt
6 tbsp olive oil
Herb oil
Dissolve the sugar and yeast in the warm water and set aside while you get the rest of the ingredients together. To the bowl with the poolish, add the flour, salt and oil, then the water/yeast mixture. Using the paddle attachment, begin beating it slowly—if you have a guard for your mixer, you may want to use it at this point. Once all the flour has incorporated, switch to the bread hook and continue beating at a medium speed for another 5-7 minutes.
You’ll know you’re done when the dough clears the sides of the bowl but still sticks to the bottom of it. You may need to add more flour or water if that isn’t happening. Remove the hook and any dough that may be stuck to it, scrape the sides of the bowl and cover it and let it rest for 20 minutes or so.
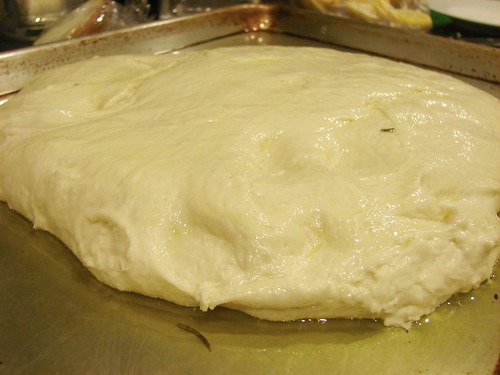
Prepare the baking sheet you’ll use to bake the focaccia. Some recipes suggest lining it with silpat or parchment paper. I did neither. Instead, I spread about 3 tbsp of herb oil, trying to avoid the herbs, on the bottom of the sheet and I smeared it really well all over and up the sides.
Dump the dough right onto the middle of the sheet, use a spatula to push out any dough stuck to the bottom of the bowl. Remember the ciabatta and how the dough is allowed to rise then it is pulled and folded? Reinhart’s focaccia follows the same principle, I followed it once and didn’t use flour.

After dropping the dough on the oiled baking sheet, I spread it to fill the sheet (as best as possible). Then I folded it into thirds, covered loosely with plastic wrap and allowed it to rest for 30 minutes.
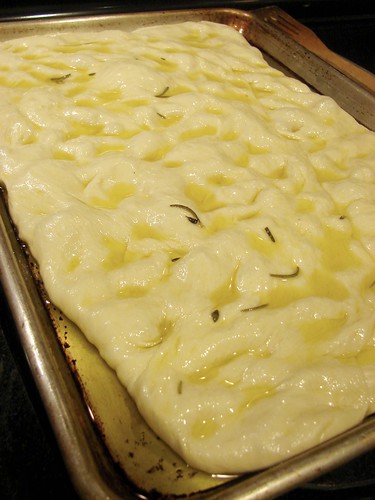
By now the dough should have swollen nicely. Dip your fingers in the oil and stretch the dough out to fill the sheet again. You may need to rotate the risen dough to better fit the sheet. Don’t worry if you don’t get dough into all the nooks and crannies, it will rise again and it will fill it up.
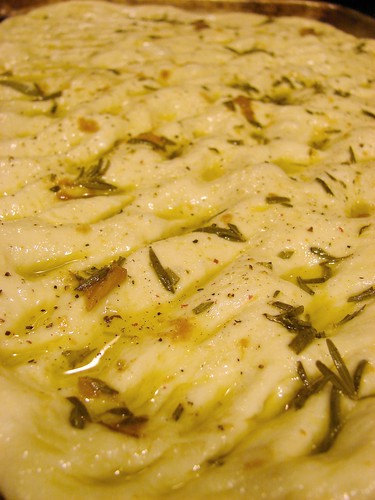
Pour more of the herb oil over the top and massage it into the dough. This will create the dips and creases characteristic of focaccia and will also allow the oil to work its magic in the dough. Feel free to allow as much or as little of the herbs to dot the top of the focaccia. Give it a sprinkling with coarse salt and freshly ground black pepper. Set it aside while you prep the oven, at least another 30 minutes or so.
In the meantime, preheat the oven to 500°. If you have a pizza stone, put it the oven as it preheats. I like leaving the stone under the baking sheet, it helps to diffuse the heat more evenly. Once the oven reaches temperature, place the focaccia sheet on top of the stone, close the oven and reduce the temperature to 450°.
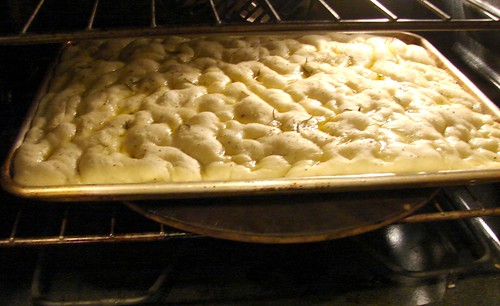
Bake for 1o minutes, then rotate the sheet to make sure it bakes evenly and bake for another 10 minutes or until golden brown.

Remove from the oven and brush with more of the herb oil. Allow it to cool for about 10 minutes before transferring to a wire rack to cool. If you’re anything like me, you will cut into it while its piping hot, who can blame you. Just look at that face!

Enjoy!

Cookingly yours,
Anamaris
I had put it off as long as possible. I had to remind myself of the advice I give my friends: ‘just try it, you may be surprised by the results’. So I did. I still have a hard time believing it. I measured. I mixed. I kneaded. I baked ciabatta and won! I mean, the last time I attempted making bread was eons ago and quite unsuccessfully.
My mom makes awesome bread. But for me, it had never worked. The yeast taste was too strong. The water I used to bloom the yeast was either too hot or too cold. I’d end up with heavy little lumps of dough and a feeling of failure. But as I’ve lurked around the Bread Baker’s Apprentice challenge pages, I kept telling myself maybe, just maybe I could try again.

First off, I read and reread Nicole’s recipe on Pinch My Salt. Her ciabatta looked so…, so… seductive. I had to try it. She used the poolish method. After I was done making jokes, I looked it up and realized that a poolish is nothing more than a dough starter, like is used for sourdough; how foolish did I feel (heh, I couldn’t help myself). I also think this might be the main reason I didn’t end up with that odd yeasty taste from past attempts. I think the poolish, since the recommendation is to make it a day ahead, allows the yeast to relax a bit and get rid of its uppity attitude.
For the poolish, I was to mix:
2-1/2 cps bread flour
1-1/2 cps warm water (from the tap)
1/4 tsp dry yeast
I first stirred in the yeast into the water and allowed it to hang out for 10 minutes or so. Then it all went into my trusty Kitchen Aid for a whirl until it was smooth and looked like this.
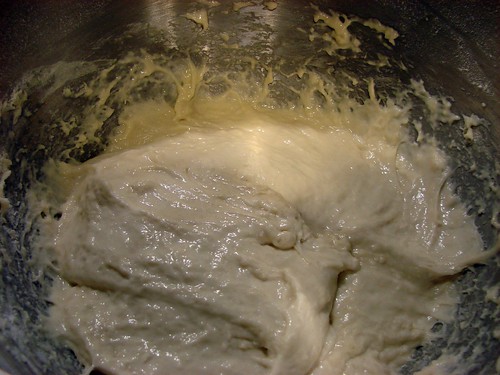
I covered it with plastic and left it on the counter for HOURS, and watched it bubble up and grow. Eventually it goes into the fridge overnight.
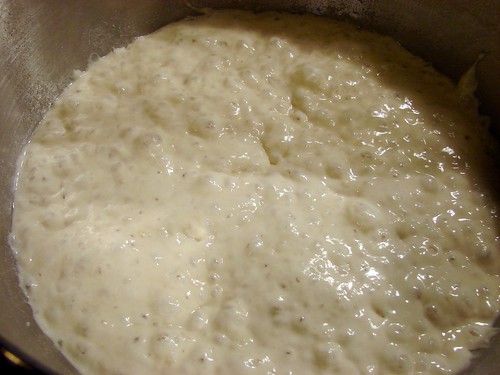
The next day, remove the poolish from the fridge at least an hour before you mix the ciabatta. See? It grew even more!
To the Kitchen Aid bowl I added:
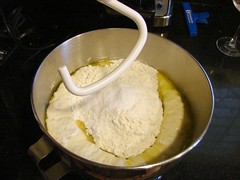 3 cps bread flour
2 tsps dry yeast
1-3/4 tsp salt (you’ll need more if using sea salt)
4 tbsps extra virgin olive oil
1/2 to 3/4 cp warm water
Then dropped the poolish right on top and let Kitchen Aid have its way with it. I started out with 1/2 cp of water, and added more to get to a wet and sticky dough. I allowed the mixer to do the heavy lifting. I beat the dough until it looked smooth and silky.
Ciabatta dough should be wet and sticky, you will not knead in any flour. Once the dough looked smooth, I floured my counter with a LOT of flour and spread it out. I then dropped the dough right in the center of the floor pool and, following Nicole’s instructions, I shaped it into a triangle… of sorts.
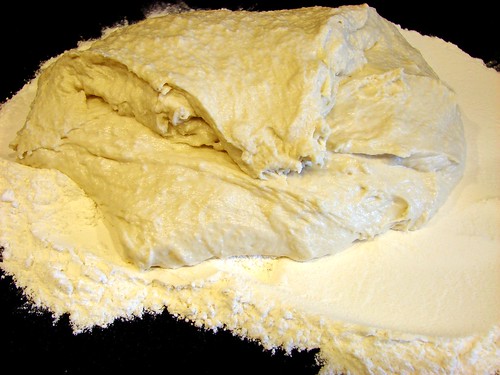
Cover it with plastic and let it rest for about 10-15 minutes. At the end of that time, the dough is ready to begin the stretching dance. Aside: this dough feels incredible! It feels cool and fluffy, like doughy cotton balls.
Anyway, stretch out the sides of the triangle. I stretched it out to about 2-feet wide. Remember there’s a lot of flour around the dough, you’ll want to get rid of some of the excess. I used a brush to get rid of the flour on top.
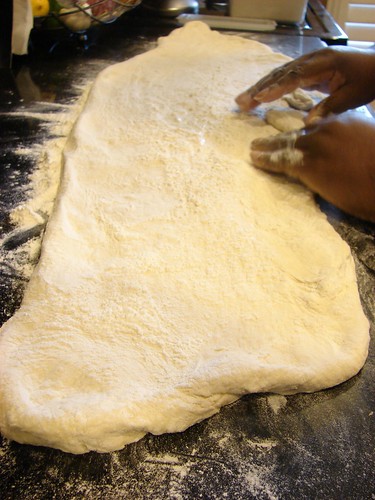
Next, fold it into thirds. Take one end and fold it over to about the center, brush off the excess flour, then take the other end and fold it over the top of the first fold. Now, cover it with plastic wrap and let it rest for 30 minutes. Walk away.

I tucked the plastic in to make sure the dough didn't dry up
One more time. Stretch it out, brush off the excess flour, fold into thirds. Cover with plastic wrap and this time, let it rest for 90 minutes.
During this period, you should get things ready to slice the dough into  loaves and set them onto a couche to rest some more. I am not a baker, so I don’t own a fancy couche. Instead, I enlisted a few kitchen towels to do the trick.
I lined up 2 towels, then took a third one and pooled it to create a rim on one end. Left a smooth space about 4-inches wide and made another ripple. I used 2 towels to be able to create 3 spaces with rims on either side. Sprinkle flour on each space.
I also took a baking sheet and poured coarse cornmeal on the back side of it.  This will serve as your traveling suitcase for the loaves. This way you can slide them onto your preheated baking stone awaiting in the oven.
At the end of the 90 minutes, divide the dough into thirds. Stretch out each third, fold it into thirds as you did before and place the folded dough into one of the spaces of your makeshift couche. Once you have all 3 pieces tucked into their spot, cover with plastic again and allow it to rest while you get the oven going.
Hopefully you have a baking stone, if you do, put it in the oven on the middle rack. Preheat the oven to 500, it’ll take a bit longer because of the stone. You will also want to put a pan on the bottom. Ciabatta likes steam while baking, it likes to pretend it’s in the sauna room of a fancy spa–so let it. Heat up some water and keep it at a simmer. You will add this to the pan at 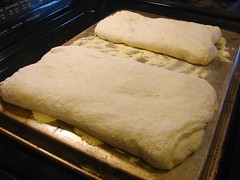 the bottom to get things hot & steamy up in der’. Nicole also recommended using a spray bottle to wet the sides of the oven while baking. Get all your gadgets ready.
Once the oven reaches temperature, it’s time to move the loaves from the cozy couche to the cornmealed pan. As you remove the loaves from the couche, stretch them out and drop them onto the pan. I have a 16-inch or so baking stone, so I was only able to fit 2 loaves at a time. Now, get ready, the next part goes kinda fast.
Slide the loaves off the back of the pan and onto the stone. You may need to help them along, but if you put enough cornmeal under it, it will slide quite easily. Push it all the way back into the oven. Then add enough water to that pan at the bottom, I added about 2 cps of already hot water. STEAM! Hurry, close the oven.
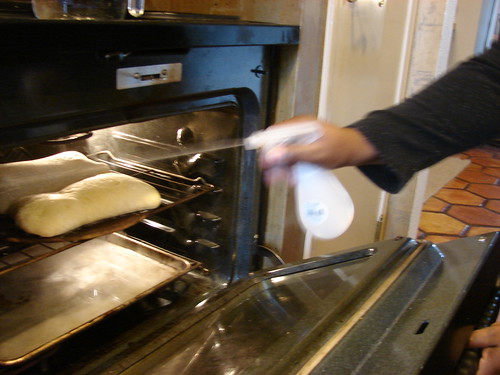
Give it a couple of minutes, then grab your spray bottle and spray the sides of the oven. More STEAM. Close the door. Wait about 30 seconds and spray again. Wait 30 seconds and repeat. Now turn down the temperature to 450. I missed this part on Nicole’s post, so my loaves were a bit too dark. They looked like my children might have. They will bake for 15-20 minutes. And you’ll have awesome bread. Hope you left some butter out.
Here’s a closeup:
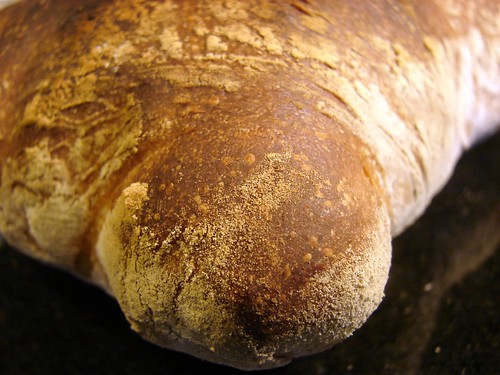
Now for the bragging part. I was so nervous about this. My ciabatta had holes, BABY!
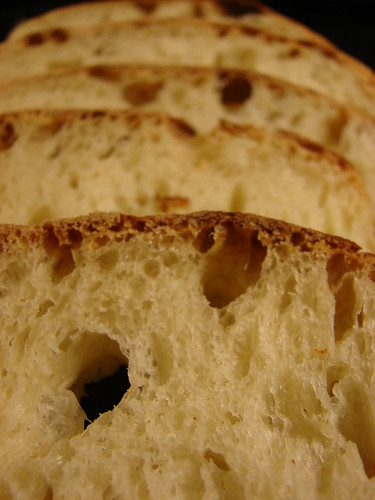
But wait, there’s more…

Before I let you go, I have to thank my hubbz for the action shots. He does a really good job with those, doesn’t he?
Cookingly (and bakingly) yours,
Anamaris


 For the dough:




 Queso Oaxaca: Mexico’s take on a melty mozzarella


 This will serve as your traveling suitcase for the loaves. This way you can slide them onto your preheated baking stone awaiting in the oven.


