I just realized I haven’t done one of these in months! My apologies. I like sharing the tips and tricks I’ve picked up along my cooking journey. We’ve covered how to pick and prep tubers like yuca and otoe, we’ve made plantains less daunting, Latin cooking basics, even some of the fancy sounding cooking methods such as coulis. This time will be all about the mighty coconut.
Earlier this week, one of my friends commented, or lamented, on Facebook about how difficult it was to find fellow coconut lovers. Her status generated a great deal of comments listing the pros and cons of this fruit. Here’s what I had to say on the subject.
As foods seem to break across more and more borders, ‘exotic items’ become more readily available. That’s wonderful, but it also means we may not utilize them simply because we don’t understand them. So let me introduce you to Mr. Coconut or Señor Coco as it is known in my world.
This fruit goes through a few different stages and is edible throughout most of them. Once it grows to a decent size, the young/green coconut can be harvested, cracked open and the water in it can be consumed. The water is slightly sweet and incredibly refreshing. In Panama and many other Central American countries, you’ll find them chilled and sold at corner stores.
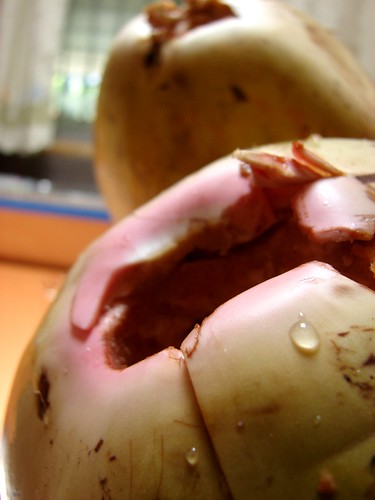
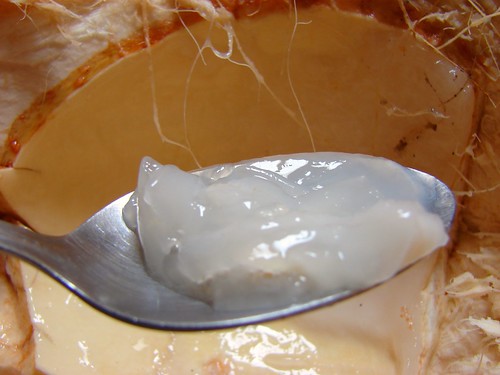
As the fruit matures, the meat will become more and more dense. First you will find a gelatinous meat that has to be eaten with a spoon. At this stage, the meat tastes much like the coconut water, only sweeter.
The more mature the coconut, the more dense the meat, until you arrive at the very thick and milky meat that is usually shredded into foods.
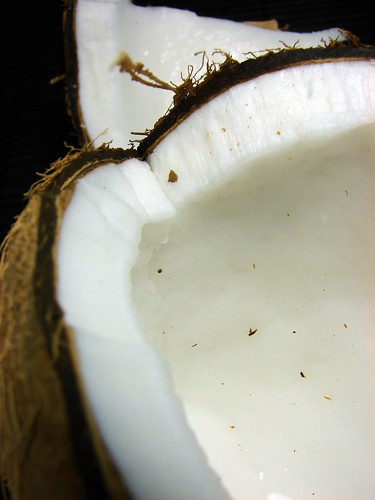
So how do you crack it? Let’s get to that.
I like using a hammer to crack the outer shell enough to drain the water out.
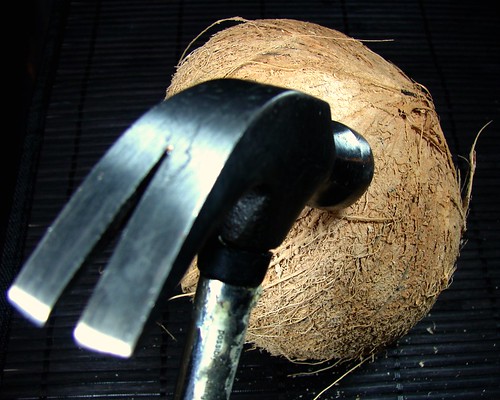
Once drained and the water has been reserved, I continue hitting it with the hammer to break into manageable pieces.
Then begins the ‘peeling’. Use the tip of a knife to separate the meat from the hard shell. Gently push the knife through, and the meat will pop right out of the shell.
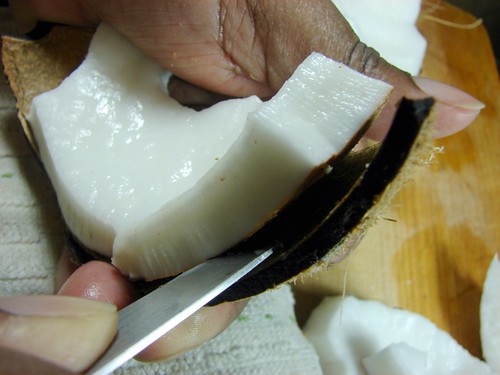
That really is all there is to it. Discard the shell, rinse the coconut pieces and use them at will! Check out the step-by-step shots here.
Cookingly yours,
Anamaris
The perfectly roasted chicken is like a mystical unicorn or an urban legend. It always seems to happen to a friend of a friend of your second cousin. A nicely roast chicken should be flavorful, juicy and should have a beautiful golden and crisp skin. Often times you manage the beautiful skin, but the meat is bland and dry. Today I’m going to share my secret for always perfect roasted chicken.
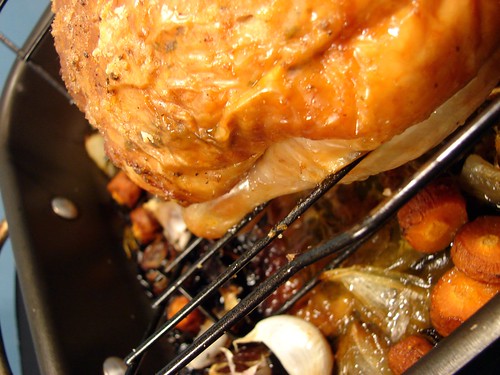
The beauty of it is that you can use any herb you like, or what’s available. The other wonderful thing about this chicken, is that… it is SUPER easy to make and requires no fussing about. I promise. Really. You can take my word for it or my name isn’t Anamaris! And it is.
The other cool thing with roast chicken… leftovers! At the Price household, we’re not breast lovers, but the breast makes the most delicious chicken salad ever! I do have to admit that even I enjoy just eating the breast meat, and that’s saying something. Ok, I’ll stop gushing. On to the chicken business.
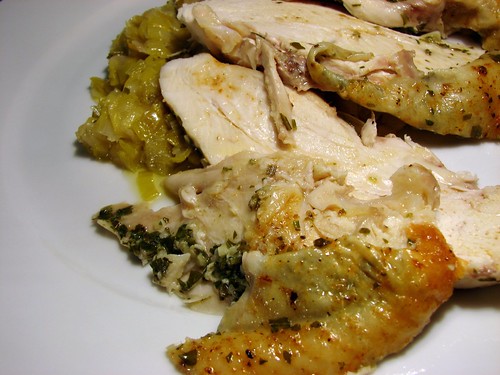
When it comes to roasting the bird, the first thing is to start on its tan early on. So you would roast it at a high temperature (450°) for about 15 minutes before reducing the temp to 325° for the long haul. On average, it takes about 20 minutes per pound to roast the chicken perfectly. If you have a meat thermometer, you’ll want to insert it into the thick part of the thigh–avoiding the bone, and it should read at least 165° C.
Perfect Roast Chicken
1 4-6lb whole chicken
3-4 tbsp butter, soften
Chopped herbs–I used rosemary, Italian parsley, garlic
Sea salt
Fresh black pepper, ground
Smoked paprika
1 lemon, quartered
Rosemary stems
10-12 garlic cloves, whole & unpeeled
2 carrots, quartered
1 large onion, quartered
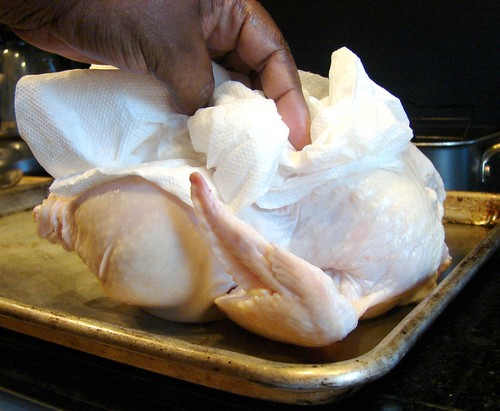
Preheat oven to 450°. First, remove all the innards from the chicken. Usually, they tuck the neck and giblets inside the bird; you don’t want to roast it with those in there. You can save them to make the gravy or to make broth later. Rinse the chicken inside and out. Pat dry with a paper towel.
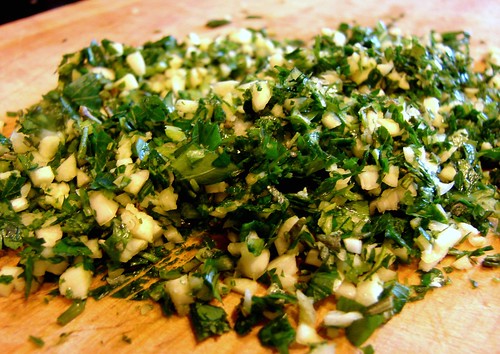
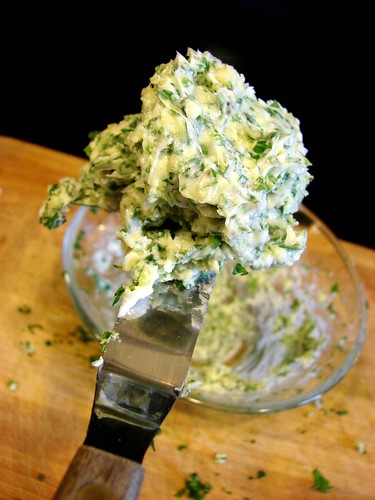
Combine the chopped herbs, about 1/2 cp all together, with the softened butter and season with a bit of salt & pepper.
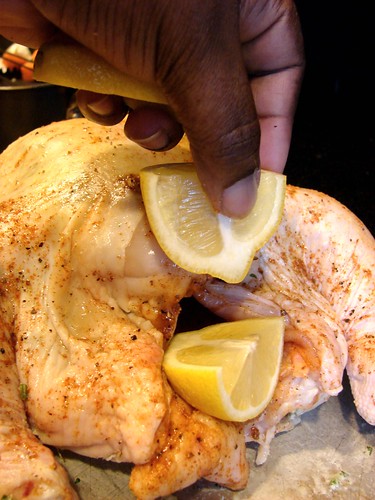
Pull away on the chicken skin and insert bits of the herb butter between the skin and meat. Rub the skin with a bit of olive oil or leftover herb butter. Combine the salt, pepper and paprika, use it to season the cavity and the skin of the chicken. Fill the cavity with the lemon, some carrots, rosemary stem and whole garlic cloves.
Prepare the roast pan. Place the rest of the carrots, garlic cloves, onion, rosemary around the bottom of the roasting pan and rack. Place the chicken on the rack. I like to roast with the breast down, this way it benefits from the drippings from the skin and dark meat. Again, we are not breast lovers, so we choose to roast the breast at the bottom to keep it nice and moist, if you love breast and want the crisp skin on it, then roast it on top.
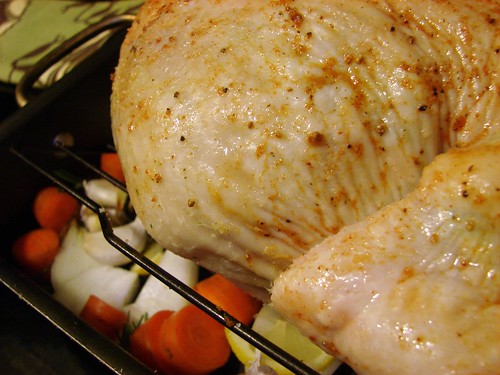
Pop it in the oven at 450° and cook it for 15 minutes. Then reduce the temperature to 325° and cook for just under 2 hours (for a 5-pounder). Once done, remove the chicken from the oven and allow it rest for at least 15 minutes before carving.
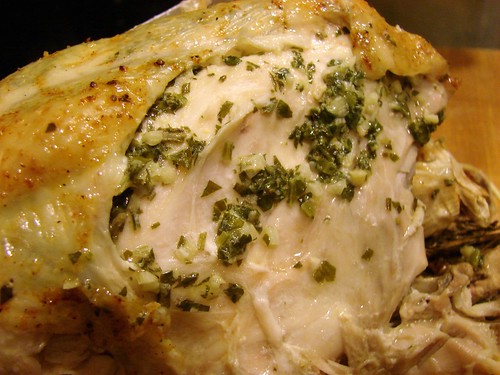
You can use the drippings to make a gravy.
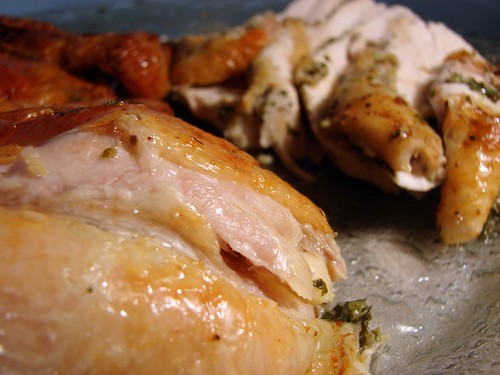
Cookingly yours,
Anamaris

And my heart is still in Panama, will probably always be. My love is in Houston and that is where I live. But, currently I’m still in Panama caring for my mom.
Time is limited right now, and rather than fail my promise to you, I decided to dig through my archives and bring attention to a few posts from the beginning days of this blog. These speak specifically to my cooking identity. If you’ve just found me, there’s a very good chance you’ve missed them. So here goes nothing.
This first one speaks to my cooking habits, those things I do as second nature as prepare a dish. Cooking Un-science.

The next one takes a look at my spice cabinet. I promise you it is much more exciting than my underwear drawer :). Spice Me Up, Scotty.

Finally, shortcuts. If you spend a good amount of time doing a task, you always develop shortcuts. Tricks of the trade. A way to minimize or expedite steps. Here are my Shortcuts.
That’s it. A little blast from the past.
Cookingly yours,
Anamaris
Just before we get into that business, why is it called a pineapple? It looks nothing like an apple, thought I guess it is pokey like a pine cone… OK, that’s over, back to the fruit at hand.
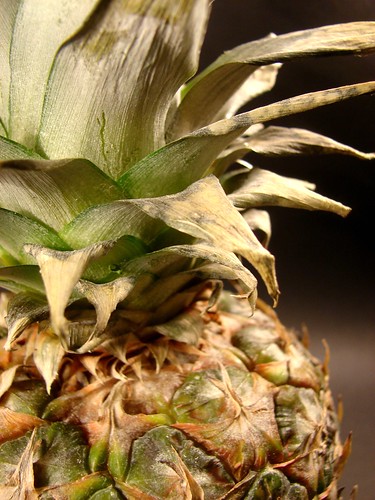
With Summer heating things up, the grocers and markets are filled with delicious fruits, particularly those from more tropical climates. Pineapple happens to be one of my favorite fruits. Love, love, love IT! Love it! Believe me, once you’ve had a taste of fresh pineapple, you’ll snicker at the canned stuff. I want to make sure you eat as many of these fresh babies as possible, so I’ll give you some pointers to help you break it down.
Picking Pineapples: Put your senses to work.
See: It should be a bright yellow, maybe a bit of green here and there. As with any other fruit, make sure there are no visible blemishes–brown or black spots. If you can only find them with very green peel, then take it home and allow the sugars to mature over a few days.
Touch: It should be firm to the touch, but not hard. It should give a little
Smell: Go ahead, put your nose to it. Pay special attention to the bottom, it’ll be the most fragrant area. It should smell sweet with a hint of tartness.
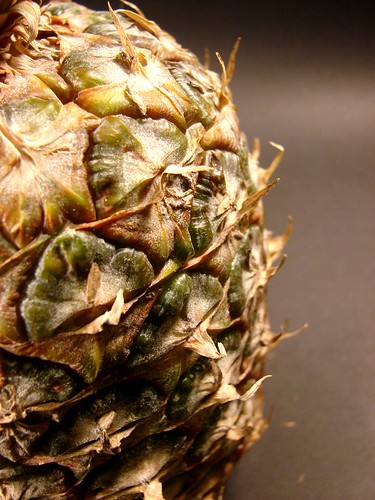
Pineapples can be prickly, if you have sensitive hands, you may want to use something to protect them. Now for the fun part, this is how we breakdown a pineapple in Panama.
Remove both ends. You can break off the leafy top or just use a knife to cut about 1/2-inch off the top and bottom of the pineapple. This serves 2 purposes: it will stabilize the fruit and make it easier when removing the peel with a knife.

Stand the pineapple on one end (use a cutting board) and with the knife, begin cutting off the peel of the pineapple. Move in a downward motion, always away from you. Give it a clockwise turn and repeat until you have removed all of the peel.
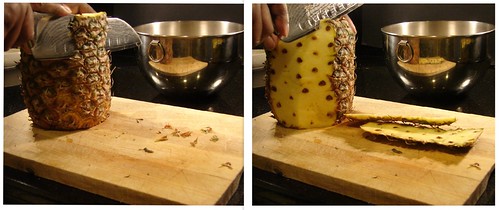
Remove the eyes. Cut the flesh in a shallow diagonal cuts on either sides of each row–you’ll probably be able to cut across 3-4 at a time. Remove the cut outs and repeat.

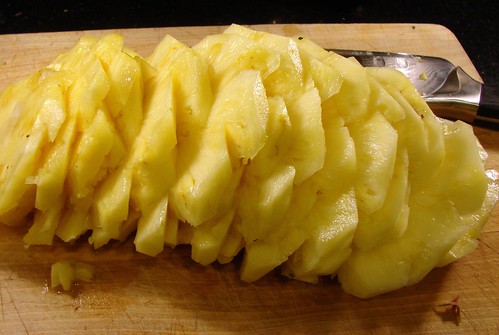
The pineapple will end up looking like a spiral. Kinda cool!

Now it is ready to slice and eat. One last thing, though. You want to make sure not to eat the core, it tends to be tough and it has an enzyme that causes your tongue to feel stiff and weird. It makes my lips feel itchy. Just stay clear of it.
Eating fresh chunks of pineapple is great, but check out this cocktail. That’s what I’m talking about!
Cookingly yours,
Anamaris
Mangoes are my favorite fruit. I wouldn’t want to live life without them. Mangoes are deliciously versatile and excellent for you. Mangoes are pretty. They’re pretty when green. They’re pretty when ripe. Mangoes are pretty with or without peel. Doesn’t that sound like an essay submitted by an 8-yr-old? That’s how mangoes make me feel. Like a kid looking forward to a full life. I love mangoes, I simply do!
I don’t know how many varieties there are, but I do know that I can think of at least 10 different types available in Panama. Some are extraordinary, while others are considered poor quality and snubbed. Now that I live in Houston, I cherish EVERY mango I can get my mango-eating hands on.
It also occurs to me that as common as they are to me, they are still exotic to a lot of people. With that i mind, I thought I would give you a quick how-to peel a mango post. No mad scientist skills required, to tell you the truth, I’m worried you’ll find this unnecessary and patronizing. But really, I’m coming from a place of helpfulness.
First, don’t buy your mangoes soft/ripe already. Instead, opt for the ones that still have quite a bit of green in them. It’s best to let them ripen under your watchful eye. Just leave them out on your counter for a few days and allow nature to do its thing. Sniff it, squeeze, but not too hard. When it smells sweet and honey-ey, its ready. The outside will be a mottled orange-red, depending on the varietal you get.
There are 2 routes I know of. The first one is how I used to do it back in the homeland, Panama–did I mention I’ll be there in 3 weeks? I digress. This is your basic peel a fruit route.
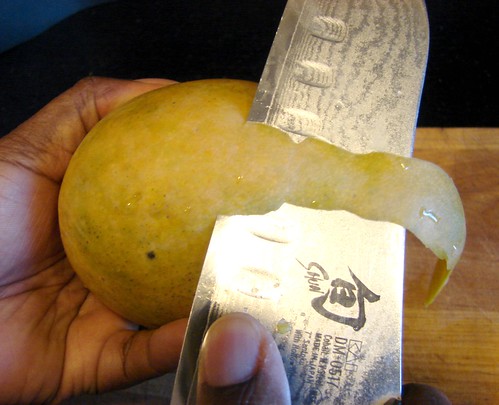
See? You knew how to do that.
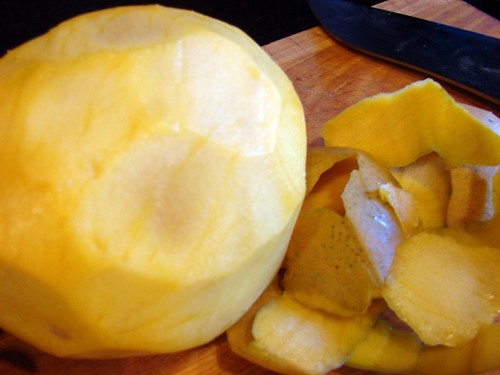
Now it’s ready to eat or chop at will. The other method I learned after moving here. I think it looks fancy and pretty.
First, remember there’s a large pit right in the middle of the mango. One side of the mango is rounded and the other end has a slight point/end. Trim the rounded side so you have a flat surface on the mango, stabilize to avoid cooking injuries.
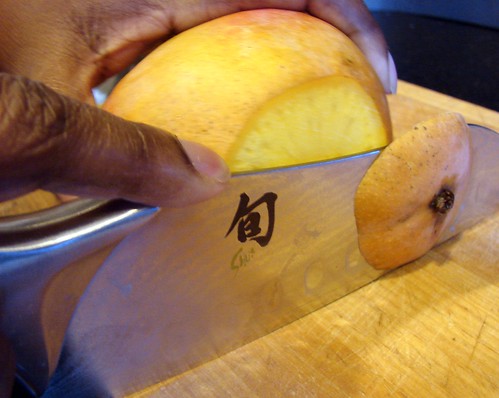
Lay it on the trimmed end and place the knife on either side of the pointy end and work it down. Then do the same to the other side.

Once you have 2 halves, score them across. Be careful not to cut too deeply, you don’t want your knife to cut through the peel.
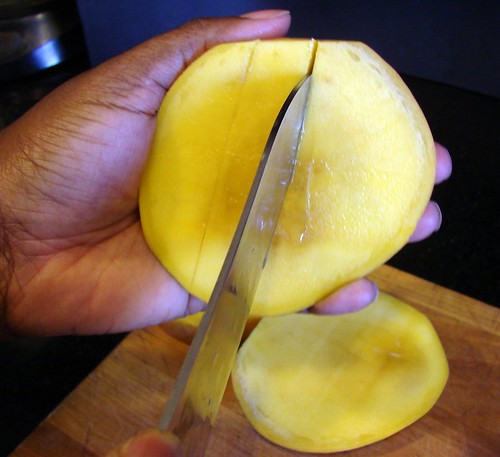
Flip it and score it in the opposite direction. Again, mind the peel.
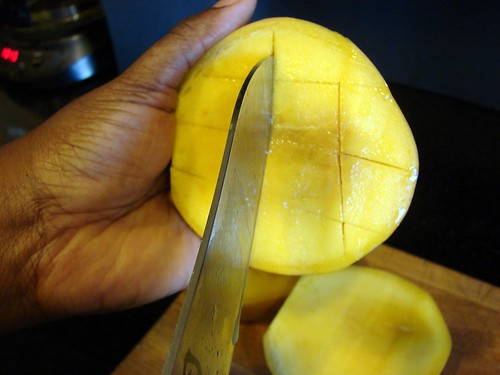
Now the fun and making pretty part comes in. Hold the halves with both hands and push from the bottom/skin side in.
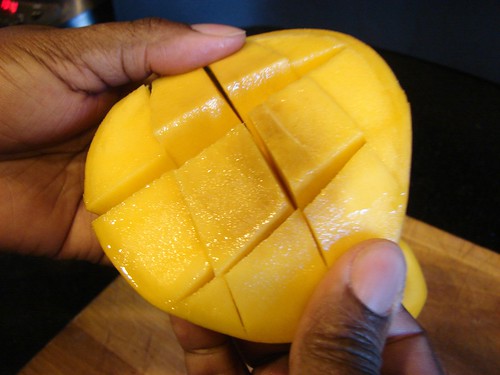
Once it’s flipped, it looks like this.

You can cut the cubes with the knife or you can tear them off with your fingers. Then peel the section with the pit, there’s a lot of meat there too. It’s ready to eat.

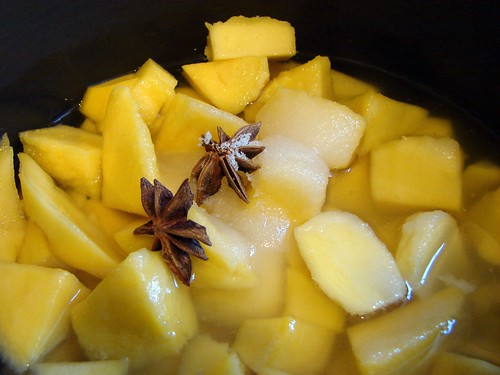
As it turned out, these weren’t the best mangoes, so I didn’t eat them like this. Instead, I added some sugar, water, star anise and salt and simmered it down until the mango was softened and used it to jazz up other meals.
Cookingly yours,
Anamaris
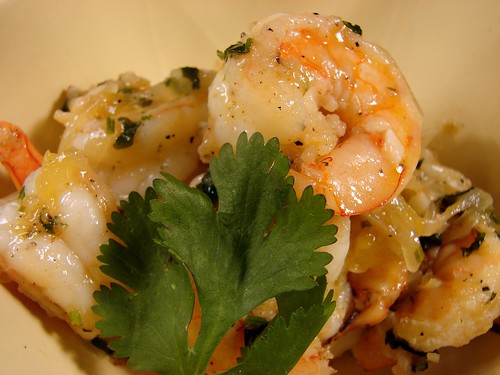
And this is one of the meals I created with the caramelized mangoes. Tangy & Spicy Shrimp and Mango. Yum, no?
Throwing a Dinner or Cocktail Party
I have a big dinner coming up this weekend. I am 1 of 24 featured publishers selected by Foodbuzz to give readers an inside look at a dinner. My concept is to highlight foods by region–US regions and couple those with US wines. Sounded like a swell idea, I’ve always been interested in determining how to pair foods and wine. There’s been a great deal of research involved, now that it’s done, I will share with you how I go about organizing similar events.
Here are the prep steps, as I see them:
- Select theme
- Set the menu
- Guest list & Invitations
- Date & Time
- Venue & Decor
- Shopping lists
- Prep work
- D-Day set up
- Putting it all together
- Enjoy your labour of love
First things first – Themes and Menus
The first 3 steps are interchangeable, but they should be the first things you take into consideration when planning your soiree. Depending on the type of event, say something informal like a cocktail or Superbowl party, you can decide on menu items at any time because, most likely, you’ll have nibbles that will conform to most guests needs. If, on the other hand, you’re planning a more intimate dinner, then you need to make sure all guests will be comfortable with the planned menu.
The last is the scenario I’m faced with this time. I have a clear concept in mind, sorta, so my guest list was limited to friends who enjoyed food–old and new, basic and exotic–as well as wine. I had to be deliberate about those I invited, particularly since it was limited to 6 guests. When you know who will attend and you know their eating preferences, you’ll have an easy enough time determining the menu.
Guest List & Invitations
Who do you want to spend time with? What is the reason for your dinner party? Are you celebrating something or someone? These are some the questions to consider when you’re in the planning stages. Also keep in mind the size of your venue, make sure your guests will be comfortable.
Invitations: this is entirely up to you and, to some extent, how formal the event is. I wouldn’t send evites for a wedding reception or a 25th wedding anniversary. But evites are my favorite modus operandi. They’re easy, it allows me to know without a doubt who has received it, makes your guests’ lives simpler by simply hitting a quick reply button and there are so many designs available and it is environmentally friendly.

If you will be mailing paper invitations, choose a design that mimics your decor concept. Make sure you have the full names and correct addresses of your guests. Include an RSVP by date and mode (call you, send a card back, smoke signals). If you’re including an RSVP card, make sure you provide them with the stamp and have the cards addressed to you.
Time & Date
The date for this event was predetermined for me: February 27th. Since this will be an elaborate 8-course meal (yeah, I have NO clue what I was thinking about), I set the start time to 6:30pm. I’m assuming each course will take about 30 minutes from presentation to discussion. Keep your fingers crossed for me, will ya?
When you’re determining the time for your event, you will consider what meal will be served, how much preparation needs to happen while the guests are already there and then give them enough time to not only eat, but enjoy the course served, compliment the hostess, beg for the recipe, blah, blah.
Venue & Decor
Where will this shindig take place? At your home or a friend’s? A restaurant? Park? Again, the theme and guests will determine the where. For me, I was thorn. I knew it had to be near a kitchen and that I wanted it to be homey and cozy. I had thoughts about having it at a friend’s home, she has more room than I do. The reality is that I will be preparing quite a bit of the courses on the spot and most of the side dishes will be made the day of. Transporting pots, dishes, pans through Houston seemed Nightmare on Elm Streetesque. So, home it is. Our home. Where I know all my nooks and crannies. Where I know where all the pots and spoons are. How hot the oven cooks. You know, home.
As for decor, flowers are always a must. Flowers and candles make any room look and feel especially special and that’s how I want my guests to feel. I have a couple of standard vases I love and I pick up a few blooms from my local grocer. I’m not a terribly inspired floral arranger, but floors look good without the wanting for much. One arrangement on the coffee table–a medium sized one. A couple of loose blooms in the bathrooms. Some tealights strewn about the room and votives on the table. Keep your flowers in the same color palette and you’ll have settings to die for.
Shopping Lists
I like ‘em. I don’t always pay attention to them, but when it’s time for a dinner party, I’m militant about it. That’s because of my super short attention span. If I don’t pull out my list as soon as I walk into the market and proceed to check things off as I find them, I will, inevitably, leave a few things behind.
So, once I have tweaked the menu, I write down the ingredients for the various recipes. I check my pantry for items I may already have and then i make my way through the aisles of stuff.
I also make a list of any serving dishes, silver, dinner, barware that may be needed for the event. That way I make sure I find what’s missing, whether I borrow, steal or buy it. Well, not steal. I just wanted to see if you were still paying attention. Designate what entrée will be served in which dish/plate, and make a note of it. If you figure this out ahead of time D-Day will be a breeze.
Prep Work
The best part about a dinner party is getting to enjoy the company of friends and loved ones. That is why I do my very best to do as much of the heavy lifting ahead of time. Make sure you have sides that will reheat well, even entrees. Desserts too.

This is also a good time to get all your dishes cleaned and ready. Load up the dishwasher for a quick rinse and set everything to the side. If you’re using fresh flowers, get them ready the day before. That will give the arrangements time to chill out and get comfy and gorgeous.
D-Day – The Set Up
If your event is at home, do any last minute cleaning and freshing up your home may need. Make sure the ambient temperature is cooler than normal–you will be running the oven or stove and you’ll have more people in your home than you usually do.
Start cooling your wine or beer bottles at least 3 hours earlier. Decide if you’d like to play some music and have the playlist ready to go. Set the table, put out the flowers and candles. Get the ambience going.
Also, take a moment to determine the sequence in which you need to reheat, toss or prepare any of the dishes you’re serving. Hopefully you’ve prepared some items ahead of time, make yourself a note of what needs to hit the oven or boiling water when.

Putting it all together
Say you’re serving a green salad, angel hair pasta with meat sauce, bread sticks and warm apple pie. You would make the meat sauce the day before (it will taste WAY better too) and chill it. Make your crust the day before as well. Then the day of, you begin to heat your meat sauce about 20 minutes before guests get there. At the same time you fill a pot with water and put it on the stove over medium low heat to get the water warmed up. The oven goes on after your first guest arrives to bake/reheat the bread sticks. After everyone has said hello, toss your salad greens, throw the bread in the oven and bring up the temperature of the water. Enjoy half your salad, go in the kitchen and throw in the pasta and come back to the table finish that yummy salad.
See? It’s all about being ready and timing the sequence of events. While everyone is eating, you can bake that pie.
Enjoy your labour of love
Pour yourself a tall one, mingle and giggle and enjoy your friends. Stop by on Sunday when my official 24, 24, 24 post will be up.
Cookingly (and entertaingly) yours,
Anamaris
If you’re as addicted to cooking shows as I am, you’ve heard and seen this sauce. It is used to add another flavor profile, to make a dish look pretty when plated. It is called coulis and it is insanely easy to make, while packing an incredible punch.
A coulis is a thick, condensed sauce of French origin. Most often, you’ll hear about fruit coulis, but it can also be made with vegetables or herbs for savory recipes.

This recipe is for a strawberry coulis–remember you can substitute the strawberries with your preferred fruit and follow the same process. You can make this ahead of time, as it will keep in the refrigerator for up to one week. A fruit coulis goes quite well over ice cream, cakes, fruit.
Strawberry Coulis
2 cps frozen strawberries
3 tbsp sugar
1 tbsp orange liqueur
1/2 cp water
Put all the ingredients in a small saucepan, stir and bring to a boil over high heat. Lower the temperature to medium and cook for about 15 minutes or until it begins to thicken or becomes syrupy.
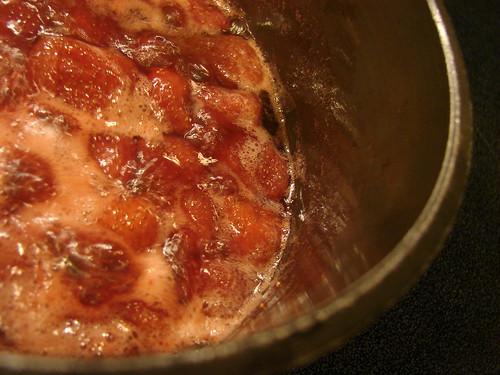
Remove from heat and allow it to cool for a few minutes. Pour the strawberry syrup into the blender and puree for a few minutes. You can strain the syrup if you wish, but with strawberries, unless you have a very fine sieve, you will still have the seeds–even if very fine.
Try it with this easy chocolate dessert.
Cookingly yours,
Anamaris
Roux and the White Gravy.
Thanks for coming back for another tip or trip in the Chef School corner. This time we’ll take a look at Roux. This is the base behind a number of sauces, as well as most gravies. A roux will help thicken any sauce and add more depth of flavor.
A roux will be lighter or darker depending on the type of sauce you plan on creating. Lighter roux can easily be made with butter, however, if you plan on a dark sauce/gravy, it may be best to use fat with a higher smoking point. a vegetable, you will cook your roux
Making a Roux
In a medium pan, heat the fat over medium heat. Then add flour. The ratio is 1:1, although bumping the flour a bit can be helpful and lowers the fat content. So, for every tablespoon of fat add 1-1/2 tablespoon of flour. Using a whisk incorporate the flour into the fat. Keep whisking until it reaches the desired color. The objective at this point is to cook the flour, that’s why the temperature shouldn’t be too high.
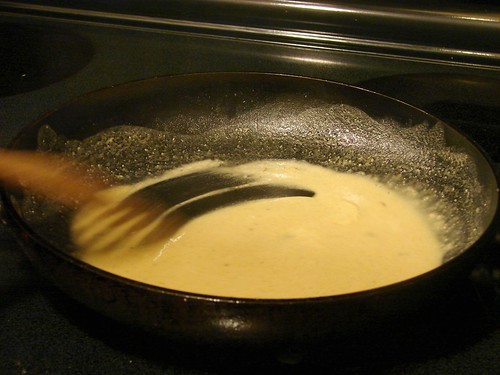
That’s it.
If you decided to make a gray with this roux, be mindful not to add hot liquids, instead, add broth, water or milk that is at room temperature or warm. Also, add them a little at a time, making sure to stir vigorously to avoid creating lumps in the gravy. Also remember that in order to achieve its full thickening potential, you must allow the sauce to boil lightly before turning it off.
I made a white gravy with the roux. I started out with bacon fat, about 2 tablespoons and 3 tbsp of flour. I cooked the flour until lightly golden, about 5 minutes, then added about 2 cps of whole milk.
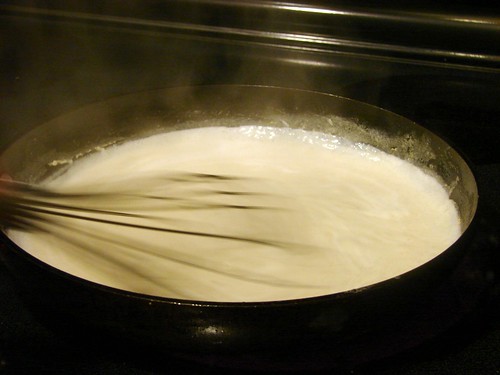
Once thickened, I seasoned it with sea salt, freshly ground pepper and a dash of nutmeg. It became the background for my Bacon & Asparagus Gravy. It was delicious!
There’s more! I’ll tell you in a minute, first, humor me.
I was down to the last chicken breast I purchased for the V-Day recipes and I didn’t know what to do with it. I had the chicken and some asparagus left. You may remember I mentioned not preferring chicken breast. I find it dull, dry and almost flavorless. What can I say? I’m a dark meat kinda girl.
But, I had a chicken breast leftover. As I drove home from work, I kept pondering my options. It wasn’t enough for Hubby’s yummy chicken tenders. Scratch. I’m trying to keep my carb intake down, so adding it to pasta was not an option. Scratch that too. But something with a crunch is what my brain wanted. Then, lightbulb! How ’bout Chicken Fried Chicken(ish), Gravy and Asparagus.
I came up with Chicken Fried Chicken with Asparagus and Bacon Gravy. Don’t ask me how that happened, but you’ll be glad it did! Here’s the awesome recipe.
Chicken Fried Chicken
For the chicken:
1 chicken breast, skinless & boneless
1 tbsp extra virgin olive oil
1 tsp sea salt
1 tsp black pepper
1 clove garlic, crushed
1/2 tsp Herbs d’Provence
1-1/2 cps panko crumbs
Let’s make that lonely chicken breast multiple, shall we? Butterfly that breast, why don’t you! The idea is to split the breast in half and even it out. Make sure your knife is very sharp. Carefully work the knife through the breast, you now have 2 halves.

Now that it’s butterflied, you will need to even out the thickness. Cut 2 sides of a large ziploc bag. Lay the breast down on one side of the bag, top it with the other end then use a mallet or a flat heavy pan to flatten the breasts out. This is also known as Paillard.
This is what it looks like before:
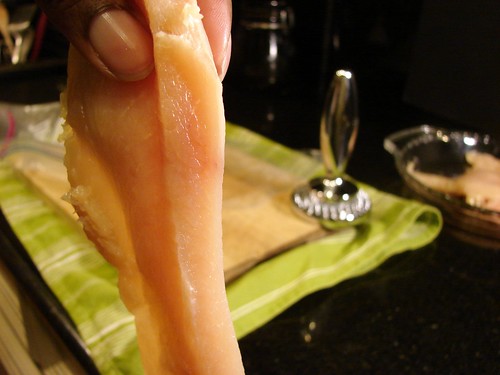
And this is it after:

Now that the chicken breast has been thinned out, combine the oil, S&P, garlic and Herbs dProvence in a bowl and add the breast meat. Spin it around to coat all sides and set aside.
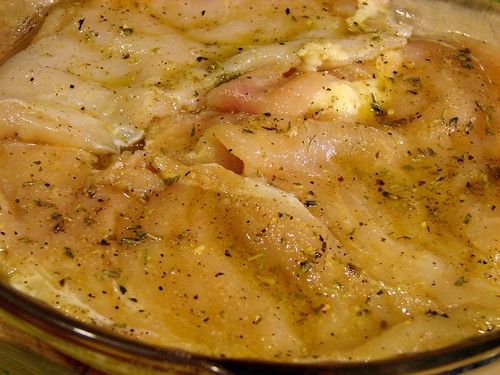
For the Bacon Asparagus Gravy:
3 slices bacon, finely chopped
Bacon drippings, about 2 tbsp
3 tbsp flour
10 asparagus spears, chopped
2-1/2 cps whole milk
Sea salt & Fresh pepper
Dash of nutmeg
Brown the bacon in a medium pan. Once golden brown, remove the bacon to a bowl. Drain out most of the drippings, but do not discard the fat, you will need it to make the gravy.
After you’ve peeled and trimmed the asparagus, cut them to pieces that are about 1-inch long. Heat the pan you cooked the bacon in and add the asparagus, throw in a pinch of salt and pepper. Toss the asparagus around a few times, then cover with a tight-fitting lid. Allow it to cook for about 2-3 minutes, just until the asparagus is al dente. Remove and add to the bowl with the bacon. Set aside.

In that same pan, add the rest of the bacon fat over medium heat. When it is hot, add the flour and stir with a whisk. You’re now making a roux. This is a white gravy, so the flour shouldn’t brown. However, in order to improve the taste of the gravy, you need to make sure the flour is cooked. The color should be that of light honey.

Once the roux is the right color, slowly begin to add the milk. Make sure you’re stirring while you add the milk or you’ll end up with lumps. Once all the milk has been added, continue stirring and allow it to come to a boil.

Once it boils, lower the temperature and stir some more until it thickens. When it reaches the consistency you’re looking for, add the asparagus and bacon. Taste and adjust the seasonings as necessary. Set aside.

Now is time to cook the chicken. In a medium skillet, heat enough vegetable oil to cover the bottom of the pan. Spread out the panko crumbs on wax paper and dip the chicken pieces in it. Once the oil is hot, fry the chicken pieces to a golden brown. Remember the chicken is very thin now and will not need to cook for long, probably 2 minutes per side. Remove and drain.

To plate, place a piece of chicken on a plate, then add the gravy right next or on top of the chicken. Enjoy it!

Cookingly yours,
Anamaris
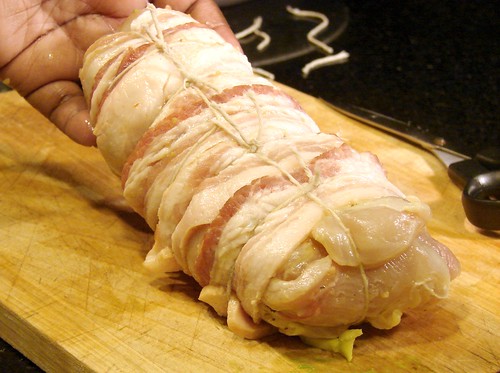
Truss that chicken!
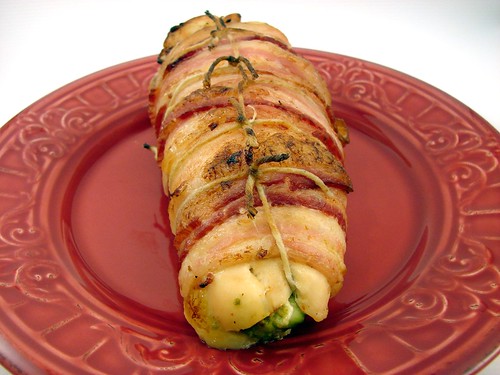
I’ve always been fascinated by trussing. It looks so… cheflike. So professional. So fancy. So out of my league! For years I avoided it like the plague. The idea of stuffing and rolling and knotting something seemed somehow out of my reach.
So why truss? To cook log-like foods evenly. Almost anytime you stuff and roll something, there’s a chance the ‘package’ will be unevenly shaped and won’t cook properly. It also keeps thing looking tidy–like bird wings. If you tie them to the body, then they don’t look like they may fly away from the platter. Finally, trussing keeps all the goodness in. Nothing oozes or slips out of the cavity. See? A handy trick, right?
One day I decided I would give it a try. The roll wasn’t all that attractive, but it did serve it’s purpose. It was good enough to commit to the process. I bought cooking twine and gave living space in my pantry. I didn’t avoid recipes simply because they required trussing.
Today I will share with you how *I* truss. It may not be the fancy Le Cordon Bleu way, but it looks good. Most importantly, it’s easy and it WORKS! Ready? Get your twine.
The traditional style for trussing uses one long piece of twine. I find it awkward to keep that piece of string going in the direction it should or I mean for it to. Instead, I tie individual pieces: cutting 1 long piece to tie it across the longest section and, depending on the size of the item in question, at least 3 shorter pieces to crisscross.
First things first. Twine. Remember that scene in Bridget Jones where she makes dinner for her friends and trusses something with blueish twine? Yeah. Make sure you use cooking twine. These will usually be made of cotton and colorless. There are also some elasticized ones, I’ve not used those, but when I buy a rotisserie chicken, that’s what’s on it. Anyway, avoid colored twine.
Second thing: After cutting the twine, soak it in water before using. Not a must-do, but the twine will darken as the meat cooks. If you soak it, it will not burn.
OK, let’s do it.
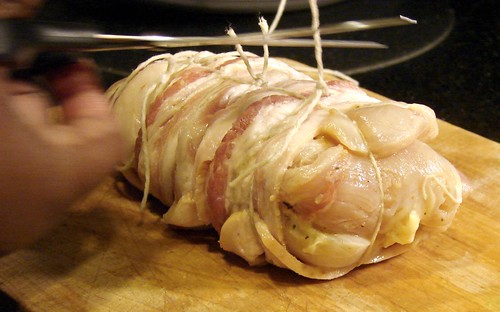
Step 1 – Once you’ve stuffed and rolled, take the longest piece of twine and slide it under the trussee. Bring it to the top, pull towards one of the ends and tie 2 knots. Make sure to pull it taut, but not too tight.

Step 2 – Crisscrossing. Take the shorter pieces, again, slide it under the roll until you reach the center. Now pull it to the top, and tie a double knot.

Step 3 – Crisscrossing. Take another piece of twine and slide it under to about 1-inch from the center tie. Pull up, double knot. Repeat this step for as many sections as you need. The chicken breast I rolled for this demonstration was about 7, maybe 8 inches long. I tied it twice on either side of the center cross-section.

Step 4 – Trimming. All that’s left now is to trim the excess twine. Use a very sharp knife or scissors for this. Trim pretty close to the knots, just not so close that you need worry about the knots coming undone.
Step 5 – Done. Go roast it now.
