
Don’t you just love it when 2+2=4? When things just don’t seem to be lining up and then they just all come together? Cooking and baking should be fun, stress free, an opportunity to wing it. Baking is scientific, so you do need to follow a recipe’s measurements, but that doesn’t mean you can’t make substitutions.
 A couple of weeks ago, Andrea from Family&Food invited me to participate in a new bread baking group: Mellow Bakers. Much like the BBA, they plan on following recipes from a specific cookbook, Bread by Jeffrey Hamelman. What drew me to this group is the idea of baking at a mellow pace. I love bread, but I’m trying to stay away from it AND I don’t really want to feel pressured to making a bread a week. So this group suits me just fine.
Paul from Yumarama is the group’s hallway monitor, he suggested we bake a bread a month, further, you can bake the chosen recipe or try a different one if that one doesn’t speak to you. See? Mellow. So the first bread was picked: Traditional English Hot Cross Buns.
I tweaked this recipe out of necessity, and also desire. Let me tell you about my complications. I don’t like lemon peel, from the go I knew I wouldn’t use that. As I thought about it, I knew I wanted to use candied ginger instead. And currants are ok, but I had these gorgeous Sultanas in my pantry… no way I was going to ignore them and purchase currants in their stead. Then…, I had car issues and never made it to the store to purchase the candied ginger AND I ran out of granulated sugar!!! Thankfully, I had brown sugar.
To deal with the lack of candied ginger, and since the recipe calls for simple syrup, I minced fresh ginger and added it when I made the brown sugar simple syrup. The result? Little flecks of sweet gingery goodness that perfumed the buns and a flavorful glaze to brush the tops. SCORE!

Hot Cross Buns
makes 13 buns
For the sponge:
1/4 cp bread flour
7/8 oz milk, warm
1/2 tbsp sugar
2-1/4 tsp dry yeast
This is the runniest sponge I’ve ever made, out of like 5 so far. It was easy to mix by hand. Warm the milk, it just needs to be tepid and mix the yeast into it. In a separate bowl, combine the flour and sugar, then add the yeasty milk and whisk until well incorporated.
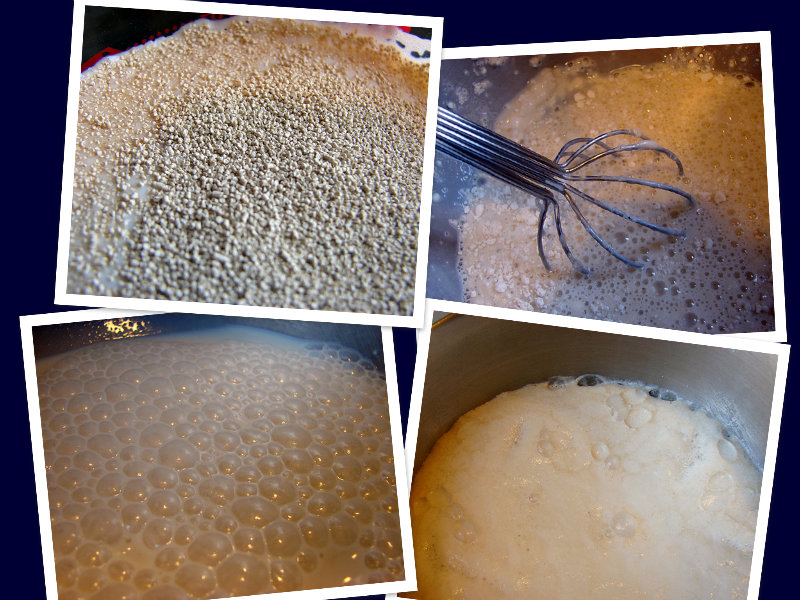
Set aside, cover with plastic wrap and allow it to rise for about 45 minutes. Although it may seem unlikely, it will double in size and hold its shape quite nicely. It looked like a souffle!
If you plan to follow my recipe as I prepared it, then this is a good time to make the simple syrup. However, if you opted for ready-made candied ginger, then you can make the syrup later.
For the syrup and ginger:
1/4 cp ginger, finely minced (approx)
1/2 cp brown sugar
1/2 cp water
Combine all ingredients in a small saucepan and bring to a boil over medium heat. Allow it simmer until the sugar is completely dissolved and the syrup begins to thicken. It took about 15-20 minutes. Remove the ginger bits and set the syrup aside to cool.
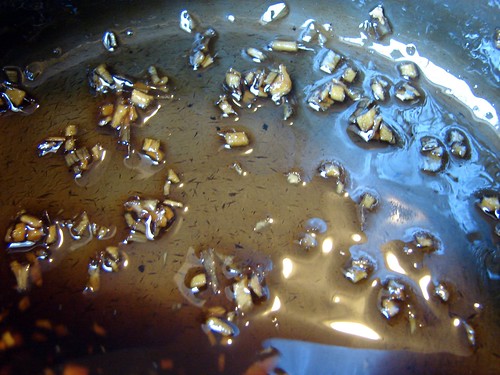
Combine the ginger with the raisins.
 For the dough:
2-3/4 cps bread flour
4 tbsp butter, softened
1 egg, at room temperature
1/4 cp sugar
3/4 tsp sea salt (a bit less if using regular salt)
1-1/2 tbsp allspice
3/4 cp golden raisins
2 tbsp candied ginger, finely minced
In your mixer’s bowl, combine the flour, sugar, salt and allspice then mix in the butter. Mix until the butter has dispersed evenly into the flour.
Mix in the egg, then add the sponge and continue mixing for about 3 minutes to develop the gluten.
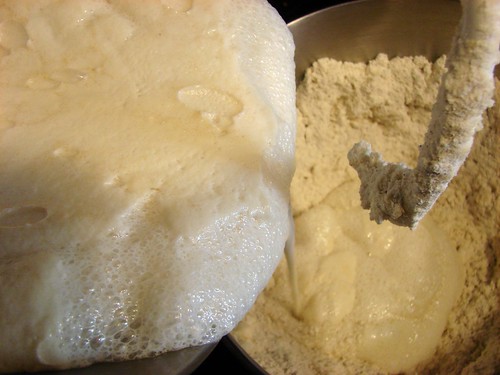
Add the raisins and ginger mixture and beat until evenly incorporated. Scrape the sides and cover the bowl with plastic wrap, set aside and allow it rise for 1 to 2 hours.
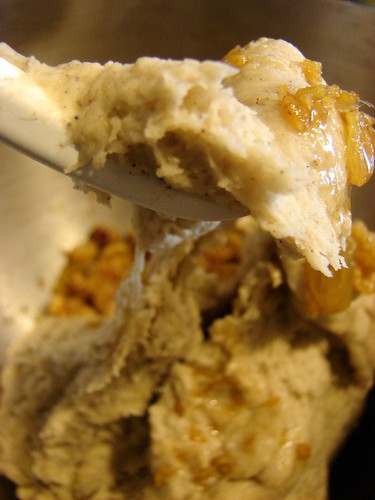
After it has doubled in size, turn the dough onto your countertop and divide it into 12 (or so) even pieces. I got 13 pieces slightly larger than a golf ball. Time to shape the pretty buns.
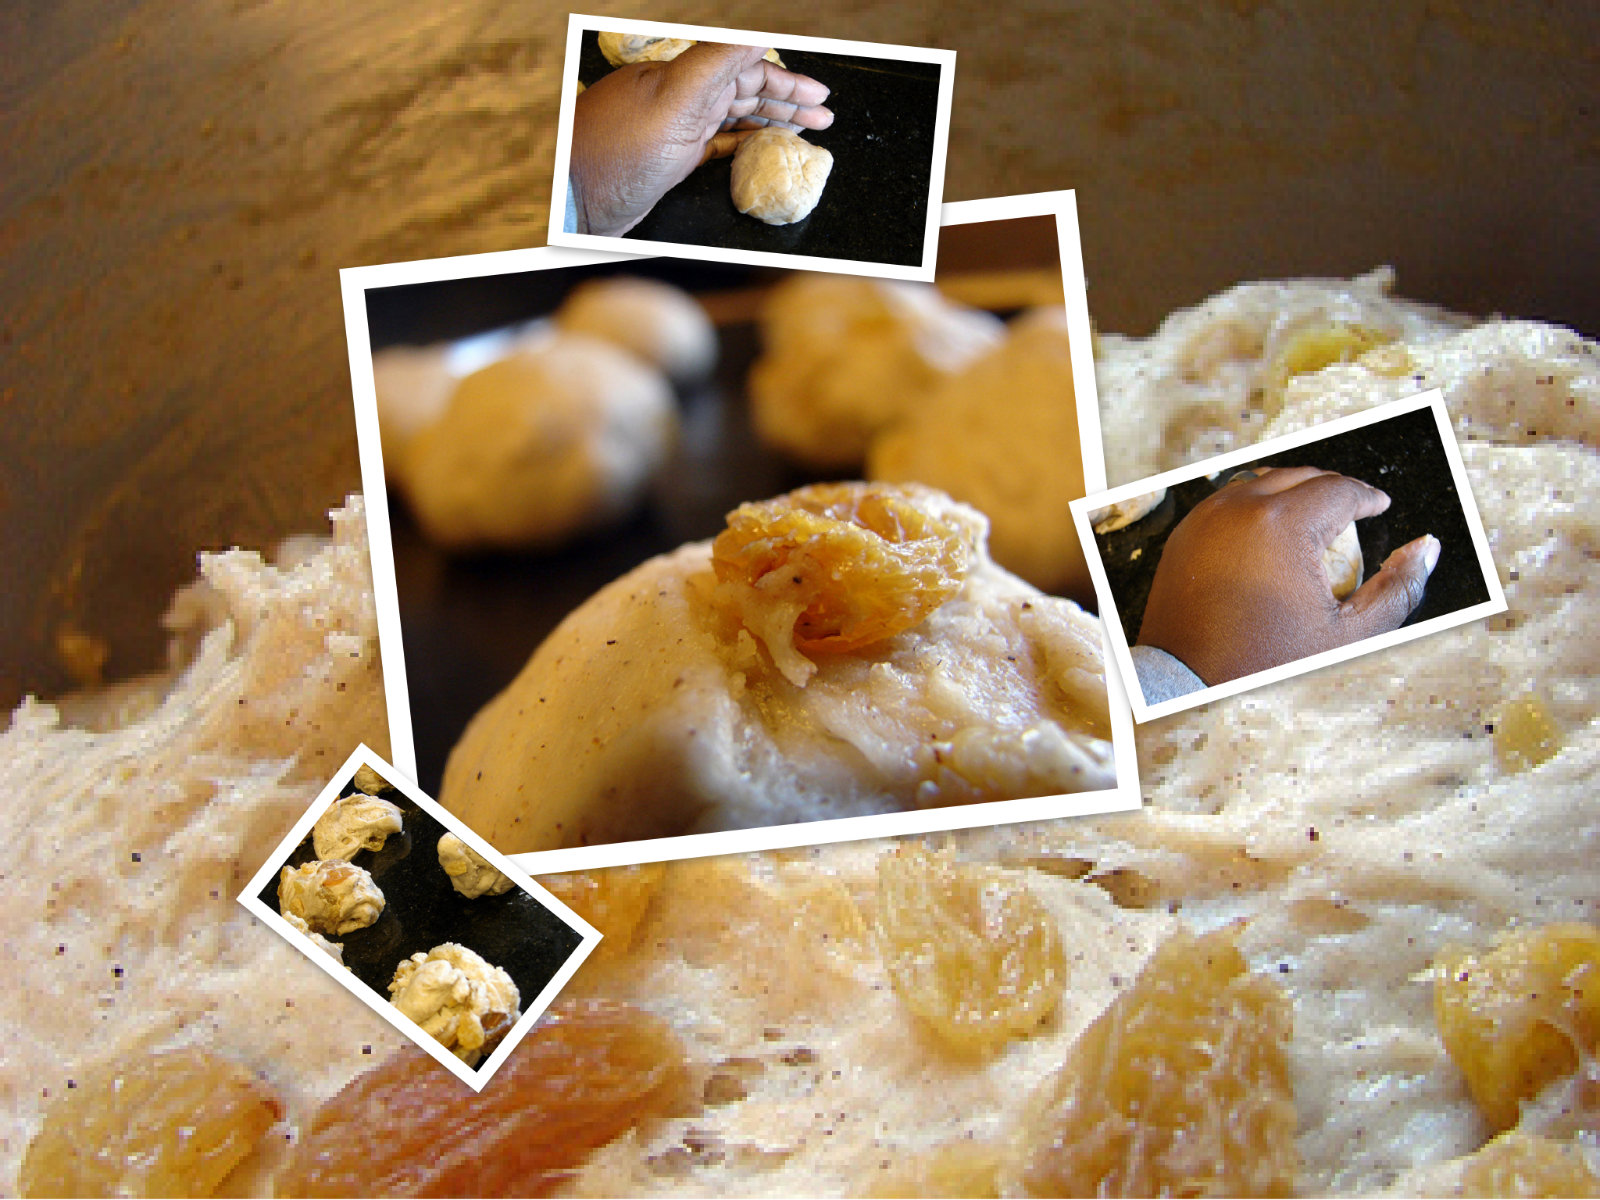
Take each piece and roll into a ball by cupping your hand over it and rolling it on the countertop. You may have a seam, make sure you keep it at the bottom when you transfer the buns to a baking sheet prepared with silpat or parchment paper. Repeat until all buns are done.
Cover the buns with plastic wrap and allow them to double in size for another hour. While they rise, prepare the crossing paste and simple syrup, if you haven’t yet.
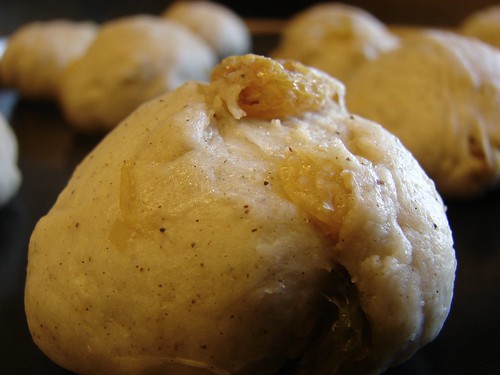
For the crossing paste:
In a small bowl combine 1 cp all purpose flour, 3 tbsp oil, about 1/2 cp water. Add water a bit at a time, you want the paste to be smooth and thick, about the consistency of ketchup… Keep in mind that this will need to go through a piping bag, you don’t want it to be too thick or too thin.
Once the buns have risen to twice their original size, preheat the oven to 440. Dump the paste into a piping bag fitted with a medium size round tip. I only had a star tip, that’s what I used. Pipe a line across the middle of the buns going in one direction, then rotate the sheet 90 degrees and pipe lines transecting the first ones, forming a cross.

Pop the tray in the oven for 12-15 minutes or until the tops are golden brown. As soon as they come out of the oven, brush the tops with the cooled syrup.
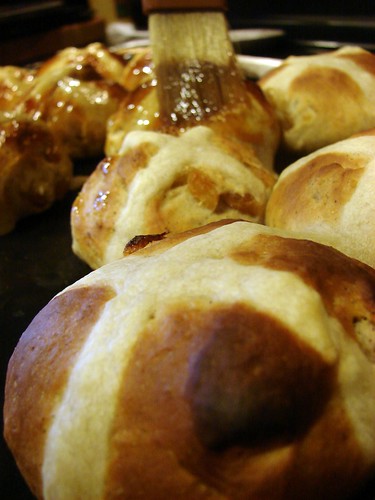
These are delicious fresh out of the oven, with a dab of butter.
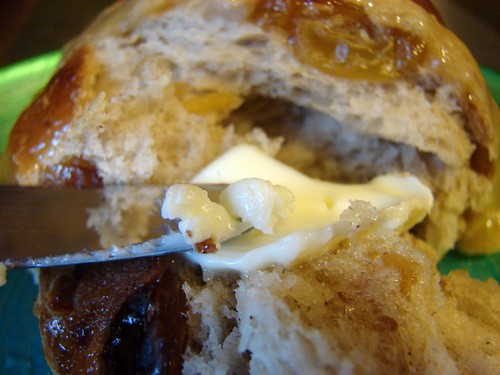
The other option is to eat them Caribbean style. See, as I read this recipe, I realized these sounded a lot like ‘bon‘ I used to eat in Panama. Bon is a cross between a bun and a fruitcake. These seem lighter than I remember bons being, and I like that, but the taste is pretty close.

In Panama, they will serve you a slice of bon, it is buttered and topped with American cheese. So I sliced my buns, toasted them on a skillet with plenty of butter and topped them with sliced cheddar.

You be the judge.

Cookingly yours,
Anamaris
Here it is. The last recipe for the 24, 24, 24 dinner I had in February. A lot of really good dishes, a lot of really good food, a lot of pictures and typing! This last one is pretty simple and super delicious too.
This was for the Western region: Nevada, Utah, Colorado, Idaho, Wyoming and Montana. Cowboys and rodeos, baby. Originally, foods were prepared directly over open fires, or in a Dutch oven. Today’s chefs have taken the region’s traditions and fused them into a satisfying cuisine that utilizes game, freshwater fish, grass-fed beef and bison.
I found an interesting recipe by Jeremiah Water, another pioneer of California cuisine. I know this wasn’t for California, but this dish sounded appropriate. Vodka Marinated Rib Roast. How could I pass on that? Vodka & beef?! Shush yo’ mouth!
Then, problems. I couldn’t find rib roast, the closest I came was a sirloin roast. I ordered 2 lbs of it and the piece of meat, though beautiful, didn’t seem large enough. Because of this, I ended not using the roast for the party and sub’ing it with filets. I still marinated them in vodka, of course. So, you get a 2-fer here, how-tos for the filet and roast.
Vodka Marinated Filet Mignon
Serves 4
4 tenderloin filets, trimmed
4 slices bacon, thick cut
1/4 cp vodka
1 tsp sea salt
1-1/2 tsp fresh ground pepper
1-2 cloves garlic, crushed
Wrap each filet with one slice of bacon and secure with a toothpick. In a shallow bowl, combine the rest of the ingredients and dip the filets in this slurry.

Make sure to coat all sides and allow it to marinate in fridge for at least 20 minutes, but no more than 2 hours.

Heat a skillet until smokey, add a bit of olive oil and sear the filets. Depending on how done you’d like it, sear for 3 or so minutes per side. Remove from the skillet and set aside for a few minutes to allow the juices to redistribute. For the meal, we served these with an awesome Potato Chive Tart.
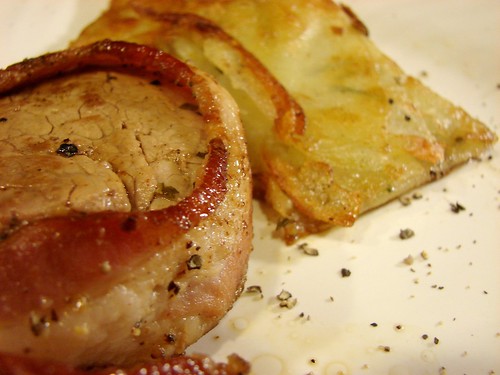
And since I already had this beautiful roast…

Vodka Marinated Roast
Serves 4-6
2-3 lb sirloin roast
5 bay leaves
1/2 cp vodka
1-1/2 tbsp sea salt
1 tbsp fresh ground pepper
Using a sharp knife, make shallow slits in the fat and insert the bay leaves. I cut the leaves into small sections that made sliding them easier.

Combine the rest of the ingredients and rub it all over the roast. Let stand at room temperature for 2 hours.

Preheat the oven to 325°. Heat a skillet until smokey and sear the roast on all sides.

Transfer to your roasting pan (I used the same skillet, just added a roasting rack), insert an oven-safe meat thermometer and roast until it reaches 140° for rare to 160° f0r medium.

Transfer the roast to a carving board, cover loosely with foil and let rest for 30 minutes.

Carve the roast into thick slices and transfer to plates. Pour any carving juices over the meat and serve at once.

Yeah. I know.

You can use the same basic marinade for any cut of beef you like.
Cookingly yours,
Anamaris
You know what’s funny? Calling something by the wrong name. It’s not like I don’t have the whole world just a few fingertips away. Nonetheless, for the 24, 24, 24 meal I called this a Potato & Chive Galette. Turns out, galettes are supposed to have a crust, which this definitely doesn’t. I don’t know what it is, because a tart should probably have a crust too.
What I do know, is that this was off the chains good! It allowed me to use my mandolin, and you know how much I love that. Layering the paper thin slices of potato and then pan frying them to make a crust, turned out something simply delicious. I wish you could’ve tasted them. Oh wait, you can! This was served with Vodka Roasted Beef Filets…oh my!
Potato & Chive Tart-thing
Serves 8
6-8 medium potatoes, peeled, preferably Yukon Gold
1/2 cp chives, cut to 1/2 inch pieces
Sea salt
Fresh ground pepper
Melted butter, about 1-1/2 sticks
Preheat oven to 375°. Prepare a 9×13 baking dish by generously covering the bottom and sides with softened butter.

Using a mandolin on the thinnest setting, slice the potatoes into paper-thin slices. I sliced about 2 at a time, this allowed me to layer them before they turned color. Under different circumstances, I would suggest slicing all them and putting them in cool water until ready to use. But for this I wanted to keep as much moisture out as possible. So working in batches was a better method.
Place the first layer of potatoes on the bottom of the baking dish making sure to cover the entire surface and overlap them slightly. Next, using a brush, dab with melted butter. Now sprinkle some chives, salt & pepper. Begin a new layer.
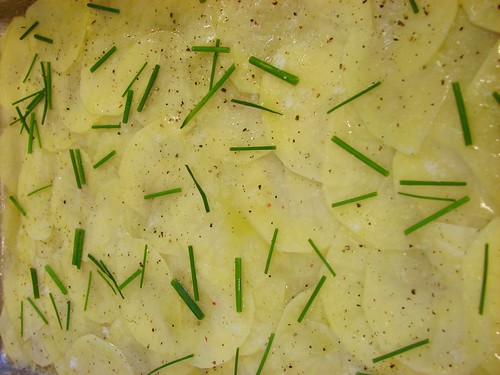
I layered potatoes 3 or 4 times, repeating the steps above every time except for the top layer. Do not sprinkle chives on the top, just finish with butter, then salt & pepper. Once you have layered all the potatoes, put it in the oven until the potatoes soften, about 40 minutes or until the potatoes are tender when pierced.
Now. You have 2 options here. You can stop at this point, just slice the tart-thing and serve. Or, if you like the balance of crisp and soft like I do, you can crisp it up a bit. uh huh.

Invert the tart-thing and slice into even squares. Heat a skillet, add some olive oil and butter and brown the squares on both sides. Drain on paper towels and serve. That night we browned them in the same skillet we cooked the filets, it had bacon fat. HELLO!

Cookingly yours,
Anamaris
The hubbz and I both love lamb, but I don’t have a lot of experience with it. Actually, this was my 2nd venture into lamb world. I love the mildly gamey taste of it and I especially love how easy it is to prepare. These were a hit served with the Calabacitas.
Grilled Lamb Chops

For this dish I kept the lamb pretty simple. It was marinated with crushed garlic, sea salt & black pepper, I made a little rub of it with a bit of extra virgin olive oil. Marinate for how long? As short as 10 minutes or as long as a few hours like I did here. Remember this was part of the 24, 24, 24 event, so I did as much prep work as possible.

Once ready to cook them, preheat the oven to 375° and heat a skillet with a bit of olive oil and seared the chops on all sides. Once browned, leave them in the skillet and place them in the oven, allowing them to roast for about 15 minutes for rare lambs.

Remove and allow them to rest at least 10 minutes before carving. Serve with the chutney and Calabacitas.

Three Chili Chutney
1 poblano peppers, roasted
2 Anaheim or Hatch peppers, roasted
1 canned chipotle chile, seeded & minced
1 granny smith apple, unpeeled & diced
1/2 cp sherry vinegar
1/2 cp water
1/2 cp light brown sugar
1/4 cp granulated sugar
1 teaspoon garlic, minced

Roast the poblanos on a grill or under a broiler. After they have cooled, peel off the charred skin, seed and dice.

Combine the chilies with the remaining ingredients in a saucepan and cook over a moderately low heat for about 25 minutes (until the apple is tender and most of the liquid is evaporated).
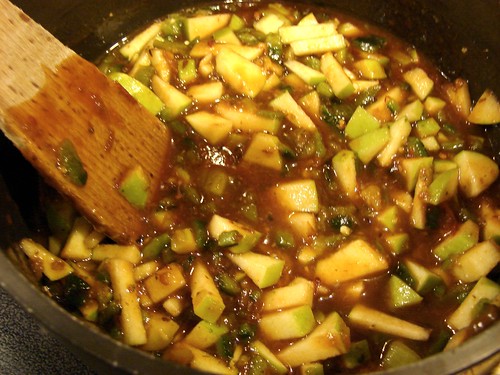
Cook until the apples are tender and the chutney has thickened.

This was another incredibly successful dish for the food orgy that was our 24, 24, 24 dinner last month. We put together a menu based on foods by the various US regions. This entrée represented the Southwest region: Arizona, New Mexico and Texas.
The food in this region was heavily influenced by Spanish immigrants who brought ingredients such as chiles, tomatoes. These were then combined with ingredients common to the area, which included red pepper, cummin and cinnamon. And, of course, this is cattle/livestock country, so the entrée had to include something meaty. We ended up with: Lamb Chops with Pepper Chutney and Calabacitas.

Calabacitas is a true New Mexican favorite, you will often find it as one of the sides you can pick from when you eat at most restaurants. I remember having it in Albuquerque many years ago. It was a creamy casserole of sorts, with Mexican squash, corn, chilies, cheese and a hint of allspice. For this recipe I wanted something ‘fancier’, so I was thrilled when I came across this version over at Fete & Feast. It brought to mind a stuffed chayote my mom prepares. Anyway, here it is:
Calabacitas Rellenas
Serves 6
6 small zucchini squash
1 tsp. ancho chile powder
1 Tbsp. extra virgin olive oil
1 small red onion, diced
1 cp fresh corn kernels
1/2 cp red bell pepper, chopped
4 oz. chopped green chiles
1 tsp allspice
1 cp queso Oaxaca*, shredded
1/4 cp crema fresca or heavy cream
Salt and pepper
Preheat the oven to 375° degrees.

Slice the top ½ inch from the squash. The squash I used for this were very small, about 4-5 inches long each and I used a whole one per person. To trim and remove their filling, I split each zuchinni at about 2/3s of the way–less than halfway through. If you’re working with larger ones, you could simply split them in half horizontally and scrape out the seeds.

Bring enough salted water to cover the squash halves to a boil. Drop the halves into the boiling water and cook for 2 minutes. Remove shells from boiling water; nestle close together in a glass baking pan, and season with a little more salt and pepper.
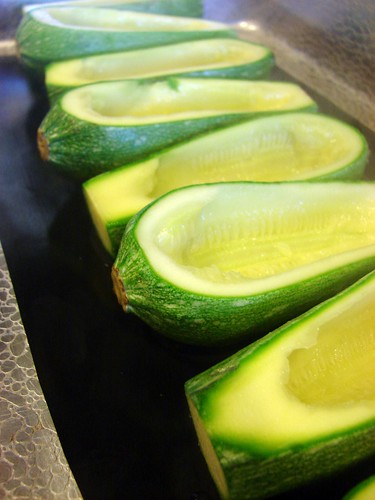
Heat the olive oil in a large sauté pan. Cook the onion until soft and starting to become translucent, about 5 minutes. Remove the pan from the heat and stir in the corn, and green chiles. Let cool for about 5-10 minutes. Then add 2/3s of the cheese, crema, and allspice. Check for seasoning; add salt and pepper to taste.

Mound some of the stuffing into each squash half. Cover with foil and bake for 30 minutes. Remove the foil, sprinkle the rest of the cheese, and return to the oven. Cook for an additional 5-7 minutes or until the cheese is bubbly.
Cookingly yours,
Anamaris
it’s happened again. I’m on Foodbuzz’ front page. I’m a Top 9er again!!! All that sweating and freaking out over edible flowers paid off. Not that the mere enjoyment derived from every bite wasn’t enough. or that your kind words and encouragement doesn’t send me on a swoon fest. But you kinda like me, I’m still perplexed as to why, but I ain’t complaining.
But to be on the top of close to 2,000 submissions daily… That’s not nothing.
Anyway, if you need proof, check it out. You can also click on the picture and buzz me around.
Thanks for your support!

UPDATE:
Instead of sending you to another post, I’m going to include the poll here so you can tell us which of these dishes strikes your fancy. Take a moment to acquaint yourself with the fantastic bloggers that submitted recipes this month. Believe me when i say you won’t be disappointed.
Then think about the 3 recipes, how original they were, would you like to try it? Would you attempt it? Then record your vote for your choice. We’re dying to hear from you. You can read the full post after the jump.
[polldaddy poll=2938726]
Aaah, Spring. It’s beginning to peek around here. The grass is greening, trees have bloomed, allergies have overtaken my body. Yesterday was supposed to be the first da of Spring, but in Houston temperatures dipped into the 30s overnight. Old Man Winter refuses to go quietly; good for him.
Anyway, as last month’s winner of the challenge, Casey chose our ingredients: edible flowers, shallots and a choice of beef, pork or lamb. From reading the posts from those who participated, this was indeed a challenging challenge. Heh. All 3 of us seem to have experienced some palpitations over it, then managed to pull out the stops. I’m really excited about all these dishes, hope you are too.
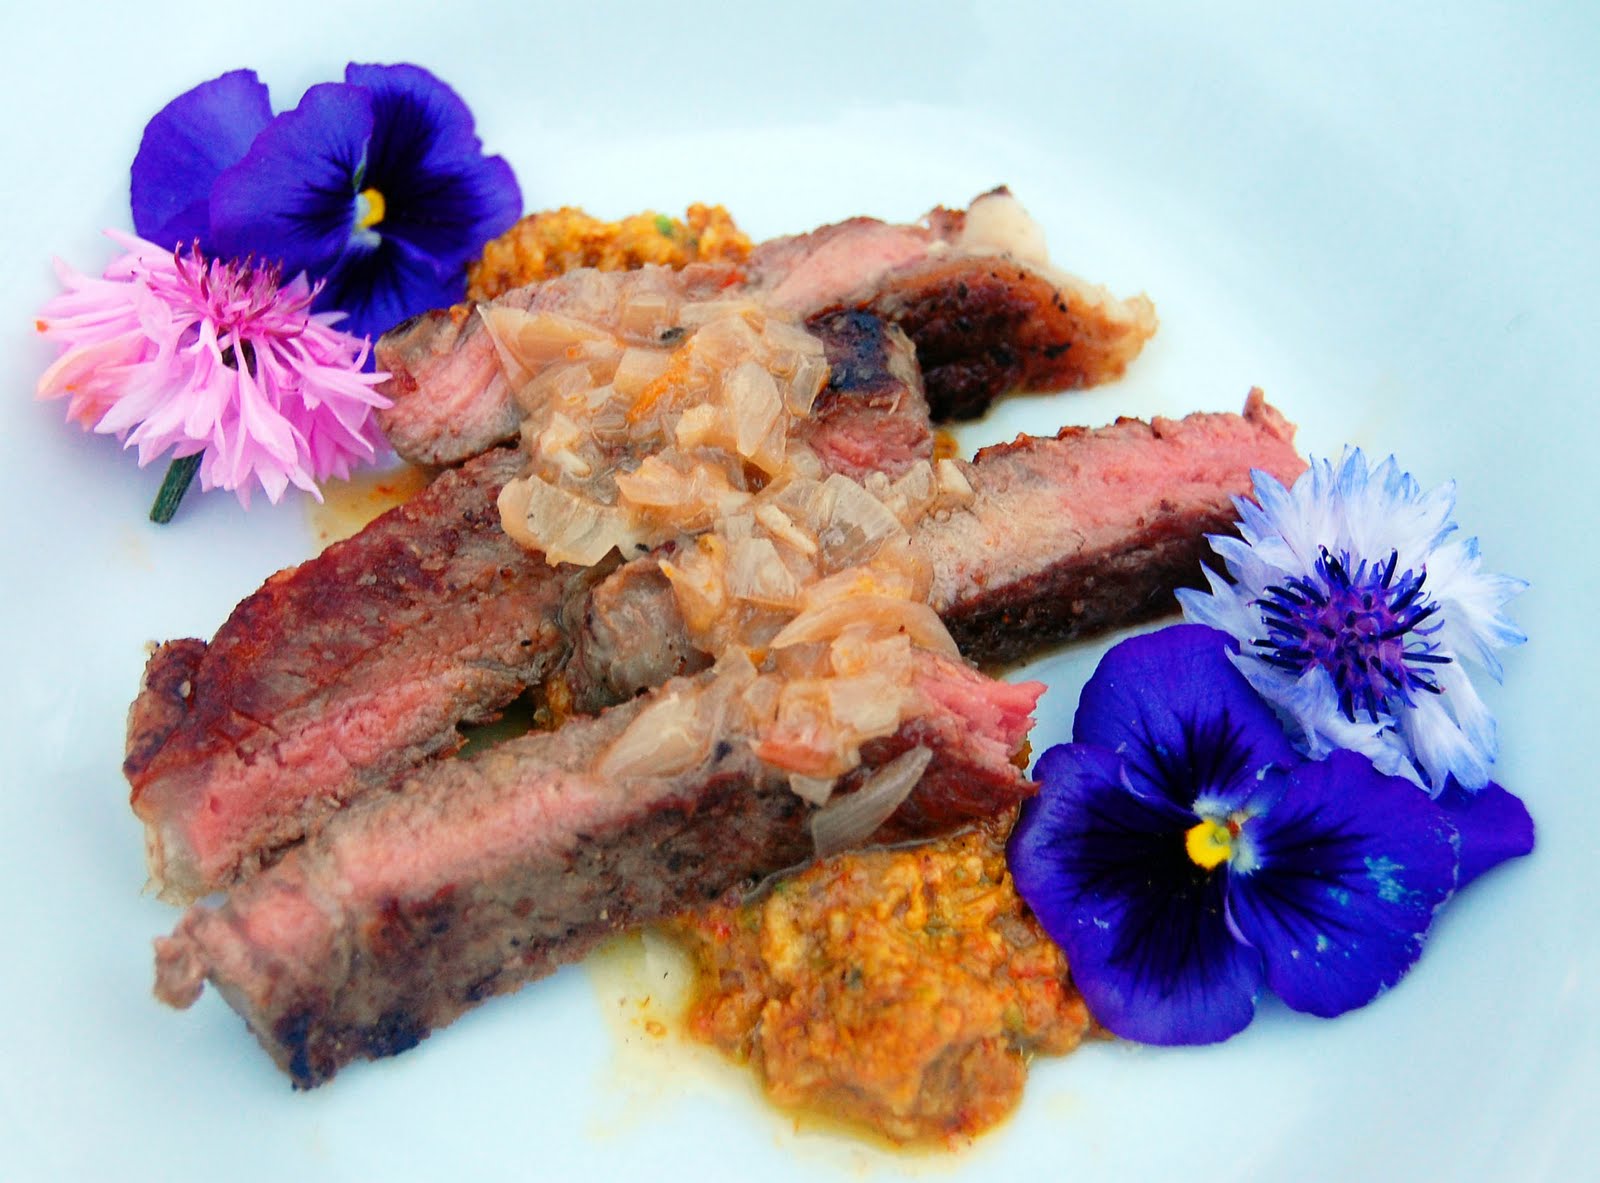
This was Jenn‘s first time making the challenge, and her dish looks amazing. She made nasturtiums into pesto and infused a sauce with shallots and a mix of edible flowers. YUM! Check out her recipe here.
__
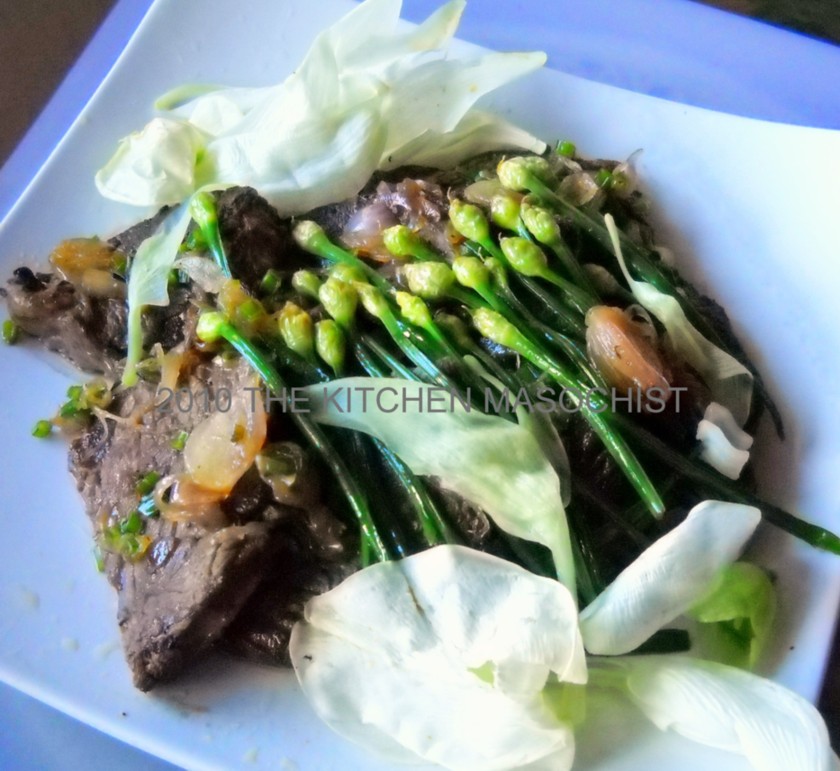
Have you ever heard of corkwood flowers? Well, if you were in the Philippines you would. That’s where the Kitchen Masochist lives and where she got the idea for her recipe. She seared beef and served it with a reduction from the flowers and Asian shallots. Gimme gimme! For the recipe, go here.
__
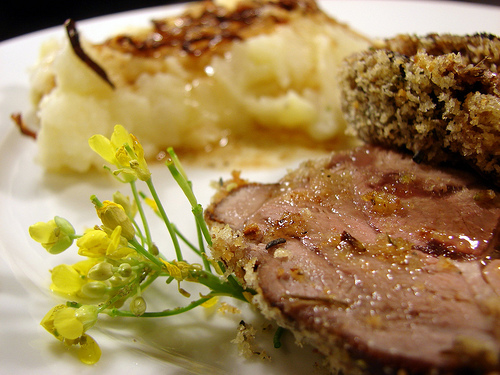
Me? I had a meltdown, or close to it. Couldn’t find the flowers, not sure if it has to do with the fact that Spring isn’t quite here, or just Houston limitations. Anyway, I got these yellow ones (I still don’t know what they are, if you do, holla!) I used them as garnish because I didn’t find a discernible taste. I opted for dried lavender and crusted some lamb with it. You can see my recipe here.
I had a great time with these ingredients, living outside the box is cool even when its uncomfy. I hope this will inspire you to try something new too.
Cookingly yours,
Anamaris
Once I won a ToastMasters Impromptu Award for sharing my dislike of bananas. They still call me the Banana Lady at work. I have a banana mental block: its smell, the way it looks when exposed to air, the texture. Believe me, I have banana issues. Big ones, but I won’t bore you with them. HOWEVER, there are 2 things I like banana hints in: banana bread and banana fritters. The fritters are another goody my mom used to make when I was growing up.
I’ve been thinking about banana fritters for a while now, so when I bought a share of produce from a local farmers market association-group-co op thing and it included bananas, I knew the time had come. I stared at them for days waiting for them to ripen enough to make these fritters. Then they were ready, so here you go:
Banana Fritters
About 10 fritters
2 very ripe bananas
1 egg, beaten
2 tbsp sugar
1 cp flour
2 tsp baking powder
2 tbsp milk
1 tbsp butter, melted
1/4 tsp grated nutmeg
1/4 tsp sea salt
Oil for deep-frying
Mash the bananas, it’s ok to have a few lumps. Stir in the egg, then the rest of the ingredients, until you end up with a pretty thick batter.
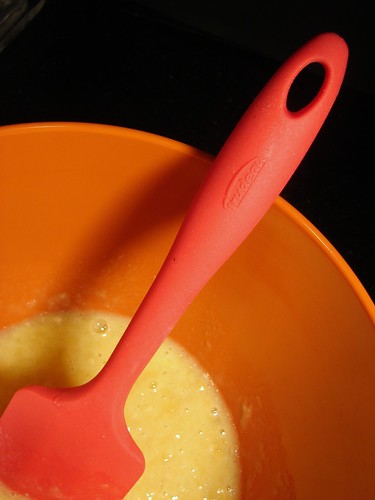
Preheat the oil over medium temperature; you don’t want to fry them too hot, otherwise they will brown while remaining raw in the center. Use a large soup spoon to pour the batter. Here’s a trick: dip the spoon in oil before scooping batter from the bowl, this will keep the batter from sticking to the spoon.

Drop the batter into the oil and spoon some of the hot oil over the fritters. This helps seal the top and makes it easier to flip. Fry for about 2 minutes per side until lightly brown and crisp on the edges. Once you flip them, give them a little squeeze, this helps to cook through the middle.

Drain on paper towel and serve dusted with powdered sugar.
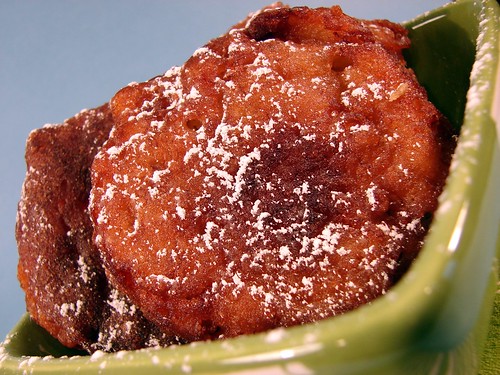
THEN…
I REALLY went bananas. *I*, Anamaris of Chef It Yourself, the same person who unloves bananas and who cringes at the sight of banana splits, went for the chocolate. I did. I don’t know what happened.
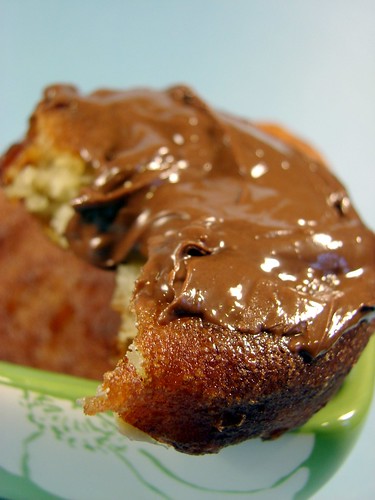
I don’t know why I did it. Well, I think I do know why I did it. It’s become apparent to me that my palate is growing up, expanding, refining, becoming more flexible.
I gave it a try, and OH.MY.GAWD!

Just a light smear of it will do. There was something magical about the combination. The fritters are slightly sweet with just a hint of banana, they develop a nice crisp edge, while they’re goey doughy inside. The Nutella teases you with its light chocolate taste.

Now I must leave you so I can come to terms with this choco-banana turn.
Enjoy!
Cookingly yours,
Anamaris
Casey, Casey, Casey. I have to say thanks, even if begrudgingly. Edible flowers…, WTH!!! I don’t think I’ve ever eaten any or had any on something I’ve eaten. I mean fresh edible flowers specifically. Nev.Ah. So when you threw those in as one of the ingredients for this month’s Top Chef It Yourself Challenge, you threw me for a huge loop. And that’s exactly what this challenge is about. Stretching comfort zones, thinking outside the boxes. Exploring. Testing. Challenging. So really. THANKS. Gracias, Merci, Grazie, Danka and all other languages I don’t know.
I tried, really I did. I Googled, Yellow Paged, emailed, did all the researching things one does in order to find something. Finally, a contact mentioned they had edible flowers through their organic market association thing and they could get me some. So I got them…, they weren’t labeled. I still don’t know what they are. They didn’t taste like anything *insert VERY pregnant pause here* even remotely special. They just tasted sorta *pause* green.
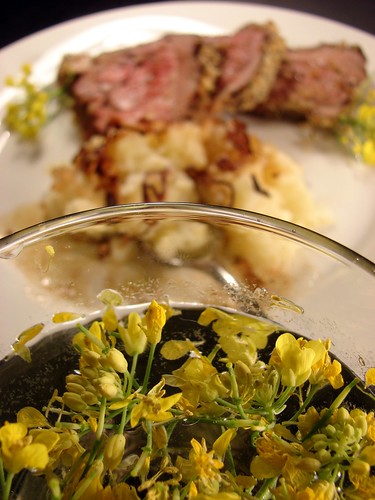
In the end I feel I copped out a bit, I went with dried lavender. In my defense, I’ve never cooked with it, unless you count Herbs d’Provence. The other ingredients were shallots and our choice of beef, pork or lamb. Since I’m trying to challenge myself, I opted for lamb. I had only cooked it twice and both times I cooked chops. To recap: lavender, shallots and leg of lamb–those were my ingredients.
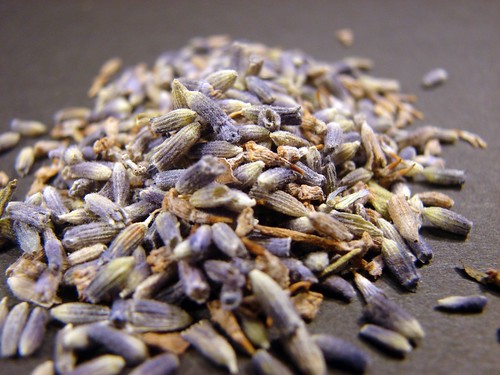
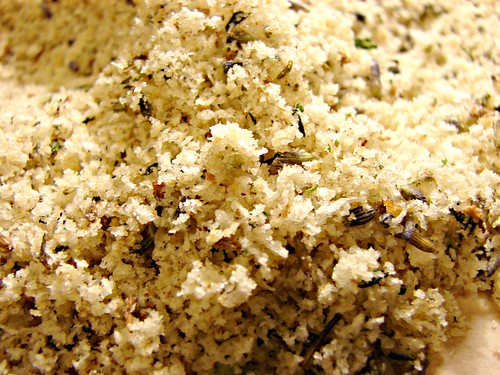
I had a very clear idea in my head. I once saw Gordon Ramsay prepare lamb chops that he crusted in a parsley-breadcrumb mix. They were beautiful. The green was bright and vibrant. And that’s what I envisioned, except I was hoping for purple. I didn’t quite get that effect. Not sure if it was because my newly purchased food processor didn’t grab the lavender buds or if it’s just because the lavender was dry and thus didn’t spread its lovely hue. No matter. The result was out of this world deliciousness.
Lavender tastes slightly sweet, not minty but slightly so. Maybe like very mild rosemary? There’s a certain smokiness to it. It paired incredibly well with the lamb’s gamey taste, almost spotlighting it. It was divine. I crusted the lamb with lavender and breadcrumbs and served it with a turnip & potato mash with fried shallots and brown butter sauce. That’s a mouthful, and it was oh so good. Here’s the scoop.
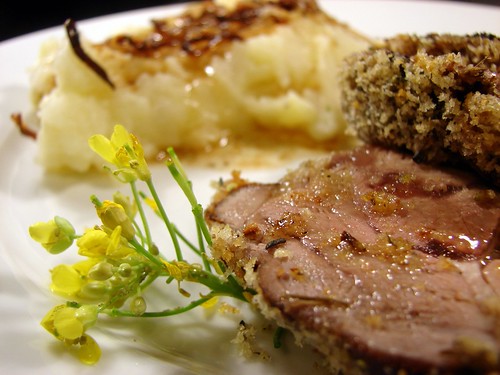
Lavender Crusted Leg of Lamb
Serves 4
1 leg of lamb, deboned (approx 2lbs)
2 tsp garlic, crushed (about 2 cloves)
2 tsp sea salt (I used my Mediterranean salt)
1 tsp black pepper
2 tsp extra virgin olive oil
1-1/2 tbsp lavender buds
1 tbsp thyme, fresh
1-1/2 cp panko crumbs
2 tbsp extra virgin olive oil
Mix the garlic, salt, pepper and 2 tsp oil and rub it on the lamb to marinate. Truss the lamb, this will help cook it evenly. Set it aside for now, this is a good time to prep the turnips or whatever side you plan on serving with this. Combine the lavender, thyme, panko and the rest of the oil, set aside.
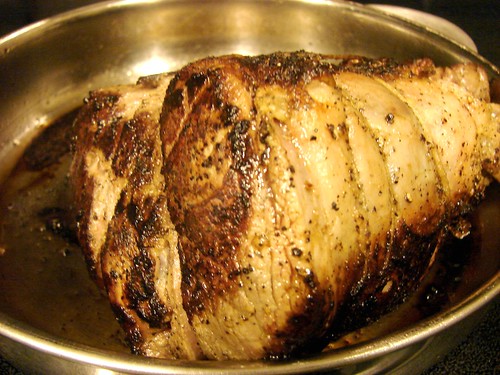
Heat an ovenproof skillet over high heat and swirl a few drops of olive oil. Sear the lamb on all sides, cooking for about 2-3 minutes per side. Preheat oven to 375°.
Cover the leg with the panko mixture on all sides, pressing it onto the leg of lamb. Put it back on the skillet and pop it in the oven to roast for about 40 minutes or until the internal temperature reaches 170°. Once it reaches this temperature (for rare lamb), remove it from the oven and allow it sit for at least 15 minutes to allow the juices to redistribute.

Now let’s talk about the turnips. I’ve only had them twice before this time, I noticed they seem to retain a lot of water. Since I wanted to mash them, I wanted to make sure there was some creaminess, that’s why I added the potatoes. The other thing I did was steam instead of boil them, that kept them nice and dry.

Turnip Potato Mash with Fried Shallots & Brown Butter Sauce
2 cps turnips, peeled & chopped
2 small potatoes, peeled & chopped
Sea salt
3 tbsp butter
I have one of these little steam baskets, I put it at the bottom of a medium sized pan and added enough water to create some steam. The water shouldn’t come through the basket. Combine the turnips and potatoes, add about 1-2 tsps of sea salt and place them on the basket. Cover with the pan’s lid and cook at a medium boil for about 20 minutes or until fork tender.
Once the potatoes and turnips are tender, drain the water and return the turnips to that saucepan (without the basket). Add the butter and mash roughly. Adjust seasoning as desired, set aside and keep warm.
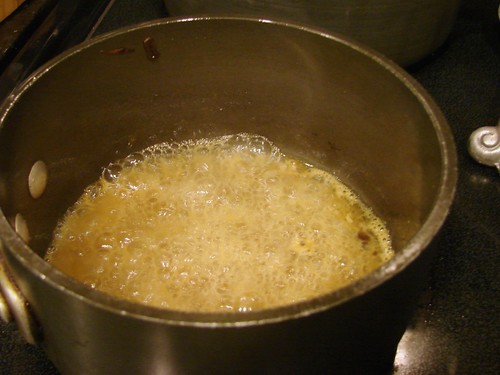
For the Brown Butter Sauce: In a small pan melt 3 tbsp butter over medium low heat.
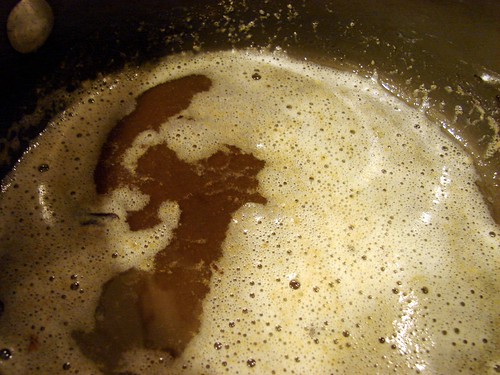
Continue heating the butter until it begins to change color to a deep golden brown. At this point add 1/4 cp of sherry and flame it to burn off the alcohol. Keep warm.
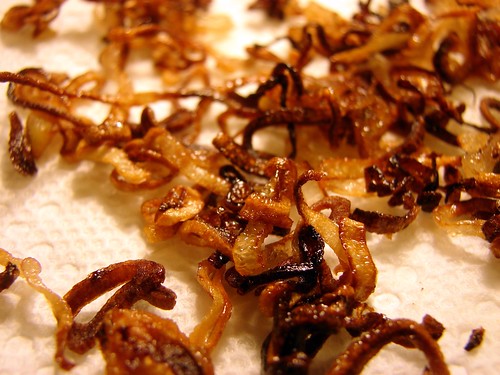
For the Fried Shallots: Thinly slice 2 shallots. Heat about 2 tbsp of oil on medium high heat. Add the shallots trying to keep them in a single layer. You’ll want to keep your eye on this, as the shallots with brown fairly quickly. Once browned, drain on paper towels.
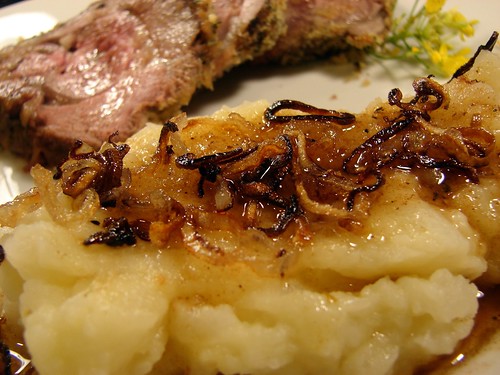
Bring it all together. To plate it, place a couple medallions of the lamb on a plate. Spoon some of the mash next to it and top the mash with a couple tablespoons of the butter sauce. Top the sauce with the fried shallots. Eat it! Add the shallots last so they’re still crisp when you eat them.
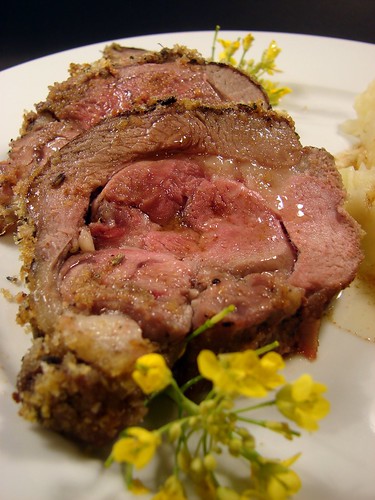
Doesn’t that look just AWESOME?!

Cookingly yours,
Anamaris
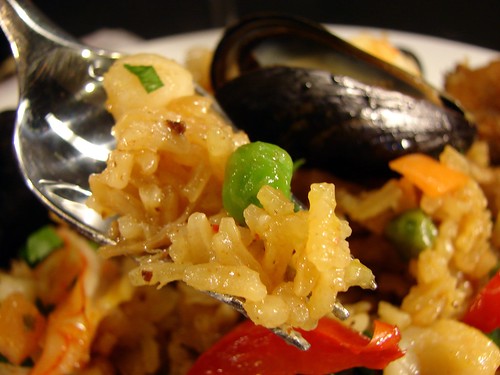
I’ll tell you what. If ever I’m asked what would I like as my final meal, Paella will definitely be on my mind. It combines a bit of everything I love in the food world: rice, seafood, pork, chicken, saffron, RICE! Ay bendito! It makes my heart quicken.
There isn’t a thing about this dish I don’t love. I love the look of it. I love the taste of it. I love the scent of it. I just love it, seriously. I do. I’m not exaggerating. I made this batch Sunday evening and ate the last bit of it for lunch on Wednesday. The Hubbs and I REALLY enjoyed this and took full advantage of it.
This isn’t an official, traditional, hand-me-down recipe. This is Paella the way I remember my mom making it and the way I’ve tweaked it over the years. I think it took just over an hour to get it all done, but I didn’t really track the time. It isn’t terribly time-consuming, but there are a few layers to take care of before arriving at the final product. Soooo worth it.
Disclaimer: Special thanks to my dear hubby who did all the action shots. The plating shots are mine.
Paella A Mi Manera (my way)
Serves about 8
For the meats:
6 chicken thighs
1/2 lb pork shoulder, approx
1-1/2 tsp sea salt
1 tsp black pepper
1/2 tsp Spanish paprika
2 tsp garlic, crushed
1-2 tsp extra virgin olive oil
4-6 plum tomatoes (about 2 cps)
1/2 cp dry sherry or white wine
I prefer using thighs as these will be braised for a bit, but if you are partial to chicken breasts, then use that. These thighs still had the bone and skin attached, this adds a lot of flavor to the cooked meat. You want to use a cut of pork that is well marbled (fatty), again this will be braising for a bit and marbling will prevent it from drying up.
Chop the pork into 1-inch cubes and put them in a medium bowl together with the chicken pieces. Season with the salt, pepper, paprika and garlic, give it a good toss to make sure all the pieces all well coated and set aside while chop the tomatoes. Slice the tomatoes in half, remove the seeds and dice into small pieces. Set aside.
You will need a saucepan that is big enough to hold the entire paella; it should also be on the shallow side and have a good fitting lid. Preheat the saucepan over medium-high, add enough oil to just glisten the bottom of the pan. Once the pan is hot, add the chicken pieces-skin side down as well as some of the pork. Brown the chicken and pork on both sides; you will probably have to do this in 2 batches. Make sure the pan is hot enough to sear the meat without drawing too much moisture from it.
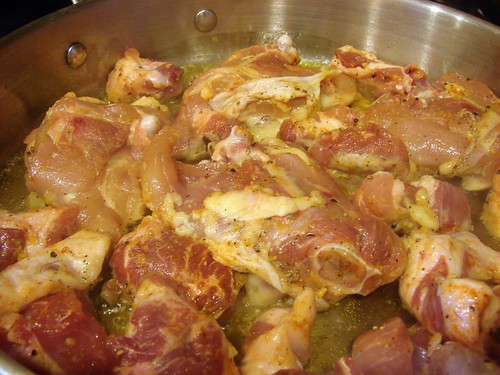
Once all the chicken and pork is browned, remove it from the pan and set it aside. Since you’re browning the chicken with the skin still on, you may have quite a bit of fat left in the pan. Drain some of it, keeping about 2 tbsp in the pan. Add the tomatoes right into the pan; the moisture from the tomatoes will help loosen the drippings stuck at the bottom. Believe me, you want to scrape every bit of that into the sauce.
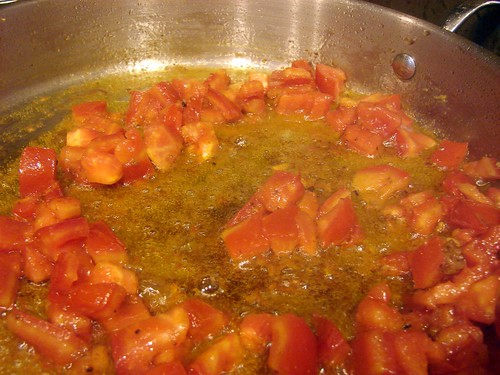
Once the tomatoes begin to soften and you’ve loosened the drippings, add the sherry and, if you’re not nervous about it, light a flame to burn off the alcohol. You don’t have to do it, since the tomatoes are still cooking at a pretty high heat, this will help evaporate the alcohol. Lower the temperature to medium-low, add the chicken and pork and cover it. Allow it to simmer for about 30 minutes or so, you’ll be preparing the veggies and seafood while that simmers away.

For the Paella:
 1/2 cp Spanish chorizo, diced
1 onion, chopped
3-4 scallions, finely chopped
1 red bell pepper, sliced
4 cps rice (I used jasmine)
1/2 cp dry sherry or white wine
6 cps chicken/seafood broth
Saffron, a generous pinch
2 Bay leaves
1 lb large shrimp
1/2 lb baby scallops
1 tsp garlic, crushed
1 tsp sea salt
1/2 tsp black pepper
1 tsp extra virgin olive oil
1 lb mussels
3/4 cp peas & carrots, frozen
1/4 cp Italian parsley, finely chopped
Sea salt
Extra virgin olive oil
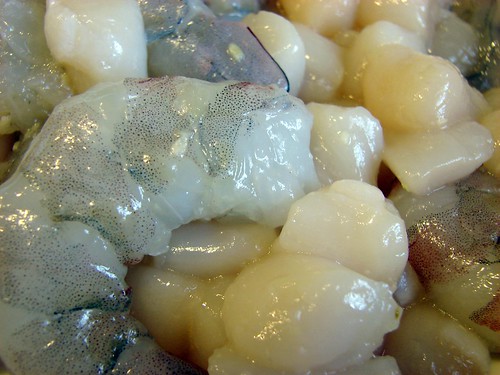
Prepare the seafood: hopefully you bought unpeeled shrimp. If so, peel and devein the shrimp, but hold on to the skins. Put the deveined shrimp and scallops in a bowl and add the teaspoon of garlic, salt, oil and pepper. Mix it well and set aside.
Also, make sure you give the mussels a good scrubbing and that you remove the beard.

Place the chicken broth in a small pan and simmer it with the bay leaves and the shrimp peel for about 15 minutes. Strain the broth and discard the peel and bay. Add the saffron to the broth and allow it to steep while you begin cooking the aromatics.
The chicken and pork should be nice and tender by now, remove it from the pan, but leave the dripping in the pan. When the chicken has cooled, pull it off the bone and break into bite size pieces. Set it all aside.

To the pan where you cooked the chicken, add the bell peppers slices and cook them until they begin to soften. Remove the peppers from the pan and set aside.
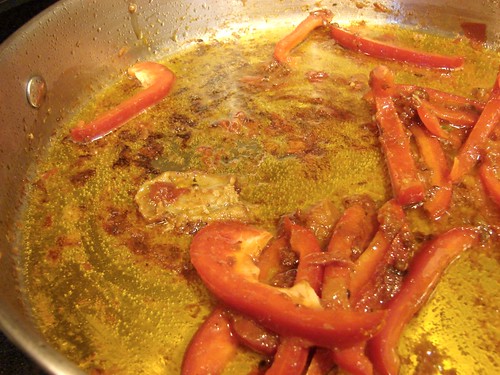
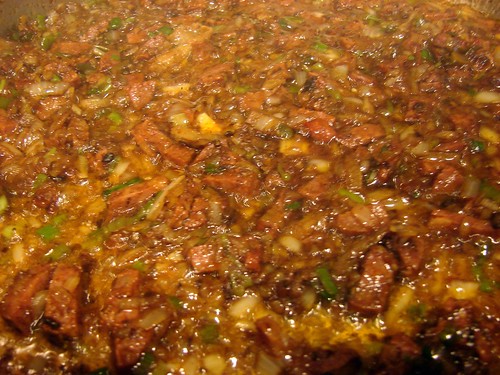
To the pan, now add the cubed chorizo. Remember Spanish chorizo is similar to andouille, it is dry and hard, not to be confused with the Mexican variety. Cook the chorizo until it begins to render its fat. Add the onions and scallions and cook until the onions are translucent.

At this point, add the 1/2 cp of sherry and make sure you release all the drippings at the bottom of the skillet.

You will notice how dramatically the color changes after deglazing. It becomes this beautiful deep terracotta hue and you just know there’s an incredible amount of flavor layered in there. And I can’t even begin to explain how glorious it all smells.
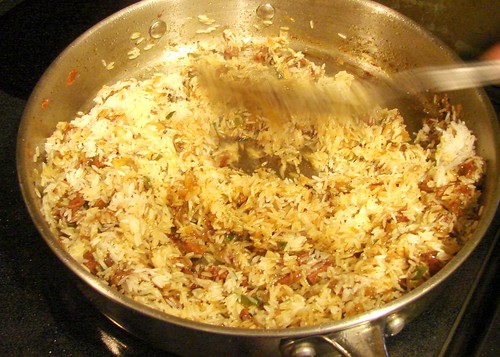
While the onions cook, rinse and drain the rice. Add the rice to the pan with the onions, stirring to make sure all the grains are coated. If it looks too dry, add a bit of olive oil. Continue stirring and frying the rice for about 3 minutes until the grains begin to turn white.
Add the broth and give it a quick taste to make sure the rice liquid is well-seasoned, adjust accordingly. Allow the broth to come to a boil before layering the meats on top.

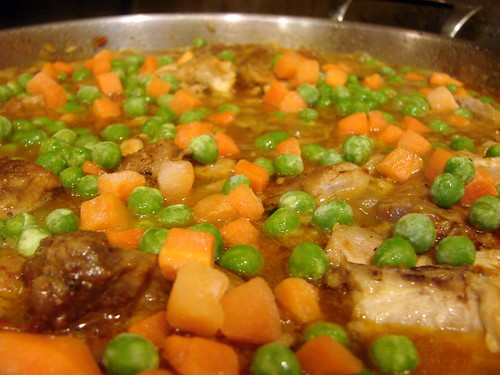
First the chicken and pork, make sure to push them into the rice.

As the liquid evaporates and you begin to see the top of the rice, add the peas & carrots trying to spread them out as evenly as possible.
Next, layer the red peppers.

It’s time for the mussels. Again, push them into the rice and try to spread them around.

Reduce the temperature to low. More than likely, the liquid will be almost completely gone by now, this is when you layer the shrimp and scallops over the top.

Once you have all the seafood in, place the lid over the pan and allow it to steam for 20 minutes to give the rice grains enough time to open, at which point it will be done!
Sprinkle the parsley over the top just before serving.
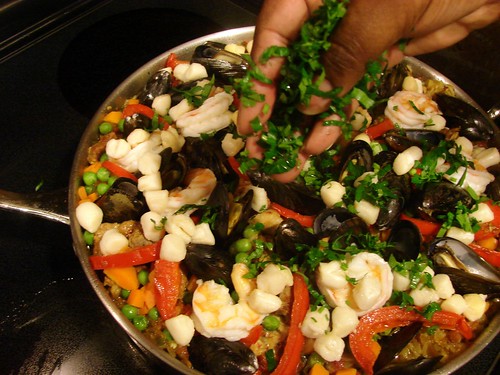
It makes a beautiful presentation to bring the pan right over to the table, but you can also serve it beforehand as the pot WILL be completely full.
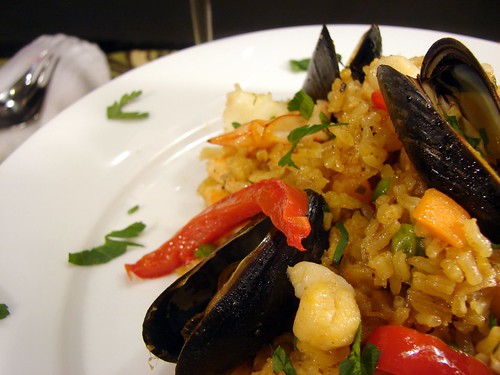
Enjoy!

Cookingly yours,
Anamaris
 A couple of weeks ago, Andrea from Family&Food invited me to participate in a new bread baking group: Mellow Bakers. Much like the BBA, they plan on following recipes from a specific cookbook, Bread by Jeffrey Hamelman. What drew me to this group is the idea of baking at a mellow pace. I love bread, but I’m trying to stay away from it AND I don’t really want to feel pressured to making a bread a week. So this group suits me just fine.
 For the dough:


