I like bagels. I won’t say I love them, because it’s not that intense between us. I don’t eat a lot of bagels because I have a tough time finding bagels that balance chewiness with the necessary crust. But when the Mellow Bakers added bagels to April’s lineup, I knew I was gonna try them.
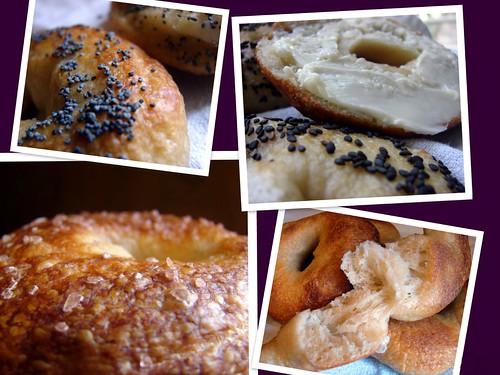
Yes, I’m behind on this submission. I’ve been busy traveling. The good news is, this is a relaxed baking group, hence the name, Mellow Bakers. I had to order things I’d never heard of such as diastatic malt powder and syrup. I also got some of that coveted high gluten flour because I’m pretending to be serious about this bread making business.
I started the dough yesterday and was immediately struck by the scent of yeast. I’ve decided it is one of my favorite smells now. Slightly sweet, with an underlying pungency. Filled with the promise of glorious bread. Yep, I’m digging the breading.
I followed most of Mr. Hamelman’s instructions for the home batch, but added a bit more salt because I use sea salt instead of the regular stuff and about 1-2 tbsps more water to keep the dough pliable. I also allowed the dough to ferment a bit longer before shaping, an extra hour to be exact.
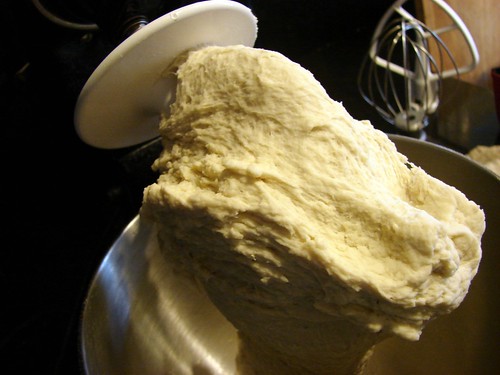
This is the first time I weighed dough before shaping. Hamelman suggested making each bagel with 4 ozs of dough, but I wanted mine just slightly smaller, so I weighed to 3ozs and ended up with 22 bagels.
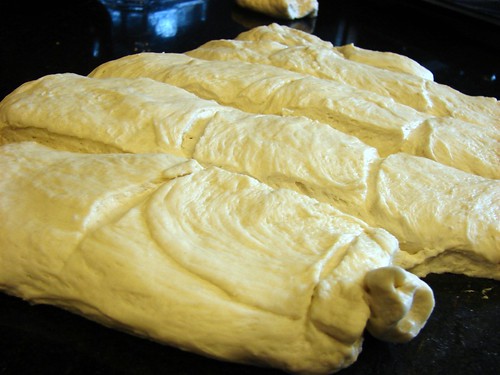
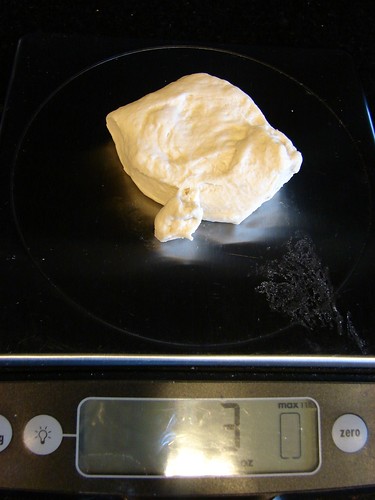
When it came time to shape them, I tried both methods: rolling and poking.
Rolling and wrapping: roll each piece of dough to about 6-8 inches long, then wrap it around the broadest part of your hand slightly overlapping the ends. Roll your hand back and forth on the counter to seal the ends together.
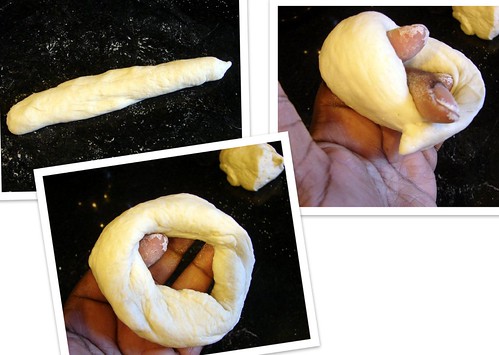
Poking: shape the dough pieces into tight balls, poke a hole in the center with your thumb. From the center gently pull until you have a nice size hole in the center.

Place the finished bagels on a sheet pan that has been sprinkled with cornmeal. Cover with plastic wrap, they’re now ready to be stashed in the fridge overnight or at least for 6 hours.
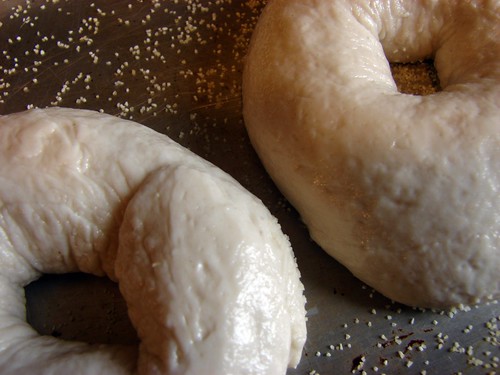
The next day when you’re ready to bake, preheat the oven. The book suggested taking it to 500°F, but I’ve noticed that when I heat the oven that high, it browns my breads too quickly, so I went for 475° and placed my baking stone on the first rack.
First step requires the bagels to be boiled. I added malt syrup to a large stockpan filled with water and brought it to a boil. I used enough syrup to make the water look like strong tea. The idea behind this step is to reactivate the yeast since it has been refrigerated for a while. The other benefit of this step is to gelatinize the starch on the surface so you end up with beautifully chewy bagels.
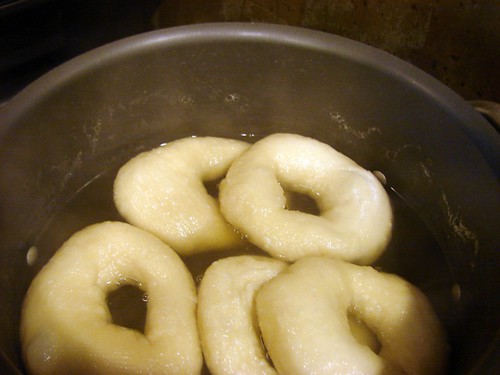
I had the benefit of reading the comments from other bakers before I began my bagel process, so I learned from some of their challenges and took some precautions or made some changes. The first change was to pull the bagels out of the fridge and allow them to slowly come to room temperature. This wasn’t intentional, but I noticed that the bagels I boiled & baked last were a lot puffier than the first batch. Since I didn’t have a bagel board, I boiled & baked in batches of 5-7 bagels at a time.
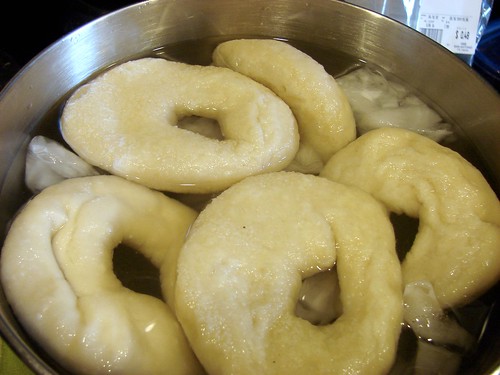
Also, instead of leaving them in the water for 45 seconds as suggested in the book, I allowed them to stay in for a few minutes until *I* noticed that they were swelling. Then I removed from the water and placed them in an ice bath as instructed for 3 or 4 minutes. Transfer them to a baking sheet/stone that has been sprinkled with cornmeal.
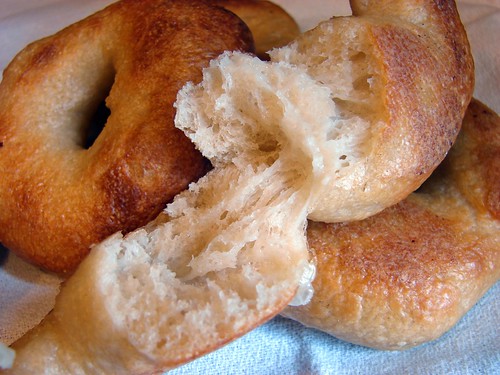
The first batch I made was plain, no toppings. For the second batch, I followed the same steps: boiling, icing, draining, but before placing them on the stone press one side into a plate of sesame seeds, poppy seeds, onion flakes, or seeds of your choice, then put them on the stone or sheet pan.
The instructions were to put the seeded side down and then flip the bagels halfway through baking. As a matter of fact, the instructions are to flip them regardless of topping or not. I didn’t like the way the looked after flipping, they seemed flat and distorted. I’m probably doing something wrong, but I liked them best left alone. I baked the topped ones with the topping on top and simply rotated the stone at 5 minute intervals. They baked for a total of 15 minutes or so.
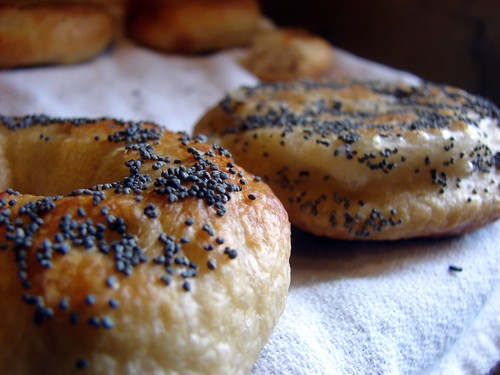
In the end, the bagels were chewy and crusty, just the way I like them. On the last batch, I noticed that while boiling, some of the surface gets very thin–gelatinous and it can burst allowing water to hide inside. In those cases, the center was a bit doughy. I caught on the very last batch and made sure to drain that water out before putting the bagel on the stone.
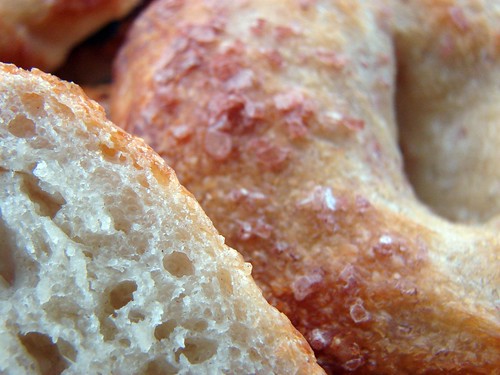
I’m so glad I tried these. I’m a happy bagel camper and if you’d like to check out the bagels by some of my other mellow cohorts, follow this link to the bagel gallery.
Cookingly yours,
Anamaris
This is a popular dish in Panama, you’ll often see it served for breakfast with a fried egg–then it becomes Bistec a Caballo. Caballo is a horse and I have NO idea why the mention of a horse is necessary, but I don’t make up the names, I just eat the food.
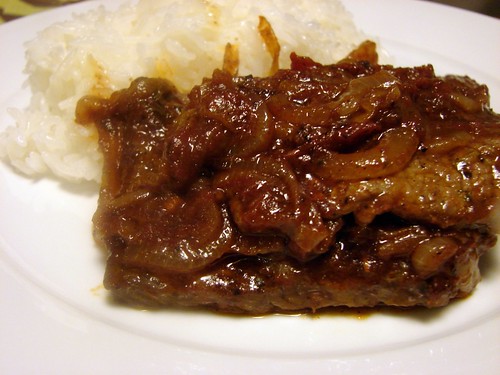
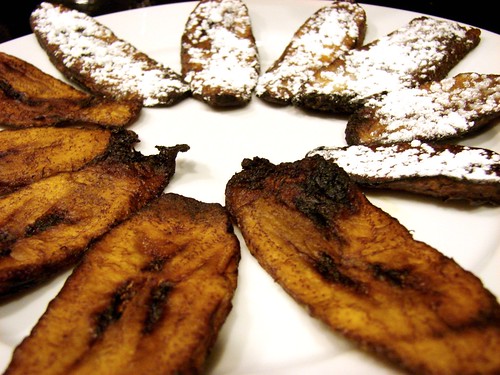
The beef used for this is a cheap cut, no fancy meats and it is then drizzled with pan juices. For breakfast, this will be accompanied by hojaldas or tortillas, otherwise, white rice and tajadas are the right companions.
I’ve improved the dish by cooking the beef a to medium rare and because The Hubbz needs a bit of gravy/sauce, I added pureed tomatoes to maximize the pan juices. This is not a recipe, there’s no need for one, what I’m offering is a step-by-step guide. Adjust as necessary.
Bistec Encebollado
You will need:
About 1 lb beef round tip
Sea salt
Black pepper
Onions
Crushed garlic
Oregano
Olive oil
Fresh tomatoes
Crushed tomatoes
I used slices of round tip, about 1 lb of filets 1/2-inch thick. I took a mallet to them to make the slices uniform and to tenderize it a bit. I ended up with slices that were about 1/4-inch thick and cut them into medallions that were about the size of my palm.
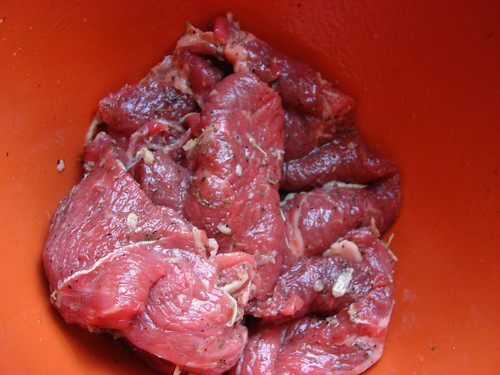
Season with salt, black pepper, crushed garlic, oregano and olive oil. Set aside while you prepare the rest of the ingredients.
Slice 2-3 medium onions, if you like onions, you can’t have too many. Slice them into rings about 1/4-inch thick. You will also need 1/2 a red bell pepper diced. Substitute with green pepper if you can’t get your hands on red or skip it all together. Remove the seeds from a Roma tomatoes and dice finely.
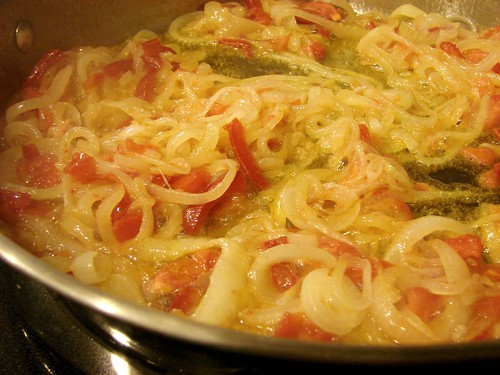
In a large skillet, heat about 3 tbsp of olive oil and add the onions, cooking them until they start to become translucent, then add the bell peppers. Cook for a couple of minutes before adding the tomatoes and 1-2 tsps of white vinegar. Cover and cook for another 3-5 minutes. Allow the oil to drain, remove from the skillet.
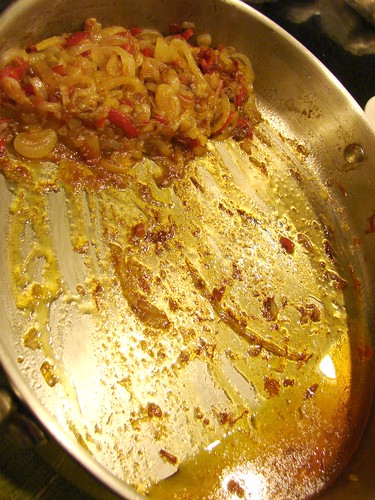
Heat the skillet and oil, brown the medallions in batches. Make sure not to crowd them or you’ll end up boiling them instead of searing. Cook them to the desired doneness, remove and keep warm until all the beef is browned.
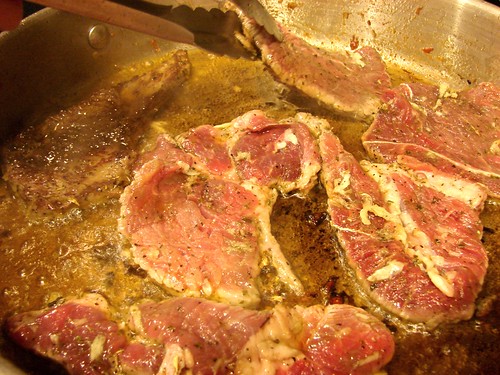
Return the onion mixture to the skillet, add a bit of liquid (wine, sherry, beer, stock, water) to loosen the bits before adding about 1 cp of crushed tomatoes. Adjust seasoning, allow it to cook for about 3 minutes, then add the slices of beef turning them into the sauce. Turn off the heat.
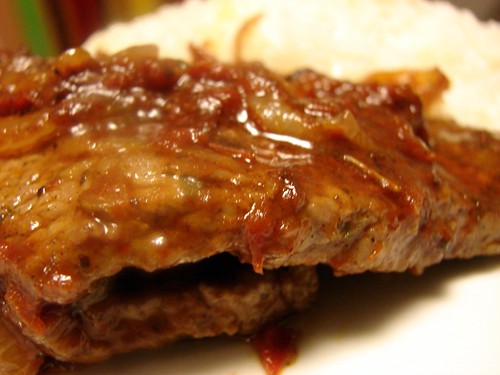
Serve with rice and tajadas.
Enjoy!
Cookingly yours,
Anamaris

I’ve got Panama on the brain. It’s always in my heart, obviously, but I’ve not been able to get it out of my temporal lobe.

It may have something to do with the fact that we brought back so much of what we enjoyed there. I grabbed as many bottles of Seco Herrerano and D’Elidas hot sauce as we could fit into suitcases.
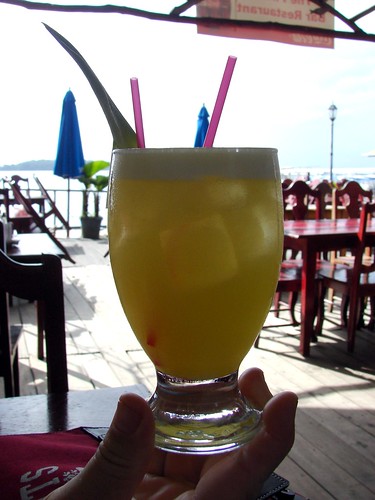
Pineapple juice & Seco. Oh Yeah!
I know have close to a hundred packets of El Arrocero, tons of corn tortillas and empanadas, chorizo…, yeah, I went nuts at the grocery. Oh. COFFEE. I brought bags upon bags of Café Durán. THE best coffee ever in the history of humanity and coffee.
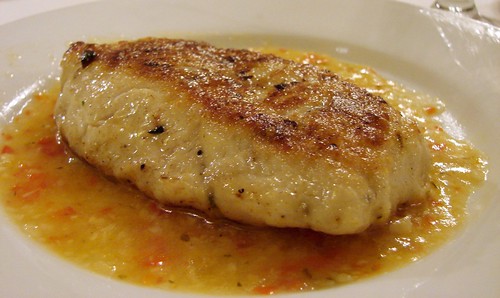
Las Tinajas' Corvina al Ajillo
Sunday I made Camarones al Ajillo (shrimp in garlic sauce) tweaking the garlicky sauce a bit to resemble the one served in every restaurant where we had Corvina al Ajillo (croaker in garlic sauce). The sauce is thicker and includes red bell pepper. Since I hadn’t made it to the store yet, I didn’t have bell peppers, but I added a bit of flour to start a roux and thicken the sauce. Other than that, I followed the recipe. Yum!
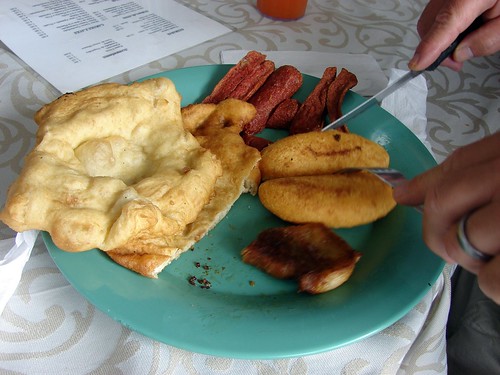
Breakfast at El Montuno
Monday I pan-fried thick pork chops and served them with tons of caramelized onions, a lazy ode to an encebollado using what was still in the fridge. That was served with Hojaldas (hojaldre), a traditional Panamanian fried bread popularly served for breakfast and evening snacks.

Last night I went for the traditional Bistec Encebollado. I added crushed tomatoes to accommodate The Hubbz need for a sauce. This was served with plain white rice–though there’s nothing plain about it-and Tajadas, sweet plantain slices that are fried to enhance and caramelize their sweetness. That recipe is here.
Is it any wonder I can’t get Panama out of my brain?

Cookingly yours,
Anamaris
I’m back. I really had a tough time willing my legs to move towards that airplane yesterday afternoon. Why can’t I be on a permanent vacation? Maybe if I played the lotto and won one of the mega bucks prizes I could.
It’s always wonderful going home. I was telling The Hubbz that I’m always aware that I miss home, but the moment I see the landscape from the plane, I realize how very much I miss it. All of it. But now I’m back and I will share some of it with you. Try to, anyway; it never seems to translate quite as well.
Originally, my plan was to share some of the food with you as we ate around town. At the last minute I decided to leave the laptop behind and just plug in at local internet cafes. What was I thinking? The few times I thought about it while I was out, I was too busy taking in the sights and foods. Then when I was out of the city and made it to one, they didn’t have USB connections on the computers. So…, it was a no go.
Over the next few days, I will share my trip with you. Foods. Sights. Culture. Life. I have over 800 pictures to sort through, please bear with me, but I do hope you’ll enjoy the show. Once it begins.

Begrudginly back,
Anamaris
Panama. I know you’ve heard about it. I know this, because there is a mention of this little country in every other action movie ever shot or still in production. I think its funny that such a small place gets so much play. As often as it is referred to, though, people know very little about it.

Puente del mundo, Corazon del universo–translates to bridge to the world, heart of the universe; that’s my homeland’s slogan. Panama is best described as melting pot in which just about every culture is represented. It only makes sense that the food is as varied as its people.
I was lucky enough to have my epicurean beginnings there and now I will be taking my darling husband to what he jokingly refers to as the ‘birth place of civilization’. The joke will be on him once he realizes how true that statement really is. HA!

We will be in my beautiful country for about 10 days, enjoying 2 vibrant foodie areas: Panama City and Bocas del Toro. In Bocas we will be surrounded by beautiful beaches while we enjoy food with a very distinct Caribbean flair. In Panama City, we will eat all my childhood favorites (or so I hope) and delight in dishes from around the world.
We will cover the full culinary spectrum: high brow to everyday staples. Fancy schmanzy to dives and roadside vendors. Mamas serving food at fondas to a 6-course meal by a Spanish chef. We will visit my mom’s bakery, which has been around for over 25 years and is still going strong. We will get a ‘raspao’ (shaved ice) while walking around town and my mandatory No Me Olvides sundae at La Inmaculada. This is going to be a foodie’s wet dream and you’ll get to live vicariously through every bite we take.
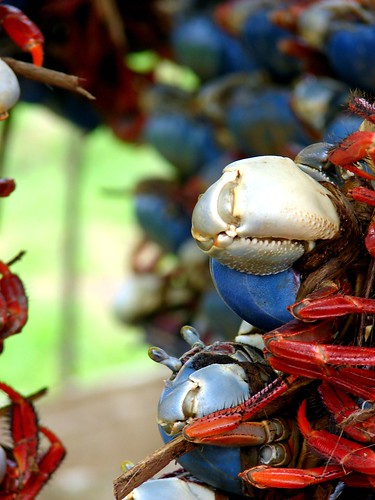
Stay tuned for the food, sights, sounds and smells of Panama.
Impatiently yours,
Anamaris
I’m totally lame, I know this. I didn’t make a new dish for today, to commemorate Cinco de Mayo. In my defense, I’m too busy driving my OCD-self crazy with last minute shopping and planning and preparing for my trip to Panama. In case you have forgotten, the Hubbz and I leave Friday…weeeeeeeeeeee!
Anyway, will you allow me to alleviate some of my lameness with a trip down memory lane? Huh? Huh? Let me call your undivided attention to something old. Something that may very well predate our time together and, hence, be new to YOU. It’s all about you, after all.
Here’s a humble roundup of recipes with a Mexican flair or, at the very least, a jalapeño. You can click on the images for the full recipes. Now grab a Negra Modelo and a seat, enjoy the ride.
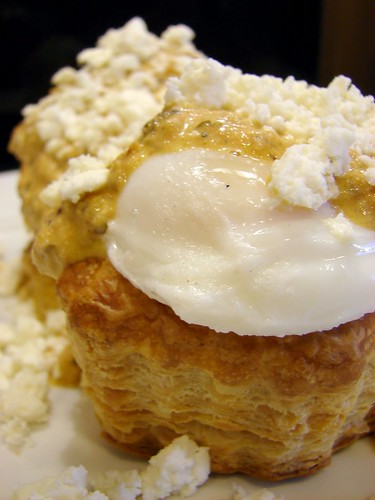
Let’s start with brunch: Huevos Benedictinos – a twist on the traditional Benedict. This one incorporated chorizo, a creamy salsa and queso fresco into puff pastry baskets.
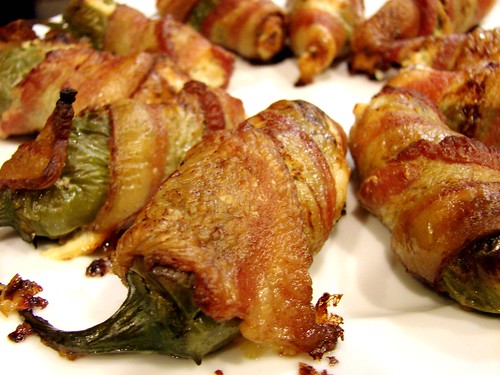
The FDA suggests we have 2 snacks a day as part of a healthy diet. With that in mind, how about snacking on some Jalapeño Poppers.
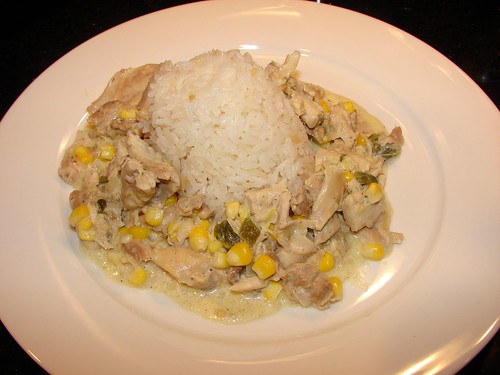
Once you’re ready for dinner, why not try this creamy Chicken in Poblano Sauce. I know I want some right now.
And no holiday would be complete without dessert. Flan is a very common offering in Mexican/TexMex restaurants here in Houston, however, this one is made extra creamy thanks to the addition of cream cheese.

Feliz Cinco de Mayo!
Cookingly yours,
Anamaris
I was lucky enough to hit the fantastic foodie city of New Orleans about a month ago. That was probably the beginning of crawfish season in the Gulf Coast and there were all sorts of dishes and yummy treats prepared with the mud bugs, as they’re lovingly called.
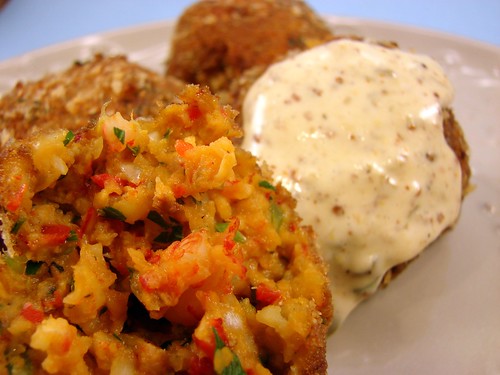
I had never tried crawfish balls before, but I loved them! Sorta like a crabcake shaped like a ball and fried. The moment I took a bite I knew I would be making them at home and so I did. I don’t really think there’s a need for a very specific recipe, but I’m listing the ingredients and the amounts I used here. In the end, you want the dough to be wet, but pliable enough to hold its shape. These can easily be frozen and just fried as needed.
Crawfish Balls
2 cps crawfish tails, peeled & deveined
1/2 onion, chopped
1/2 red bell pepper, chopped
1 serrano chili, chopped (optional)
4 slices of stale bread
1 egg
3 tbsp Italian parsley, chopped
3 tbsp green onions, chopped
Salt, black pepper and cayenne pepper, to taste
11/2 cups of bread or panko crumbs
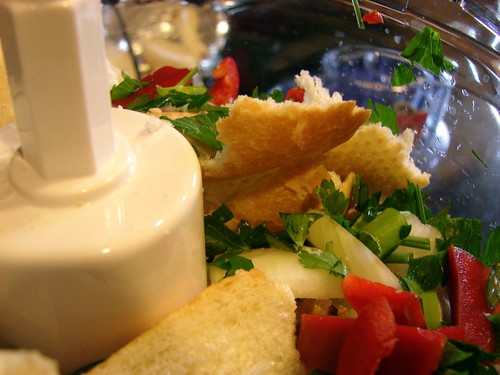
If you have a food processor, don’t worry about chopping the ingredients finely. I essentially threw all the aromatics and the bread into the processor and blitz it until they were pretty fine, then added the crawfish, egg, salt & pepper and pulsed until blended. This way, some of the tails are still in pretty large chunks.
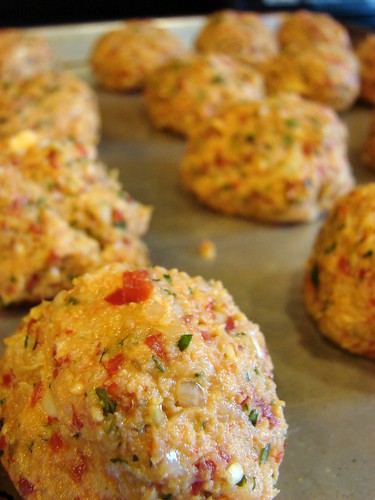
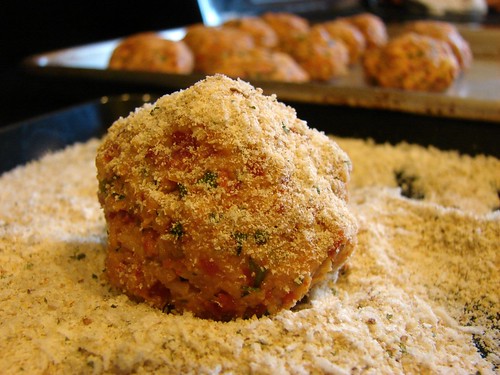
Shape the dough into balls about the size of a ping pong ball and roll in bread crumbs. I found it beneficial to shape the balls and place them in the freezer for about 15 minutes before rolling in the breadcrumbs. Once they have been rolled in crumbs, you can freeze them in an airtight container or ziploc bag and use them at a later date.
Fry them in a deep fryer or use a regular pan with enough oil to submerge the balls; heat the oil to 375° and cook until deep golden brown. Serve with a remoulade or cocktail sauce.

Cookingly yours,
Anamaris
I need your help. I still don’t know what to call this dish. It all started as a challenge posed by Cindy, my friendster. Apparently there was competition not long ago, for which the contestants had to submit a dish using pickles as a main ingredient. She extended the challenge to me and being the competitive sucker that I am, I accepted.
It was an odd ingredient for me to work with because I’m not all that crazy about pickles. I don’t crave them as a snack. I asked they be skipped on sandwiches. I eat them very seldom. But I had to do it, I just had to take a swing at it.
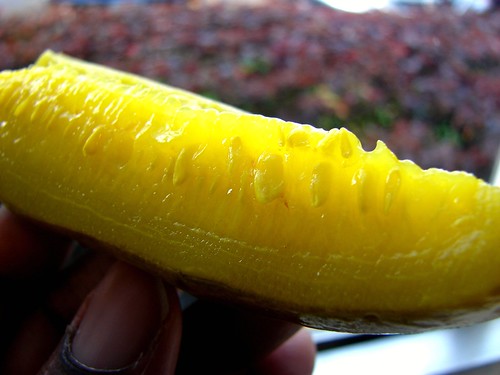
It took me a few days to settle on an idea. I envisioned raviolis, pickle ravioli topped with pulled pork. My thought was a play on a pulled pork barbecue sandwich. I would sub the pasta for bread and instead of bbq sauce, a tomato ragout.
On my first attempt, I chopped pickles and sliced carrots very thinly and used that to fill the ravioli. I made about 3 ravioli, it was a test after all. That was OK and I imagined that once it was together with the pork, it would all come together. However, I wasn’t wild about the textures. The pickles were chewy in a weird way. I gave the whole thing a bit more thought and by the time I was ready to make the final version, I had tweaked the original version to what I’m sharing here.
Note: You’ll need to plan ahead for this one as the pork will need to cook in advance. Slow-cooked even. However, you could use leftover meat instead of the pulled pork. I used wonton wrappers to make the ravioli. I really like the lightness of the dough and how incredibly easy it makes the task. This recipe made 25 ravioli, enough for 5-6 servings.
For the Pulled Pork
1 Pork butt roast (this one was about 5-6 lbs, but I used less than half for this recipe)
8-10 garlic cloves, sliced
Sea salt & black pepper
1 large onion, chopped
4-5 medium tomatoes, seeded & chopped
3 cloves garlic, crushed
1/4 cp Italian parsley, finely chopped
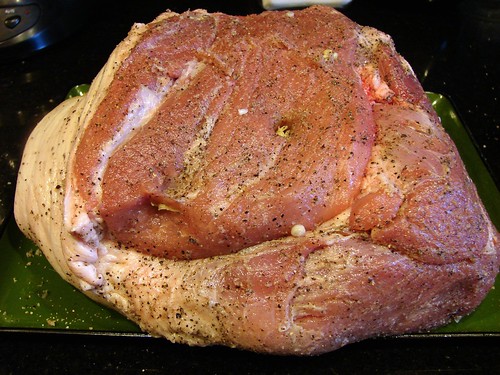
Cut slits into the meat and fatty side of the roast and insert slices of the garlic into each slit. Sprinkle generously with salt & pepper and let it rest for 30-60 minutes.
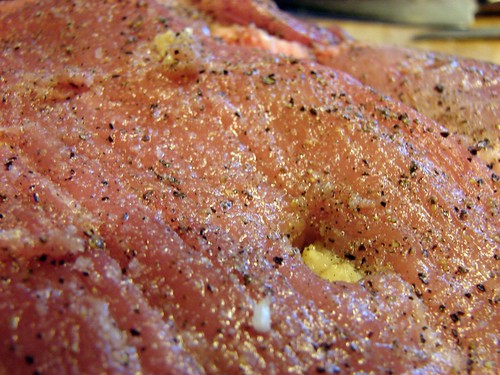
Place the roast into a crock pot and cook overnight on low. It took about 10-12 hours for a 5-lb roast to be done. I put it in Friday around midnight and it was ready when I woke up Saturday morning.
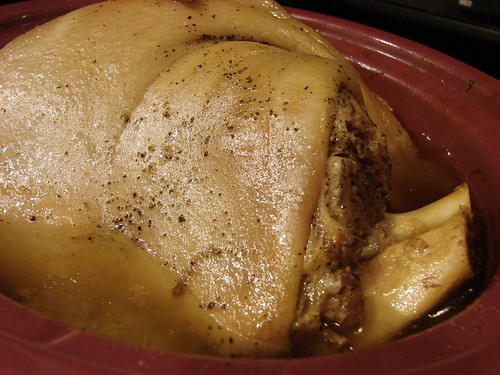
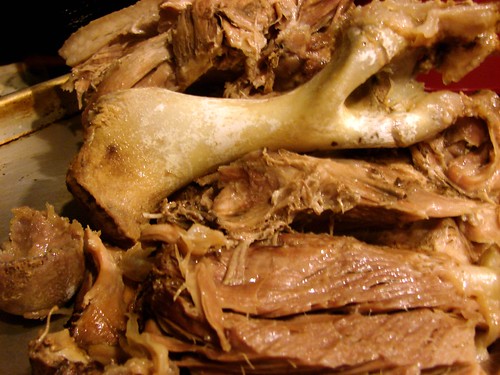
Remove the roast from the liquid and allow it cool. Reserve the liquid to use in the ragout. If it has cooked enough, it will LITERALLY fall off the bones. Pull the meat apart, you’re essentially shredding it. Set aside.
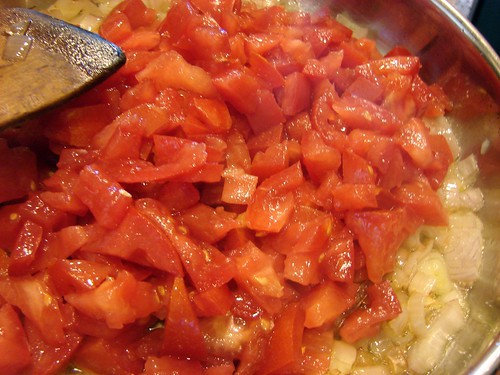
In a large skillet, heat about 2 tbsp of extra virgin olive oil and add the onions; cook them until translucent, then add the garlic and tomatoes. Cook over medium heat until the tomatoes break down and the chunks are unidentifiable, about 12-15 minutes.
Add about 3 cps of the pulled pork and a bit of the pot juices you reserved. Lower the temperature and simmer for another 15 minutes or so, stirring occasionally. Add the parsley and turn off the heat. Adjust the seasonings by adding a sprinkling of salt and pepper, if necessary. Keep warm until ready to serve.
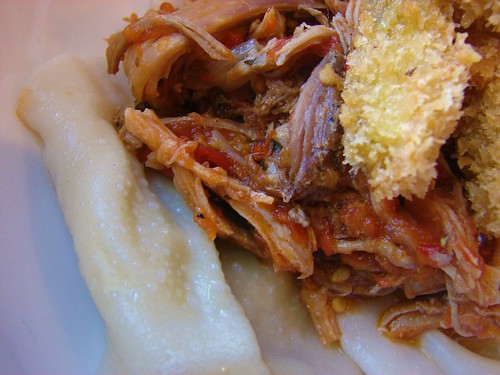
Pickle and Onion Ravioli
For the Pickle Filling:
1-16 oz jar of dill pickles, drained
1 medium onion, roughly chopped
1/2 cp cheese, something like Gouda
2 tbsp heavy cream
1 tbsp extra virgin olive oil
2 pkgs wonton wrappers (25 per package)
To prepare: Drain the pickles completely, by laying them on paper towels for about 30 minutes. This will not only drain the moisture, but also help remove some of the pickling.
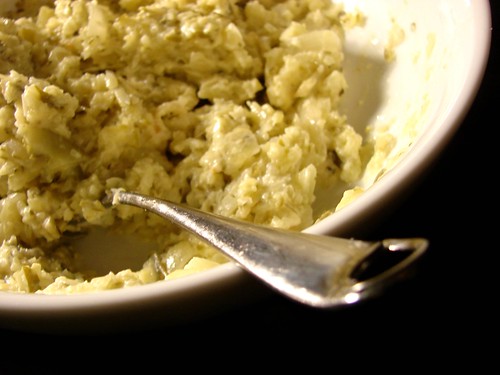
In the meantime, heat a medium skillet with the oil and cook the onions until they are translucent. Set aside to cool. Put the pickles and onion into a food processor and pulse until they’re minced. Mix in the cheese and enough of the cream to make it into a paste. Set aside.
Lay out a few wrappers at a time and brush one side with water, then place a heaping teaspoon of filling in the center of the wrapper, then top with another wrapper. Be careful not to put too much filling.
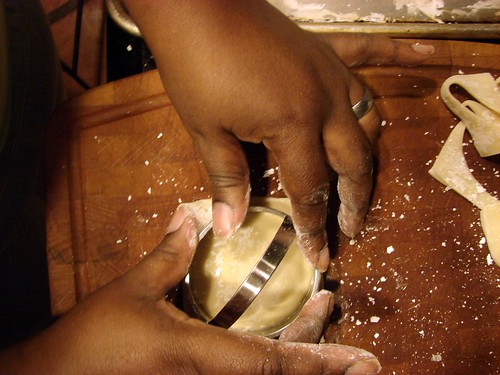
This time I decided to use a biscuit cutter to make them into rounds. Make sure you pinch the edges very well once you’ve trimmed them. This will ensure the filling isn’t lost in the boiling water. Continue until you’ve used all the filling. I froze them overnight, but you can proceed to cook them right away.
Bring a large pot of water to a rolling boil, then add about 2 tbsp sea salt and a bit of oil. Drop the ravioli into the water and immediately lower the temperature to medium. You don’t want the water to be boil too hard once the ravioli are in, otherwise they will split open. Cook the ravioli for about 8 minutes, they will begin to float once ready. Carefully remove them from the water onto a colander or strainer and then to the serving plate. Be careful, they’re very delicate.
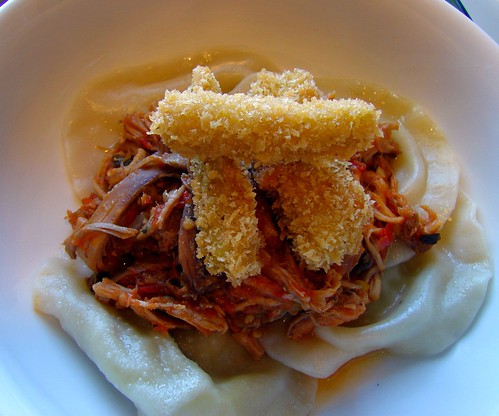
I topped the plates with fried pickles. Originally, I did it for presentation’s sake, but I have to admit they added another lovely dimension to the dish.
For the Fried Pickles I used about 15 spears, I removed the seeds and drained them on paper towels for about 15 minutes. Then I cut each spear into 3 sections, set aside.

In a small bowl combine 1 cp flour and whisk in about 1/2 cp of beer, you want the batter to be thinner than pancake batter. Dip the pickles in the batter, then roll them in breadcrumbs or panko before deep frying at 375°.
Plating: Place 4-5 ravioli at the bottom of the plate, top with a mound of the pork ragout and crown with the a few pieces of pickle.
I will let the judges: Cindy, Dorothy and Lindsay, give you their input. They judged the dish on 4 areas: Creativity, Taste, Use of the Ingredient, and Presentation. I will say that I found it to be an unexpectedly delicious and interesting dish. But I still don’t know what to call it. What do you suggest? The components are: Ravioli filled with pickles and onions, pulled pork in a tomato ragout and fried pickles. HELP!

Cookingly yours,
Anamaris


