Getting flowers is always wonderful. The pretty colors. The scents. The feeling you get every time you take a peek at them. Birthday flowers. Anniversary flowers. I’m sorry flowers. They’re all wonderful, but Just Because flowers are my favorite.

The Hubbz, MY Hubbz, came home with huge bunches of flowers.

Roses. Lilies. Rhododendrons. All in the most beautiful shades of orange. Gorgeous! That’s why I love that man.

I’ve been dealing with some of life’s difficulties. Unwelcomed realities. Harsh ones. My mom’s health is deteriorating, it’s been tough. Please send some positive thoughts her way.

Oh, by the way, I keep forgetting to introduce you to the newest addition to the Price household. Meet Mocha.

Mocha Java to The Hubbz.

Mocha Loca to me. Isn’t she sweet?!

Speak of the devil; she’s giving me the hungry look. Gotta go.
Woof woofly yours,
Anamaris
Just before we get into that business, why is it called a pineapple? It looks nothing like an apple, thought I guess it is pokey like a pine cone… OK, that’s over, back to the fruit at hand.

With Summer heating things up, the grocers and markets are filled with delicious fruits, particularly those from more tropical climates. Pineapple happens to be one of my favorite fruits. Love, love, love IT! Love it! Believe me, once you’ve had a taste of fresh pineapple, you’ll snicker at the canned stuff. I want to make sure you eat as many of these fresh babies as possible, so I’ll give you some pointers to help you break it down.
Picking Pineapples: Put your senses to work.
See: It should be a bright yellow, maybe a bit of green here and there. As with any other fruit, make sure there are no visible blemishes–brown or black spots. If you can only find them with very green peel, then take it home and allow the sugars to mature over a few days.
Touch: It should be firm to the touch, but not hard. It should give a little
Smell: Go ahead, put your nose to it. Pay special attention to the bottom, it’ll be the most fragrant area. It should smell sweet with a hint of tartness.

Pineapples can be prickly, if you have sensitive hands, you may want to use something to protect them. Now for the fun part, this is how we breakdown a pineapple in Panama.
Remove both ends. You can break off the leafy top or just use a knife to cut about 1/2-inch off the top and bottom of the pineapple. This serves 2 purposes: it will stabilize the fruit and make it easier when removing the peel with a knife.

Stand the pineapple on one end (use a cutting board) and with the knife, begin cutting off the peel of the pineapple. Move in a downward motion, always away from you. Give it a clockwise turn and repeat until you have removed all of the peel.

Remove the eyes. Cut the flesh in a shallow diagonal cuts on either sides of each row–you’ll probably be able to cut across 3-4 at a time. Remove the cut outs and repeat.

The pineapple will end up looking like a spiral. Kinda cool!

Now it is ready to slice and eat. One last thing, though. You want to make sure not to eat the core, it tends to be tough and it has an enzyme that causes your tongue to feel stiff and weird. It makes my lips feel itchy. Just stay clear of it.

Eating fresh chunks of pineapple is great, but check out this cocktail. That’s what I’m talking about!
Cookingly yours,
Anamaris
Fresh pineapples rock. They’re delicious, satisfying, refreshing and good for you. They’re pretty too! They make for a healthy snack, but that’s not the only way The Hubbz and I enjoy our pineapple(s). Sometimes we make a few drinks.

We had lots of fresh fruit juices on our trip to Panama, we also had lots of cocktails made with Seco and fresh fruit juices. Seco Herrerano is one of the liquors made in Panama. It is distilled from sugar cane, has a faint sweetness but is overall tasteless, much like vodka. Incidentally, you probably can’t find it outside of Panama, vodka or light rum would be a perfect substitute.

Seco is usually served with fresh fruit juices, my favorites being passion fruit and pineapple. The Hubbz was sold with the very first one we had upon arriving in Panama. Fresh passion fruit that was slightly frothy, almost like a smoothie. But it wasn’t until we made it to Bocas del Toro and saw the bartender mixing our drinks that we realized what was going on. She took the peel off the pineapple, removed the core and dumped the meat into a juicer. Then poured it into ice-filled glasses and topped it, quite generously, with Seco. OH.MY.

I don’t have a juicer, but a blender works just as well. No need for a formula here. Glass. Ice. Light liquor. Juice. Stir. Drink. Repeat (the most important step). I really think I just wanted to brag about Seco Herrerano. 
Gulp, gulp,
Anamaris
I still find it to be:
Fun.
Exciting.
Interesting.
Funny.
A learning experience.
Worth waking up in the morning.
Challenging in all the right ways.
Rewarding.
Last week made a year since The Hubbz and I said *I do* and it’s been a year filled with living, loving and learning. Who would’ve known that two people who had given up on love, who never believed in fairy tales, who faced all the challenges life sent their way would feel like love-struck teenagers ever again.
We got to know each other before we ever met and when we did, we knew almost instantly we would see each other every day for the rest of our lives. On our first official date we decided to cook together, it seemed only appropriate we did the same for our first anniversary.

Want to know what was on the menu?
Tomato & Avocado Salad
Pan Seared Scallops with Red Pepper Confit


I can’t really explain how incredibly good these were, and so easy to put together. The salad was a no-hassle toss together kinda deal, and the parsley made it so fresh and crisp. Then the red pepper confit was out-of-this-world good. I swear I could take a tub of that and eat it on its own!
For the salad:
Cube 4 slices of ciabatta (or other bread you like) into 1-inch cubes and toast them in a nonstick skillet with some butter and olive oil. Set aside and allow to cool.

In a bowl, combine chopped
Tomatoes (I used 3 small ones)
1/2 avocado
1/2 cp fresh mozzarella
about 1 cp fresh Italian parsley (tear the leaves from the stems)
Add the cooled bread and toss with 2-3 tbsp of your favorite vinaigrette. Serve immediately.

For the Red Pepper Confit:
2 large red peppers
about 1/3 cp extra virgin olive oil
2 cloves garlic crushed
1/2 red onion (or yellow)

Add all the ingredients to a medium saucepan over medium heat and cook until the peppers have softened completely (about 30 minutes). Allow it to cool for about 15 minutes before pureeing it–use a blender or a small food processor.

Return it to the saucepan and add a bit of broth or water to thin the puree. Keep warm while you cook the scallops.
For the scallops:
10-12 scallops (these were medium-sized)
rosemary stems (remove the springs and save for future use)
salt & pepper

I used the rosemary stems and skewered 2 scallops on each one. You can skip this step if you want. Heat a nonstick skillet on high and add about 1 tbsp of oil. Make sure the scallops are dry and sprinkle with a bit of salt & pepper and sear them on the skillet. About 2 minutes per side, should be enough for medium-large scallops. Set aside and keep warm.
To plate: I wanted to preserve the crust on the scallops, so I blanched a few asparagus spears to put between the sauce and the scallops. Spread about 2 tbsp of the pureed confit, lay a few asparagus, then top with the scallops.

Happy Anniversary, Papucho!
Cookingly yours,
Anamaris
NYC is one of my favorite cities. EVER. I love everything about that place. I was lucky enough to have friends who lived in and around the city, so I got visit quite often. Each time I went, I would be in search of the ‘best of…’ something. One year, for a NYE visit, it was the best whiskey sour. Don’t know, don’t ask. I was younger then. Another trip was the best pizza. And another it was the best cheesecake. You get the drift.
I love cheesecake. Not the fancified, flavorfied kind. Just the basic NY cheesecake with either cherries or strawberries on top. I don’t remember where I had the best cheesecake on that particular trip. Probably because the memory was banished with all the brain cells I killed with alcohol that weekend. Nonetheless, cheesecake continues to be one of my guilty pleasures.

Years ago I realized that Cheesecake Factory cheesecake met my needs. I like their cheesecake. It is dense but not too heavy, sweet without being overpowering. I don’t always want to get dressed for cheesecake, though. And the only CF location here in Houston is ensconced in the Galleria mall, a destination omitted from my ‘must go’ list.
Here’s a recipe I’ve made over and over, I got it from one of the morning shows years ago. It is super easy and even more delicious. If you love cheesecake, you’re gonna love this one.
As Good As Cheesecake Factory Cheesecake
For the crust:
3 cps cookie crumbs (whichever ones you like)
¼ teaspoon ground cinnamon
1/2 cp (1 stick) softened butter
Preheat oven to 475°. You will need a 9-inch spring form pan and another pan large enough for the springform pan to fit inside to use as a water bath. Fill the large pan with about ½-inch of water, and place it in the oven while it preheats.
Line the bottom of the springform pan with parchment or wax paper and wrap a large piece of foil around the bottom (outside of the pan) This will keep any water from seeping through while the cheesecake is in the oven.

Combine the cookie crumbs and cinnamon in a medium bowl, before working in the softened butter.Press the crumb mixture into the bottom of the pan and sides of the springform pan. You can use something flat, like bottom of a glass to press it evenly. Place the crust in the freezer until the filling is done.
For the filling:
4 8-oz pkgs. cream cheese
1-¼ cps granulated sugar
½ cp sour cream
1 tsp vanilla extract
1 tsp almond extract
5 eggs

Use a mixer or food processor to combine the cream cheese, sugar, sour cream, and extracts. Scrape down the sides of the bowl and continue to blend until these ingredients are smooth. Add the eggs one at a time, making sure they are well mixed into the batter before adding another. Pour the filling into the cooled crust.

Place the cheesecake in the water bath, be careful not to burn yourself, but also not make sure you don’t splash water onto the cheesecake. Bake at 475° for 1o minutes before lowering the temperature to 350°. Continue to bake for 50 to 60 minutes or until the top of the cheesecake turns a light brown or tan color. Remove the cheesecake from the oven and water bath and allow it to cool for about an hour.

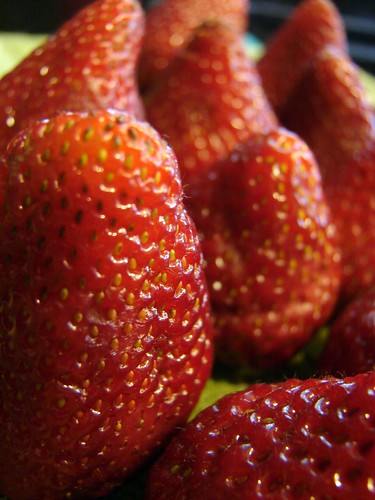
Cover and chill the cheesecake in the refrigerator for at least 6 hours, preferably overnight. Serve with your favorite fruit topping or just whipped cream. Strawberries are in season, so I made a bit of coulis and spread it over the top of the chilled cheesecake before covering with sliced berries. This recipe is enough for 12 generous servings.

Enjoy!

Cookingly yours,
Anamaris
My family is large. HUGE, which is a requirement for any good, self-respecting Latin family. We, Hispanics/Latinos, don’t differentiate between immediate and extended family. Are you kidding? We don’t even have to share the same bloodline! It’s not unusual to have ‘Tias y Tios’ (aunts and uncles) everywhere. The lady at the school cafeteria line, a parent’s childhood friend, basically anyone you see on a regular basis becomes part of your family.
My mom has 10 siblings, there’s a 20 year+ gap between the eldest and youngest. Her siblings had an average of 3 kids each, some of their kids have aunts who are younger than them. And when they all come together in one space, it really is an experience. The Hubbz was fascinated by how many conversations go on at once and people don’t have to be standing next to each other to be part of it.

Mami y Papi
My aunt Linda was explaining all the family idiosyncrasies to The Hubbz. All about the age difference between them, why my youngest aunt said ‘she didn’t know her oldest brother’. Linda and Lidia explained that the older siblings (my mom is as close to the middle as you can get) generally speak to each other in English, but the younger lot prefers Spanish. There were stories about my grandfather who passed away when I was 7, stories about me growing up, stories about my grandmother’s antics–she’s a real pistol, that one. Stories about life and family, the young and the old.

From left: Mami, Linda, Bubbles, Marcelina
Who knows what the Uncles were talking about, but they were gabbing it up.

Just like my mom’s family, there’s a nice age gap between myself and my siblings. My sister Magali is 5 years older, while my brother Almet is 15 years younger than me! He was only 7 when I moved to Houston, so he grew up and I didn’t witness much of it.

My sis has 3 girls: Kamaris, Karina and Katherine and 2 grandkids. That’s Anthony, giving me the angry face in the picture. Isn’t he sweet? The next picture is my brother Almet and his wife Vicki, they’re still newlyweds.
And these are my 2 youngest nieces, Katherine (blue top) and Karina. Top Model material, both of them. If there’s a camera within a 2 mile radius, they’ll be ready for it.

This is just part of what I consider my immediate family. On this visit I only saw 2 of my cousins when my mom threw a breakfast filled with Panamanian goodies. That was fun, made me think of Sunday dinners. Now you’ve met some of my peeps. My loved ones in far away lands. A piece of my heart.
Speaking of Sunday dinners. We ate A LOT of really good fun in Panama. Lots of it. All kinds of it. Check out the foodstream, it will make you hungry, I promise. I will post about specific dishes as I recreate them, but for now, a picture really is better than 1,000 words.

Tortillas y chicharron!
Anamaris
 Another month, another group bake. This month the Mellow Bakers are working on pizzas, among other breads. I love pizza, well, I love pizza crust. But it is tough to find one that love. There’s a pizza place that’s been around for ages, Antonio’s Flying Pizza has, quite possibly, the best pizza in Houston. Hand-tossed, with a crisp, thin center and pillowy, chewy edges. They also have an awesome sauce and DO NOT overuse it. OHMY!
Well, thanks to Mr. Hamelman, I’ve found the 2nd best pizza crust. It’s on page 273 of his book Bread. I thought this was a good opportunity to have a few friends over and see what would happen when I tried my hand at pizza-making. Let me tell you, it went VERY well. I’ll walk you through it.
The dough starts off a day in advance with the fermentation of a biga. A biga is a pre-ferment. This produces organic acids which significantly contribute to the structure and development of the dough and, ultimately, the rise and flavor of the bread.
In this case, the biga needs to develop for at least 12 hours, mine went for a little over 16. I have to confess, though, this biga was quite different from the ones I’ve made thus far. It actually freaked me out! First, it was a VERY tough dough, the pre-ferments I’ve done before were anywhere from runny to medium-stiffness. Second, it rose like gangbusters! Within 3 hours it had tripled in size. Previous ferments developed very slowly. To avoid what I thought might’ve ended up being over-development, I put it in the fridge overnight and removed it a couple of hours before I was ready to make the full dough.

Crisis averted, I began working on the final dough about 3-4 hours before my friends were to arrive. Per the formula (that’s what they call bread recipes, how very scientific!), the dough needed to rise for about 2-1/2 hours before baking. Friends were due at 8ish, I began the dough around 3ish.
I opted to half the baker’s recipe, so I ended up with 5lbs of completed dough, which was then divided into 13 balls weighing approximately 6.5 oz each to make small personal pizzas. The collage shows the steps necessary prior to adding toppings and baking.

The oven is preheated to its maximum, 550° in mine, with the baking stone/pan left in the oven so it is smoking hot before the pizza goes on. A fellow Mellow Baker indicated they used the back of a cast iron skillet. This was a genius suggestion because we only have a medium sized pizza stone, but I do have large cast iron grill. And that’s what I used to bake these babies. Sprinkled some semolina on the stone and grill, then slid the topped pizzas over top.

They baked for about 10-15 minutes and were perfectly delicious. Check’em out.

Cookingly yours,
Anamaris
I’ve been slow with this, VERY slow with this. But I’ve done it! I’ve selected my favorite shots: 85 of about 800, how crazy is that?
There’s a little of everything, except for food, I still need to work on those. There are straightforward shots of the sights, a few shots of things that caught my eye and some captures of typical Panama things.
I hope these give you a taste of my beautiful little country. Who knows? Maybe it’ll interest you enough to make it your next destination, you won’t regret it.
Here are just a few samples, click on any of the pictures or follow the link to my Flickr stream and watch the slideshow.
Enjoy!
Anamaris


This is a popular one, isn’t it? It seems everyone has heard of and/or had Arroz con Pollo at some point in their lives. The combination of rice and chicken seems to be present in most every culture, which makes sense when you think about it. Generally, both of the main ingredients are fairly inexpensive. It allows a cook to feed a large number of people with a small amount of ingredients, with a dish that still looks sensational.

I’ve always loved Arroz con Pollo, I’ve had many variations of it. Some I liked, some I loved, some I didn’t. Over the years I’ve perfected mine by combining the winning factors of all the good ones I’ve had. Panamanians like their arroz con pollo with olives, capers and raisins. Yep, raisins. There is something really magical that happens when you have the briny flavor from the capers combined with the sweetness of the raisins. The dish is still savory, but it definitely gains some significant depth because of them.
It is a satisfying, easy and delicious family recipe, the kind that is prepared for special occasions. I usually make a large batch of it to make sure there’s enough for leftovers. By the way, it keeps getting better and better everyday after its made.
Arroz con Pollo (chicken and rice)
Serves 6-8
For the chicken:
8 chicken thighs
3/4 tsp sea salt
2-3 cloves garlic, crushed
1 tsp black pepper
1 packet Knorr Sazón
1 large onion, roughly diced
2 cps tomatoes, seeded and diced
1/4 cp cilantro, chopped
12 oz beer (preferably something robust like a medium lager)
For the rice:
1/2 large red bell pepper, sliced
3 cps long grain rice
4 cps broth (from the chicken)or water
Sea salt to taste
2/3 cp pimento olives
3 tbsp capers
2/3 cp seedless raisins
1/2 cp peas & carrots, frozen
1/4 cp parsley, chopped
Preparing the chicken
You will need a heavy-bottom, medium to large size pan with a tight-fitting lid; the dish is pretty much cooked in a single pot. First, season the chicken with the first 4 ingredients. I prefer cooking the chicken with its skin, it adds flavor and makes the addition of oil unnecessary for this step. You can remove the skin once the chicken is cooked. If you opt to use breast instead of thigh meat, I will highly recommend keeping the skin to help keep the meat moist.

Heat the pan over medium-high heat and brown the chicken pieces in batches, if necessary. Once the chicken has been seared on both sides, remove and set aside. Remove any excess fat from the pan, leaving about 1 tbsp, but do not discard the rest, you will use it to make the rice.
Add the onions and tomatoes, scrape the drippings stuck to the bottom of the pan. Add the cilantro and beer. About the beer; we generally have robust beers at home, such as Modelo, Blue Moon, Sam Adams, Grolsch. I find these are great for cooking, because they’re so flavorful. Use what you have around, just avoid anything light, if possible.

On with the cooking. Once the beer has started to boil, return the chicken pieces to the pan and make sure to add any juices that came out of the chicken. Lower the temperature to medium-low, cover with a lid and simmer for about 25 minutes or until the chicken is very tender. Once the chicken is cooked through, remove the pieces and allow them to cool before removing the meat from the bone. Drain and reserve all the cooking liquid from the pan, set aside.
Preparing the rice:
Rinse the pan and heat it over medium-high heat. Add 3 tbsp of the reserved fat and saute the red pepper until tender. Remove from the oil and set aside. Rinse and drain the rice, add it to the pan, stirring to coat it with the oil. Make sure to stir continuously for about 3-4 minutes. Now add enough water or chicken broth to the reserved liquid to make 4 cps, add it to the rice, season as needed. Bring it to a boil without disturbing it.

Once the water is almost completely evaporated, reduce the temperature to low and layer the previous ingredients. First the olives and capers, then the shredded chicken and peas & carrots, finally, top with the raisins and peppers. Cover with the lid and allow the rice to cook/steam for 30 minutes.

At the end of the 30 minutes, stir the chicken and vegetables into the rice and serve.

Cookingly yours,
Anamaris

I can’t tell you when was the first time I had a taste of this magical dessert, but I CAN tell you it’s been one of my favorites ever since. And when I realized how simple it is to make, it was all over. I don’t make it often. Not because I don’t want to, it’s because I would require a crane to leave home IF ever I did. “When” I do make this thing, I eat most of it all.by.myself. And I reserve the right to begrudge anyone who dares have some.

The debate over the origins of this little treat will likely continue ’til kingdom come. And why not? I would totally claim it as my own! I mean, this thing is perfection on a spoon or fork. In any case, rumor has it the dessert originated in Nicaragua, so that’s the story I’m sticking to. It is possible that the recipe was featured on the label of Nestle’s evaporated and condensed milks in the early 1900s. A clever marketing move that may be responsible for one of the most coveted desserts around.
Let me count the ways I love theeez here dessert. It’s super moist. Light and dense all at once. It is served cool. It isn’t overly sweet (depending on the baker’s preference). And the cream can be flavored with almost anything you’d like. Me myself, I prefer the basic vanilla-ey recipe. Call me a prude if you must, but I like what I like. I’ve tried variations of it flavored with chocolate. I’ve heard of adding coconut milk (that one intrigues me), but I’ve not made either of those. I do, from time to time, add a bit of alcohol–bourbon, Amaretto, rum. I also prefer to flavor the sponge cake with almond extract instead of lemon extract.
Ok, I’ll shut up now and give you my version of it. Most recipes will suggest equal amounts of milk, but I find that ends in a very sweet cake. I’ll still eat it, but I can eat a LOT more of it when the sugar content is toned down, so I add more of the evaporated milk and heavy cream. Also, even though I’m a big proponent of generic brands, I must admit that when I make this one, I go for a well-known brand name. It may be in my head, but I won’t take any chances when it comes to my tres leches.
Pastel de Tres Leches
For the sponge cake:
6 eggs, separated
1 cp all-purpose flour
¼ tsp salt
1 cp extra fine sugar
1-1/2 tsp vanilla extract
1 tsp almond extract
Preheat oven to 350°. Separate eggs and place the yolks in the bowl of your mixer. Beat the yolks until they change to a creamy yellow and are the consistency of yogurt. While the yolks are beating, sift the flour and salt together and set it aside.

Remove the yolks from the bowl and set aside. Make sure to wash the bowl and beaters very well before adding the egg whites; this is important because if there’s any residue of the yolk, the whites will not stiffen into a meringue. Beat the whites until they form soft peaks, adding the sugar a couple of tablespoons at a time. Add the almond and vanilla extract.

Fold in the egg yolks until evenly incorporated. The purpose behind folding egg whites into a batter, is to end up with a batter that is airy and light. This is a good how-to link.
Once the eggs are incorporated, fold in flour a bit at a time. Make sure to check the bottom of the bowl for any flour that may have found it’s way to the bottom.
I used a generously buttered (not floured) 9-1/2×14″ Pyrex to bake this. It makes it convenient, it bakes and works as a serving dish to keep all that milky goodness in place. Bake at 350° for 20-30 minutes or until a knife/toothpick comes out clean when inserted in the center. While the cake is baking, prepare the milk bath.
For the milk bath:
1 can (12 oz) evaporated milk
1 can (14oz) sweetened condensed milk
2-1/4 cps evaporated milk
2-1/2 cps heavy (or whipping) cream
1 tsp vanilla extract
2 tbsp bourbon (or your preferred liquor) optional
Combine the evaporated milk, condensed milk, cream, vanilla and alcohol in a mixing bowl. Whisk until well blended; the condensed milk will tend to hang out at the bottom of the mixing bowl.

Once the sponge comes out of the oven, pierce holes all around the top. Give it about 10 minutes to cool then invert it onto a tray lined with wax paper, pierce holes on the bottom cake. You can use a fork or a small knife for this task. Before returning the cake to the baking dish, use a paper towel to wipe any butter that may have dried while baking. Pour half of the milk bath into the baking dish, then place the warm cake bake into the dish. Pour the rest of the milk bath over it. At this point you may have to wait a few minutes to allow the cake to soak all of the milk before adding any more.

Once all the milk has been added, cover loosely with plastic wrap and refrigerate for at least 3 hours or overnight. IMHO, the longer you allow it to cool, the more enjoyable tres leches becomes.
Note: If you have a deep-lipped serving dish, you can use it to add the milk bath and as your serving vessel. I usually leave my tres leches in the container I use to bake the sponge cake.

If you wish to top it with a frosting of sorts, you can opt for a plain meringue–this seems to be the traditional topping. I don’t like it. Instead I whip more heavy cream, about (1-1/2cps) and fold in 2-3 tbsps of condensed milk. You could add sugar, 2-3 tbsps if you don’t have any condensed milk left. Spread the topping over the cooled cake. Serve and wait for the sounds of pure enjoyment.
Cookingly yours,
Anamaris