I thought I would trick you into reading this one. It’s not so much tricking as it is deceiving. The truth is, yuca is the Latin Americans’ potato. Both are tubers. They have similar textures, although yuca is more fibrous. And they could probably be swapped out in most dishes.
Today I’m going to share with you two variations in the way we prepare yuca throughout Latin America. First, let me redirect you to a post from months ago. It walks you through the process of choosing, peeling and cooking yuca. Once you have that part done, then you can move on to one of these methods. Yuca con mojo is essentially a garlicky plate of yuca. Mojo is Latin-Caribbean sauce/dressing that is spooned over foods in Cuba and Puerto Rico, especially. The other variation would be Yuca Fries with Spicy Mayo-Ketchup dipping sauce. No real recipes here, just a bit of this and a pinch of that.
Yuca con Mojo
1 lb yuca, cooked and chopped
3 cloves garlic, minced
1 tsp garlic puree
Sea salt
Juice of 1 lime
2/3 cp olive oil
1/2 cp fresh Italian parsley, finely chopped
Keep the yuca warm or prepare the mojo while they cook. Heat up a small pan over medium temperature and add the minced garlic, make sure to stir it constantly to avoid burning it. Once that garlic softens, add the garlic puree and lime juice. Stir until well blended and cook for about 5 minutes over medium low temperature. Add half of the parsley and season with salt. Remove it from the heat.

Drizzle over the warm yuca and serve with another sprinkling of parsley. YUM!
Yuca Fries with Spicy Mayo-Ketchup
1 lb yuca, parboiled and cut into thick fries
Vegetable oil for frying
Sea salt
1 cp real mayonnaise
1/4 cp Ketchup
1/2 tsp garlic powder
1-2 tsps habanero hot sauce
1 tsp sugar
Fry the yuca in enough oil to cover them, make sure the yuca has had a chance to cool before frying. It will take about 5 minutes to fry them to a golden brown. In the meantime, combine the rest of the ingredients and whisk them together. Check the seasoning and add a bit of salt IF necessary. Don’t forget you’ll salt the yuca after it has fried.

Serve as dipping sauce for the fries. By the way, both of these sauces/dips go incredibly well with potatoes and plantains. You can see more hunger-inducing shots here.
Cookingly yours,
Anamaris
Here it is again. Pork. Pig. Porky. Oink. I know, I know. I cook a lot of pork. But it IS the other white meat, remember? Besides, I find that it is incredibly easy to cook and almost impossible to mess up. It is also inexpensive, but can still look impressive. So why not abuse it?!

Pork butt or shoulder roasts are very versatile. You can get them boneless or with the bone in. You decide whether you want to cook it whole or in pieces. It’s all up to you. For this recipe, I went with a whole boneless piece. I’ve posted other roasts, some stuffed, some traditionally roasted, and some belly love, this time it was rubbed and roasted with a different set of spices.
The truth is, you can use pretty much any spice and herb combination you love. That’s the beauty of pork, it is very forgiving and not at all prissy. I hope you love this one as much as we did, I think you will, particularly because it is so easy to put together. Make sure to give at least 2 hours to marinate in the spices, it will enhance the flavor a great deal.
Roast Shoulder with Orange and Spices
Pork butt/shoulder roast, approx 4-5 lbs
Juice and zest from 1 orange
2 tsps cumin powder
2 tsps thyme
2 tsps Spanish paprika
2 tsps sea salt
2 tsps black pepper

Combine all the spices and juice together and rub it all over the roast. Allow it to marinate for no more than 4 hours, but at least 2.

Preheat oven to 325°. Place roast on a roasting pan, make sure the fattier side is on top. I would usually put it on a roasting rack, but this time I wanted to make sure the juices didn’t evaporate, so I used the roasting pan that came with my oven. The kind that looks like 2 shallow pans and fit over each other: one is flat with slats and the bottom one is about 1-inch deep.
Roast it for approximately 2-1/2 hours or until the internal temperature reads between 160° and 170° depending on the level of doneness you prefer. Once done, cover it loosely with foil and allow it to rest for at least 15 minutes to give the juices a chance to redistribute.

In the meantime, drain the cooking juices into a small saucepan to make a quick sauce. Add the juice of 1 orange and bring it to a soft boil before adding 1/4 cup of Sherry. You can flame it or allow it to boil briskly to cook off the alcohol. Adjust the seasoning as needed, but more than likely, it will be perfectly salted already because of the drippings. Turn off the heat and stir in 2 tbsp of cold butter.
Slice the roast and serve it with the sauce over top or on the side. This went beautifully with some Arroz con Coco!

If you’d like to see the rest of the pictures, follow this link.
Cookingly yours,
Anamaris
I was on the phone with Dodo this morning, for a while. She’s my bestie and we try to play catch up on the weekends. This has been a bad week for both of us. She with work drama, me with the rotten seasonal allergies. There was a lot of catching up to do. Even when we plan on meeting up a few minutes later for breakfast, we manage to talk and talk. Then we sit before coffee and breakfast things and we do it all over again. For hours. What can I say? We like each other.

One of the topics was about my blogging routine. When does it happen? When was that meal prepared? How long before a dish shows up on the blog. On and on. I explained to her that very seldom do I post a dish immediately after making it. Probably not the smartest thing to do, I don’t know. But I cook and photograph as I go and those pictures may stay in the camera for weeks before I even download them to my home computer. Even longer before I upload them to Flickr and share them with you.
Take this side dish, for instance. I made this at the beginning of September, that’s about 7 weeks ago! There’s no real method to this madness. I think I just keep cooking and shooting, then I pick what to share based on what I really liked or what photographed best or what would be a quick and easy post. Sorry, sometimes I do slack off, not too often, though. One thing I can tell you, is that if it’s a cocktail, that post goes right up!
So, let’s talk about rice. Rice is one of my favorite things in the world. If I were stranded on a deserted island and could only have a few things, rice would be one of my choice items. I’ve even converted The Hubbz to my rice cult; he now understands and respects The Holy Grain.

Arroz con coco (coconut rice) is ever-present in Panamanian meals. We love the stuff! Now, this is not a dessert. It is a savory side dish with a subtle taste of fresh coconut. I’m not sure how many of you, my bloggies, have eaten or cooked with coconut milk. More often than not, it seems the first image that comes to mind when thinking of coconut is the dry flakes or Coco Lopez (which makes an AWESOME Piña Colada, btw). However, real coconut is nothing like either of those. It is creamy, with a hint of natural sweetness.
This method I’m sharing, will intensify the coconut flavor and does take a few extra minutes spent drawing the oil out of the cream. The other method would be to simply substitute the water you’d use for the rice with coconut milk. Remember to look for the unsweetened coconut milk. Here we go.
Arroz con Coco
2 cans unsweetened coconut milk (about 14 oz)
3 cps long grain rice
1/2 cp raisins
Sea salt
Sugar
Water
Vegetable oil
Let’s make some coconut oil: Pour one can of coconut milk into a medium-size pan and bring to a boil over medium heat. The water will evaporate after about 5 minutes and you’ll be left with the dense cream. Continue to cook it over medium heat until the oil begins to come through. Some of the cream solids will begin to brown and caramelize, that’s ok. It’ll make the rice pretty.

Once all the cream has turned to oil. Remove from the heat and allow it to cool for a few minutes. This will make about 1/4 cp of oil.
Add an extra 2 tbsps of vegetable oil to the pan and heat over medium high temperature. In the meantime, rinse and drain the rice. You want to rinse just as you begin to heat the oil, this prevents the rice from getting goopy after cooking. The easiest way to rinse the rice is to put it in a colander and run it under cool, tap water. Let it drain; you may need to give it a quick shake to get the excess water out.

Once the oil comes to temperature, add the rice and stir it around every couple of minutes. This will help loosen any of the bits stuck to the bottom after making the coconut oil. Also, there should be enough oil to coat all the grains.
Measure out the other can of coconut milk and add enough water to end up with a total of 5 cups. Pour it over the rice, make sure to loosen any grains stuck to the bottom. Stir in the salt, about 2-3 tsps and 1 tsp of sugar. Make sure to stir it all very well and quickly, you don’t want to be stirring once it begins to boil.

After the liquid has dried, add the raisins to the top, lower the temperature to low heat and cover with a tight-fitting lid. Allow it to steam for at least 30 minutes before removing the lid. Don’t, under any circumstances, remove the lid before that.
At the end of the 30 minutes, you can stir in the raisins. It is ready to serve. The coconut flavor will intensify after a day. That’s why this recipe is for 3 cups, to make sure you’ll have some leftovers!
Enjoy!

Cookingly yours,
Anamaris

Sort of, but not exactly. See, confit is a French cooking and preservation method. The idea is to salt and flavor meats that are then slowly cooked in their own fat (or added fat) and later preserved in said fat. Carnitas are not preserved in the fat, though I don’t see any reason why they couldn’t be, except for the fact that they wouldn’t last that long at the Price household.
I’ve had incredibly beautiful and delicious duck confit in Paris. They usually use the leg and thigh portions of the duck because these are fattier cuts. When they bring it out, the duck skin is slightly crisp and glistening, almost see-through. The meat is super tender and flavorful, enhancing the duck’s earthiness to the umpteenth degree. It is very aromatic, you can pick up the scents of garlic, thyme, sometimes ginger and clove.
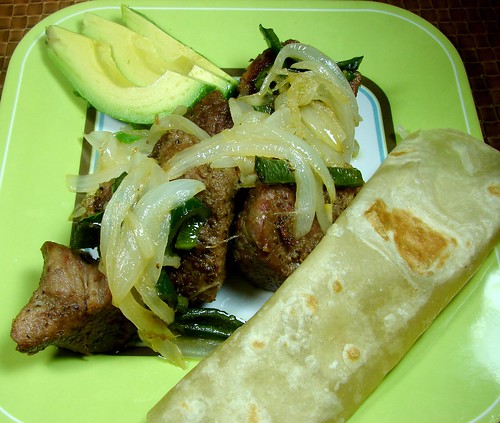
Similarly, carnitas are made with a fatty cut of pork, most often a butt or shoulder roast. It is seasoned and slowly cooked in its own fat. The resulting meat is fall-apart tender and flavorful. Some places will serve it slightly crisped and topped with grilled onions and peppers.
There are many reasons I love making these at home. It’s super cheap: pork butt/shoulder roasts can usually be found for as low as $1/lb. It’s incredibly easy to make: once the pork is sliced, there’s very little fussing about. It feeds an army and works well as an entrée, a taco, or pretty much anything you can dream up. And finally, I love pork. Do you need more reasons?

Of course, there are hundreds, if not thousands of versions and recipes. But I find that the simpler, the better and over the years I’ve come to figure out how I like ‘em. I use just a few aromatics and pre-mixed fajita seasoning. If you can’t find the fajita seasoning, just use equal parts salt, black pepper and garlic powder. Here’s my super secret recipe…, yah. not really.
Carnitas (little pieces of meat)
1 Pork butt or shoulder roast, boneless (about 5lbs)
2 tsp fajita seasoning
1 tsp cumin powder
1 tsp oregano
2 yellow onions, sliced
1 poblano pepper, seeded & sliced
1 tbsp olive oil

Cut the roast into pieces that are about 1-inch thick and season with the next 3 ingredients (don’t discard too much of the fat). Place the seasoned in a dutch oven or heavy-bottom pan, trying to keep it on a single layer. Add about 1 cp of water, just enough to have it come up around the pork, but not necessarily cover it.

Cover the pan with a tight-fitting lid and bring to a simmer over medium-low heat. It will simmer for about 45 minutes before the liquid evaporates and it begins to render the fat. At this point, remove the lid, lower the temperature and begin to brown the pieces of pork. Turning them a few times for the next 15-20 minutes.

You can cook cook the onions and peppers in a separate saute pan, just until softened. Serve with tortillas, rice and/or beans.

Cookingly yours,
Anamaris
I think its funny how there are months for everything, but I’m not going to lie and say I don’t enjoy the ones devoted to food. Well, unless it happens to be a food I don’t enjoy, like bananas. A little birdie told me October is National Chili month; I have to guess it’s due to the first visages of Fall (for most of the US states), temperatures begin to drop and people begin to crave hearty stews. Again, my guess.

Living in Houston, I’ve come to understand people here and all over the state of Texas are big on the whole chili thing. There are festivals and cook-offs celebrated throughout the Fall, aimed at finding the best recipe. There are as may variations to chili recipes as there are people in Texas, but one thing I’ve come to learn is that real Texas chili does not include beans.
MY chili isn’t so much chili as it is Chile con Carne. Not Texan, probably not Mexican, but the variation I learned from my mom. Another difference here, is that more often than not, in Texas chili is served with cornbread. My version tastes best atop a heap of perfectly cooked white rice. I made it for The Hubbz not long ago and he loved it AND he’s a native Houstonian! So there must be something good there.
As with all stews, aging is a virtue. The taste will improve and intensify every day after you make it. So why not give it a whirl?
Mi Chile con Carne
2 lbs ground chuck (80/20)
2 cps white onion, diced
Fresh serrano peppers, finely diced
2 cloves garlic, crushed
1 tsp cumin powder
1-1/2 tsp Italian seasoning
3 cps red or pinto beans, cooked
2-3 cps beef broth
Sea salt & black pepper
Notes:
- I don’t use a very lean ground beef for this, you won’t add any fat and you need some to cook the onions and develop some flavor.
- If I have the time and/or forethought, I will cook my own beans with 1 clove garlic and bay leaf, then use the cooking liquid instead of adding broth. I have used canned beans as often as I’ve used fresh, but I do rinse my canned beans and discard the canned liquid.
- You decide how hot you want it, add as many or as few serranos as you’d like.

Heat a large pan over high temperature and add the beef, breaking it apart as you drop it. You can leave it in marble-sized clumps as it cooks; add the garlic, cumin and Italian seasoning at this time. The liquid from the beef will sweat out, as it evaporates, the fat will be left behind and you’ll be able to brown the beef.
Lower the temperature to medium high and add the onions and serrano peppers. Continue cooking until the onions have softened and become translucent.

Add the beans and scrape off the goodness stuck to the bottom of the pan. Then add the broth or liquid from the beans, enough to cover the beef. Adjust seasoning with salt & pepper as necessary, but keep in mind that the saltiness will intensify as it simmers. Lower the temperature to low, cover and allow it to simmer for about 40 minutes, stirring it every so often.
Serve over white rice and top with sour cream and/or cheese.

¡Buen provecho!
Cookingly yours,
Anamaris

Ok, I know that title does nothing for you except maybe tell you there’s a post about ceviche coming up. But right now, as I type these words, at this very moment, I keep hearing Tequila! You know the little tune by The Champs everyone does the Conga line to at weddings? I do realize how this dates me, but hey, the song is stuck in my head and I hope it is now stuck in yours.
Anydoooo, I made ceviche. I made shrimp and scallops ceviche. I made ceviche for the very first time. EVER. It was so good and so easy and did I mention how good it was? Because it really, really was. See, ceviche is on every menu in Panama. Makes sense when you consider how readily available fresh seafood is. They make it out of pretty much anything that swims or floats. As common as it is in my motherland, I’ve always been intimidated by the process.

I served it with corn tortilla strips and platanitos (thinly sliced and fried green plantains). For some reason, the tortilla strips go really well with the shrimp bits, while the plantain compliments the scallops’ smooth texture and sweetness. I think you should give it a try, let me tell you what I did.
Ceviche de camarones y conchuelas (Shrimp & Scallops ceviche)
Adapted from Bertha de Pelaez
1 lb medium shrimp, peeled & deveined
1 lb small scallops
1 Garlic clove
1 Bay leaf
Sea salt
2/3 cp fresh lime juice
1/3 cp fresh orange juice
2 tsps Dijon mustard
1 tsp habanero paste
1 red onion thinly sliced
1 avocado, cubed
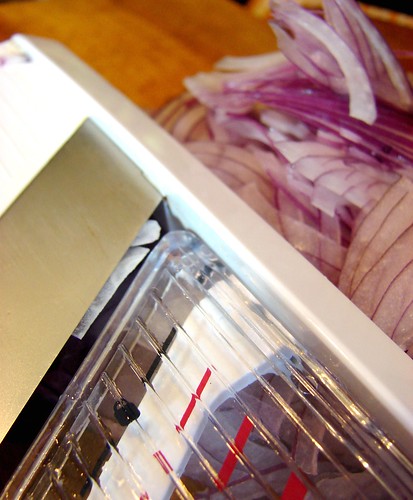
First, get the pickling juice ready. In a glass or plastic bowl, combine the fruit juices, mustard, habanero, salt to taste and add the onions. I sliced mine with a mandolin to make sure they were very thin, but if you like raw onions, you need not worry about thickness. Set aside

Step 2: blanch the seafood. Fill a large pan with water, add the garlic and bay leaf and a bit of salt. Bring the water to a slow boil for about 5 minutes, to allow the aromatics to flavor the water. Drop the seafood in, turn off the heat and allow the shrimp and scallops to remain in the water for 3 minutes or so. Long enough for the shrimp to begin to pink.

Have a bowl of iced water at the ready. Remove the seafood from the hot water, drain then plunge into the cold water. Leave the seafood in the cold water long enough to stop the cooking.
Now add the seafood to the pickling mix, making sure there’s enough liquid to cover most of the seafood, if not all. Since the seafood is partially cooked already, it will only take about 2 hours for all the flavors to meld, but if you can make it hours ahead, the flavor will only improve. Just give it a stir every now and then to make sure the seafood is pickling evenly.

Add the avocado cubes just before serving cold with chips. Enjoy!

Cookingly yours,
Anamaris
For some beer!

OK, I have to admit I don’t quite get the chicken jokes. Or the knock-knock ones, must have something to do with cultural differences, but I had to give it a try. I’m supposed to always use a catchy title, not that I think this one was, but I’m trying.
A few days ago, Tyler Florence was making the ultimate Coq au Vin and it looked amazing as most of his ultimate dishes do. So I started thinking how I could bring it to Latin territory and this is what I came up with. Coq au Biere: Chicken in beer. This was oh so delicioso! It got better day after day; day 1 was awesome, but day 3 was beyond words.
I really liked the way the beer just mellowed out and became earthy, smoky and slightly sweet as it cooked into the sauce. I originally served it with very ripe, fried plantains or tajadas. I wanted to compliment the flavors of the chicken and beer with the sweetness of the plantains. On days 2 & 3 I served it with white rice to really benefit from the flavors in the sauce. I hope you will give this one a try, it is pretty easy to put together.
Chicken in Beer
8-10 chicken thighs
All purpose flour (for dredging)
2 tsp sea salt
1-1/2 tsp black pepper
2 cloves garlic, pureed
2 tbsp vegetable oil
3-4 Spaish chorizo links, sliced (or bacon)
2 cps onions, chopped
2 cps mushrooms
2 cps carrots, chopped
1/4 cp sherry or white wine
1 bottle medium dark ale (like Negra Modelo, Shiner)
2 cps fresh cilantro, chopped
1 tsp herbs de Provence

Season the chicken with salt, pepper and garlic puree, set aside. Combine flour with a pinch of salt and pepper and use it to coat/dredge the chicken pieces. Reserve 1-2 tbsp of the flour. Meanwhile, heat the oil in a large, heavy skillet over medium high heat and brown the chicken pieces on both sides. Set aside.

Remove the excess oil and cook the chorizo in the same skillet. Then add the onions, cooking until softened. Add the mushrooms and carrots, and allow to cook until the vegetables have softened. Add the cilantro and Herbs d’Provence, once mixed in, add the reserved flour and allow it to cook for a couple of minutes.

Pour the sherry and allow it to cook down over high heat. Then stir in the beer and broth.

When the beer is well blended, add the chicken pieces and any juices that drained from the chicken. Cover and simmer for about 1 hour. Remove the lid and continue to simmer for 15 minutes to allow the sauce to reduce a bit.

That’s it! Serve with fried tajadas and or rice.

Cookingly yours,
Anamaris

My mom was an extraordinary cook and hostess. Some of my most cherished memories involve her, cooking and friends filling a room. It is only appropriate her cookbooks and notes would become my priceless inheritance.

While my sister and I cleaned out the house and determined what would stay and what would go, we came across books and notebooks and loose notes Mami wrote through the years. Selfishly, I claimed most of them.
As I find my way back to blogging, I will share a dish I found in one of her notebooks. Arroz con Guandú (Rice with Pigeon Peas) is a staple in Panama. That’s probably the reason this recipe caught my attention immediately. It is generally prepared with cured pigs tail and coconut milk. I haven’t been able to find pigs tails here in Houston, at least not the cured ones, so I sub’d with salt pork. Does the trick just as nicely. As for the guandú, I used frozen, but you could use canned and skip the cooking step. The Hubbz and I loved this dish, I’m sure you will too.

Risotto con Guandú
2/3 cp guandues (pigeon peas)
1/2 cp salt pork, chopped
1 can coconut milk (make sure it is unsweetened)
2/3 cp white wine
5 cps water
2 cps Arborio rice
Butter
Sea salt & black pepper

If you will use frozen peas, your first step will be to precook them in the coconut milk (a can will usually be about 14 0z) + 1 cp water. Add just a little bit of salt and a dash of sugar and allow it to cook for about 20 minutes or until the guandues are tender, but not mushy. Strain the guandú out of the liquid and add enough water to measure at least 7 cps. Keep the water on warm.
You will want to use a skillet with a tight-fitting lid to cook the risotto. Add the salt pork to the skillet, cooking it over medium high heat to render the fat.

Add the rice, if there isn’t enough fat to generously coat all the grains, add a bit of extra virgin olive oil. Continue toasting the rice until the grains are milky white. Add the guandu and stir well.

Add the wine, stirring constantly. Once the wine evaporates, begin adding the coconut water about 1 cup at a time. Once the water evaporates, add another cup. Continue doing this until the rice is tender and creamy.

Add 2 tbsp of butter, stir it into the rice. Serve immediately and enjoy!

Cookingly yours,
Anamaris
Hello my blogies! It’s been a long time, hasn’t it? I’m still trying to figure things out, wishing there was a template or an established procedure for the grieving process. Alas! There isn’t one, I’ll just have to wing it.

Needless to say, going back home was very difficult. The only thing that helped was the knowledge that my Mami’s brave fight with cancer was finally over. She’s no longer in pain, no longer uncomfortable, she’s done putting on a brave face for us. She lived an amazing life. She loved and was deeply loved. She was caring to a fault and was cared for like a queen.
Mami was generous too. I like to think she decided this was the right time so I could be home when so many of my favorites fruits were in peak season. No mangoes, but what was available, I haven’t had in decades and I’m going to share them with you. I’m going to give you a look at what I ate while I was in Panama. Check it out.
Pixbae or Peach Palm Fruit.

How do I describe the flavor of this one??? It isn’t sweet, let’s start with that. It is dense, has the density of a potato and kinda tastes like one. Maybe a Yukon gold, it has a slight hint of sweetness in the background. It is also a bit nutty and has a pit that, when cracked, has a little edible nut.

The pixbae has to be cooked before eating. This was my first time cooking them with instructions from my Tia Lidia. The fruits need to be washed, then the bottoms are scored with an X, they’re then boiled in salted water with a bit of vegetable oil. It takes about 45 minutes to cook.
It’s then peeled and eaten just like that or made into soups, salads, puree and, more recently, tamales.

Moving on… Nance, sometimes known as wild or yellow cherry. Also a fruit, it is very tart and not generally eaten whole.

Nance has a black pit and the pulp needs to be squeezed off it–either by hand or pulsing it in a blender. It is then strained and used to make chicha. In Panama we make chichas or fruit drinks that are served with every meal. Unlike Mexican aguas frescas, our chichas are 70% fresh fruit juice, 20% water and 10% sugar. We make chichas with almost any fruit.
The other common use for nance is Pesada, a pudding-like dessert made with nance, fresh corn and sometimes coconut milk. This is then served with crumbled queso blanco (white cheese similar to queso fresco).

Pesada de nance con queso
One of my mom’s friends made a batch just for me and it was de.li.cio.so!
Look at this spread…

Can you tell how happy I was? Here’s the whats.

Maracuya or passion fruit

Naranjilla, also known as Lulo in Colombia

Guayaba
This one needed to ripen a bit more. When they’re ready to be eaten, the flesh turns a beautiful coral color. This is what Guava paste is made from, of course, I don’t know why they call it guava paste…
Finally, tomate de árbol. I had not seen this one before, but it is very pretty.

Fear not, I didn’t just eat fruits.

I had some Bistec a Caballo, of course.
My dad took me to one of his favorite Fondas, a road-side full-service food stand.

can you see the prices?
The 3 of us ate for a grand total of $7.50. I had fried fish with patacones, my aunt had a side of patacones and dad had the chicken soup. Oh, and 3 nance chichas.

Follow this link to see the details. That bowl of soup is filled with chicken and veggies and that fish… was pure perfection!
Good cooks run in the family. This was the spread my Aunt Bubbles (Irma) put together for us. She makes the best bacalaitos, cod fish fritters!

Hats off to the cook! Tia Irma sitting in the middle with the blue top.

I was able to spend some quality time with dad and my siblings, the aunts and cousins. We ate, laughed, cried and remembered my mom.
Anamaris

I am slowly finding my way back here, I have the yearning to blog, I’m just working on the other stuff that gets it done. First, I want to thank all of you for your kind words and support, for not throwing me out with the bath water and for all your patience and love.
Since the main focus of this blog is food and cooking, I probably should keep the puppy shots away from the main page. Something about food and pets might offend some sensibilities. But I had to tell you about her, so here she is. Go on! Follow that link!
In puppy love,
Anamaris