
Don’t you just love it when 2+2=4? When things just don’t seem to be lining up and then they just all come together? Cooking and baking should be fun, stress free, an opportunity to wing it. Baking is scientific, so you do need to follow a recipe’s measurements, but that doesn’t mean you can’t make substitutions.
 A couple of weeks ago, Andrea from Family&Food invited me to participate in a new bread baking group: Mellow Bakers. Much like the BBA, they plan on following recipes from a specific cookbook, Bread by Jeffrey Hamelman. What drew me to this group is the idea of baking at a mellow pace. I love bread, but I’m trying to stay away from it AND I don’t really want to feel pressured to making a bread a week. So this group suits me just fine.
Paul from Yumarama is the group’s hallway monitor, he suggested we bake a bread a month, further, you can bake the chosen recipe or try a different one if that one doesn’t speak to you. See? Mellow. So the first bread was picked: Traditional English Hot Cross Buns.
I tweaked this recipe out of necessity, and also desire. Let me tell you about my complications. I don’t like lemon peel, from the go I knew I wouldn’t use that. As I thought about it, I knew I wanted to use candied ginger instead. And currants are ok, but I had these gorgeous Sultanas in my pantry… no way I was going to ignore them and purchase currants in their stead. Then…, I had car issues and never made it to the store to purchase the candied ginger AND I ran out of granulated sugar!!! Thankfully, I had brown sugar.
To deal with the lack of candied ginger, and since the recipe calls for simple syrup, I minced fresh ginger and added it when I made the brown sugar simple syrup. The result? Little flecks of sweet gingery goodness that perfumed the buns and a flavorful glaze to brush the tops. SCORE!

Hot Cross Buns
makes 13 buns
For the sponge:
1/4 cp bread flour
7/8 oz milk, warm
1/2 tbsp sugar
2-1/4 tsp dry yeast
This is the runniest sponge I’ve ever made, out of like 5 so far. It was easy to mix by hand. Warm the milk, it just needs to be tepid and mix the yeast into it. In a separate bowl, combine the flour and sugar, then add the yeasty milk and whisk until well incorporated.
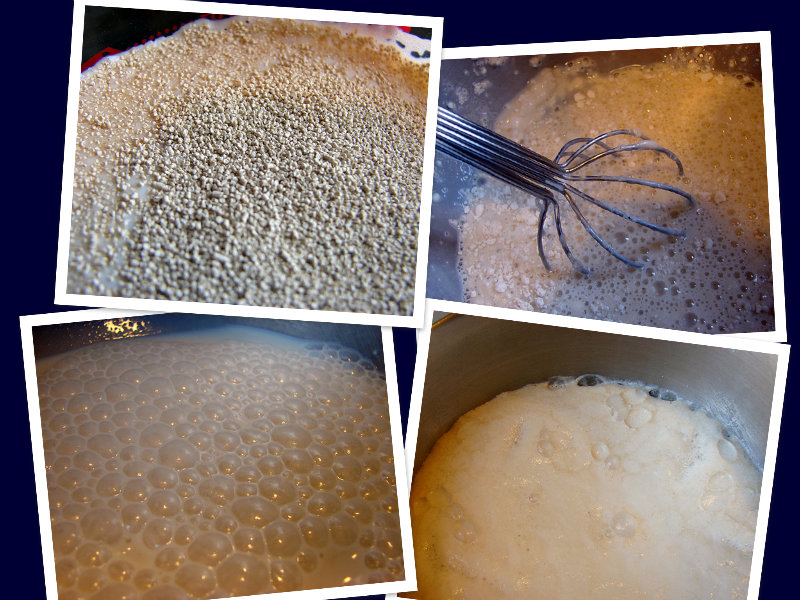
Set aside, cover with plastic wrap and allow it to rise for about 45 minutes. Although it may seem unlikely, it will double in size and hold its shape quite nicely. It looked like a souffle!
If you plan to follow my recipe as I prepared it, then this is a good time to make the simple syrup. However, if you opted for ready-made candied ginger, then you can make the syrup later.
For the syrup and ginger:
1/4 cp ginger, finely minced (approx)
1/2 cp brown sugar
1/2 cp water
Combine all ingredients in a small saucepan and bring to a boil over medium heat. Allow it simmer until the sugar is completely dissolved and the syrup begins to thicken. It took about 15-20 minutes. Remove the ginger bits and set the syrup aside to cool.
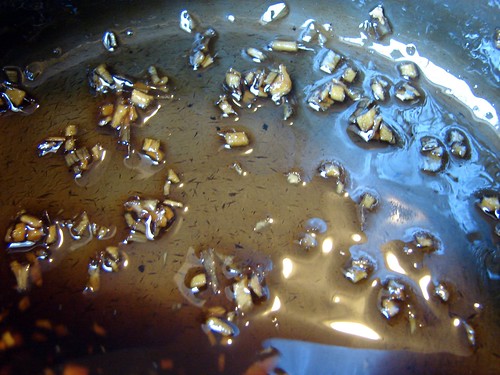
Combine the ginger with the raisins.
 For the dough:
2-3/4 cps bread flour
4 tbsp butter, softened
1 egg, at room temperature
1/4 cp sugar
3/4 tsp sea salt (a bit less if using regular salt)
1-1/2 tbsp allspice
3/4 cp golden raisins
2 tbsp candied ginger, finely minced
In your mixer’s bowl, combine the flour, sugar, salt and allspice then mix in the butter. Mix until the butter has dispersed evenly into the flour.
Mix in the egg, then add the sponge and continue mixing for about 3 minutes to develop the gluten.
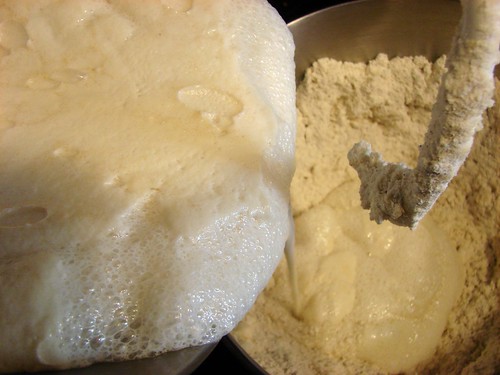
Add the raisins and ginger mixture and beat until evenly incorporated. Scrape the sides and cover the bowl with plastic wrap, set aside and allow it rise for 1 to 2 hours.
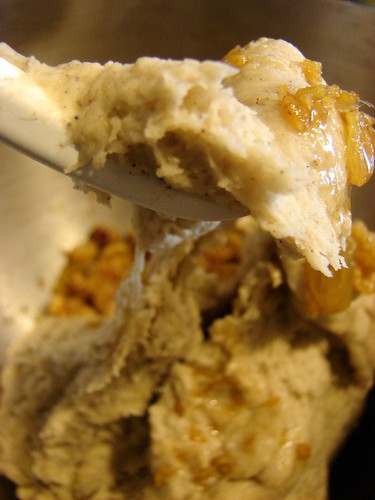
After it has doubled in size, turn the dough onto your countertop and divide it into 12 (or so) even pieces. I got 13 pieces slightly larger than a golf ball. Time to shape the pretty buns.
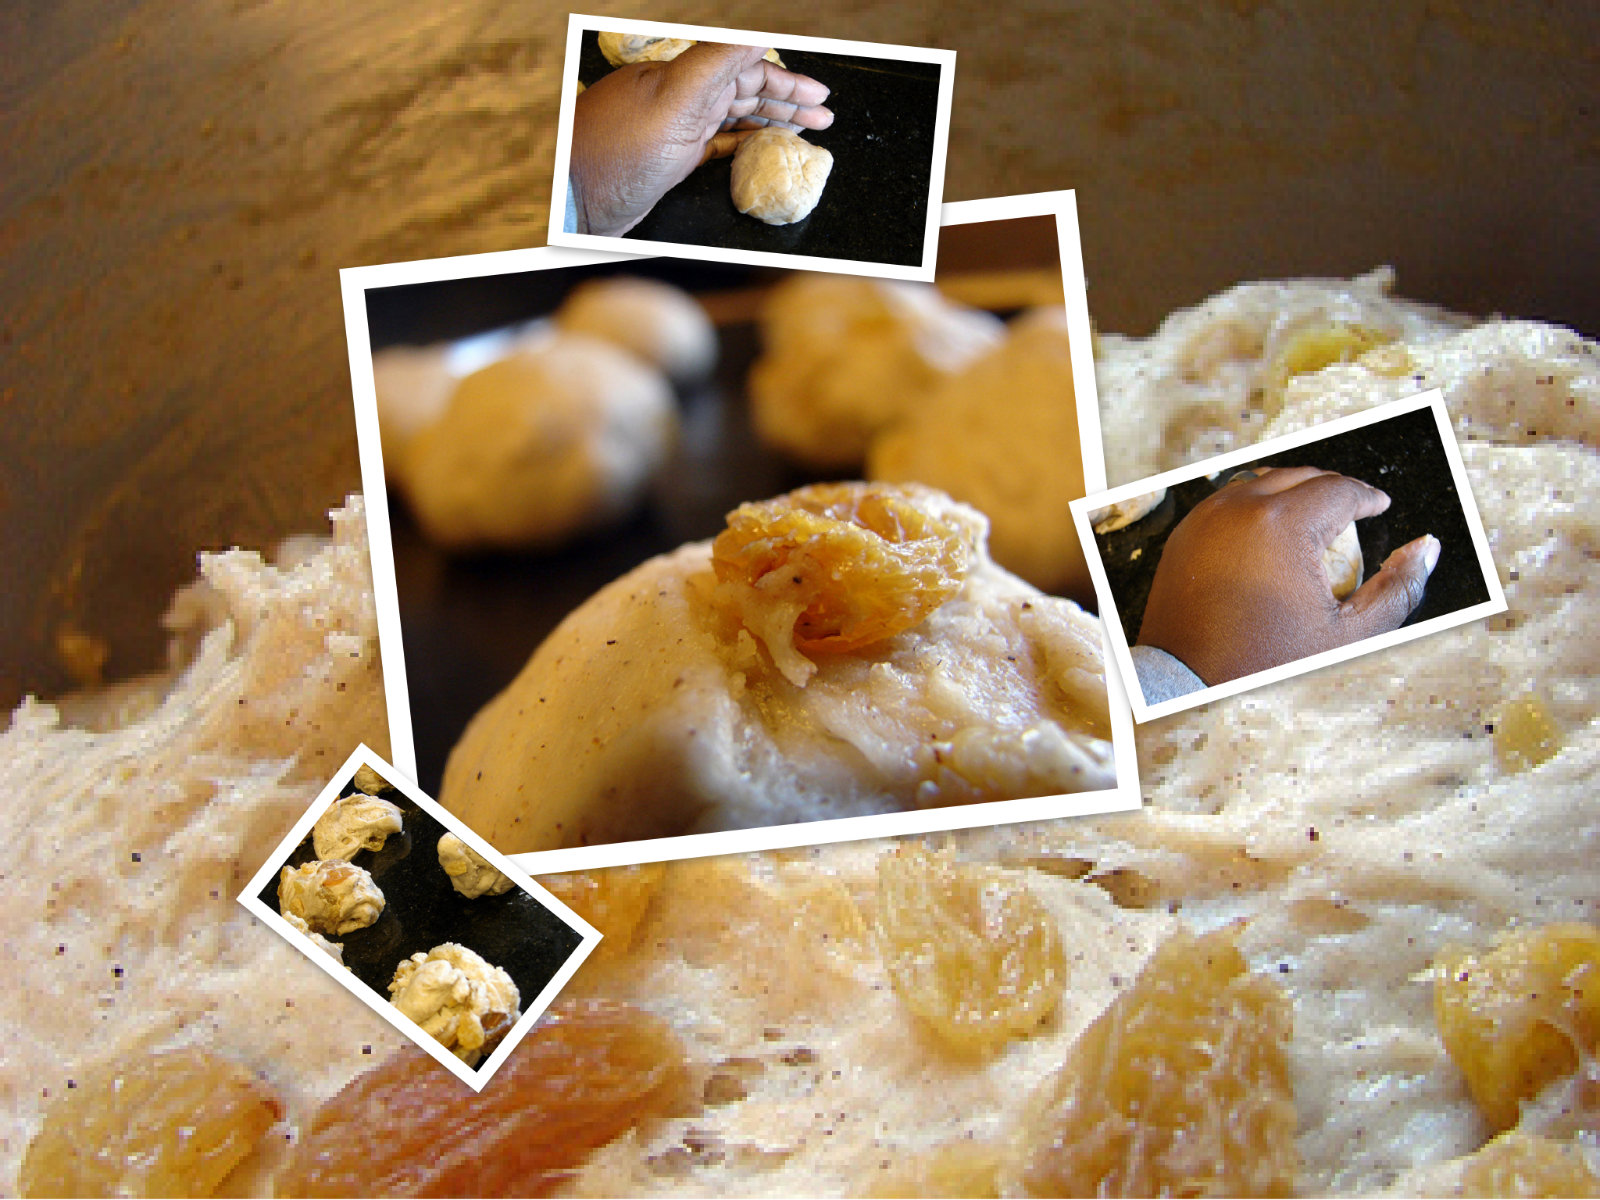
Take each piece and roll into a ball by cupping your hand over it and rolling it on the countertop. You may have a seam, make sure you keep it at the bottom when you transfer the buns to a baking sheet prepared with silpat or parchment paper. Repeat until all buns are done.
Cover the buns with plastic wrap and allow them to double in size for another hour. While they rise, prepare the crossing paste and simple syrup, if you haven’t yet.
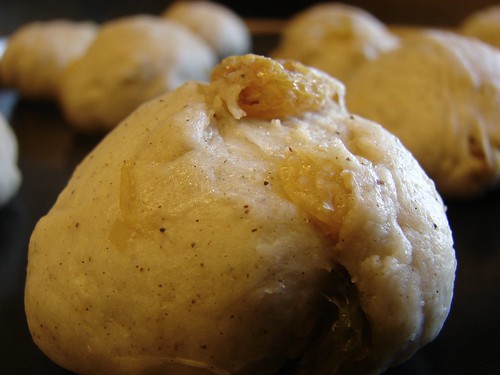
For the crossing paste:
In a small bowl combine 1 cp all purpose flour, 3 tbsp oil, about 1/2 cp water. Add water a bit at a time, you want the paste to be smooth and thick, about the consistency of ketchup… Keep in mind that this will need to go through a piping bag, you don’t want it to be too thick or too thin.
Once the buns have risen to twice their original size, preheat the oven to 440. Dump the paste into a piping bag fitted with a medium size round tip. I only had a star tip, that’s what I used. Pipe a line across the middle of the buns going in one direction, then rotate the sheet 90 degrees and pipe lines transecting the first ones, forming a cross.

Pop the tray in the oven for 12-15 minutes or until the tops are golden brown. As soon as they come out of the oven, brush the tops with the cooled syrup.
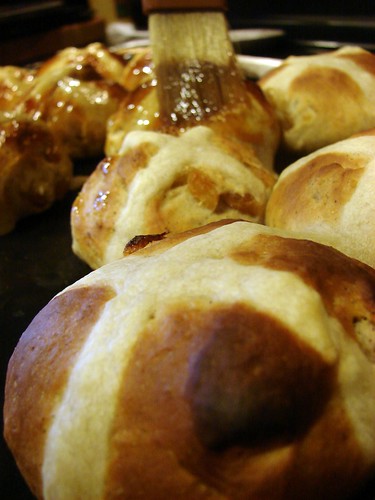
These are delicious fresh out of the oven, with a dab of butter.
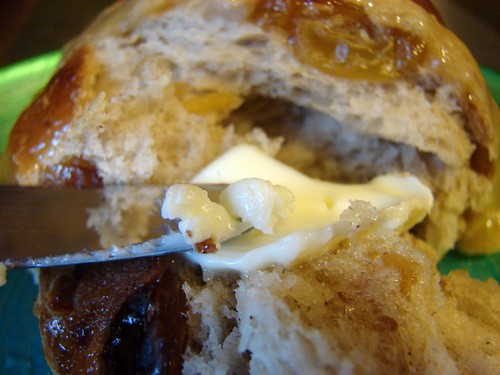
The other option is to eat them Caribbean style. See, as I read this recipe, I realized these sounded a lot like ‘bon‘ I used to eat in Panama. Bon is a cross between a bun and a fruitcake. These seem lighter than I remember bons being, and I like that, but the taste is pretty close.

In Panama, they will serve you a slice of bon, it is buttered and topped with American cheese. So I sliced my buns, toasted them on a skillet with plenty of butter and topped them with sliced cheddar.

You be the judge.

Cookingly yours,
Anamaris
I love learning new things, especially new cooking things. Be it techniques, flavors, ingredients, I love it. The world is so full of delicious and unique goodies, we would need to live several lifetimes in order to appreciate them all. There is a flower/plant that is very popular in Panama, the Caribbean and Mexico. In Panama and the Caribbean it is known as Saril or Red Sorrel. In Mexico, they call it Flor de Jamaica (Jamaican flower) and they use it for their aguas frescas–essentially, flavored (infused) waters.
These next 3 shots were taken by Peter, Mr. P. de Panama. A US expat living in my little country, who kindly allowed me to use his shots in exchange for the link to the recipe featuring them. I think I got the best end of that deal. Definitely take some time to visit his Flickrstream, he has some awesome photos here.

Saril bush, flower and ...the thing you make the juice with

Similarly, I’ve been drinking Ponche de Saril (Saril punch) since I was a little kid; my mom and aunts would sit around for hours piting the flowers, then they would steep them with lots of ginger. To serve it, sugar and sometimes lime juice was added and then the drink is poured over lots of ice. It is one of the most beautiful and refreshing things you’ll ever drink, an awesome combination of tartness and zing. My mouth is watering just thinking about it.

the pits!
That was the only use I was aware of for this flower, a relative of the common hibiscus plant. Recently, I read a post by one of my fave foodies, Lesley over at The Mija Chronicles. She used the reconstituted flowers to make quesadillas, then I discovered she has a fascination with the little flower and has prepared and eaten many dishes incorporating it. To say I was intrigued does not cover it. I couldn’t get it out of my mind. The possibilities seemed endless once I realized the genius of exploiting the flavors of the miracle flower. What to do…?
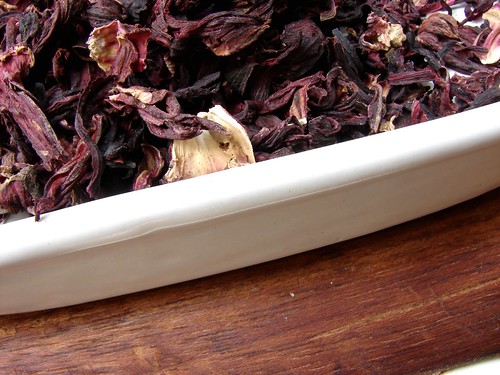
As you can see, the flower is a bright purplish red, the color intensifies when dried. The liquid, broth, tea, water, whatever we should call it, is a beautiful ruby red, a bit more intense than the color of cranberry juice. I wanted to make sure that the dish I created continued to pay homage to the vibrancy of the flower’s color. Saril’s flavor profile could be compared to that of fresh cranberries, I guess. Except, not as tart, giving way to a slight sweetness along the way. Again, I needed to preserve those flavors in the final product: chicken would open itself up to the flavors. A bit of heat and we would be golden. Want to see?
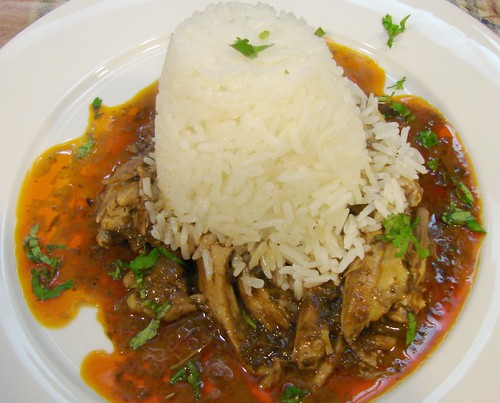
Chicken in Saril and Ancho Sauce
For the chicken
1 whole chicken, cleaned
2 carrots, halved
1/2 cilantro bunch
4 cloves garlic, whole
1 tbsp Herbs d’Provence
1 tbsp sea salt
Water
Remove the innards from the bird’s cavity and rinse the chicken under cold tap water. Place all the ingredients, except for the chicken and water in a stockpot, rest the chicken over them, then fill the pot with enough water to completely cover and submerge the chicken. Place on the stove on high heat until it comes to a boil. Once it boils, lower the temperature just enough to keep it at a slow boil (about medium-high flame) and allow it to cook for another 20 minutes.
At the end of the 20 minutes, turn off the heat and cover with a tight-fitting lid. Let it steam for another 30-45 minutes. Remove the chicken to cool and reserve the broth. This will result in the most beautiful, flavorful, moist chicken meat ever and the broth is amazing. Once the chicken has cooled, break the chicken into pieces and remove the meat from the bones into bite-size pieces. Set aside.
For the sauce
2 cps reserved broth
2 ancho chilies, whole
2/3 cp dried saril
2 tbsp raspadura or dark brown sugar
1-2 tbsp olive oil
1 yellow onion, diced
2 cloves garlic, finely chopped
1/2 cp cilantro, chopped
1 tbsp flour
1/2 cp heavy cream, approx
Reserved chicken broth
Sea salt & black pepper
Place the raspadura, anchos and saril in a small pan with about 2 cps of the chicken broth, bring it to a slow boil for about 10-15 minutes, just until the chilies have softened. Puree in the blender until smooth.
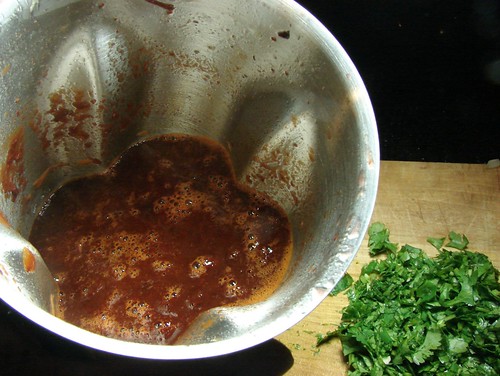
Heat a pan large enough to hold all of the chicken meat and add the olive oil, onions and garlic, cook until the onions are soft and translucent. At this point add the cilantro then the flour and stir constantly over medium heat, don’t let the flour burn, this will help thicken the sauce later. Add the saril puree and enough broth to make the sauce runny, about the consistency of half & half.
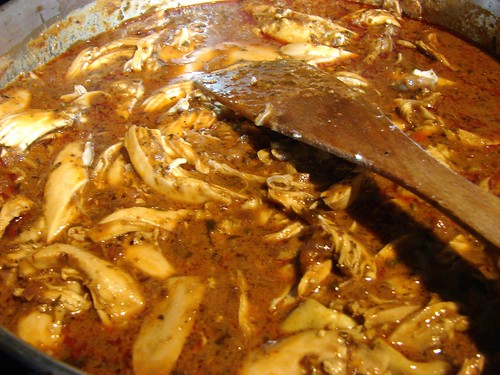
Once the sauce thickens a bit, to about the consistency of heavy cream, stir in the cream then add the chicken and lower the temperature to a slow simmer. Allow it to cook for 20-30 minutes, long enough for all the flavors to come together. Serve over white rice, maybe even pasta and be ready to be oh so happy!
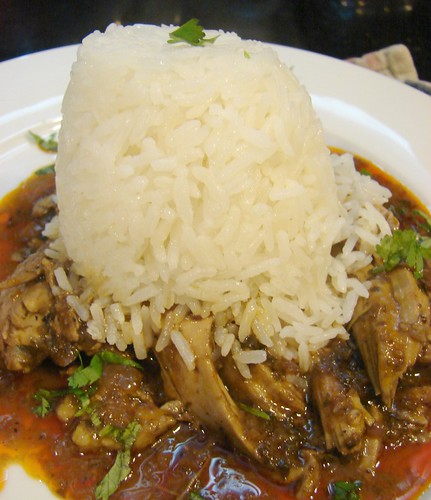
To see just a few more pictures of the cooking goodness, go to my Flickr stream, here. Don’t forget to stop by Peter’s page while you’re there. Mil gracias, Pedro!!!
Cookingly yours,
Anamaris
A few weeks ago, The Hubbz, The Pup and I took a few days off to visit the Texas Hill Country. If you followed my tweets that week, you know that we started off in San Antonio. A required stop whenever there, is Chris Madrid’s. Who is Chris Madrid? I have NO clue, but they make the best burger in the world in his honor (or hers, if Chris is short for Christina).

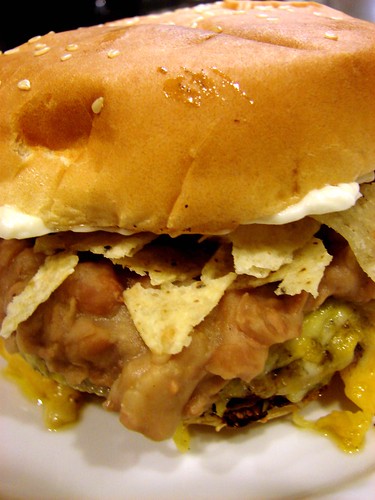
The Tostada Burger is simply the most ingeniously delicious burger you’ll ever eat. It starts with the buns, which I think must be homemade and taste like a brioche. The buns are then stuffed with a homemade all beef patty (you can tell its homemade because the shape is all irregular and imperfect). Not much seasoning on the beef, just fresh, juicy stuff. Then comes a smear of homemade refried beans, a handful of broken tortilla chip pieces. Then it happens. Cheddar cheese. A thick, almost vulgar blob of melted cheddar sits on top. And to crown it all, about a tablespoons of chopped sweet TX onions. Ay bendito! Its crazy; its good, its crazy good!
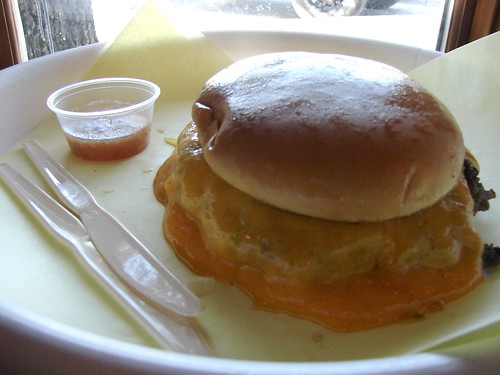
After stuffing our faces, we were Fredricksburg, TX bound. I made reservations a little motel just on the edge of town, this was my first time staying at a roadside motel. The Country Inn & Cottages was a simple, quaint little motel with tiny, but über clean and comfortable rooms and an open heart for dogs. ‘Nuff said.

That was the extent of my trip prep, another first for me. I usually know every attraction, restaurant, hot spot and gas station available at my intended destination. Not this time. I really enjoyed not having the pressure of a fully planned itinerary…, this time. One thing I did know, was there was wine. Lots and lots of local wine. Tastings began Saturday.
I’m going to list these as a countdown, leaving our absolute favorite for last. Before we get started, I want to say we did not have a single glass of bad wine. In fact, we bought bottles upon bottles at each of these wineries, but there were definitely some incredible wines out there and each winery had a different feeling.
Grape Creek Vineyards ~ This is a gorgeous place, they’ve set it up to look and feel like a winery would in Tuscany. There’s a grand entrance and a beautiful patio with a fountain. The attendants were a bit stuffy for our taste, but the wine was lovely.
We each sampled a couple of different wines and settled on: the Cuvee Blanc, Mosaic and the Grand Rouge.

Fredricksburg Winery ~ this winery sits right on the main drag. Like many of the wineries in the area, it is a family business. We walked up to the counter and chatted it up with the attendant who was a Houston transplant (we bumped into lots of those here). We ended up with 2 bottles: one of each. A Vintners Cuvee and the most amazingly flavorful spiced red. I’ve never had spiced or mulled wine, you know, the stuff that is served warm? But OMG! I couldn’t stop smelling it or drinking it. Now I’m waiting for the temps to drop again so I can polish off our bottle.

Torre di Pietra ~ This winery sits right next to Grape Creek, but it was much more low-key. After our tastings, we just sat outside enjoying the sun, the cool wind and wine. It was just heavenly.
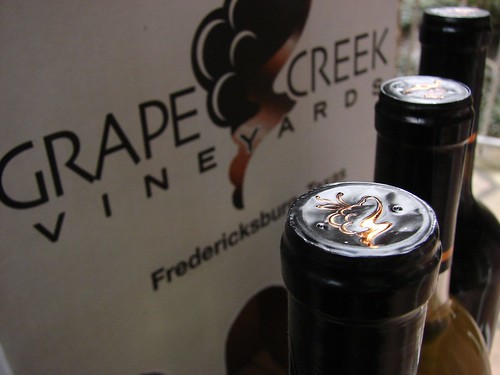
They have this Tango Port that is just unbelievable, and I’m not even a fan of the stuff. However, for us, there were 2 clear winners here: Amore di Toscano, a lovely almost chocolatey blend of Sangiovese, Cabernet and Syrah. When he poured this one, he told me he called it ‘Trouble’, man, was he right. The second bottle we brought home was their Late Harvest Zin…, oh my. This guy is oh so yummy and kinda raunchy in the best possible way. Here’s a description of all of their wines.
The last winery is our favorite. Chisholm Trail Winery is located just outside Fredricksburg. It may be out in the middle of nowhere, but their wines are full of life, personality and sass. Rebecca was our tasting expert and she explained and answered every question we had and even the ones we didn’t ask.

She told us about Paula’s passion for wine and her very personal approach when mixing the grapes. She told us all about Lenoir grapes, a TX-specific crop, and how it tints the wines and makes them oh so dark and rich looking. She was honest about her favorite wines, about how some needed a bit more time to mature and come into their own. Rebecca left us unwilling to leave and wanting to throw caution to the air, pack our bags and never leave that little town. Thanks, Rebecca!
The Hubbz and I loved every wine we tasted at Chisholm, but were sucker-punched by 3 in particular.

Diablo, what a devil this one is. A blend of Lenoir and Syrah grapes, it is spicy, rich, sweet, dark. Very, very dark.
Lone Wolf. This one got them a gold medal. It is made from 100% TX grown Lenoir grapes and it just explodes in your mouth. Un.be.lievable. Our third choice was a Bella Star a tasty white.
Beer is also big in this area, there are a few breweries in Fredricksburg and the whole Hill Country region. If you haven’t already, add it to your list of places to see. You will not regret it.

Oh, did I mention this…?

Buzzily yours,
Anamaris
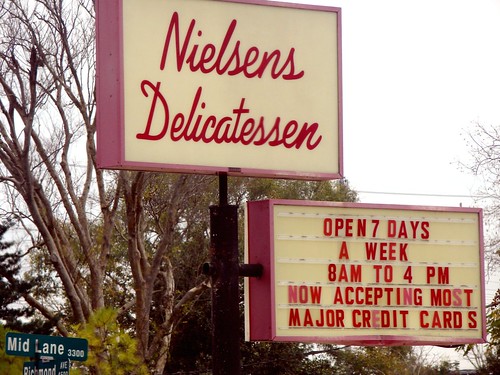
At the corner or Richmond and Mid Lane sits an unassuming establishment called Nielsens Deli. I had driven by this place countless times since moving to Houston, but never thought about stopping by, I imagined it was just a deli selling deli meats. Recently, a good friend invited me out for a quick lunch promising me I would have the best potato salad and deviled eggs EVAH! Off to Nielsens we went.
As you walk into the stand-alone building, you’ll come into a long narrow room, the deli counter will be just a couple of feet and directly across from the front door, that’s where you place your order, unless you’ve called it in. Turn right and to the opposite end of the room, pick up some chips and pay for your order. If you’re dining in, you can grab one of the stools lined up against the storefront glass. If you’re feeling particularly playful, tease the incoming customers as they come up to the counter.
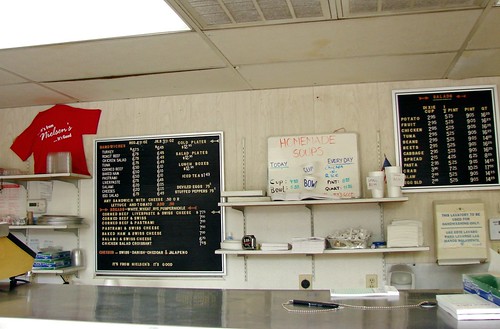
Ok, this is a food blog, right? Let’s talk shop. First, I was tickled by the lingo I heard as I approached the counter. The customers, regulars no doubt, have learned how to properly order their meals: ‘a Jr Corned beef, extra spread on rye and a pixie potato salad‘. It made me think of a kinder, gentler soup Nazi.
I’m not a big sandwich person, it just doesn’t seem like a meal, but these sandwiches are awesome! I had the corned beef on white with extra spread (they make their own mayo…OHMY!), an egg and a pixie of egg salad. Let me tell you, this corned beef was good and piled high on the homemade bread. No skimping here.
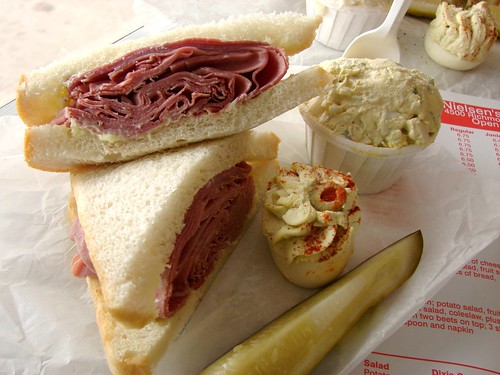
Anni had the turkey on white, extra spread an egg and a pixie of potato salad. I had a bite of her turkey and was surprised by how flavorful it was. They’ve been roasting their own turkey breasts since the deli opened in 1952, I think they have it down.
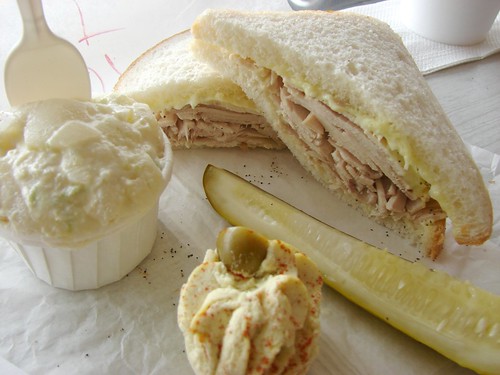
Now. For the really exciting part. Those sides. I love potato salad, but not the mustardy kind and not with a bunch of stuff in it. KISS (keep it simple, sweetie) is my motto. And KISS it they do. Loads of their amazing homemade mayo, piled with eggs and celery for some crunch, this potato salad ROCKS! It is so good that years ago Gourmet magazine sent a letter requesting their recipe!
Then we go into the deviled egg territory. Insanity, that is all I can say about it. Next time I go, I will have the chicken salad sandwich, apparently it is incredible. And I believe it, because I had a pixie of the egg salad… it was as if they just chopped the deviled eggs and stirred it all up.
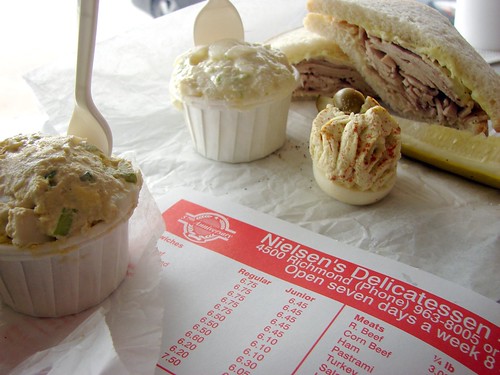
If you’re from Houston, you should definitely visit this Houston institution, do it soon! It’s just inside the loop at Richmond. If you’re coming to Houston for a visit, put this one on the list.
Nielsen’s Deli (daily from 8:00 a.m. to 4:00 p.m)
4500 Richmond Avenue
713.963.8005
Eating around,
Anamaris
So, tell me, have you enjoyed meeting my bloggy friends? I hope so, I’ve had a lot of fun celebrating my blogiversary with them, I’m so grateful they hung out with us. I’m rounding off the month-long celebration with this one, but no worries, I will bring this feature back in 2011. I promise, but for now, let’s meet Nancy!
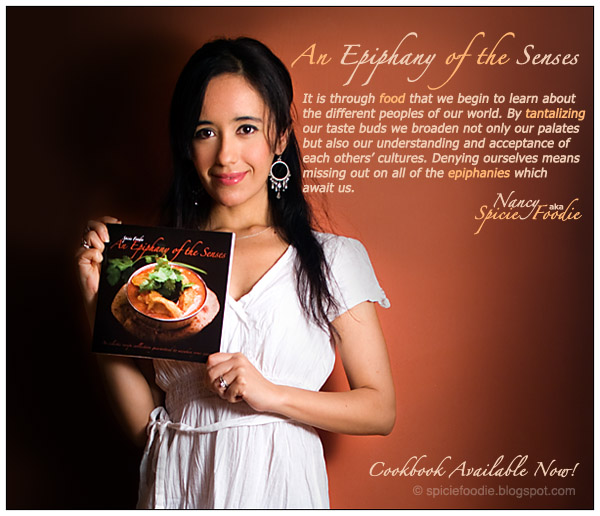 I was immediately intrigued with her blog, Spicie Foodie, the first time I read it. Nancy is a Latina living and cooking Mexican recipes in Europe, a feat when you consider the availability, or lack thereof, of traditional ingredients. Nonetheless, she’s managed…quite beautifully as you’ll see from her photographs. Yes. I envy every shot on her blog. Enough about me, heeeeere’s Nancy!
What is the elevator pitch for your blog?
Spicie Foodie is a blog about a Mexican expatriate cooking ethnic foods in Europe. Healthy, fresh and delicious recipes to spice up your kitchen!
Why and when did you decide to become a blogger?
It was in late July of 2009. Really the idea was because I badly needed a distraction from my job. All I wanted to do was be in the kitchen cooking,baking and experimenting. Then I started thinking it over in my head and mentioned it to my husband. He was very positive and for the idea, so I started my blog.
What’s next for your blog
Well, I’ve just announced the release of my first cookbook. It’s called An Epiphany of the Senses, and you could say it’s my blog come to life. Most of the recipes are new but it still has all of the Spicie Foodie soul in it. I’ve poured all of my heart and soul into my book and the goal is to just keep getting the word out about it and see where it goes from there. Also the YBR (Your Best Recipe) event is gaining popularity and I am looking forward to hosting it every month.
What sound or noise do you hate?
I hate the sound of paper being folded. You know when someone slowly folds the crease until it’s completely flat, running their finger or nail across it. Eeeek! Just writing this makes me cringe!
Lucy & Ethel or Monica & Rachel?
I have to admit that I’ve only watched like 2 episodes of Friends. So I don’t know much about those characters, hehe no I don’t live in a cave. But regardless I would still choose Lucy & Ethel. I loved that show so much, so glad for reruns. I’m totally Lucy, always in trouble and my husband could say , “Naaannncyy you got some esplainin to do”, on more than a hundred occasions.
If you had 3 wishes, what wouldn’t you wish for?
I wouldn’t wish for cold rainy weather, I wouldn’t wish for love-handles and I wouldn’t wish for a shortage on Cocoa. (Can’t live without chocolate!)
If you have to hire a TV attorney, past or present, who’d represent you?
Lionel Hutz from the Simpsons. Is he still on the show I wonder? Well if I needed a really good Lawyer it would be Patti Hewes, she’s a real cut throat biatch! and you know she would win. I love the Simpsons and just watched a couple episodes of Damages, great show.
I love Damages too, Glenn Close totally rocks that role. Those were just a few questions I asked, but Nancy, in true Latina form, had more to say. So I’m just handing this over to her and making myself a cocktail. Talk among yourselves.
Hi everyone and thank you Anamaris for inviting me to do a guest post on your blog. When Anamaris invited me she asked if I could share a recipe with you that showed how living in Europe has influenced my Mexican dishes. For those of you familiar with my blog you know that I am a Mexican expatriate and I’ve spoken a lot about the lack of authentic Mexican ( and other ethnic) ingredients where I live. This has lead to my experimenting with the local ingredients available as well as learning to make many things from scratch.
While I have always strived to stay as authentic as possible with my ethnic cooking, sometimes it can be extremely difficult to find what I need. One Mexican dish or rather salsa that is commonly served at my house is Pico de Gallo also know as Salsa Mexican. A simple salsa made from tomato, onion,cilantro, fresh chiles, lime juice, and spices. Sounds simple enough no? Well, fresh Jalapeños or Serranos are virtually non-existent here in Prague. Limes are usually hard as a rock and not worth spending money on. Cilantro is not always available either, especially in the winter. Limes are not a local product, fresh hot chiles are not in the local cuisine either. But both parsley and radishes are abundantly available all year round. So on those occasions where the Mexican ingredients are not available I’ve created a different version of Pico de Gallo. You can say it’s a Czech take on a Mexican classic.
Doesn’t this look amazzzzing?!!!
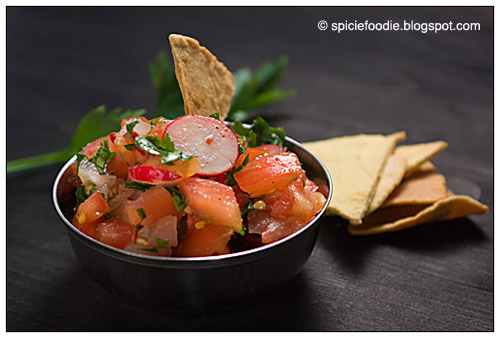
Spicie Foodie’s Czech-xican Pico de Gallo
4 Roma tomatoes, finely diced
1 small white or yellow onion, finely diced
8 small red radishes, finely sliced
large handful of finely chopped flat leaf parsley
1 large lime or substitute with a small lemon, juiced
1 tsp. red pepper flakes ( I add more for a spicier version)
1/2 tsp. granulated garlic
1/2 – 1 tsp. salt
a pinch of ground black pepper
Gently mix all ingredients in a large bowl until well combined. Cover the bowl with kitchen wrap, place in the refrigerator and allow to cool for 10 minutes before serving. Serve with corn chips as a healthy snack or as a topping or accompaniment to a Mexican meal.
Nancy is currently accepting entries for Your Best Recipe (YBR), just click that link to see who’s in and to submit your own. Since she has changed the format a bit to make it about the year’s best recipe, I’m taking my time to decide, I think I will enlist your help! For now, don’t wait any longer, go visit my friend Spicie Foodie, she’ll be really nice to you.
Panamá, being the proverbial melting pot, has an incredibly abundant Chinese presence. You can’t walk more than a few yards before stumbling into a Chinese restaurant or a corner tienda, a little neighborhood store where you can buy everything from fresh bread to pigs feet and a hammer. That means Chinese food has been influenced by the local’s taste buds and available produce. Chinese food in Panama is completely different from Chinese food in Houston and Houston’s is nothing like Chinese food in NYC. Adaptability. I often wonder if I would enjoy Chinese food in China. But I digress.
I’ve shared with you a recipe for roast chicken very popular in Latin America. This is pretty much the same thing with a few changes and the addition of this ketchupy sauce added to chicken in Panamá. I don’t know what it is about this simple sauce, but it would probably fall under the Chino-Latino category. Almost every Chinese restaurant in Panama will offer some version of this rotisserie chicken and BBQ pork, which is absolutely divine.
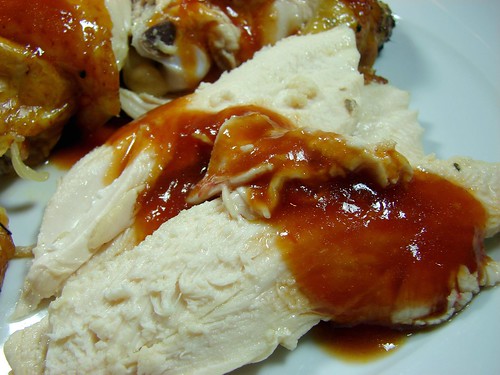
The chicken is seasoned pretty much the same, then roasted to golden perfection and served with the yummy sauce all over it. To ensure the chicken is super juicy, I brined it for just over an hour, ideally, I would’ve allowed it to brine longer, but it was still delicious. It occurs to me that this would also work brilliantly with turkey, I may just give it a try. Here’s what you’re looking for.
Pollo Panamá
1 whole chicken, approx 4-6 lbs
For the brine:
2 Sazón packets
4 garlic cloves, crushed
4 tbsp soy sauce
2 tsp sea salt
2 tbsp Italian seasoning
2 tbsp sugar
Water
Chino-Latino Ketchup
1/2 cp ketchup
1-1/2 tbsp soy sauce
1-2 tsp sugar
1/4 cp water
Habanero hot sauce, to taste
1 garlic clove, halved
2 tsp extra virgin olive oil
For the chicken: Heat about 1/2 cp of water and add the garlic, salt, Italian seasoning and sugar for the brine, allow it to come to a quick boil, then turn off and transfer to a bowl large enough to submerge the chicken. Or you can use a large ziploc bag. Give it just a couple of minutes to cool, then add the rest of the brine ingredients.
In the meantime, remove the giblets from the chicken’s cavity and rinse the chicken under cool water. Drain and place the chicken in the bowl with the brine concentrate and fill the bowl with enough water to submerge the chicken. Allow the chicken to marinate in the brine for about an hour, longer if you have the time.
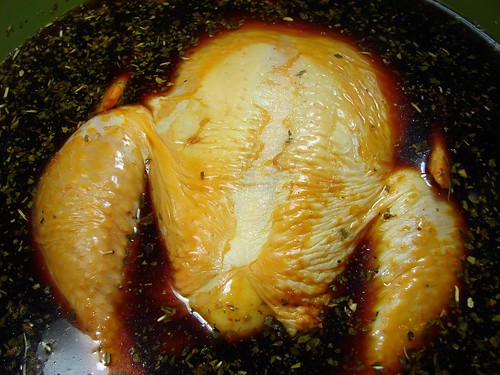
Preheat oven to 350°. Prepare a roasting pan and rack large enough to hold the chicken. Drain the chicken and pat it dry. Rub it with extra virgin olive oil and place on the rack breast side down. I prefer to roast whole chickens and turkeys with the breast down to make sure it is juicy, since breast isn’t my favorite meat. If you’d rather have pretty skin on the breast, then roast it breast side up. Place the chicken in the preheated oven and allow it to roast for about 20 minutes per pound, for a 5-pounder, you’re looking at just under 2 hours.
Note: I will usually roast the chicken or turkey at 375° for about 10 minutes, then lower the temperature to 350° for the remainder of the roasting time, but I was being very lazy with this chickie. You know what? It was still perfect!
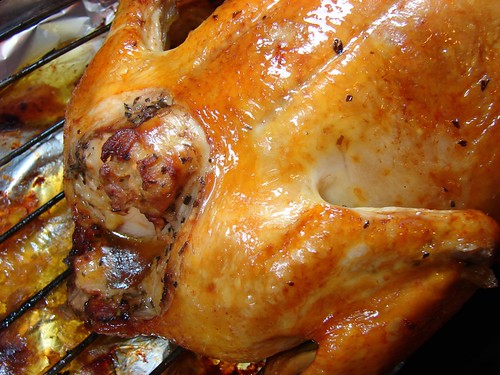
Once the internal temperature reads somewhere around 180°-185°, remove the chicken from the oven and cover loosely with foil. Allow it to rest to allow the juices to redistribute and make Ms. Chickie very happy. This is a good time to put the sauce together if you haven’t already.
In a small saucepan, heat a bit of olive oil and add the garlic halves allowing them to permeate the oil for a minute or two. Add the rest of the ingredients, tasting it after the first teaspoon of sugar, this should be to your taste. Adjust the seasoning with salt, if necessary, but the soy should take care of it. Bring it to a slow simmer for 5 minutes or so, keep it warm and spoon over the chicken to plate.
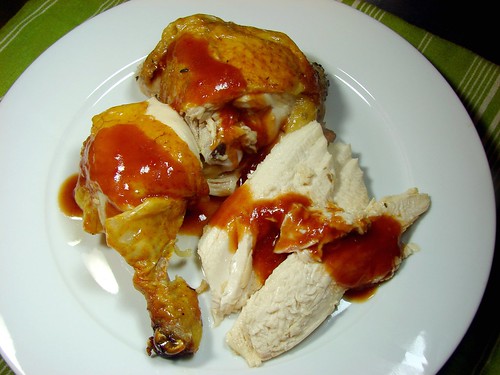
Check out the photo set for more juicy shots.
Cookingly yours,
Anamaris
Disclaimer: These aren’t pretty pictures. Sorry. Did I mention we eat every dish you see on this blog? Well, we do, and these babies weren’t waiting for a photo shoot. Allz I can say is, these are incredibly delicious and messy, the way a good burger should be. Better pictures another day. Maybe.
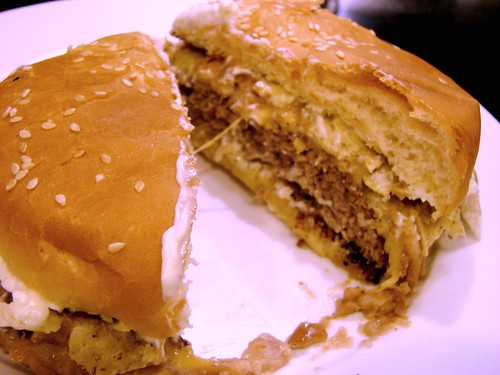
The first time I had these burgers was on my first visit to San Antonio, TX. This was eons ago, close to 15 years or so. Friends took us to this little hole in the wall grill promising the best burgers we’d ever had. They were right and continue to be. Chris Madrid has been around and expanded since then. This burger, and I have to say ‘this burger’ because I don’t think I’ve ever ordered anything else; this burger has remained the same. Consistently. Deliciously. Wackily good.
These burgers are so good and coveted by my friend Dodo and I, that we have made the 3-ish hour drive, had our burgers and turned around heading back to Houston. Yep. We have driven 6 hours for this burger. What? Like you wouldn’t?
Let me tell you about this little jewel. The Tostada Burger is dressed with mayo, refried pinto beans, tortilla chips, sweet onions, and an obscene sea of melted cheddar. Real cheddar. Melted. Real melted cheddar, I still don’t know how they achieve that feat. When they throw that burger at you, you can’t see the bun or the patty because they’re both covered by cheddar. OH. MY. GAWD. !!!.
Here’s my attempt at a Chris Madrid Tostada Burger.
2 cps pinto beans, cooked
5 bacon strips, diced
1 clove garlic, crushed
1 medium sweet onion, coarsely chopped
8 slices sharp cheddar cheese
1-1/2 lb ground chuck
Fajita seasoning
Tortilla chips, coarsely broken
4 hamburger buns
For the Onions: This is a step you can skip if you don’t mind raw onions, but I do, so I cook’em in bacon fat. Cuz bacon…, you know, makes everything bettah! Render the fat from the bacon and cook until it is lightly browned. Remove the bacon from the fat and add the chopped onions. Cook the onions until slightly softened. Once the onions have softened, remove them from the fat and set aside to drain.

For the Refried Beans: I started off with dry beans, but I have made this with whole canned beans. Do make sure you drain and rinse the canned beans before using them.
In the remaining bacon fat, add the beans, garlic and bacon together with about 1 cp of the bean cooking liquid, (if using canned beans add water or broth). Smash the beans into a chunky paste, it’s ok if you have beans that are just slightly mashed. Check the seasoning, adjusting the salt and pepper.
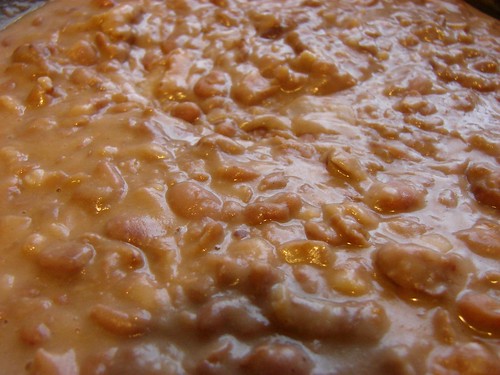
The beans should be loose, you don’t want them to be too thick. They will thicken as they sit around. Keep warm.
For the burger: Season the ground chuck liberally with fajita seasoning, try not to handle the beef too much. Once you have integrated the seasoning, divide it into 4 balls. Once divided, flatten into patties.
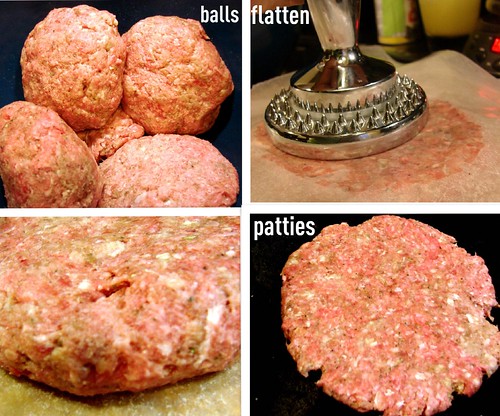
To cook, heat a flat skillet, preferably cast iron, over high heat and place the patties on the very hot pan. Cook to your preferred doneness, flipping them after a few minutes. In the meantime, preheat the broiler.
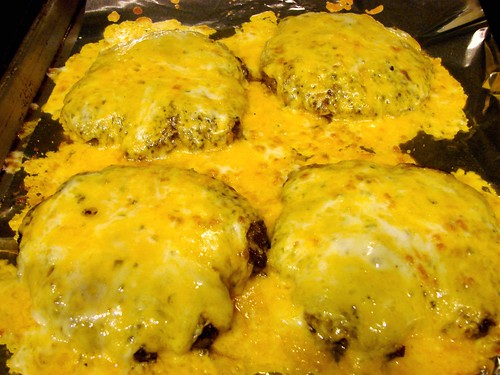
Once the burgers are done, top each with a couple of slices of cheddar and pop it under the broiler. Watch them through the little window, just wait until the cheese melts and is bubbly and beginning to brown.
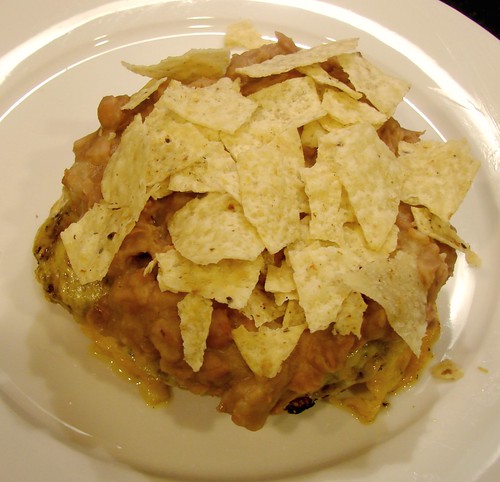
To assemble: I toasted the buns in a bit of butter, your choice to do so or not. Spread some mayo on the buns, don’t be shy. Set the cheesy patty on the bottom half, top with a couple tablespoons of refried beans. Top the beans with the crushed tortilla chips and finally, the onions. Put the other half of the bun on top and go at it. You. Will. Lose. Your. Mind. I guarantee it!
Cookingly yours,
Anamaris
PS: Make sure you have plenty of napkins.
OK, we may be off to a bad start. I know I said I was going to focus on Latin-Caribbean cuisine, and I will. Just not this time  Lo siento. I thought about typing the post in Spanish, but then you would either a) have to deal with some unreliable online translation tool, b) think I’d lost my mind and move on or c) not get to enjoy this awesome salad. My hope is that this salad will make up for my transgressions.
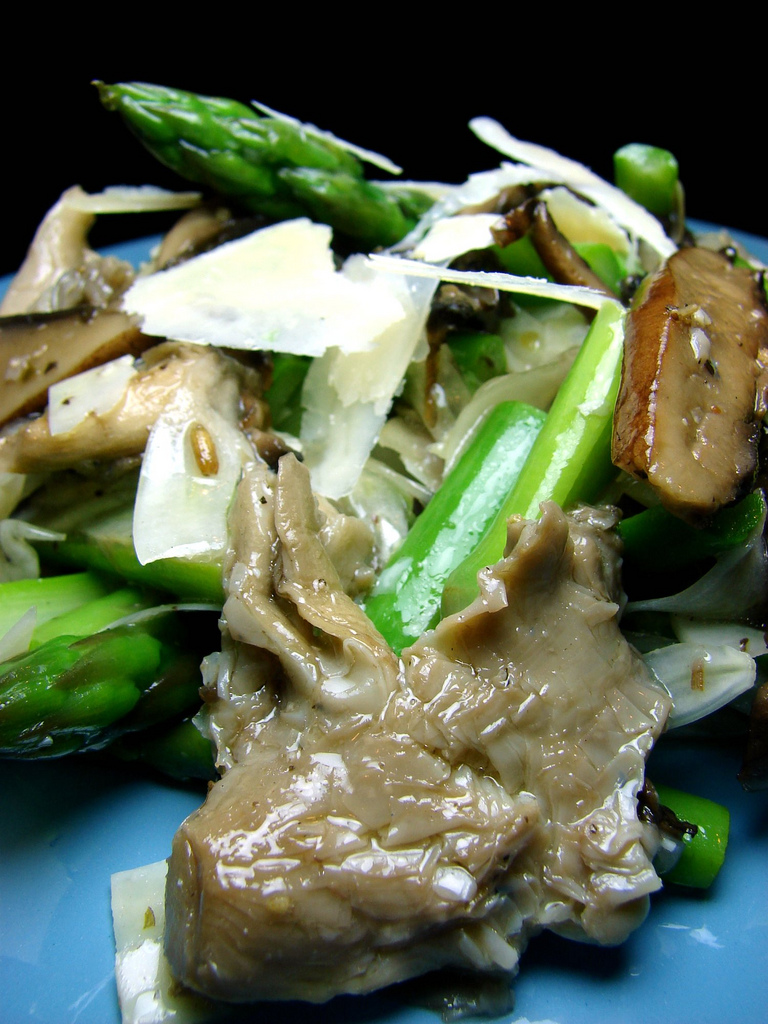
Let me start by saying…, I’m NOT a salad gal. Hey, I’m a Latina, we don’t eat salads. Well, that ‘s not true. We do. I don’t. I try, but I’m usually disinterested. Every now and then I do find a winner. Like Houston’s Cobb Salad. Or the salads at sushi restaurants with that awesome ginger or peanut dressing. But those are not the salads I want to talk to you about. This salad is unusual. It is fresh. It is satisfyingly meaty and meatless. This is a Poached Mushroom and Asparagus Salad.
I’ve been hearing about poaching meats and vegetables in olive oil. It seems to be one of the ‘it’ cooking methods at the posh places these days. Poaching is generally done using a well-flavored broth, sometimes wine, that is kept at a consistently low temperature. The idea is to slowly cook the ingredients without ever bringing them to a boil.
I used a medium-sized skillet and added about 3 cps of extra virgin olive oil. Don’t fret, you will save the oil and reuse it. Because the oil is never very hot, you don’t burn it, which allows you to use it time and again. There really isn’t a recipe here, but here’s what I did.
Poached Mushroom and Asparagus Salad
Wild mushrooms–I used portabella and oyster
3 cps extra virgin olive oil (approx)
Asparagus spears, trimmed
Fresh fennel, julienned
Sea salt
Fresh ground pepper
Your favorite vinaigrette
Parmesan or Manchego slivers
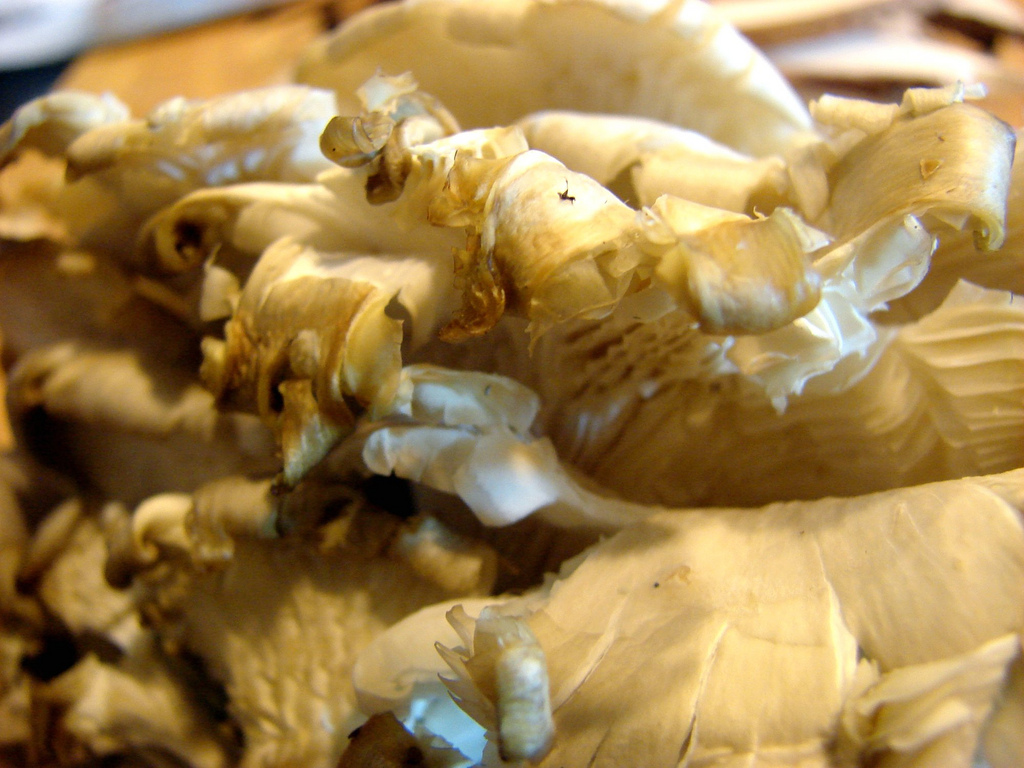
To poach the mushrooms: clean and slice the mushrooms. If you are using portabellas, make sure you remove the brown gills. Otherwise your oil will be dark brown. While you get the mushrooms ready, put the oil in the skillet and turn the heat as low as your stove will go. The oil’s temp should be between 160–185°.
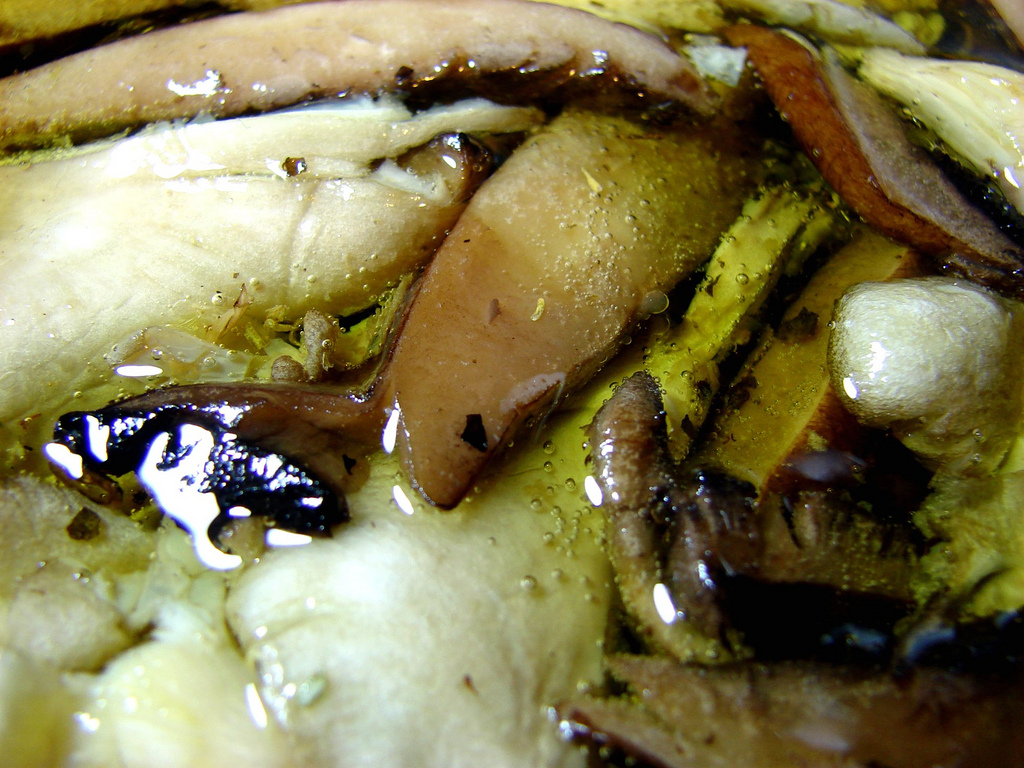
Once the oil comes to temperature, add the mushrooms. It is important that they be completely submerged in the oil. You’ll know the temperature is right if you see little bubbles slowly forming around the mushrooms. Poach the mushrooms for about 15 minutes or until tender. Once the mushrooms have softened, remove them from the oil and drain. Allow them to cool. Meanwhile, prepare the rest of the ingredients.
Blanch the asparagus: bring a pot of water to a boil. Add salt, then drop the asparagus in the boiling water. Allow them to cook for about 3 minutes. Have a bowl of iced water waiting , remove the asparagus and dunk them in the icy water. Allow them to stay in the cold water for at least 3 minutes. Remove and drain.

In a bowl combine the mushrooms, fennel, asparagus and vinaigrette–tossing to coat all ingredients. I used a store-bought white balsamic vinaigrette. Add some of the cheese slivers and toss. Top with more cheese when served.
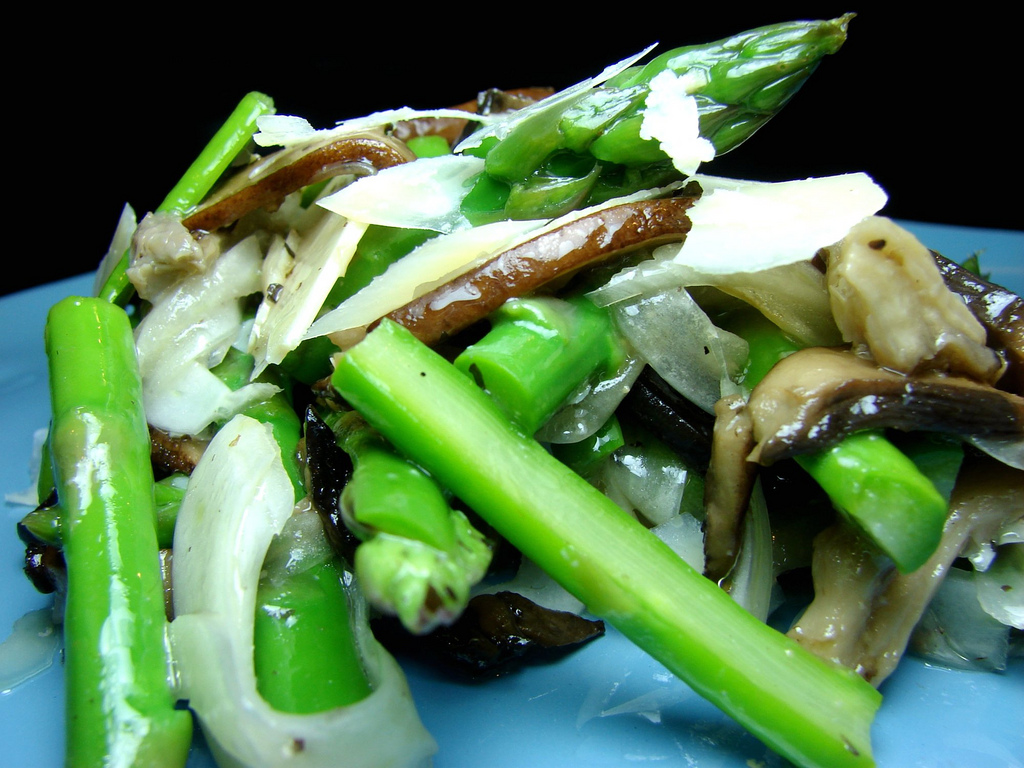
You may think using olive oil as your poaching liquid would result in an extremely oily dish, but it doesn’t. What you end up with is a delicately flavorful bunch of mushrooms. To preserve the oil: If you notice any bits or drippings, allow it to cook longer without the mushrooms. Then strain through a coffee filter and save in a glass or heavy plastic container in your refrigerator. Bring it to room temperature before the next use.
I promise you, you will make this one again. And again. Enjoy!
Cookingly yours,
Anamaris
Getting flowers is always wonderful. The pretty colors. The scents. The feeling you get every time you take a peek at them. Birthday flowers. Anniversary flowers. I’m sorry flowers. They’re all wonderful, but Just Because flowers are my favorite.

The Hubbz, MY Hubbz, came home with huge bunches of flowers.

Roses. Lilies. Rhododendrons. All in the most beautiful shades of orange. Gorgeous! That’s why I love that man.

I’ve been dealing with some of life’s difficulties. Unwelcomed realities. Harsh ones. My mom’s health is deteriorating, it’s been tough. Please send some positive thoughts her way.

Oh, by the way, I keep forgetting to introduce you to the newest addition to the Price household. Meet Mocha.

Mocha Java to The Hubbz.

Mocha Loca to me. Isn’t she sweet?!

Speak of the devil; she’s giving me the hungry look. Gotta go.
Woof woofly yours,
Anamaris
One of the menu items for my recent 24, 24, 24 submission was an ode to White Castle burgers, at least that’s where the inspiration started. Since White Castle originated in Ohio, this seemed a fun menu item to throw into the mix as the Midwest’s representative.
First, I researched what all went into those little burgers. I remember how much I loved them while visiting Missouri. I can still picture the perfect little bread squares, the thin oniony patty and how moist it all was. From that memory, I knew I wanted to mimic the moist patty and the onion topping. I needed to decide on the bread.

I found suggestions to use hot dog buns cut in half, but I wanted more. This was the Midwest; corn is big there, isn’t it? So first I thought of cornbread, then I was hit by the lightbulb. Corn Fritters. Oh yeah. A new burger was born.
Note: This was an 8-course meal I was preparing for, so I made the onions and fried the corn pancakes ahead of time. You can do the same. Also, I served these open-faced–with a pancake at the bottom only, you decide if you want to sandwich them or not.

Burgers on Corn Pancakes with Caramelized Onions
For the Burgers:
1 lb. ground sirloin (use good quality meat)
2 tsps Worcestershire sauce
1 tsp black pepper
1/2 onion, chopped
1-2 cloves garlic, chopped
2 tsps extra virgin olive oil
Drop all the ingredients except for the beef into your blender and liquify, then add the mixture to the beef. Mix it in by hand and shape into balls just slightly larger than a golf ball. Set aside in your fridge until ready to cook.
When you’re ready to serve them, heat a medium-sized skillet until smoky. Drop 2 or 3 of the meatballs, leaving enough room between them. Flatten them out and cook for a few minutes on either side. Once you’ve flipped them, top it with one of the cooked corn pancakes. This will allow the flavor of the beef to permeate the pancake. Remove from the skillet, top with the onions before serving.
For the Caramelized Onions:
1 large red onion, thinly sliced
1 tbsp butter
1-2 tbsps extra virgin olive oil
1 tbsp brow sugar
3 tbsps sherry (or cooking wine)
2 tbsps balsamic vinegar
Sea salt & black pepper, to taste
I used my mandolin to slice the onions. I love my mandolin, it makes my life beautiful and easy when I’m facing tasks such as this one. It made slicing that onion a breeze, it took me less than 5 minutes to end up with these beautiful slices.
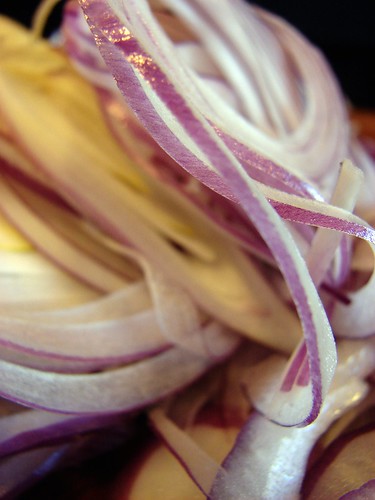
Heat up a saute pan over medium high heat and add the olive oil and butter until it melts. Then add the onions and cook them until they begin to soften.
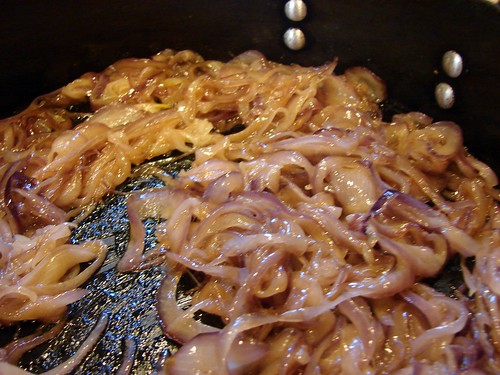
Add the sugar, this will help caramelize the onions, browning them. Once they have browned, add the sherry and vinegar. Cook until it evaporates. Check and adjust seasoning as desired. Use to top the burger patties.

For the Corn Pancakes:
3 ears of corn, shucked (about 1-1/2 cups)
 2 tbsps butter, melted
2 eggs
3 ozs whole milk
1/2 cp cheese (like Gouda, Emmentaler)
1/3 cp flour
1/2 cp coarse yellow cornmeal
3/4 tsp sea salt
1 tsp black pepper
1/2 tsp sugar
Oil for frying
After you’ve removed the kernels from the cob, add all the ingredients except the cheese and oil to your blender or food processor. Blitz it just a couple of times, you want it to be chunky. Then mix in the cheese by hand.

In a nonstick skillet, heat up enough oil to fry the pancakes, you want it to be about 1/4 inch deep. Heat the oil over medium high heat and drop the corn batter using a 1/4 cp measuring laddle or cup. Brown it on both sides, it will take about 1-2 minutes per side. Remove and keep warm.

Putting it all together: After topping the patty with one of the pancakes and allowing the pancake to heat through on the skillet, invert it onto the plate. If serving open-face: top the patty with a dollop of onions. If planning to sandwich it, place the second pancake over the patty, then top with the onions.
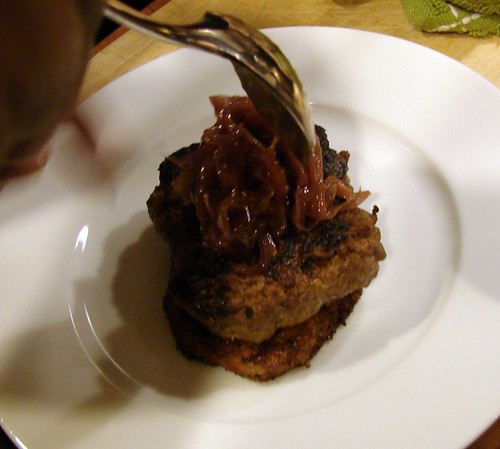
These are AMAZING. Do enjoy.
Cookingly yours,
Anamaris
 A couple of weeks ago, Andrea from Family&Food invited me to participate in a new bread baking group: Mellow Bakers. Much like the BBA, they plan on following recipes from a specific cookbook, Bread by Jeffrey Hamelman. What drew me to this group is the idea of baking at a mellow pace. I love bread, but I’m trying to stay away from it AND I don’t really want to feel pressured to making a bread a week. So this group suits me just fine.
 For the dough:


