I’ve always found that to be an odd expression. The phrase itself sounds innocuous to me, but the meaning behind it makes sense. To share, to open one’s home and/or heart to another, to be welcoming. Philosophically, the idea of breaking bread is a great one. In reality, the idea of having to share my bread with someone, elicits murderous thoughts. No. Really. Don’t touch my bread!
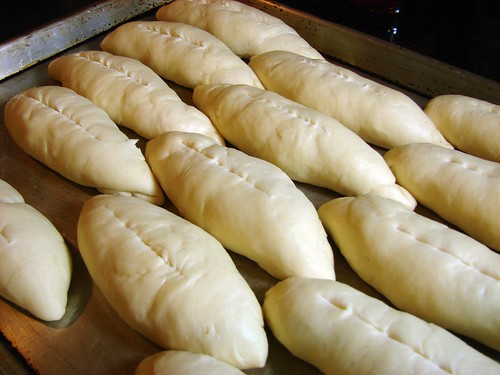
Luckily, when I bake bread, the recipe results in enough of it that I’m able to, even if begrudgingly, share it with one or two people. Tops. You get the picture. So, a few weeks ago I made some bread. Panamanian bread, something we call Pan Micha.
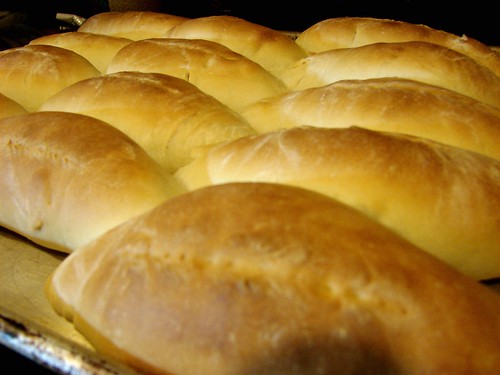
Rumor has it, this recipe was brought to my homeland by the French when they attempted building the Canal. I have no verification for that story, but I do recognize some similarities with French miche bread. Thin, golden crust and soft, light inside. What I do know for sure, if that you will find michitas anywhere there is a bakery in Panama.
I remember walking to school and stopping by the corner bakery–the aroma of freshly baked bread wafting in the air–and ordering ‘una michita con queso blanco y mantequilla‘ (a buttered michita stuffed with white cheese). Aaaaah, the bread would still be warm, the butter and local cheese melting into the center. Heavenly.
I found a recipe for it here, so I won’t retype it, just follow the link. What I want to tell you about, is how we ate them, after all, eating them is the best part.
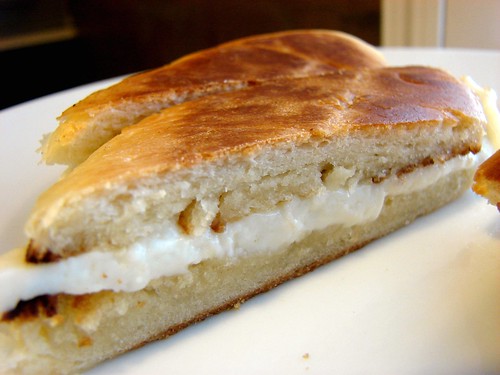
You know I’m a traditionalist, so mine had butter and Queso Fresco. Nothing else needed. I did toast them a bit.
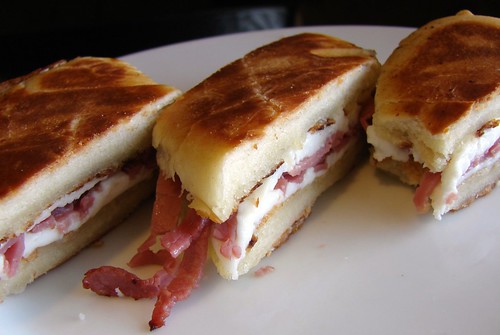
The Hubbz is a different story. He’s a man of excess, so he added some roast beef we had in the fridge. In Panama, we would’ve used ham or chorizo.
The bread was good, but not as light and airy as I remember michitas being, my quest for the perfect recipe continues.
Cookingly yours,
Anamaris
I hope I’ve tantalized your tastes buds with my previous posts about this lovely root. #1, #2
I hope it has made you curious enough to go forth and find some in your grocery store or market.
I hope you’ve scoured the web looking for more yuca recipes.
I hope you are ecstatic to find out it works for desserts too.
Those are a few of my hopes where yuca is concerned. Well, no. I really REALLY hope you’ll give it a try. Really.
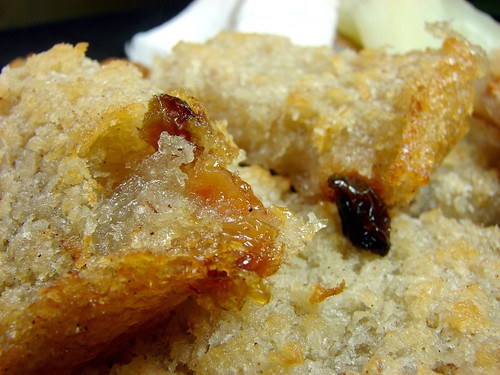
Now, let’s talk about Enyucado, or as any good Panamanian would say it ‘Enyucao’. I’m not sure I’ll be able to adequately describe the delicious piece of earthly goodness. As I mentioned, it is a dessert. It has yuca and coconut and butter. Not just butter, but buttah! It is sweet and gooey. See, yuca is very starchy. In fact, its starch is used to make tapioca, I think that starchiness contributes to the gooeyness of the dessert. Then the buttah and sugar make the edges caramelize and it all becomes a mess of sticky goodness.
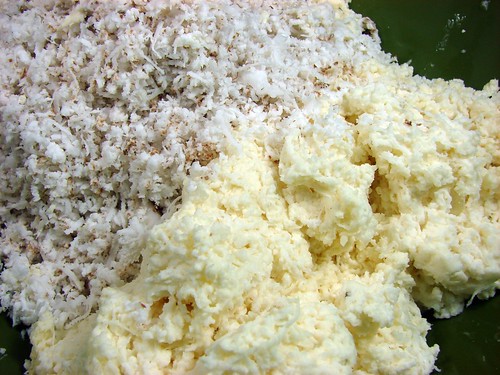
For the Enyucado, the yuca and coconut are shredded, which means there’s a bit of effort that goes into the dessert, but that is it. Once you have that part taken care of, the rest is a zinch. I promise. And it is oh so good!
Enyucado (Yuca Cake)
2 cps yuca, shredded
2 cps fresh coconut, shredded
1-1/2 cps sugar
1/2 cp butter, melted
1 tsp vanilla essence
1/2 tsp cinnamon
1/4 tsp nutmeg
2/3 cp raisins
2 tbsp anise liqueur or extract (I used Galliano)
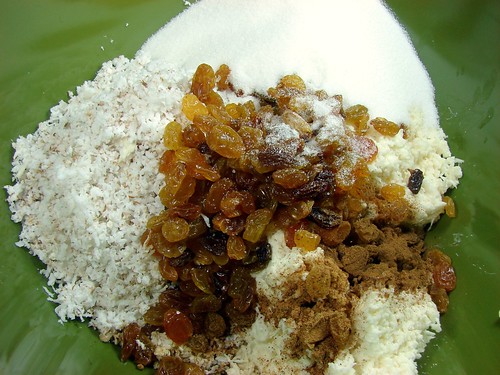
Preheat oven to 350° and generously butter a 9×13 baking pan; set aside. Combine all the ingredients and stir until the sugar has dissolved and everything is well incorporated. Pour into the baking pan and pop it in the oven. It will bake for 30-40 minutes, or until golden brown on top.
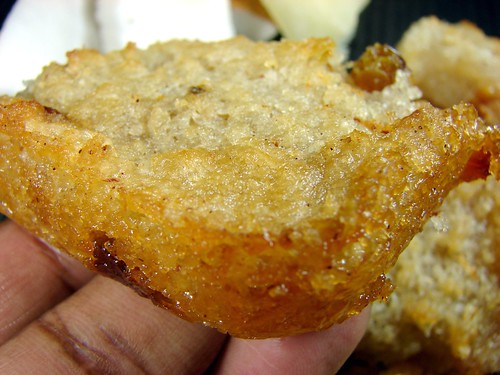
Allow it to cool before slicing into squares. For more shots, check out the set here, and to figure out how to shell a coconut, click here.
Cookingly yours,
Anamaris
Ooops! I did it again. I’ve been seduced and I succumbed. Bread baking has my heart all pitter-patter. I even committed to a proper bottle of yeast! No little throw away packets for this girl. No! I’m an honest bread baker now.
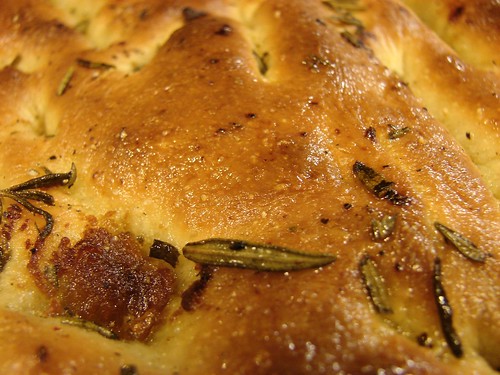
This time it was Focaccia. I needed some for a salad, so I looked at a million recipes and made a choice. Well, I settled on 2 separate versions: one is by Peter Reinhart and the other is a much simpler method by Suzanne Dunway. I really like Reinhart’s use of a poolish; I’m convinced that is the reason the bread tastes so good and not overly yeasty. He’s a bit of a Martha, though. His method is definitely on the elaborate side of things, not that there’s anything wrong with that. But, I am a novice bread maker and find myself intimidated quite easily. That’s probably why the ‘No Need To Knead’ method offered by Dunway is so appealing.
Because I was using a poolish, I followed Reinhart’s recipe and ‘day before’ preparations. Let’s get to it, shall we?
For the Poolish:
Combine
1-1/2 cps barely warm water (I measured it from the kitchen’s tap)
1/4 tsp dry yeast (like ActiveRise)
Mix in the yeast until it has dissolved and set aside for a few minutes. In the meantime, measure out
2-1/2 cps bread flour
and dump it into your mixer’s bowl. Now add the yeasty water and mix this using the paddle attachment until it is fully incorporated and smooth. You’ll probably want to beat it for about 3-4 minutes. Give it a scrape around and cover with plastic wrap. The dough will be very smooth and elastic.

Allow it to rest at room temperature for an hour or so before putting it in the fridge overnight (or longer, if you’d like).
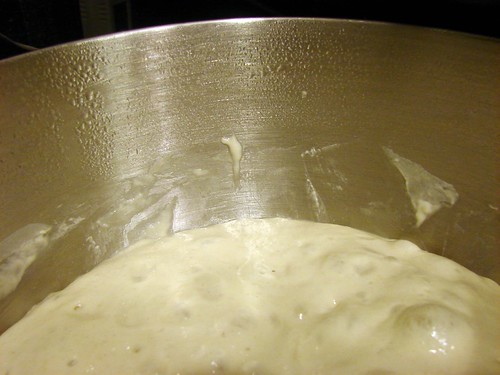
The next day or when you’re ready to bake the focaccia, remove the poolish from the refrigerator and allow it to come to room temperature at least an hour before using it. You will notice that it is bubbly and that it has expanded. This is what mine looked like after fermenting overnight.
While the poolish comes to room temperature, work on the herb oil. Here’s what you’ll need:
For the Herb Oil: in a small saucepan combine 1 cp olive oil with about 1/2 cp fresh or 2-3 tbsp dried herbs of your choice. Heat it over medium low temperature for about 20-30 minutes, you want to make sure it doesn’t get hot enough to scorch the herbs. All you’re trying to achieve is to perfume the oil.
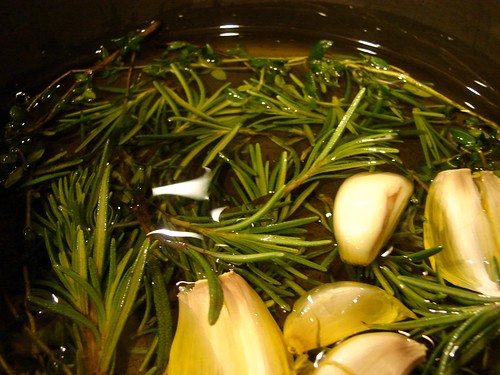
For mine I used rosemary, garlic cloves that I didn’t peel but just cut in half, and roasted garlic. Feel free to use any herbs you love, or you can add olives, sun-dried tomatoes, onions—there are no limits.
Now is time to finish the dough, for the Focaccia:
1-1/2 tsp dry yeast
3/4 cp warm water
1-1/2 tsp sugar
2-2/3 cps bread flour
3-1/2 tsp sea salt
6 tbsp olive oil
Herb oil
Dissolve the sugar and yeast in the warm water and set aside while you get the rest of the ingredients together. To the bowl with the poolish, add the flour, salt and oil, then the water/yeast mixture. Using the paddle attachment, begin beating it slowly—if you have a guard for your mixer, you may want to use it at this point. Once all the flour has incorporated, switch to the bread hook and continue beating at a medium speed for another 5-7 minutes.
You’ll know you’re done when the dough clears the sides of the bowl but still sticks to the bottom of it. You may need to add more flour or water if that isn’t happening. Remove the hook and any dough that may be stuck to it, scrape the sides of the bowl and cover it and let it rest for 20 minutes or so.
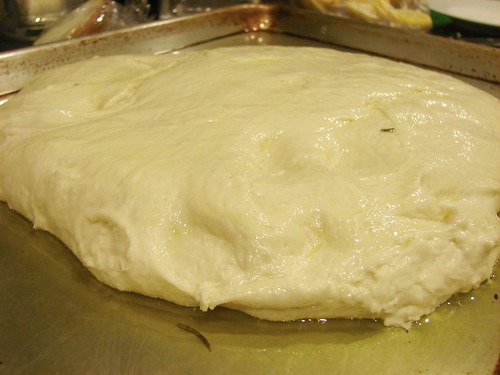
Prepare the baking sheet you’ll use to bake the focaccia. Some recipes suggest lining it with silpat or parchment paper. I did neither. Instead, I spread about 3 tbsp of herb oil, trying to avoid the herbs, on the bottom of the sheet and I smeared it really well all over and up the sides.
Dump the dough right onto the middle of the sheet, use a spatula to push out any dough stuck to the bottom of the bowl. Remember the ciabatta and how the dough is allowed to rise then it is pulled and folded? Reinhart’s focaccia follows the same principle, I followed it once and didn’t use flour.

After dropping the dough on the oiled baking sheet, I spread it to fill the sheet (as best as possible). Then I folded it into thirds, covered loosely with plastic wrap and allowed it to rest for 30 minutes.
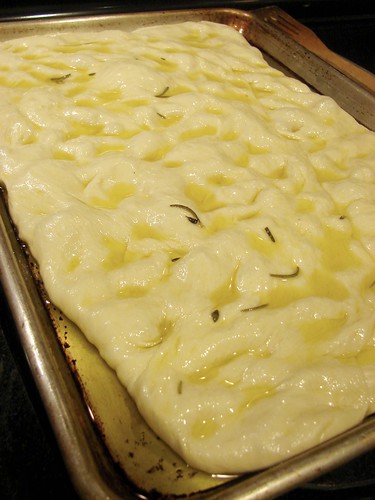
By now the dough should have swollen nicely. Dip your fingers in the oil and stretch the dough out to fill the sheet again. You may need to rotate the risen dough to better fit the sheet. Don’t worry if you don’t get dough into all the nooks and crannies, it will rise again and it will fill it up.
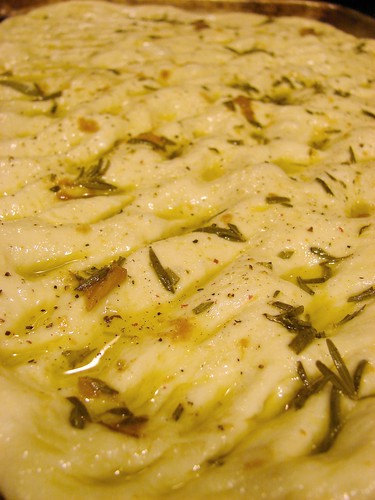
Pour more of the herb oil over the top and massage it into the dough. This will create the dips and creases characteristic of focaccia and will also allow the oil to work its magic in the dough. Feel free to allow as much or as little of the herbs to dot the top of the focaccia. Give it a sprinkling with coarse salt and freshly ground black pepper. Set it aside while you prep the oven, at least another 30 minutes or so.
In the meantime, preheat the oven to 500°. If you have a pizza stone, put it the oven as it preheats. I like leaving the stone under the baking sheet, it helps to diffuse the heat more evenly. Once the oven reaches temperature, place the focaccia sheet on top of the stone, close the oven and reduce the temperature to 450°.
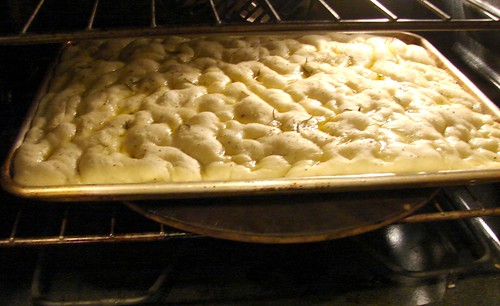
Bake for 1o minutes, then rotate the sheet to make sure it bakes evenly and bake for another 10 minutes or until golden brown.

Remove from the oven and brush with more of the herb oil. Allow it to cool for about 10 minutes before transferring to a wire rack to cool. If you’re anything like me, you will cut into it while its piping hot, who can blame you. Just look at that face!

Enjoy!

Cookingly yours,
Anamaris


