I’ve always found that to be an odd expression. The phrase itself sounds innocuous to me, but the meaning behind it makes sense. To share, to open one’s home and/or heart to another, to be welcoming. Philosophically, the idea of breaking bread is a great one. In reality, the idea of having to share my bread with someone, elicits murderous thoughts. No. Really. Don’t touch my bread!
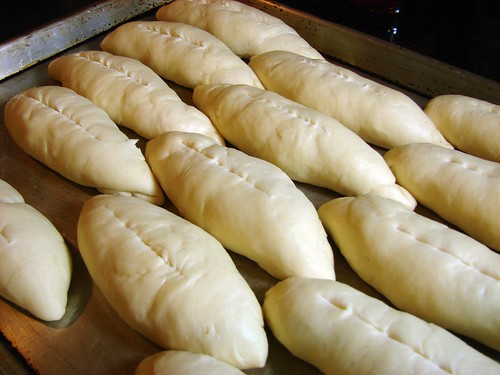
Luckily, when I bake bread, the recipe results in enough of it that I’m able to, even if begrudgingly, share it with one or two people. Tops. You get the picture. So, a few weeks ago I made some bread. Panamanian bread, something we call Pan Micha.
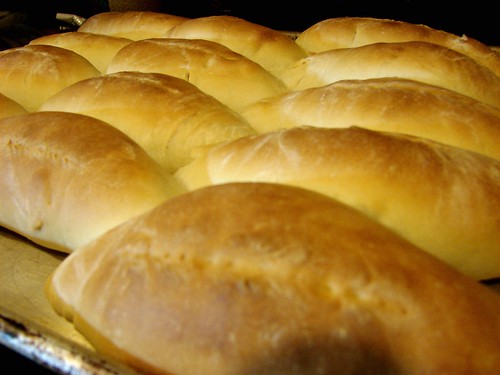
Rumor has it, this recipe was brought to my homeland by the French when they attempted building the Canal. I have no verification for that story, but I do recognize some similarities with French miche bread. Thin, golden crust and soft, light inside. What I do know for sure, if that you will find michitas anywhere there is a bakery in Panama.
I remember walking to school and stopping by the corner bakery–the aroma of freshly baked bread wafting in the air–and ordering ‘una michita con queso blanco y mantequilla‘ (a buttered michita stuffed with white cheese). Aaaaah, the bread would still be warm, the butter and local cheese melting into the center. Heavenly.
I found a recipe for it here, so I won’t retype it, just follow the link. What I want to tell you about, is how we ate them, after all, eating them is the best part.
You know I’m a traditionalist, so mine had butter and Queso Fresco. Nothing else needed. I did toast them a bit.
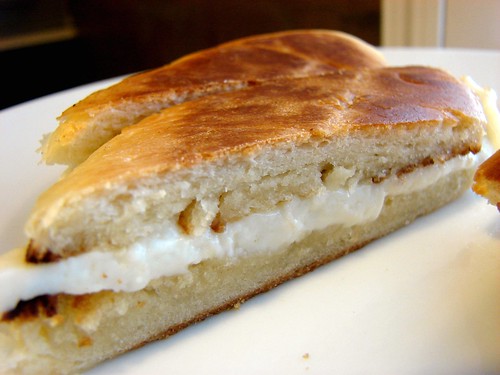
The Hubbz is a different story. He’s a man of excess, so he added some roast beef we had in the fridge. In Panama, we would’ve used ham or chorizo.
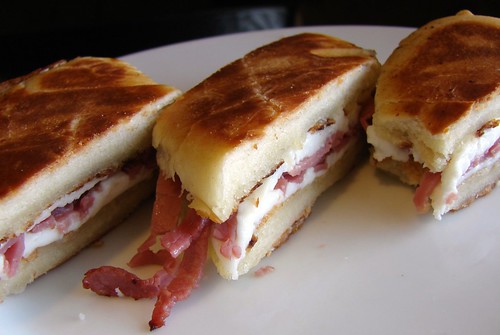
The bread was good, but not as light and airy as I remember michitas being, my quest for the perfect recipe continues.
Cookingly yours,
Anamaris
Yesterday I introduced you to Lesley of Mija Chronicles fame. She’s an expat living in Mexico City and she loves food, particularly that of the Mexican persuasion. She posted this recipe for Pan de Elote just a few weeks ago, I made it the day I read it. I’m sure that gives you a good indication of how fantastic it is. I’m SO happy I made this. My waistline isn’t happy, well, I don’t think my waistline cares one way or the other. The mirror…, that’s a different story.
Moving on. I will redirect you to her post for the actual recipe, no need to re-invent the wheel. Believe me, you WANT to see her post. You may actually want to EAT her post, but I don’t think computer monitors will taste quite the same. A few notes about the recipe and the steps to bring it together.

Her recipe was made with white corn, which is commonly available in Mexico, but I wasn’t able to find it here in Houston. The best I was able to get was 2-color fresh corn, but still, it was mostly yellow.
I was 1 ear of corn shy of 4 cups of husked corn kernels. Upon closer inspection, I only had 3 cps. Gulp. Unwilling to take such a massive risk, and because The Hubbz will always make an emergency run for me, I asked him to get me more cobs. Crisis averted.
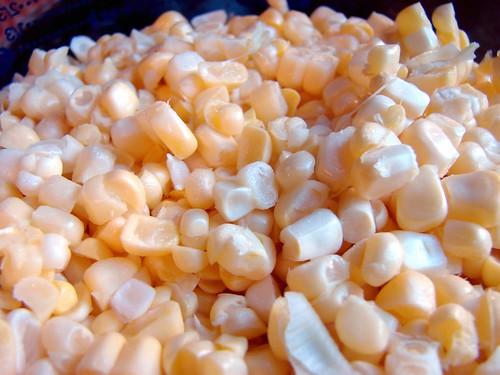
Because I suck at following recipes, I missed the part where it said to grind HALF of the corn…, you should do that.
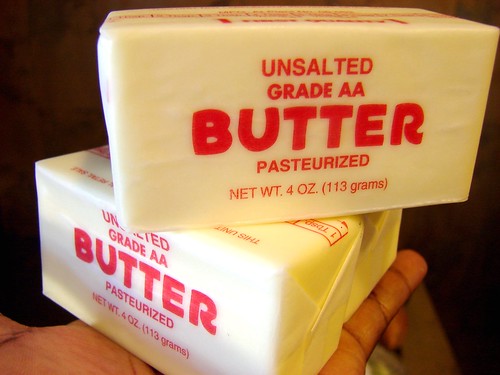
I did use the unsalted butter, but added a pinch of salt for that ying yang effect. I would also suggest using a bit less of the sugar since the US corn tends to be so sweet.
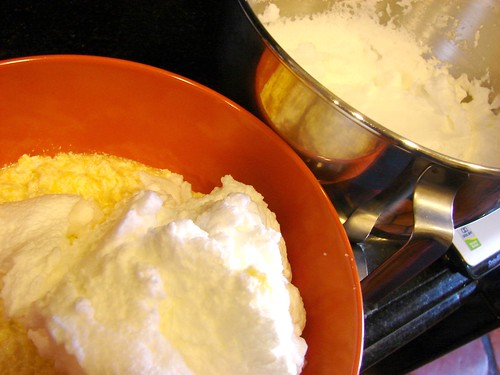
For this recipe you will beat the egg whites to punto de turrón or to soft peaks for the non-Spanish speakers. Check it out, I’m holding that bowl over my head.

And you want to fold these beautiful whites into the rest of the batter without losing all that cloudy fluff. So, take just a bit of the whites and mix them into the batter, then fold in the rest of the whites. This will make folding the two together easier and more uniform.
And when it baked for 55 minutes or so, it came out looking like this. Can you hear the choir? Aaaaaaaaaaaaah…

The Hubbz and I ate this in 2 days. I’m not proud of it, but this is about full disclosure. This isn’t cornbread as we know it here in the US, it’s not even the cakier version of it. This is a cross between a souffle and an angel food cake. Lesley describes it as a buttery corn cake, and it is all of those things. We especially enjoyed this cake with a bit of queso fresco sprinkled over the top. Ying Yang, baby.

Another keeper!
Cookingly yours,
Anamaris
Wondering whatever you will do with all that leftover turkey? I know I am! I mean, as much as I enjoy the whole meal, I get tired of the original spread after a day of leftovers. I know lots of people enjoy making their leftover turkey into sandwiches, I’m not a big sandwich fan. Can’t tell you why, just not a fan. However, every now and then… something happens and I want one.
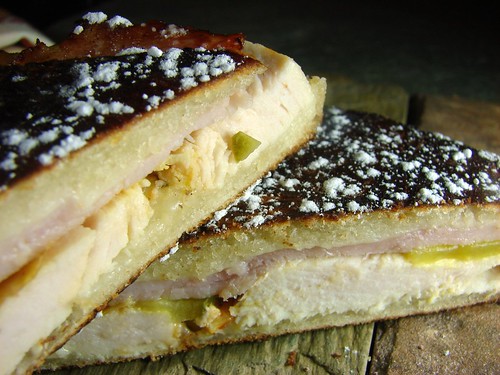
Medianoche literally means midnight in Spanish and that is the name given to this Cuban specialty. They say these came about as a snack offered to night club patrons in the wee hours of partying. I totally understand that. When I’m out late drinking and dancing (not that it has happened in a while), a need a little nibble of something. And, believe me, when you’re on the sofa watching a good movie later on, you’ll be so glad to see this beauty toasting up.
No recipe again, just the ingredients. I should mention that the Medianoche is pretty much the same thing as a Cuban sandwich, except for the type of bread used. If you have a bread that is eggy and slightly sweet, you’ll end up with a Medianoche. On the other hand, if you only have something like a baguette, it’ll be a Cuban sandwich. I used Hawaiian sweet rolls in lieu of a brioche, which aren’t readily available in Houston. The ham is a Boars Head Sweet ham, it wasn’t as sweet as the honey-roasted and worked beautifully. As for cheese, I went with a full-blood Swiss, I wanted to taste it in the sandwich.
Medianoche Sandwich
Bread
Turkey slices, thick slices
Sweet ham
Swiss cheese
Pickles
Butter
Butter the bread slices, then layer with cheese, turkey, ham, pickles, and top with cheese. Put the other half on top.
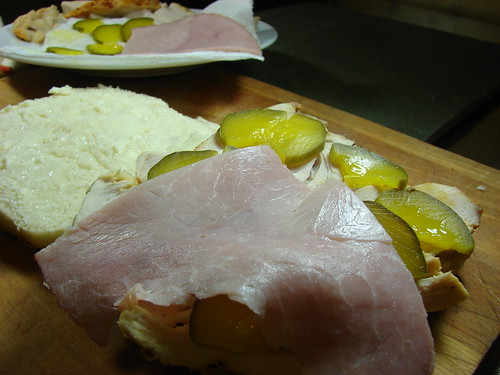
If, like me, you don’t have a Panini press, add a bit of butter to a skillet and heat over medium low temperature. Place the layered sandwich in the skillet, then press down with another pan, weighing it down, if necessary.
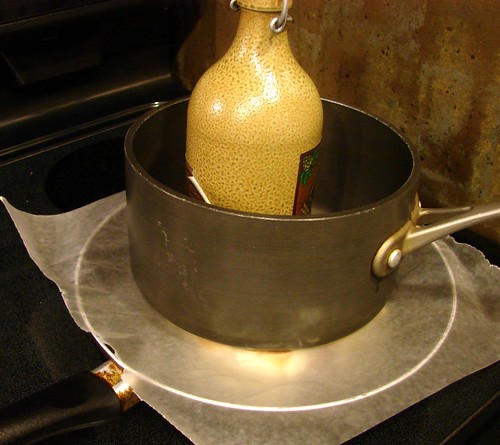
Allow the sandwich to toast for about 3 minutes per side. Make sure the heat isn’t too high or you’ll end up with burnt toast.
Slice the sandwich in half diagonally before serving. For more shots, follow the link to the photostream.

Cookingly yours,
Anamaris
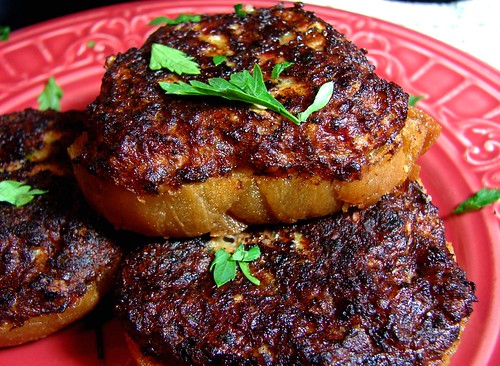
A few months ago I tried my hand at these yummy shrimp toasts, they turned out delicious. A few days ago I had some leftover shrimp and bread, so I thought I’d make them again. This time I went for a Latin twist, as promised. There are a couple of things I should point out about the ingredients.
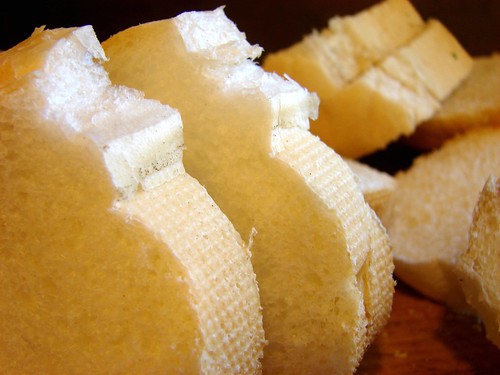
Bread last time I used sliced white bread, crusts removed and cut into triangles. This time I had a few bolillos (French rolls) laying about, so I just sliced those into rounds and called it a day. Also, it is best to have day old bread.
Recao: In Panama, you can go to the little corner store and ask the store keeper for as much recao as you need, it is usually sold in 25 cents increments. I know. Crazy. Anyway, to us, Panamanians, recao is a combination of aromatics used as the base for most dishes we cook. These aromatics will be diced, sliced, chopped or pureed depending on your recipe needs.
Recao verde has garlic, onion, green bell pepper, parsley, green onions and culantro.

Then there’s recao rojo, which consists of onion, garlic, red bell pepper, culantro and tomato. This is the one used for this recipe.
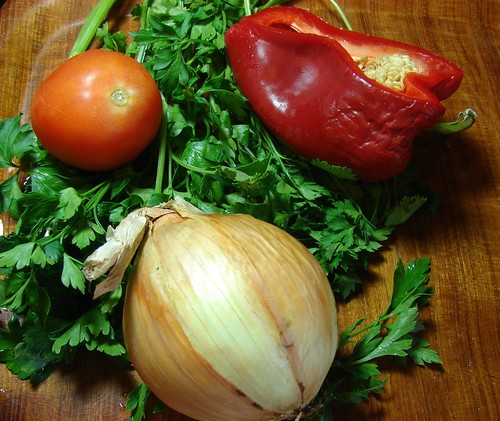
Shrimp Tostadas
3/4 cp shrimp, peeled & deveined
1/2 cp onion
1/4 cp red bell pepper
2 tbsp each cilantro and parsley
1 clove garlic, minced
2 tsp hot sauce (preferably habanero based)
2 tbsp butter, softened
2 egg whites
2 tbsp cornstarch
12-15 bread slices
Oil for frying
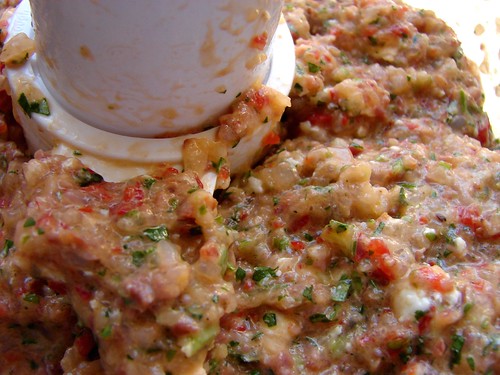
Place all the aromatics into a food processor and chop until fine. Then add the shrimp and pulse until the shrimp is pretty fine. Change the blade to a dough hook or transfer to a mixing bowl and add the hot sauce, eggs, cornstarch and butter. Mix well.
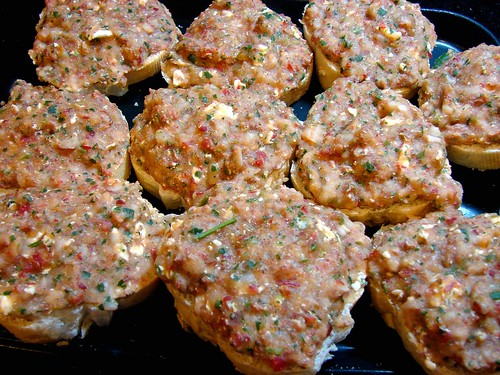
Slice the bread, if necessary, to about 1/4 inch thickness. Top each slice of bread with 1-2 tbsp of the shrimp mixture. Keep them refrigerated until you’re ready to fry them.
Use a medium-sized skillet and add enough oil to come up to about 1-inch and heat over medium heat. You want the oil to be hot enough to sizzle, but make sure it is not too hot or it will brown the outside before cooking the inside.
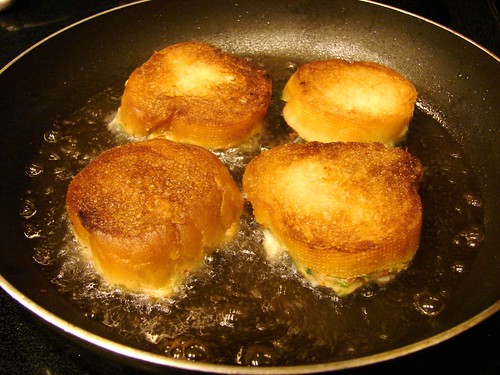
Brown the toast side first. Don’t stray away too far, the bread will brown rather quickly. Flip to the side with the filling and allow it to fry for a few minutes. Remove from the oil and allow it to drain before serving.
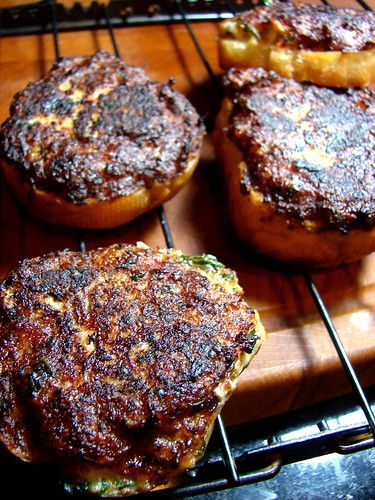
These make for a great snack and freeze well if you don’t want to cook them all at once. Serve warm and enjoy!
Cookingly yours,
Anamaris
 Another month, another group bake. This month the Mellow Bakers are working on pizzas, among other breads. I love pizza, well, I love pizza crust. But it is tough to find one that love. There’s a pizza place that’s been around for ages, Antonio’s Flying Pizza has, quite possibly, the best pizza in Houston. Hand-tossed, with a crisp, thin center and pillowy, chewy edges. They also have an awesome sauce and DO NOT overuse it. OHMY!
Well, thanks to Mr. Hamelman, I’ve found the 2nd best pizza crust. It’s on page 273 of his book Bread. I thought this was a good opportunity to have a few friends over and see what would happen when I tried my hand at pizza-making. Let me tell you, it went VERY well. I’ll walk you through it.
The dough starts off a day in advance with the fermentation of a biga. A biga is a pre-ferment. This produces organic acids which significantly contribute to the structure and development of the dough and, ultimately, the rise and flavor of the bread.
In this case, the biga needs to develop for at least 12 hours, mine went for a little over 16. I have to confess, though, this biga was quite different from the ones I’ve made thus far. It actually freaked me out! First, it was a VERY tough dough, the pre-ferments I’ve done before were anywhere from runny to medium-stiffness. Second, it rose like gangbusters! Within 3 hours it had tripled in size. Previous ferments developed very slowly. To avoid what I thought might’ve ended up being over-development, I put it in the fridge overnight and removed it a couple of hours before I was ready to make the full dough.
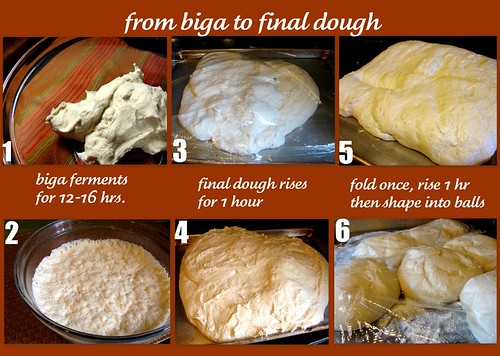
Crisis averted, I began working on the final dough about 3-4 hours before my friends were to arrive. Per the formula (that’s what they call bread recipes, how very scientific!), the dough needed to rise for about 2-1/2 hours before baking. Friends were due at 8ish, I began the dough around 3ish.
I opted to half the baker’s recipe, so I ended up with 5lbs of completed dough, which was then divided into 13 balls weighing approximately 6.5 oz each to make small personal pizzas. The collage shows the steps necessary prior to adding toppings and baking.
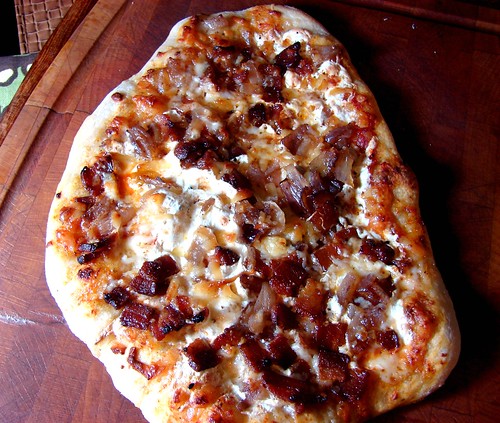
The oven is preheated to its maximum, 550° in mine, with the baking stone/pan left in the oven so it is smoking hot before the pizza goes on. A fellow Mellow Baker indicated they used the back of a cast iron skillet. This was a genius suggestion because we only have a medium sized pizza stone, but I do have large cast iron grill. And that’s what I used to bake these babies. Sprinkled some semolina on the stone and grill, then slid the topped pizzas over top.
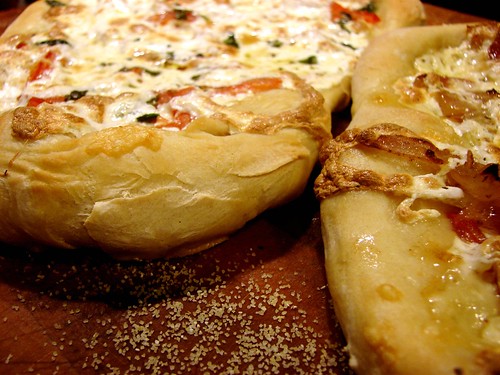
They baked for about 10-15 minutes and were perfectly delicious. Check’em out.

Cookingly yours,
Anamaris
I like bagels. I won’t say I love them, because it’s not that intense between us. I don’t eat a lot of bagels because I have a tough time finding bagels that balance chewiness with the necessary crust. But when the Mellow Bakers added bagels to April’s lineup, I knew I was gonna try them.
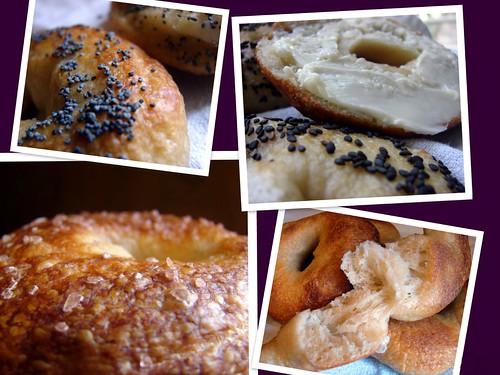
Yes, I’m behind on this submission. I’ve been busy traveling. The good news is, this is a relaxed baking group, hence the name, Mellow Bakers. I had to order things I’d never heard of such as diastatic malt powder and syrup. I also got some of that coveted high gluten flour because I’m pretending to be serious about this bread making business.
I started the dough yesterday and was immediately struck by the scent of yeast. I’ve decided it is one of my favorite smells now. Slightly sweet, with an underlying pungency. Filled with the promise of glorious bread. Yep, I’m digging the breading.
I followed most of Mr. Hamelman’s instructions for the home batch, but added a bit more salt because I use sea salt instead of the regular stuff and about 1-2 tbsps more water to keep the dough pliable. I also allowed the dough to ferment a bit longer before shaping, an extra hour to be exact.
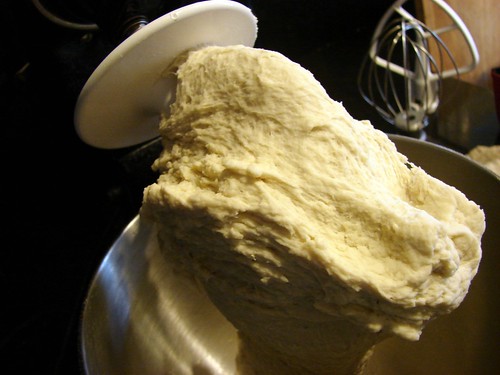
This is the first time I weighed dough before shaping. Hamelman suggested making each bagel with 4 ozs of dough, but I wanted mine just slightly smaller, so I weighed to 3ozs and ended up with 22 bagels.
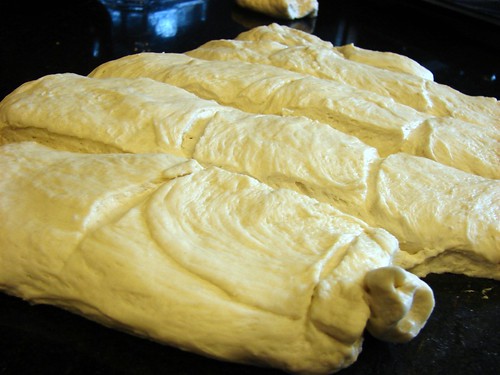
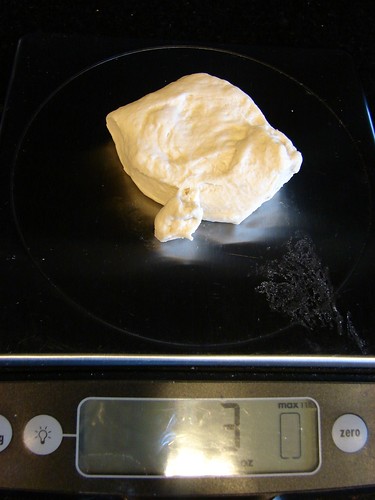
When it came time to shape them, I tried both methods: rolling and poking.
Rolling and wrapping: roll each piece of dough to about 6-8 inches long, then wrap it around the broadest part of your hand slightly overlapping the ends. Roll your hand back and forth on the counter to seal the ends together.
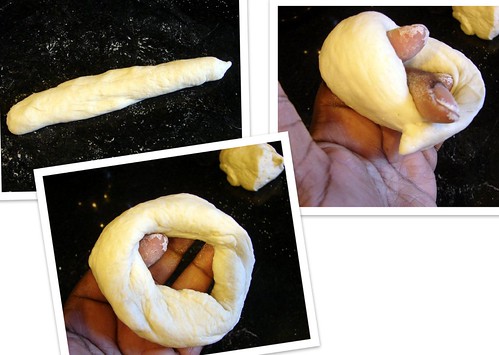
Poking: shape the dough pieces into tight balls, poke a hole in the center with your thumb. From the center gently pull until you have a nice size hole in the center.

Place the finished bagels on a sheet pan that has been sprinkled with cornmeal. Cover with plastic wrap, they’re now ready to be stashed in the fridge overnight or at least for 6 hours.
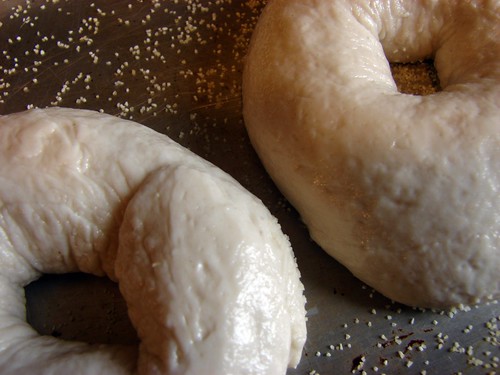
The next day when you’re ready to bake, preheat the oven. The book suggested taking it to 500°F, but I’ve noticed that when I heat the oven that high, it browns my breads too quickly, so I went for 475° and placed my baking stone on the first rack.
First step requires the bagels to be boiled. I added malt syrup to a large stockpan filled with water and brought it to a boil. I used enough syrup to make the water look like strong tea. The idea behind this step is to reactivate the yeast since it has been refrigerated for a while. The other benefit of this step is to gelatinize the starch on the surface so you end up with beautifully chewy bagels.
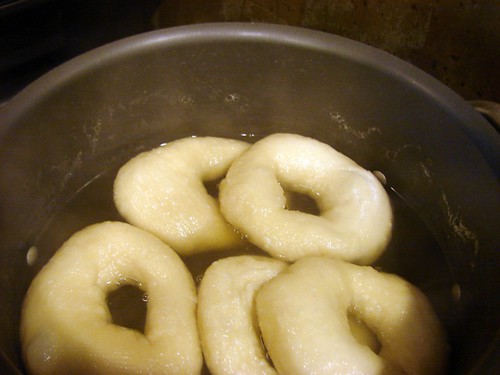
I had the benefit of reading the comments from other bakers before I began my bagel process, so I learned from some of their challenges and took some precautions or made some changes. The first change was to pull the bagels out of the fridge and allow them to slowly come to room temperature. This wasn’t intentional, but I noticed that the bagels I boiled & baked last were a lot puffier than the first batch. Since I didn’t have a bagel board, I boiled & baked in batches of 5-7 bagels at a time.
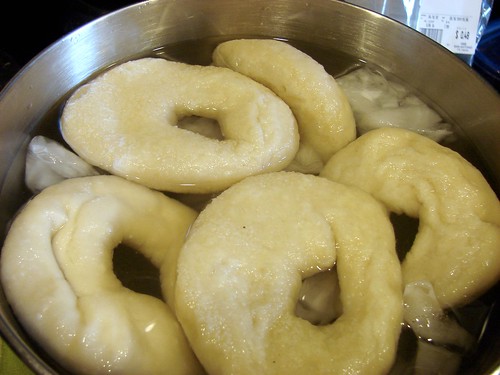
Also, instead of leaving them in the water for 45 seconds as suggested in the book, I allowed them to stay in for a few minutes until *I* noticed that they were swelling. Then I removed from the water and placed them in an ice bath as instructed for 3 or 4 minutes. Transfer them to a baking sheet/stone that has been sprinkled with cornmeal.
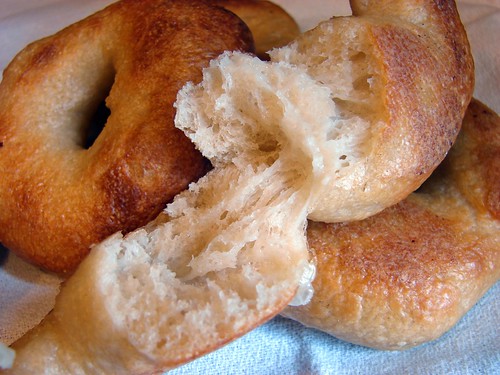
The first batch I made was plain, no toppings. For the second batch, I followed the same steps: boiling, icing, draining, but before placing them on the stone press one side into a plate of sesame seeds, poppy seeds, onion flakes, or seeds of your choice, then put them on the stone or sheet pan.
The instructions were to put the seeded side down and then flip the bagels halfway through baking. As a matter of fact, the instructions are to flip them regardless of topping or not. I didn’t like the way the looked after flipping, they seemed flat and distorted. I’m probably doing something wrong, but I liked them best left alone. I baked the topped ones with the topping on top and simply rotated the stone at 5 minute intervals. They baked for a total of 15 minutes or so.
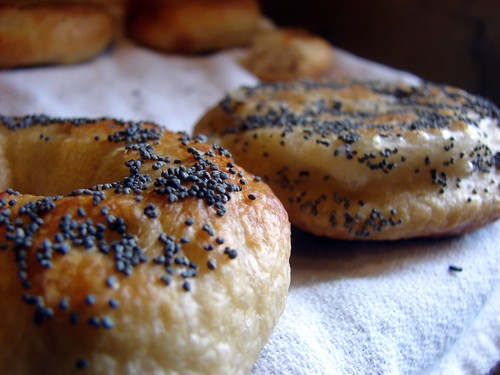
In the end, the bagels were chewy and crusty, just the way I like them. On the last batch, I noticed that while boiling, some of the surface gets very thin–gelatinous and it can burst allowing water to hide inside. In those cases, the center was a bit doughy. I caught on the very last batch and made sure to drain that water out before putting the bagel on the stone.
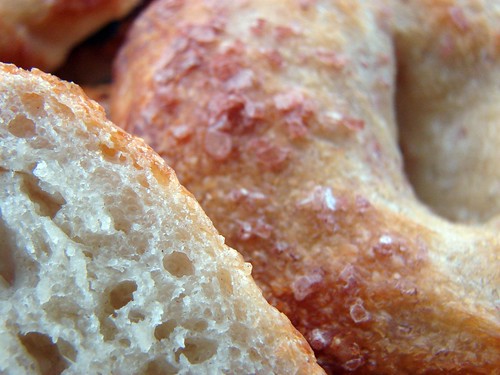
I’m so glad I tried these. I’m a happy bagel camper and if you’d like to check out the bagels by some of my other mellow cohorts, follow this link to the bagel gallery.
Cookingly yours,
Anamaris

Don’t you just love it when 2+2=4? When things just don’t seem to be lining up and then they just all come together? Cooking and baking should be fun, stress free, an opportunity to wing it. Baking is scientific, so you do need to follow a recipe’s measurements, but that doesn’t mean you can’t make substitutions.
 A couple of weeks ago, Andrea from Family&Food invited me to participate in a new bread baking group: Mellow Bakers. Much like the BBA, they plan on following recipes from a specific cookbook, Bread by Jeffrey Hamelman. What drew me to this group is the idea of baking at a mellow pace. I love bread, but I’m trying to stay away from it AND I don’t really want to feel pressured to making a bread a week. So this group suits me just fine.
Paul from Yumarama is the group’s hallway monitor, he suggested we bake a bread a month, further, you can bake the chosen recipe or try a different one if that one doesn’t speak to you. See? Mellow. So the first bread was picked: Traditional English Hot Cross Buns.
I tweaked this recipe out of necessity, and also desire. Let me tell you about my complications. I don’t like lemon peel, from the go I knew I wouldn’t use that. As I thought about it, I knew I wanted to use candied ginger instead. And currants are ok, but I had these gorgeous Sultanas in my pantry… no way I was going to ignore them and purchase currants in their stead. Then…, I had car issues and never made it to the store to purchase the candied ginger AND I ran out of granulated sugar!!! Thankfully, I had brown sugar.
To deal with the lack of candied ginger, and since the recipe calls for simple syrup, I minced fresh ginger and added it when I made the brown sugar simple syrup. The result? Little flecks of sweet gingery goodness that perfumed the buns and a flavorful glaze to brush the tops. SCORE!

Hot Cross Buns
makes 13 buns
For the sponge:
1/4 cp bread flour
7/8 oz milk, warm
1/2 tbsp sugar
2-1/4 tsp dry yeast
This is the runniest sponge I’ve ever made, out of like 5 so far. It was easy to mix by hand. Warm the milk, it just needs to be tepid and mix the yeast into it. In a separate bowl, combine the flour and sugar, then add the yeasty milk and whisk until well incorporated.
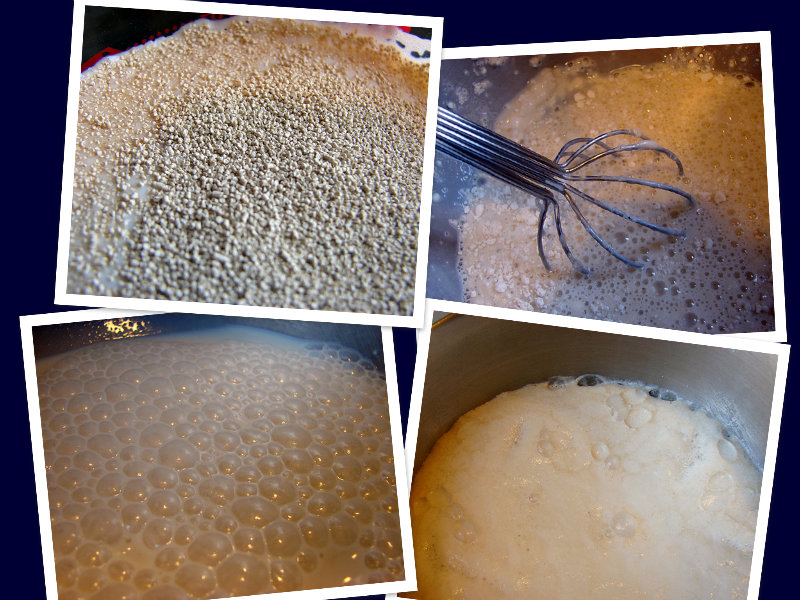
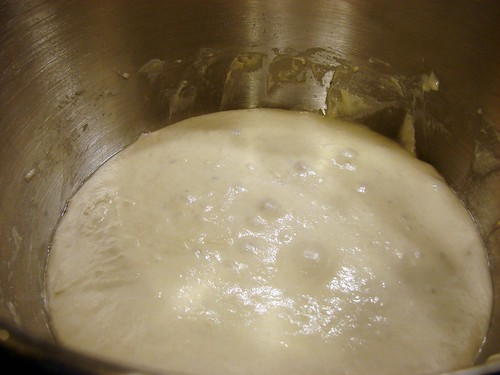
Set aside, cover with plastic wrap and allow it to rise for about 45 minutes. Although it may seem unlikely, it will double in size and hold its shape quite nicely. It looked like a souffle!
If you plan to follow my recipe as I prepared it, then this is a good time to make the simple syrup. However, if you opted for ready-made candied ginger, then you can make the syrup later.
For the syrup and ginger:
1/4 cp ginger, finely minced (approx)
1/2 cp brown sugar
1/2 cp water
Combine all ingredients in a small saucepan and bring to a boil over medium heat. Allow it simmer until the sugar is completely dissolved and the syrup begins to thicken. It took about 15-20 minutes. Remove the ginger bits and set the syrup aside to cool.
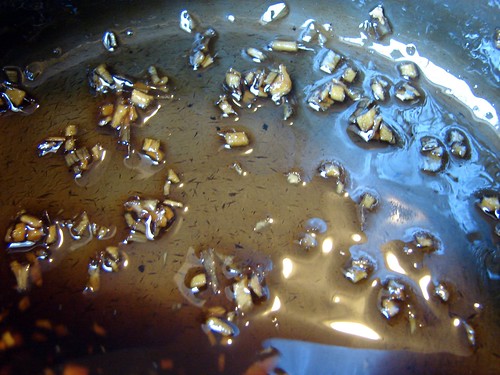
Combine the ginger with the raisins.
 For the dough:
2-3/4 cps bread flour
4 tbsp butter, softened
1 egg, at room temperature
1/4 cp sugar
3/4 tsp sea salt (a bit less if using regular salt)
1-1/2 tbsp allspice
3/4 cp golden raisins
2 tbsp candied ginger, finely minced
In your mixer’s bowl, combine the flour, sugar, salt and allspice then mix in the butter. Mix until the butter has dispersed evenly into the flour.
Mix in the egg, then add the sponge and continue mixing for about 3 minutes to develop the gluten.
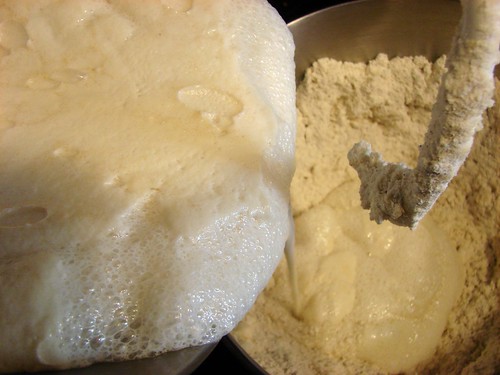
Add the raisins and ginger mixture and beat until evenly incorporated. Scrape the sides and cover the bowl with plastic wrap, set aside and allow it rise for 1 to 2 hours.
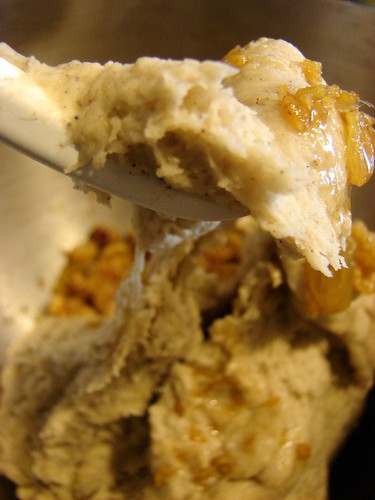
After it has doubled in size, turn the dough onto your countertop and divide it into 12 (or so) even pieces. I got 13 pieces slightly larger than a golf ball. Time to shape the pretty buns.
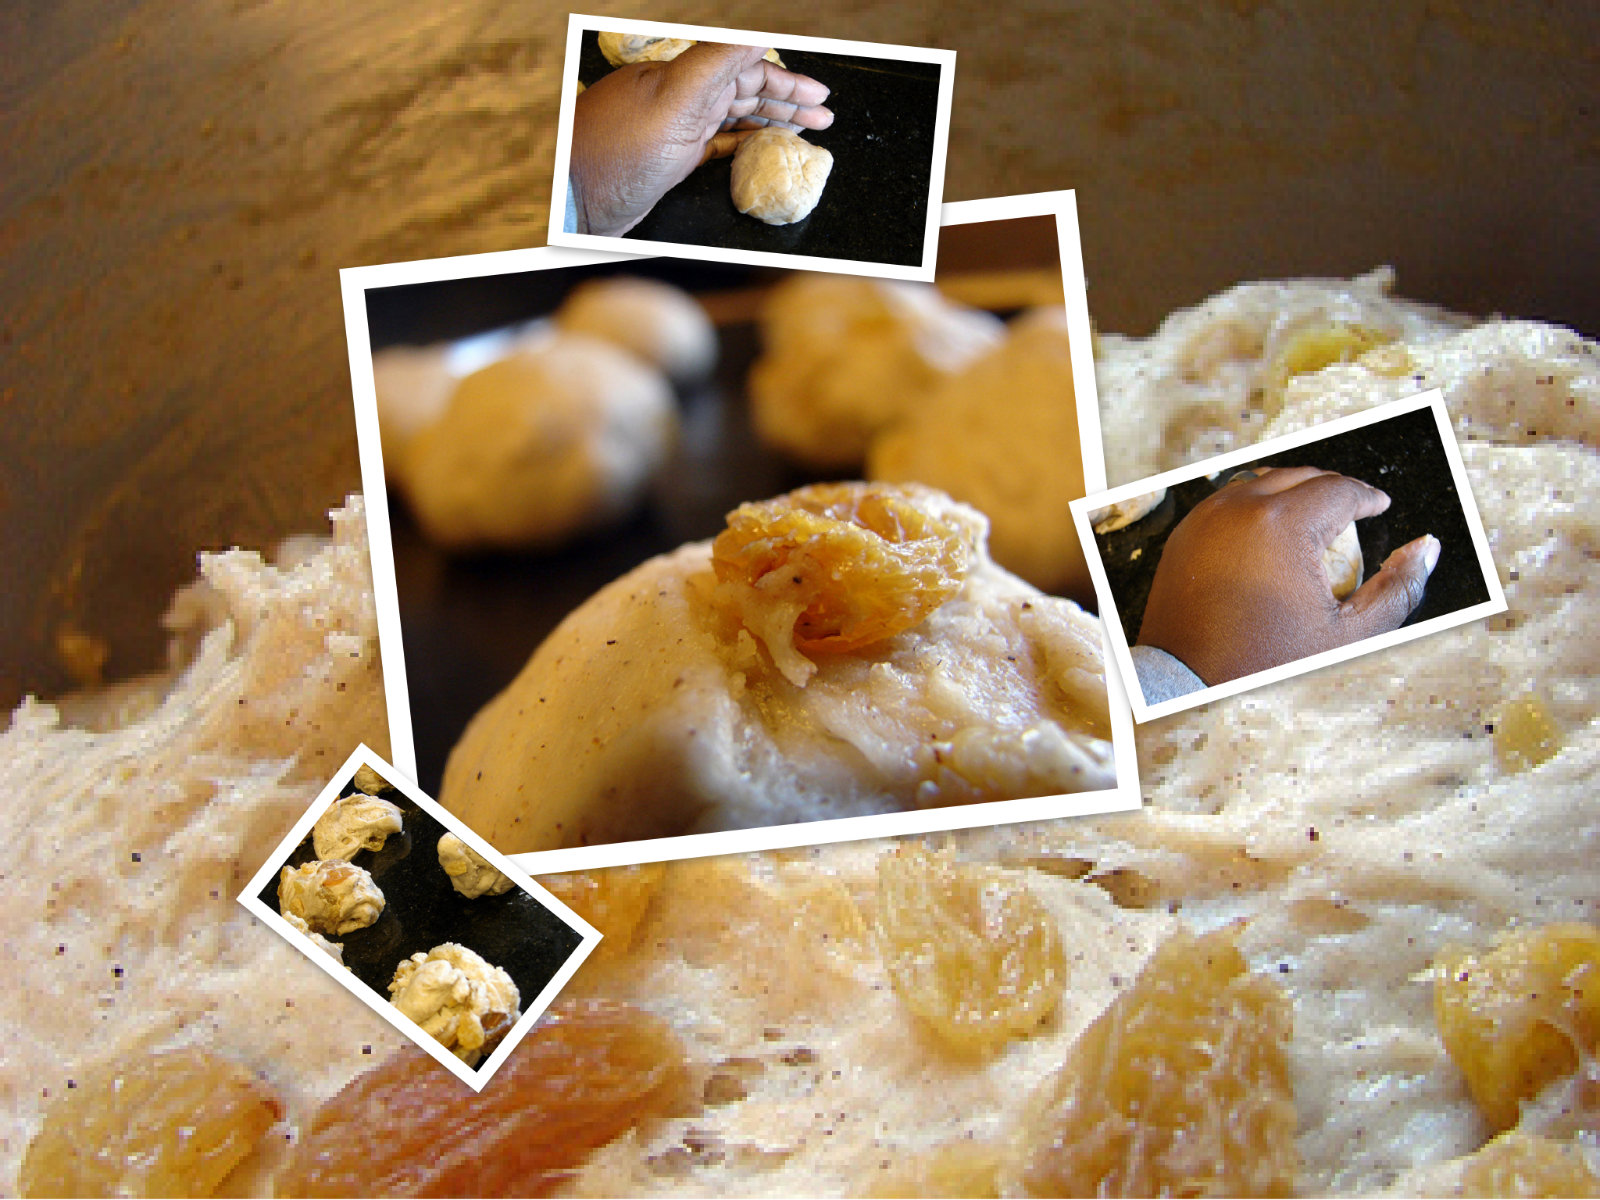
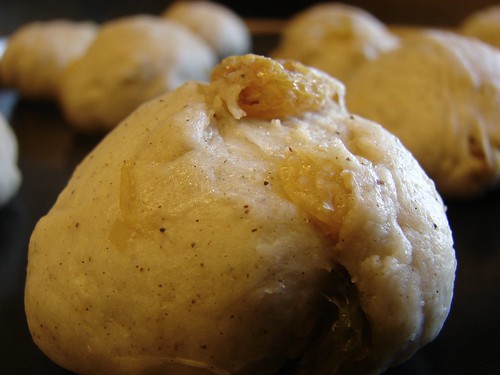
Take each piece and roll into a ball by cupping your hand over it and rolling it on the countertop. You may have a seam, make sure you keep it at the bottom when you transfer the buns to a baking sheet prepared with silpat or parchment paper. Repeat until all buns are done.
Cover the buns with plastic wrap and allow them to double in size for another hour. While they rise, prepare the crossing paste and simple syrup, if you haven’t yet.
For the crossing paste:
In a small bowl combine 1 cp all purpose flour, 3 tbsp oil, about 1/2 cp water. Add water a bit at a time, you want the paste to be smooth and thick, about the consistency of ketchup… Keep in mind that this will need to go through a piping bag, you don’t want it to be too thick or too thin.
Once the buns have risen to twice their original size, preheat the oven to 440. Dump the paste into a piping bag fitted with a medium size round tip. I only had a star tip, that’s what I used. Pipe a line across the middle of the buns going in one direction, then rotate the sheet 90 degrees and pipe lines transecting the first ones, forming a cross.

Pop the tray in the oven for 12-15 minutes or until the tops are golden brown. As soon as they come out of the oven, brush the tops with the cooled syrup.
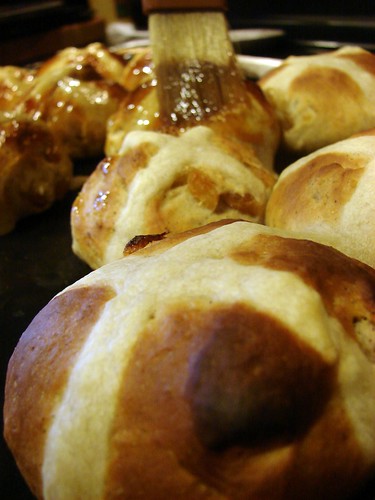
These are delicious fresh out of the oven, with a dab of butter.
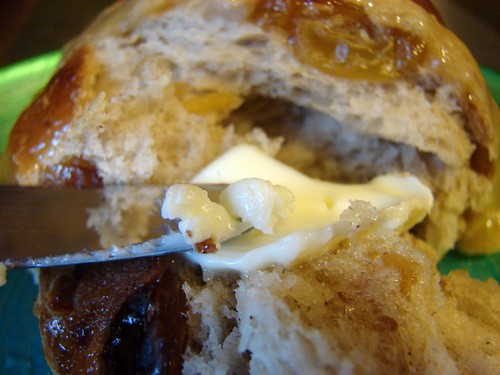
The other option is to eat them Caribbean style. See, as I read this recipe, I realized these sounded a lot like ‘bon‘ I used to eat in Panama. Bon is a cross between a bun and a fruitcake. These seem lighter than I remember bons being, and I like that, but the taste is pretty close.

In Panama, they will serve you a slice of bon, it is buttered and topped with American cheese. So I sliced my buns, toasted them on a skillet with plenty of butter and topped them with sliced cheddar.

You be the judge.

Cookingly yours,
Anamaris
Once I won a ToastMasters Impromptu Award for sharing my dislike of bananas. They still call me the Banana Lady at work. I have a banana mental block: its smell, the way it looks when exposed to air, the texture. Believe me, I have banana issues. Big ones, but I won’t bore you with them. HOWEVER, there are 2 things I like banana hints in: banana bread and banana fritters. The fritters are another goody my mom used to make when I was growing up.
I’ve been thinking about banana fritters for a while now, so when I bought a share of produce from a local farmers market association-group-co op thing and it included bananas, I knew the time had come. I stared at them for days waiting for them to ripen enough to make these fritters. Then they were ready, so here you go:
Banana Fritters
About 10 fritters
2 very ripe bananas
1 egg, beaten
2 tbsp sugar
1 cp flour
2 tsp baking powder
2 tbsp milk
1 tbsp butter, melted
1/4 tsp grated nutmeg
1/4 tsp sea salt
Oil for deep-frying
Mash the bananas, it’s ok to have a few lumps. Stir in the egg, then the rest of the ingredients, until you end up with a pretty thick batter.
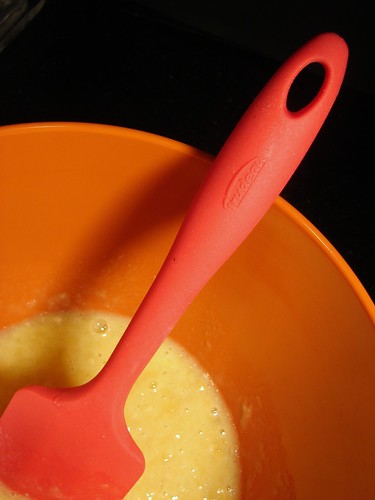
Preheat the oil over medium temperature; you don’t want to fry them too hot, otherwise they will brown while remaining raw in the center. Use a large soup spoon to pour the batter. Here’s a trick: dip the spoon in oil before scooping batter from the bowl, this will keep the batter from sticking to the spoon.

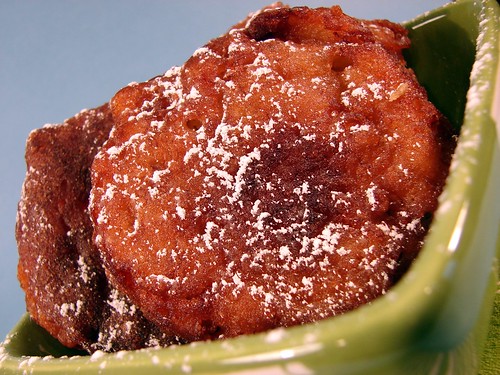
Drop the batter into the oil and spoon some of the hot oil over the fritters. This helps seal the top and makes it easier to flip. Fry for about 2 minutes per side until lightly brown and crisp on the edges. Once you flip them, give them a little squeeze, this helps to cook through the middle.

Drain on paper towel and serve dusted with powdered sugar.
THEN…
I REALLY went bananas. *I*, Anamaris of Chef It Yourself, the same person who unloves bananas and who cringes at the sight of banana splits, went for the chocolate. I did. I don’t know what happened.
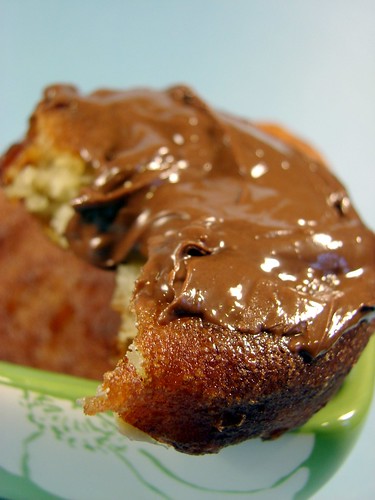
I don’t know why I did it. Well, I think I do know why I did it. It’s become apparent to me that my palate is growing up, expanding, refining, becoming more flexible.
I gave it a try, and OH.MY.GAWD!

Just a light smear of it will do. There was something magical about the combination. The fritters are slightly sweet with just a hint of banana, they develop a nice crisp edge, while they’re goey doughy inside. The Nutella teases you with its light chocolate taste.

Now I must leave you so I can come to terms with this choco-banana turn.
Enjoy!
Cookingly yours,
Anamaris
This was another dish prepared for the 24, 24, 24 event I participated in earlier this month. This salad represented California’s cuisine. The recipe comes from Chef Alice Waters, one of the chefs credited with developing California cuisine.
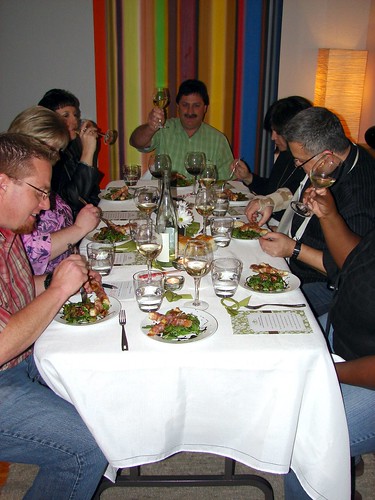
This is a beautiful salad. It was my first time trying figs, except for a failed attempt with Fig Newtons, I had never had figs. I was unable to get fresh ones, but reconstituted dried Kalamata figs. It was quite delicious and can’t wait to try it with fresh figs.
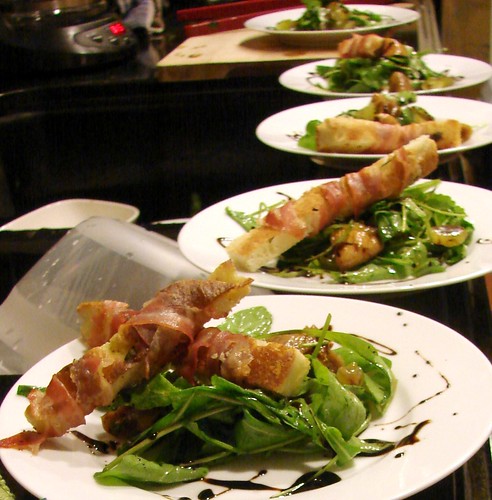
Fig and Grape Salad with Pancetta Crostini
Serves 6
3 tbsp aged balsamic vinegar*
6 thick slices bread
Extra-virgin olive oil
12 thin slices pancetta
9 ripe figs**
1 cup grapes, stemmed
6 small handfuls arugula
Salt and pepper to taste
*The recipe calls for good quality, aged balsamic vinegar. All I had was decent quality balsamic, so I went ahead and followed the instructions to reduce the vinegar to syrup. This is how:
*Add approximately 1/2 cp of balsamic vinegar to a small saucepan and allow it to slowly simmer until it reduces by a little more than half and the vinegar is thick and syrupy. This took me about 20 minutes and I stirred it often. Allow it to cool and set aside.
**As I mentioned, figs weren’t in season, to rehydrate dried figs I trimmed the stems and sliced them into quarters. Placed them in a microwave safe bowl and added just enough dry white wine to cover them(about 1/2 to 2/3 cp). Cover it with plastic wrap and zap it for 2 minutes. Remove from the microwave and allow it to cool in the wine. Remove when softened. Reserve the liquid for later use.
Preheat the oven to 375°. I had baked some focaccia a few days before, so that’s the bread I used for it. Either way, you want to cut the bread into 1-inch thick breadsticks. Trim away any crusts. Make 12 long breadsticks. Brush them lightly with olive oil and wrap with slices of pancetta-spirally, like candy canes. I actually sliced the pancetta disks in half, then carefully wrapped it around the bread. Place them on a baking sheet lined with parchment or silpat and bake for about 10 minutes or until the pancetta begins to crisp.
In the meantime, get the fruit ready. If you find fresh figs, cut them in quarters, if you’re rehydrating them, remove them from the wine at this time. Cut the grapes in half, give the arugula a good rinse and pat it dry. Toss the arugula and fruit with a pinch of salt and fresh black pepper I also added a couple of tablespoons of the wine I used to rehydrate the figs, plus 2 tablespoons of extra virgin olive oil.
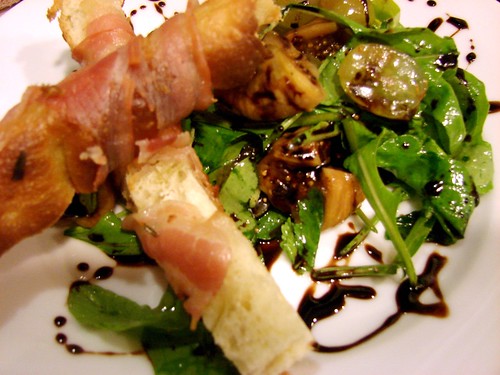
Mound the arugula and fruit on plates, drizzle with the balsamic vinegar and set a couple of crostinis on the side as garnish.
Enjoy!
Cookingly yours,
Anamaris
I’ve been bitten by the bread making bug. I mean a BIG bite. I’ve always shied away from bread making because I’ve not been successful at it. I either killed the yeast, used too much of it, added too much flour, forced the dough to bloom. Issues. I just faced a million issues when I tried making bread. I was sure my mom hadn’t shared that particular gene with me, because she’s an AWESOME baker.
Then I came across instructions for ciabatta and realized that I just had to try again. I’ve been stalking the guys over at the
BBA for months now, and though I’m not participating in their challenge, I am baking as a result of it. I must admit I’m loving Reinhart’s approach to baking and may have found a new passion in my life. But I digress.
There is another challenge I’ve been trying to participate in, but kept missing the deadlines. Joan over at
Foodalogue has a Culinary World Tour challenge. This round was all about Latin America and the Caribbean. Yep, right up my alley. And yes, I missed it every week except for the last one. Hence, this post.
This week they’re visiting Puerto Rico and enjoying its wonderful cuisine. As luck would have it, I have the inside track on Puerto Rico. You see, I’ve been there a couple of times, my bestie’s hubby is a native and Puertorrican food is pretty similar to Panamanian food. Yeah, I’m in.
Originally I was thinking about pastelón or something along those lines, but with my new baking infatuation, I opted for Pan de Mallorca. A slightly sweet, creamy, egg-based bread that is traditionally served for breakfast on the island. If you go to La Bombonera, they will slice, butter and toast it for you, and serve it alongside a café con leche. Or you can have it as a sandwich stuffed with cheese, ham, eggs, bacon, anything you love. So here’s my submission for Puerto Rico:
Pan de Mallorca
Because I’m so into Reinhart’s poolish method, I decided to implement it for this recipe as well. To get that poolish going you will need:
1 tsp dry yeast
1 cp warm water
1 cp bread flour
Dissolve the yeast in the water–I’ve been using warm water straight from the tap, it’s barely tepid. Add the flour to your mixer’s bowl, then add the yeast/water and mix until the batter looks smooth. About 3-4 minutes. Scrape the sides, cover with plastic wrap and allow it to sit on the counter for about an hour before you put it in the fridge overnight.
Next day, when you’re ready to finish the dough, remove the poolish from the fridge and allow it to sit at room temperature for at least 1 hour before mixing the rest of the ingredients.
1-1/4 tsp dry yeast
1 cp whole milk, warm
¾ cp sugar
4 cps flour
3/4 tsp sea salt
6 egg yolks, lightly beaten
1 stick butter, melted
1 stick butter, melted to brush on top
Powdered sugar
First, warm the milk, just enough to take the chill off it and dissolve the yeast into it; set aside. Into the bowl with the poolish, add the sugar, salt, yolks, milk and 1 cup of the flour and mix it until well incorporated. Then add 1 stick of the melted butter and mix evenly. Now you can start adding the rest of the flour.
Make sure you mix it well and that the dough looks smooth. It will probably need to be mixed for 4-5 minutes, the dough will begin to separate from the sides, but it will still be a very moist dough. Set aside and allow the dough to rise for about an hour or so.
Lightly dust the countertop where you will work the dough. Make sure the second stick of butter is ready to go, you will also need a pastry brush. Turn the dough onto the countertop and divide it into 15 portions.

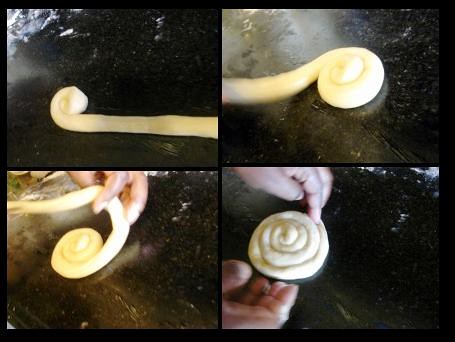
Roll each portion under your hands making it into long strip–channel your inner kindergartener and have some fun. Once you have a long strip, brush it with butter and roll into a coil.
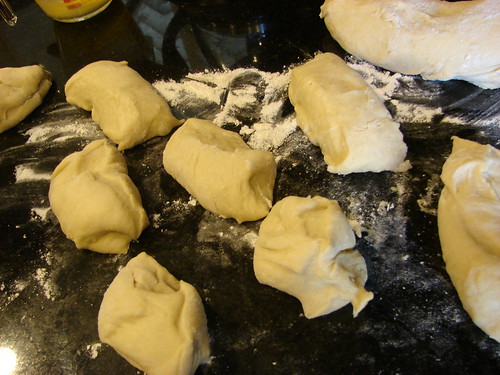
I found that the best method is to roll in one end, then pick up the length of the strip and roll it around the center. This kept the coils nice and flat. Make sure you tuck the end under the coiled dough and transfer to a greased baking sheet or one lined with silpat/parchment paper. Brush the tops with more butter and continue rolling the rest of the dough.
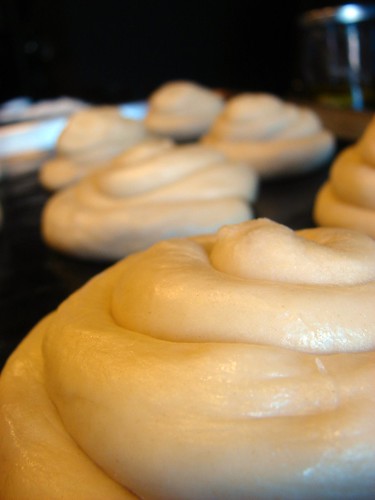
Set the tray aside and allow them to rise again until they have doubled in size. It took about 30-40 minutes for that to happen.
In the meantime, preheat the oven to 375°. Bake them for 8 minutes and rotate the tray, then bake for another 8-10 minutes.
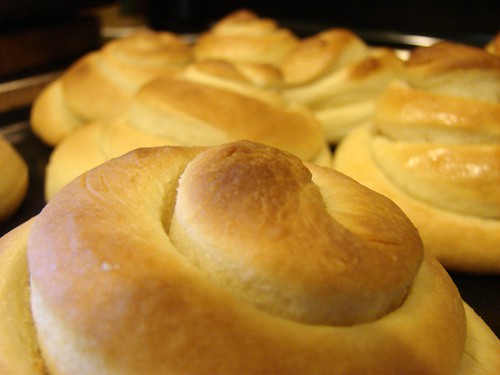
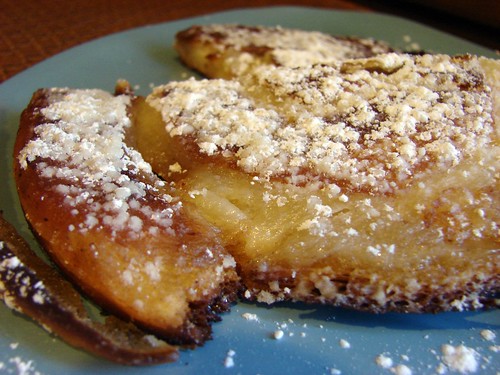
When they come out of the oven, brush the tops with a bit more butter before transferring them to a cooling rack. Dust them with powdered sugar before eating.
Now, for your personal edification, I will toast one and serve it as it is served at La Bombonera. I must admit to you, this is NOT skinny toasty bread. It IS all about the butter. Lots of it. What they do in Puerto Rico is slice ‘em in half, slather them with butter, put them together again and press them on a giant Panini press type thing. Since I don’t have a Panini, I use a more… rustic method.
After slicing and buttering ‘em I put them in a skillet that already has MORE butter melted and ready for ‘em. I keep the heat on medium low to avoid toasting it too much. Also, place the Mallorca in the butter, then flip it right away, this way you pick up butter on both sides of it. Then cover it with piece of foil and put a heavy pan over it. Press down to flatten the Mallorca.
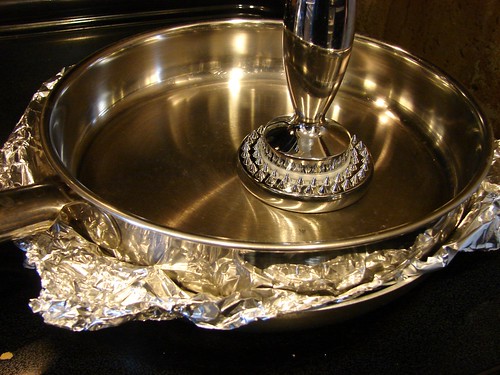
The foil creates a bit of steam in there and this allows the butter to melt through the dough. The result is almost like a cake, the bready dough gets soft and goey and oh so yummy. Make sure you flip it halfway through cooking.
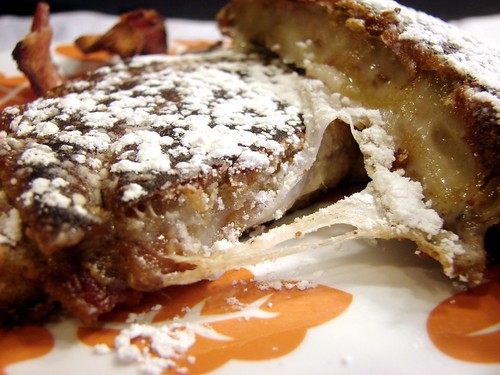
Remove from the skillet and GENEROUSLY dust it with powdered sugar. But wait, there’s more! You didn’t think I would leave it at that, now did ya? This bread makes awesome sandwiches. I didn’t have the traditional ham & cheese, but I made do with:
 Queso Oaxaca:
 Mexico’s take on a melty mozzarella
and… bacon!!!
Just make a grilled cheese sandwich: slice the mallorca in half, butter each side. Be generous, now. Layer your filling, I laid down a slice of cheese, then bacon, then more cheese. Top it with the other half of the mallorca. Into the skillet with melted butter, cover with foil, press down and toast. Listo!
And it comes out looking like this:
I know it sounds weird, but top it with powdered sugar. I don’t know what it is, but it makes it really really REALLY YUM!
Cookingly yours,
Anamaris


 For the dough:




 Queso Oaxaca: Mexico’s take on a melty mozzarella
