As I browse through my blog, I can’t help but notice how often rice seems to come up. I really can’t help it, I have a love affair with that little grain. My only hope is that I offer some variety for you. That said, this is a rice post. Yep. Mas arroz.
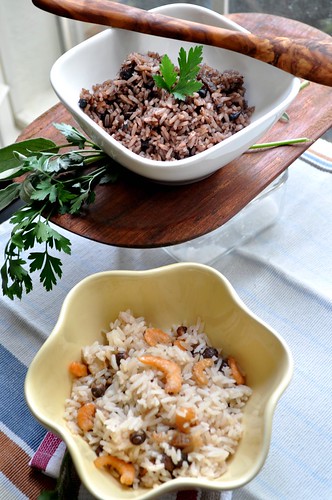
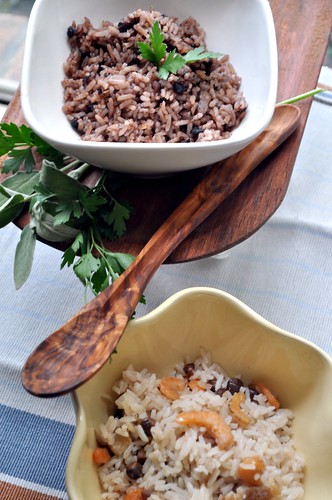
In Panama, we prepare rice in many different ways; sometimes with coconut milk, or various beans and peas. Anything you want, really. Two of my favorites are Arroz con Frijoles Negros (rice with black beans) and Arroz con Camarones Secos (rice with dried shrimp).
They’re both easy to make and follow the same process as the recipe for Arroz con Guandú. For the black beans, I used dried beans and cooked them in the coconut milk, as detailed in the recipe below, but you can use canned beans . For the one with the dried shrimp and guandú, I cooked both of those in the coconut milk first, then followed the recipe.
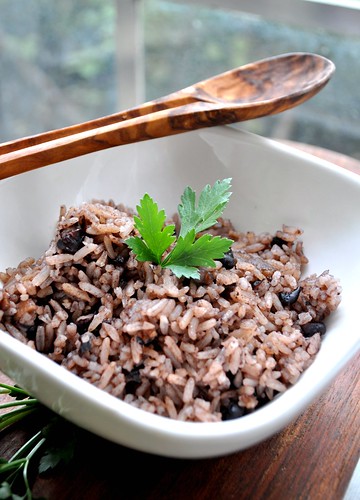
For the Arroz con Coco y Frijoles Negros (Black beans & rice)
2 cps rice
1/2 cp dry black beans
2 cps coconut milk
3 cps water
1/3 cp salt pork or bacon
1 tbsp vegetable oil
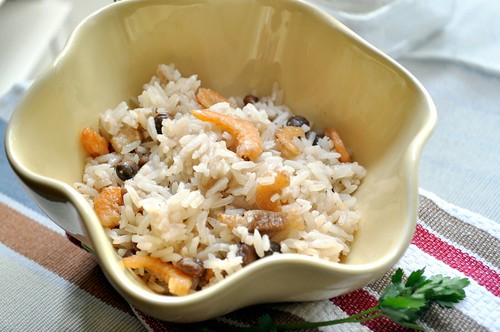
For the Arroz con Camaroncitos Secos y Guandú (Rice w/dried shrimp & pigeon peas)
2 cps rice
1 cp frozen guandú (pigeon peas)
1/2 cp dried shrimp
2 cps coconut milk
3 cps water
1/3 cp salt pork or bacon
1 tbsp vegetable oil
Method for both versions:
In a pot with a tight-fitting lid, brown the salt pork/bacon rendering some of its fat. Add the guandúes (pigeon peas), coconut milk. Bring it to a boil, then reduce the heat until it simmers. Cook it until the peas are tender, about 40 minutes. Strain the liquid and measure, add enough water to make 3-1/3 cps of liquid, set aside.
This recipe uses the frozen peas, however, if you are using the canned variety, just skip the step above. Instead, drain, rinse and strain the beans, then add coconut milk and water to measure 3-1/3 cups. Fry the salt pork or bacon just before adding the rinsed rice.
Add oil to the pan with the peas, rinse the rice and add it to the pot stirring all the ingredients. Add the liquid, check the salt, stir this well. Make sure you remove any drippings that may have been stuck to the bottom of the pan. Bring it to a slow boil; once the liquid boils do not stir it again. Keep the temperature on medium high.
Once the liquid is almost completely evaporated, bring the temperature to low and cover with the lid. Allow to steam undisturbed for 40 minutes. When you remove the lid, all the peas will be at the top, go ahead and stir them into the rice. You’re done!
Note: The flavor of the coconut milk will intensify with time. You can cook the peas a day ahead to allow the flavors to meld together.
Even though Mexican food is readily available in Houston, that doesn’t mean you get good tamales. For years I enjoyed the Rolls Royce of tamales, but most restaurants here serve tamales that are closer to a Yugo. My ex-mother-in-law made the best tamales I’ve eaten to date. She made them every year and would give each of her sons a few dozens to enjoy. I cherished those days, they only came around once or twice a year, so I had a lot of time to think and dream about them. Alicia was a generous woman, but she kept her method and recipe for tamales very close to the vest. Fast forward some 15 years, you’ll find me trying my hand at recreating the coveted tamales.

Off to the interworld I went looking for recipes and tips. I found lots and lots of them, all calling for chili powder as seasoning. For some reason, I can’t picture my mother in law dumping chili powder to season her pork or chicken. So, I’m going to make this up as I go, combine some of the ingredients I saw her utilize in other dishes and see what happens. It all begins with the chilies. I used 3 different dried chiles:
- Chile Ancho is pretty mild by comparison to other dried peppers, it has a smoky fruity flavor. This isn’t surprising when you realize that Anchos are dried red poblano peppers.
- Chile Guajillo also a mildly flavored chile, that seems to bring out the best in its companions. Fruity, but with sweeter undertones than other peppers. Interestingly, guajillos are also used to make Harissa paste, a condiment popular in North African dishes.
- Chile Pasilla are very dark and wrinkled like a raisin, they’re also pretty mild heat & fruity.
I used all three chilies a few different ways. First, to braise the pork and chicken. Yes. I made 2 different types of tamales, I had to. Both meats were cooked separately and slowly with onions, garlic, cumin, cilantro and 1 or 2 of each chili. I made sure to add plenty of water for braising, because that very broth flavors the masa later. Once the meat is fork tender, I allowed it cool before shredding.

I also made additional chili sauce. One thing I remember about Alicia’s tamales, is that the dough was always very flavorful and colorful. For the chili sauce, I cooked the same aromatics: cilantro, chilies, onions, garlic, cumin and added tomatoes. Once everything had softened, I pureed and seasoned the sauce.

Now let’s talk about the masa. I opted to use premixed masa instead of starting off with the dry corn stuff. But first I made lard. Yep, there’s a LOT of lard in tamales. The lard helps flavor the masa and makes it lighter, fluffier. So, I got some pork fat trimmings and rendered that fat down.
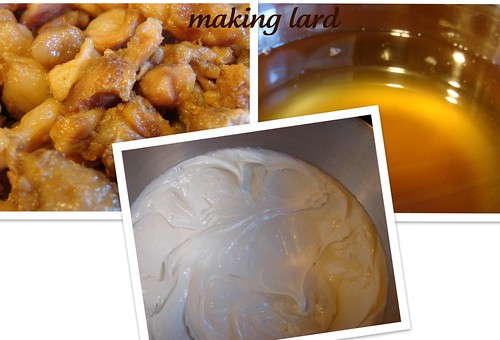
Before combining the lard and masa, I beat the lard until it was fluffy and added salt, pepper and pinch of cumin. I then worked the masa in and worked on its consistency by adding chile sauce and broth until it was about the consistency of softened ice cream.
The tamales are cooked in corn husks, these are sold in packs and need to be rehydrated before use. Once they are pliable again, you can begin the exciting task of stuffing or making the tamales. Its not a difficult process, but it is a tedious one, which is probably why it is customary to have a few friends or family members pitch in at this point.
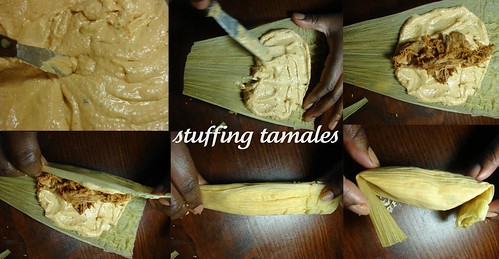
Once your tamales are stuffed, you can stack’em into a steamer pan. I took a vegetable steamer and placed it at the bottom of the pan, built a few layers with empty corn husks, this prevents the water from seeping through and ruining the tamales at the bottom and it also add to the flavor of finished tamales.

After about 40 minutes, you’ll end up with perfectly cooked, delicious tamales. Look at that gorgeous baby.
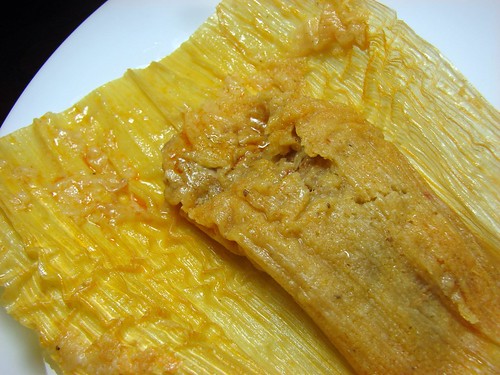
I also made some salsa and we sprinkled some queso fresco on top. I’m not offering a recipe here, I really kept adding and tasting things until they were right. I will say these weren’t quite Rolls Royce tamales, but I think I made it to Benz status.

There are lots more pictures, you can see them here.
Cookingly yours,
Anamaris
What I saw.


Today I’m hanging out with my pal Katie from You Are What You Eat or Reheat, remember her? Well, she’s had too much spiked eggnog and asked me to guest post, so I did! Tune in.
Anamaris
PS: Don’t forget to vote!

I have to admit, I’m pooped. I’ve overdone it yet again. I went cruh-ah-zee with it all and I’m now feeling like cartoon characters probably do when they go splat against the wall.
I literally haven’t stopped since I got back from Panama and the funeral. I hit it hard at work and on the blog, hurling myself at every possible distraction and project that would keep me moving. I’m like a shark right now, constantly on the move, never resting, always on to the next thing. I don’t want this to be a woe is me post, I’m just trying to say I think I will slow it down a bit for the next few weeks. There will be posting, no worries, but I’m probably gonna mix it up a bit with new and old-er posts.
So what’s on the menu today? Well, you’re probably getting ready for the holidays. For most people that means lots of shopping, for me, its food and menu planning. What can I say, I love my food. So, I’m going to point you to a couple of old posts. Both of these showcase dishes that are ALWAYS present on a Panamanian holiday table. They also happen to be 2 of my absolute favorites. Ready?
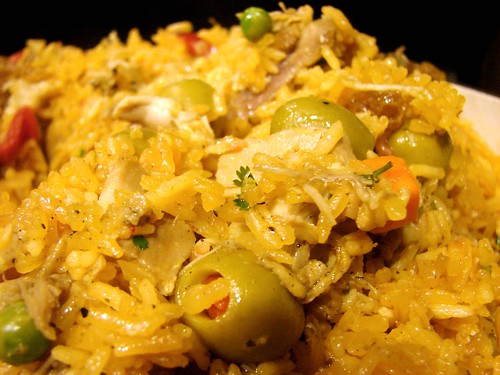
There is Arroz con Pollo. There always is Arroz con Pollo, I think it may be a law, one I will happily and faithfully abide by. When you see arroz con pollo on your plate, you know that the beautiful bright yellow rice is having a party of flavors with the chicken and the raisins and the olives and the capers and… The rice is having a really good time, trust me. Click the link for the recipe and you can see the full photostream here.
Then there will be Tamales. Whether they’re filled with chicken, pork, seafood or a combination of all of those, you will find these at your Tia’s table. I love these so much, I need to make another batch. You can too, just click this link for the recipe, the food shots are here.
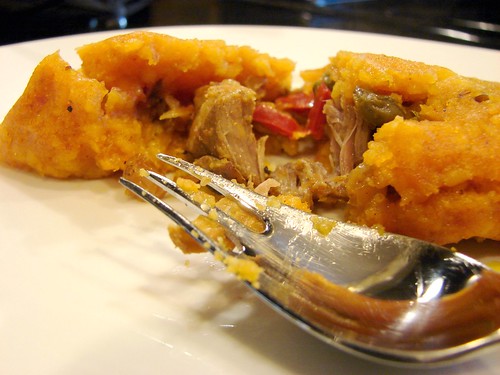
What is always present on your holiday table?
Have you ever heard of Johnny Mazzetti? If you’re Panamanian (or have lived in Panama) you probably do. Funny thing is, in putting this post together, I came to learn about the history behind the dish. I don’t think I believed this to be an original recipe by my mother, though I still think of it as her dish. Johnny Mazzetti, the dish, is very popular in Panama, so I Googled it. Turns out the dish originated in Columbus, Ohio at a restaurant called Marzetti. Leave it to Panamanians to change someones name.
Nonetheless, this was one of my Mami’s favorite party dishes because of how easy it was to prepare and how much mileage you could get from it, I mean, it goes a loooooong way. Like any other popular recipe, Johnny Mazzetti has many incarnations. My mom would make hers with olives, raisins and boiled eggs, in essence, you make picadillo and grow it with pasta.
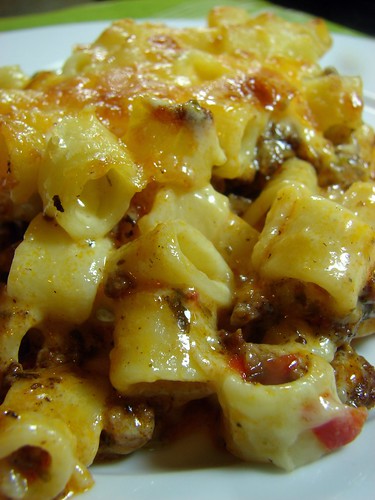
I must confess that I made this a few months ago, I was yearning for some comfort food and the memory of it came rushing back. I also have to confess that this is not really my mom’s recipe. It has been seriously adulterated… for the better. Not that there’s anything wrong with the original recipe, I just wanted…more. So I brought together 2 comfort foods: mac ‘n cheese and Johnny Mazz and ended up with a casserole of goodness. And you get dibs.
MacZetti
For the beef mixture:
1lb ground beef
3/4 tsp sea salt
1 tsp black pepper
1/2 tsp cumin powder
1 tsp Italian Seasoning
1 large onion, diced
1/2 bell pepper (preferably red), diced
2 serrano peppers, finely chopped
1/2 cp cilantro, chopped
1 small can crushed tomatoes
1 cp broth or water
1/4 cp Cotija cheese
For the pasta:
2-1/2 cps of a combination of Mexican crema (creme fraiche), heavy cream and milk (you can use all of them or take your pick)
Sea salt
White pepper
2 cps cheese (I used Pepper Jack and Cheddar)
3 tbsps butter
Dash of nutmeg
1 lb pasta (I used mezzi tubeti, but elbow, rigatoni would do)

Heat a medium skillet over high heat and add the ground beef and the next 4 ingredients, stirring well to evenly distribute the seasonings. Allow the moisture of the beef to evaporate, before adding the onions, serranos and bell pepper. Cook until the onions are translucent before adding the cilantro and tomato puree. Add the broth or water and check and adjust the seasoning as needed. Allow it to simmer for about 15 minutes over medium low heat. Stir in the Cotija cheese.
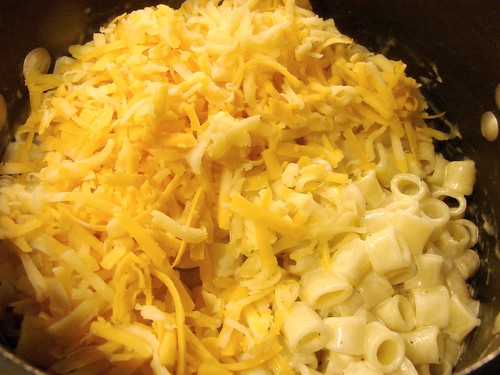
Cook and drain the pasta, then add the milk, cream and crema over low temperature. Add the cheese and butter, stirring until dissolved. Season with salt, pepper and nutmeg.

Preheat oven to 375°. Liberally butter a baking dish and spoon half of the pasta, top with all the beef, then the rest of the pasta. Bake for about 20-30 minutes or until bubbling.

For more yummy shots, click here.

Cookingly yours,
Anamaris
Rumor has it that temperatures are dropping. I have to say this is a rumor, because we, in Houston, must’ve been left off the memo distribution list. I will try not to take it personally, though I’m not sure I’ll be able to keep that promise. Nonetheless, I am here to tell you soup is on the menu.
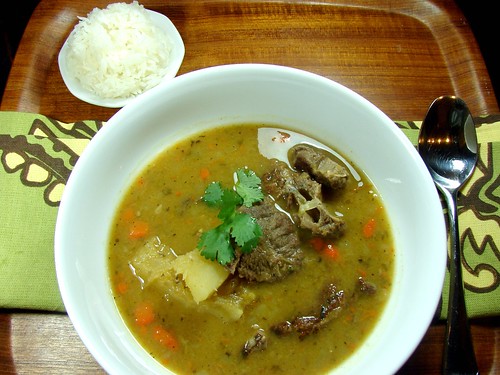
Truth be told, in Panama we have soup any and/or every day of the week. Weather be damned. It’s always hot in my little country, we like soup, we have soup. This one is a favorite of mine. My Gramms used to make it for me when I was little. She would make it various cuts of beef, sometimes with pecho (which comes from the rib area), jarrete (from the shanks), and sometimes with patas (cow’s feet). The constant is the bones. Bones are the best gift you can give soup, they help intensify the flavor of the broth. If they bother you, feel free to remove them after cooking, the meat will literally fall off the bone by the time the soup is done.
This will make a large pot of soup, which is the only way I make soup. I want to have it for a couple of days.
Sopa de Arvejas (Split Pea Soup)
8-10 large servings
1 lb beef shanks, cubed
4 beef short ribs (about 1lb)
Sea salt
Black pepper
2 tsp Italian seasoning
1 serrano or habanero pepper, whole
2 cps dry split peas
2 lbs yuca (about 3 cps), peeled
1 lb otoe (about 1-1/2 cps), peeled
2 medium carrots, chopped
3-4 garlic cloves, chopped
2 bay leaves
1 cp cilantro, leaves and stems
2 cubes beef bouillon
Water
Oil
Beef: Liberally season the short ribs and shanks with Italian seasoning, salt and pepper, set it aside while you get the other ingredients ready.

Split peas: Remove any damaged lentils or debris and rinse in cool water. Add enough water to cover and allow them to soak. Set aside.
Cut the yuca and otoe into pieces about 2-inches long. For the yuca, use a sharp knife, slit the peel off each section. Make sure you slit through the 2nd pinkish layer until you hit the fleshy white meat. At this point, use the sharp edge of the knife and push through the 2nd layer. Rinse and cut into 1-inch pieces. Check out this post for step-by-step instructions.
Carrots-peel and cut into rounds.
For the soup: Heat up a large stockpot and add about 1 tbsp of oil, smear it around. Brown the beef on both sides. Once all the beef is browned, add the drained split peas, 1/2 of the yuca and otoe, all the carrots, the stemmy end of the cilantro, and the bouillon. Fill the pot with water, about 12-15 cps or so.
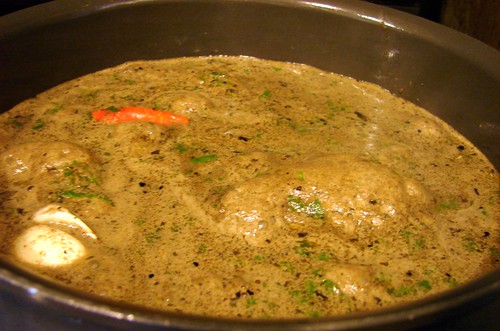
Allow it to come to a boil, and remove the foam that forms at the top when it boils. Lower the temperature to medium and allow it to come to a strong simmer. Stir it every few minutes, you want to make sure the split peas are not sticking to the bottom of the pan as that would cause the soup to scorch.
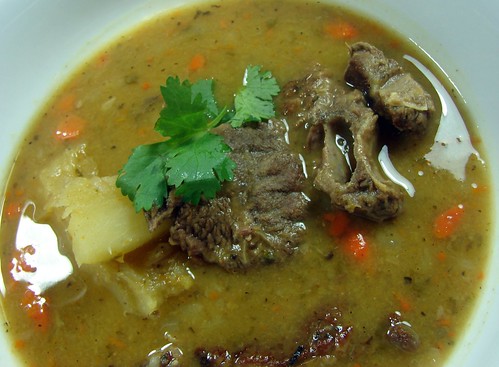
Allow it to simmer slowly for about 1-1/2 hrs for the beef to soften. At that time add the rest of the tubers and cilantro. Check the seasoning and adjust at will. Allow it to cook for another 30 minutes or so. If you used boned short ribs, you can pull those out to remove the bones and cut the meat to bite-size portions.
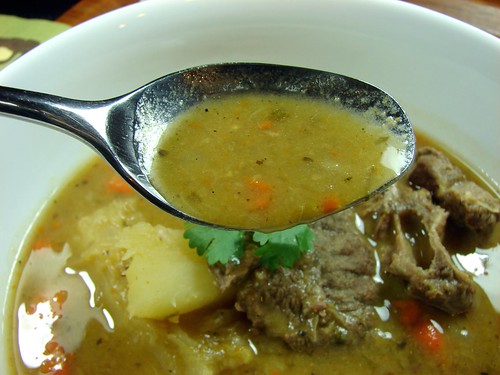
Serve with white rice If you want to see more soupy shots, follow this link to my photostream.
Cookingly yours,
Anamaris
Aside: Something weird happened this morning and it explains why this post is just coming now. See, I dutifully woke up around 5:45 am, put the post together and hit ‘Publish’. When I was at work, I checked in and noticed there was no new post. I looked and looked to no avail and, because The Man has decided is time for me to earn my keep, I couldn’t do anything about it. The long and short of it is, I have a ‘test’ blog, I accidentally clicked on that and THAT’s where this post was. All day, all by its lonesome. So here you go. Pretend its 6am.
—-
Yes, of course I’m looking back at more Thanksgiving goodies. In the weeks to come, I’ll share some new recipes for the meal of excess, but I wanted to remind you of what I shared with you last year. My blogging was in its infancy, but I can assure you my cooking was not.
Maybe you’d like to offer a little appetizer to your guests as they arrive. I love this little recipe which I submitted for a Pepperidge Farm contest. It says Autumn and it says eat me.
Aaaah, yes. The Meal. This one chronicles all the eating. Oh my. I’m so ready for a repeat.
No meal is complete without dessert, right? Especially when it addresses my love affair with Honeycrisp apples.
Thanksgiving meal
Sweet Potato pastries
Apple Squares
Fear not, my bloggies. There will be pie. Or something, but there will be plenty more.
Cookingly yours,
Anamaris
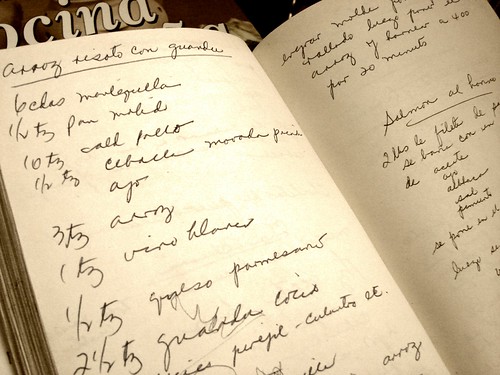
My mom was an extraordinary cook and hostess. Some of my most cherished memories involve her, cooking and friends filling a room. It is only appropriate her cookbooks and notes would become my priceless inheritance.

While my sister and I cleaned out the house and determined what would stay and what would go, we came across books and notebooks and loose notes Mami wrote through the years. Selfishly, I claimed most of them.
As I find my way back to blogging, I will share a dish I found in one of her notebooks. Arroz con Guandú (Rice with Pigeon Peas) is a staple in Panama. That’s probably the reason this recipe caught my attention immediately. It is generally prepared with cured pigs tail and coconut milk. I haven’t been able to find pigs tails here in Houston, at least not the cured ones, so I sub’d with salt pork. Does the trick just as nicely. As for the guandú, I used frozen, but you could use canned and skip the cooking step. The Hubbz and I loved this dish, I’m sure you will too.
Risotto con Guandú
2/3 cp guandues (pigeon peas)
1/2 cp salt pork, chopped
1 can coconut milk (make sure it is unsweetened)
2/3 cp white wine
5 cps water
2 cps Arborio rice
Butter
Sea salt & black pepper
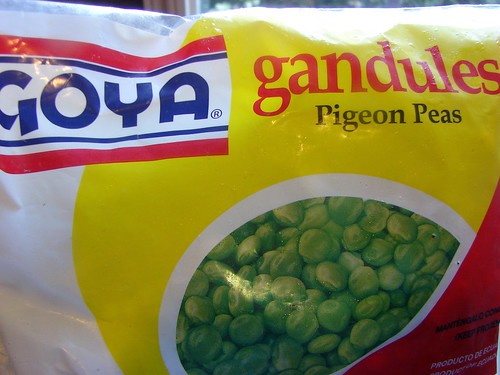
If you will use frozen peas, your first step will be to precook them in the coconut milk (a can will usually be about 14 0z) + 1 cp water. Add just a little bit of salt and a dash of sugar and allow it to cook for about 20 minutes or until the guandues are tender, but not mushy. Strain the guandú out of the liquid and add enough water to measure at least 7 cps. Keep the water on warm.
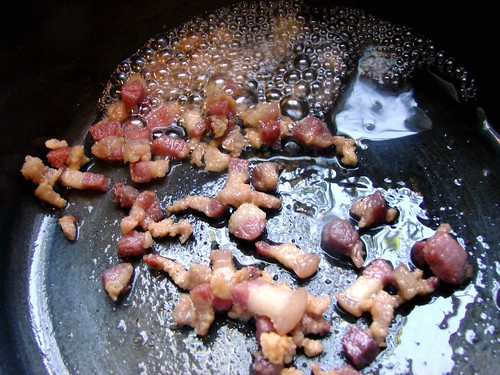
You will want to use a skillet with a tight-fitting lid to cook the risotto. Add the salt pork to the skillet, cooking it over medium high heat to render the fat.
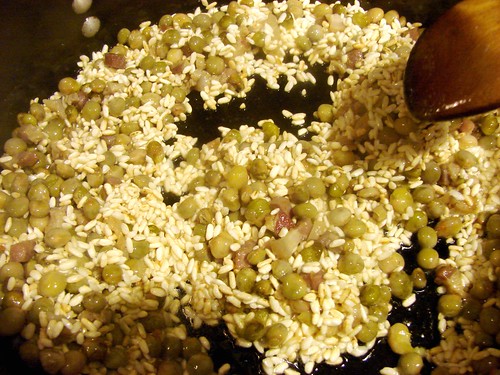
Add the rice, if there isn’t enough fat to generously coat all the grains, add a bit of extra virgin olive oil. Continue toasting the rice until the grains are milky white. Add the guandu and stir well.
Add the wine, stirring constantly. Once the wine evaporates, begin adding the coconut water about 1 cup at a time. Once the water evaporates, add another cup. Continue doing this until the rice is tender and creamy.
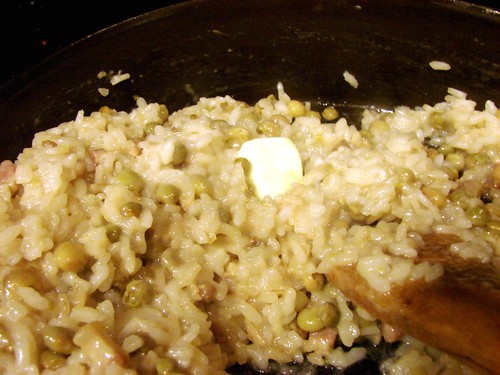
Add 2 tbsp of butter, stir it into the rice. Serve immediately and enjoy!

Cookingly yours,
Anamaris
Hello my blogies! It’s been a long time, hasn’t it? I’m still trying to figure things out, wishing there was a template or an established procedure for the grieving process. Alas! There isn’t one, I’ll just have to wing it.

Needless to say, going back home was very difficult. The only thing that helped was the knowledge that my Mami’s brave fight with cancer was finally over. She’s no longer in pain, no longer uncomfortable, she’s done putting on a brave face for us. She lived an amazing life. She loved and was deeply loved. She was caring to a fault and was cared for like a queen.
Mami was generous too. I like to think she decided this was the right time so I could be home when so many of my favorites fruits were in peak season. No mangoes, but what was available, I haven’t had in decades and I’m going to share them with you. I’m going to give you a look at what I ate while I was in Panama. Check it out.
Pixbae or Peach Palm Fruit.
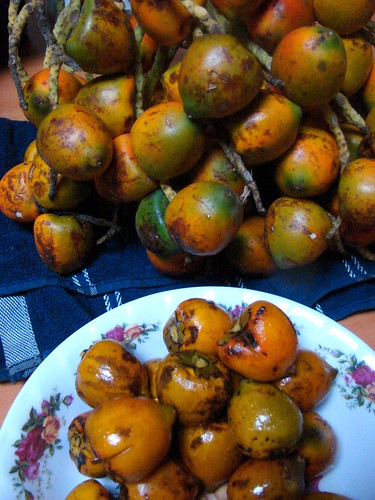
How do I describe the flavor of this one??? It isn’t sweet, let’s start with that. It is dense, has the density of a potato and kinda tastes like one. Maybe a Yukon gold, it has a slight hint of sweetness in the background. It is also a bit nutty and has a pit that, when cracked, has a little edible nut.
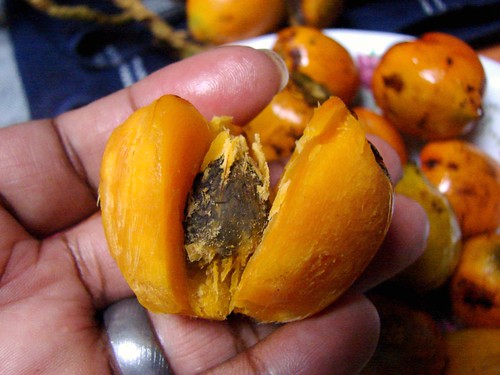
The pixbae has to be cooked before eating. This was my first time cooking them with instructions from my Tia Lidia. The fruits need to be washed, then the bottoms are scored with an X, they’re then boiled in salted water with a bit of vegetable oil. It takes about 45 minutes to cook.
It’s then peeled and eaten just like that or made into soups, salads, puree and, more recently, tamales.
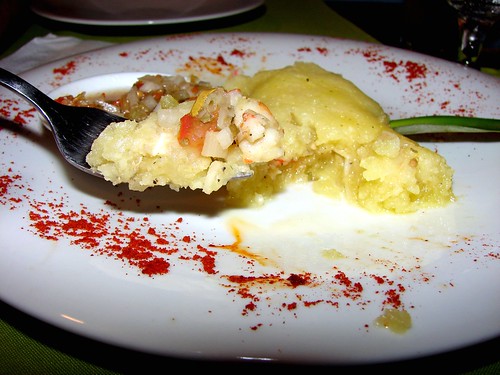
Moving on… Nance, sometimes known as wild or yellow cherry. Also a fruit, it is very tart and not generally eaten whole.

Nance has a black pit and the pulp needs to be squeezed off it–either by hand or pulsing it in a blender. It is then strained and used to make chicha. In Panama we make chichas or fruit drinks that are served with every meal. Unlike Mexican aguas frescas, our chichas are 70% fresh fruit juice, 20% water and 10% sugar. We make chichas with almost any fruit.
The other common use for nance is Pesada, a pudding-like dessert made with nance, fresh corn and sometimes coconut milk. This is then served with crumbled queso blanco (white cheese similar to queso fresco).

Pesada de nance con queso
One of my mom’s friends made a batch just for me and it was de.li.cio.so!
Look at this spread…

Can you tell how happy I was? Here’s the whats.

Maracuya or passion fruit

Naranjilla, also known as Lulo in Colombia

Guayaba
This one needed to ripen a bit more. When they’re ready to be eaten, the flesh turns a beautiful coral color. This is what Guava paste is made from, of course, I don’t know why they call it guava paste…
Finally, tomate de árbol. I had not seen this one before, but it is very pretty.

Fear not, I didn’t just eat fruits.
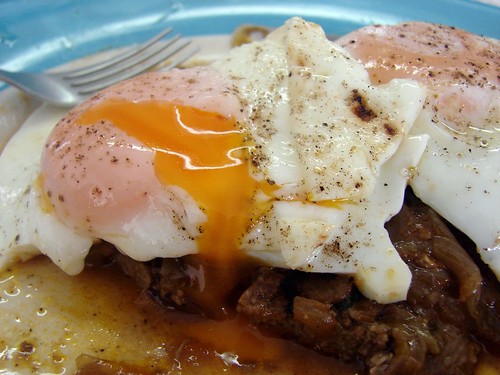
I had some Bistec a Caballo, of course.
My dad took me to one of his favorite Fondas, a road-side full-service food stand.

can you see the prices?
The 3 of us ate for a grand total of $7.50. I had fried fish with patacones, my aunt had a side of patacones and dad had the chicken soup. Oh, and 3 nance chichas.
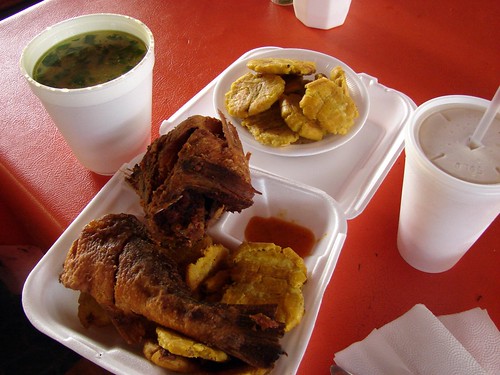
Follow this link to see the details. That bowl of soup is filled with chicken and veggies and that fish… was pure perfection!
Good cooks run in the family. This was the spread my Aunt Bubbles (Irma) put together for us. She makes the best bacalaitos, cod fish fritters!

Hats off to the cook! Tia Irma sitting in the middle with the blue top.
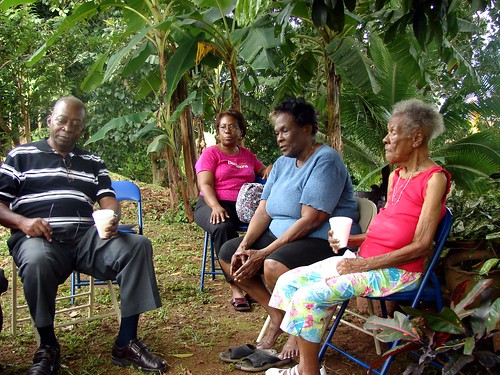
I was able to spend some quality time with dad and my siblings, the aunts and cousins. We ate, laughed, cried and remembered my mom.
Anamaris


