I’ve been bitten by the bread making bug. I mean a BIG bite. I’ve always shied away from bread making because I’ve not been successful at it. I either killed the yeast, used too much of it, added too much flour, forced the dough to bloom. Issues. I just faced a million issues when I tried making bread. I was sure my mom hadn’t shared that particular gene with me, because she’s an AWESOME baker.
Then I came across instructions for ciabatta and realized that I just had to try again. I’ve been stalking the guys over at the
BBA for months now, and though I’m not participating in their challenge, I am baking as a result of it. I must admit I’m loving Reinhart’s approach to baking and may have found a new passion in my life. But I digress.
There is another challenge I’ve been trying to participate in, but kept missing the deadlines. Joan over at
Foodalogue has a Culinary World Tour challenge. This round was all about Latin America and the Caribbean. Yep, right up my alley. And yes, I missed it every week except for the last one. Hence, this post.
This week they’re visiting Puerto Rico and enjoying its wonderful cuisine. As luck would have it, I have the inside track on Puerto Rico. You see, I’ve been there a couple of times, my bestie’s hubby is a native and Puertorrican food is pretty similar to Panamanian food. Yeah, I’m in.
Originally I was thinking about pastelón or something along those lines, but with my new baking infatuation, I opted for Pan de Mallorca. A slightly sweet, creamy, egg-based bread that is traditionally served for breakfast on the island. If you go to La Bombonera, they will slice, butter and toast it for you, and serve it alongside a café con leche. Or you can have it as a sandwich stuffed with cheese, ham, eggs, bacon, anything you love. So here’s my submission for Puerto Rico:
Pan de Mallorca
Because I’m so into Reinhart’s poolish method, I decided to implement it for this recipe as well. To get that poolish going you will need:
1 tsp dry yeast
1 cp warm water
1 cp bread flour
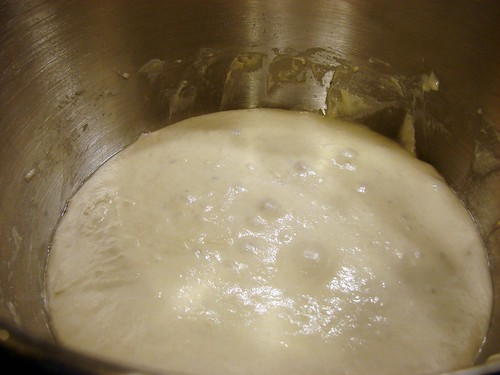
Dissolve the yeast in the water–I’ve been using warm water straight from the tap, it’s barely tepid. Add the flour to your mixer’s bowl, then add the yeast/water and mix until the batter looks smooth. About 3-4 minutes. Scrape the sides, cover with plastic wrap and allow it to sit on the counter for about an hour before you put it in the fridge overnight.
Next day, when you’re ready to finish the dough, remove the poolish from the fridge and allow it to sit at room temperature for at least 1 hour before mixing the rest of the ingredients.
1-1/4 tsp dry yeast
1 cp whole milk, warm
¾ cp sugar
4 cps flour
3/4 tsp sea salt
6 egg yolks, lightly beaten
1 stick butter, melted
1 stick butter, melted to brush on top
Powdered sugar
First, warm the milk, just enough to take the chill off it and dissolve the yeast into it; set aside. Into the bowl with the poolish, add the sugar, salt, yolks, milk and 1 cup of the flour and mix it until well incorporated. Then add 1 stick of the melted butter and mix evenly. Now you can start adding the rest of the flour.
Make sure you mix it well and that the dough looks smooth. It will probably need to be mixed for 4-5 minutes, the dough will begin to separate from the sides, but it will still be a very moist dough. Set aside and allow the dough to rise for about an hour or so.
Lightly dust the countertop where you will work the dough. Make sure the second stick of butter is ready to go, you will also need a pastry brush. Turn the dough onto the countertop and divide it into 15 portions.

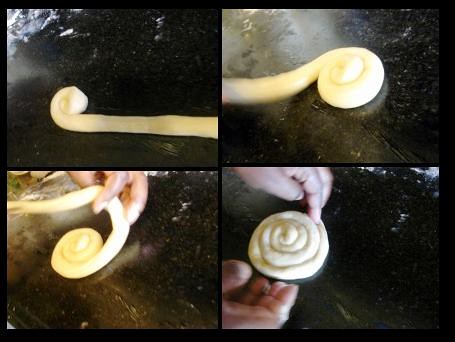
Roll each portion under your hands making it into long strip–channel your inner kindergartener and have some fun. Once you have a long strip, brush it with butter and roll into a coil.
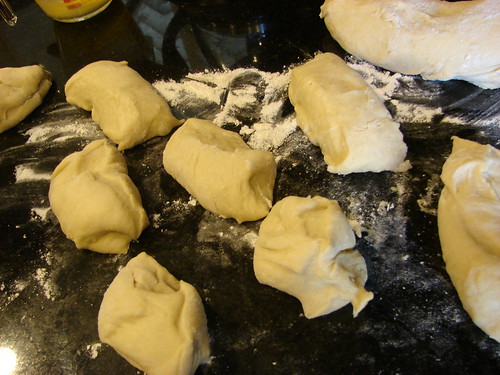
I found that the best method is to roll in one end, then pick up the length of the strip and roll it around the center. This kept the coils nice and flat. Make sure you tuck the end under the coiled dough and transfer to a greased baking sheet or one lined with silpat/parchment paper. Brush the tops with more butter and continue rolling the rest of the dough.
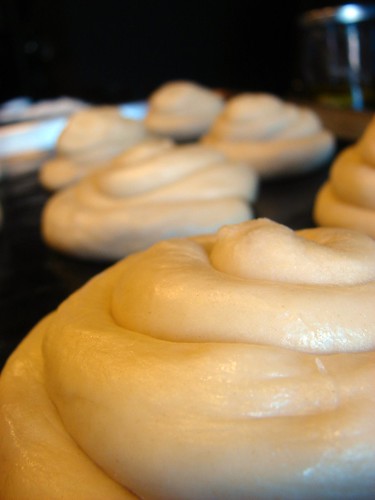
Set the tray aside and allow them to rise again until they have doubled in size. It took about 30-40 minutes for that to happen.
In the meantime, preheat the oven to 375°. Bake them for 8 minutes and rotate the tray, then bake for another 8-10 minutes.
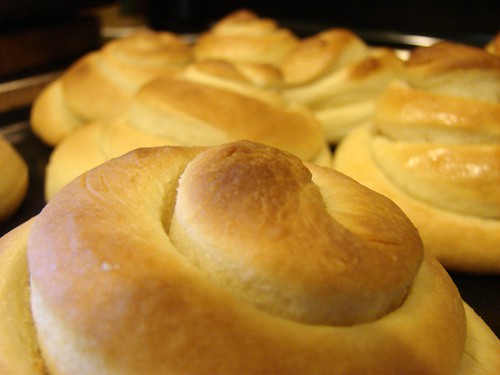
When they come out of the oven, brush the tops with a bit more butter before transferring them to a cooling rack. Dust them with powdered sugar before eating.
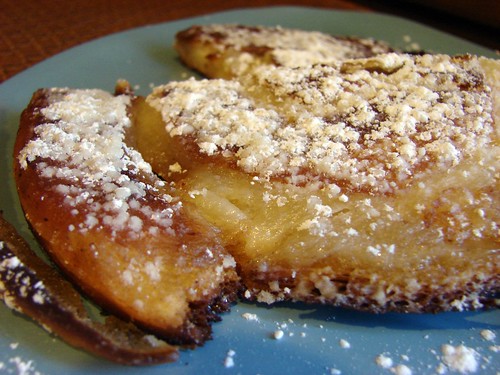
Now, for your personal edification, I will toast one and serve it as it is served at La Bombonera. I must admit to you, this is NOT skinny toasty bread. It IS all about the butter. Lots of it. What they do in Puerto Rico is slice ‘em in half, slather them with butter, put them together again and press them on a giant Panini press type thing. Since I don’t have a Panini, I use a more… rustic method.
After slicing and buttering ‘em I put them in a skillet that already has MORE butter melted and ready for ‘em. I keep the heat on medium low to avoid toasting it too much. Also, place the Mallorca in the butter, then flip it right away, this way you pick up butter on both sides of it. Then cover it with piece of foil and put a heavy pan over it. Press down to flatten the Mallorca.
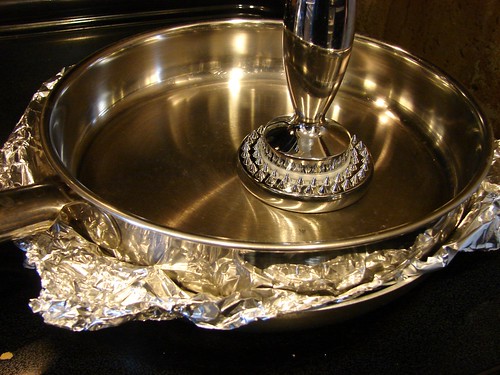
The foil creates a bit of steam in there and this allows the butter to melt through the dough. The result is almost like a cake, the bready dough gets soft and goey and oh so yummy. Make sure you flip it halfway through cooking.
Remove from the skillet and GENEROUSLY dust it with powdered sugar. But wait, there’s more! You didn’t think I would leave it at that, now did ya? This bread makes awesome sandwiches. I didn’t have the traditional ham & cheese, but I made do with:
 Queso Oaxaca:
 Mexico’s take on a melty mozzarella
and… bacon!!!
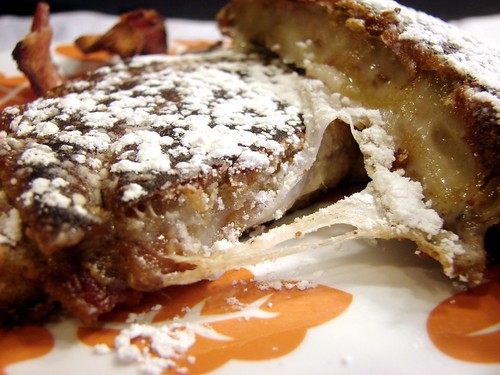
Just make a grilled cheese sandwich: slice the mallorca in half, butter each side. Be generous, now. Layer your filling, I laid down a slice of cheese, then bacon, then more cheese. Top it with the other half of the mallorca. Into the skillet with melted butter, cover with foil, press down and toast. Listo!
And it comes out looking like this:
I know it sounds weird, but top it with powdered sugar. I don’t know what it is, but it makes it really really REALLY YUM!
Cookingly yours,
Anamaris


 Queso Oaxaca: Mexico’s take on a melty mozzarella



Comments ( 20 )
I'm so glad you made it for this stop on the tour. I had pan de Mallorca for the first time when I was in PR last month and enjoyed it -- but your oaxacan cheese + bacon sandwich has my mouth actually watering! Wow, that looks delicious (and fattening).
JU R KILLINGK ME WITH THE POWDERED SUGAH- U have Sent me RIGHT over the edge now..............
Would this Pan de Mallorca happen to be the same as ensaimada?
Why yes, I do believe they are! I had not heard about those until I started working on this post. Mallorca seems to be the name commonly given it in PR, probably because that is its place of origin. There's a bit more info here.
yES, IT IS.
Have an award your way. Here's the link for the rules: http://kitchen-masochist.blogspot.com/2010/03/hey-sunshiney-day.html
Sounds like what we call Pan de Gloria here in Miami. William
Well, that would certainly be an appropriate name for it. It is pretty close to gloria!
WELL, PAN DE GLORIA IN MIAMI HAS SIRUP, I NEVER CAN FIND THE REAL ONE IN MIAMI BUT THE REAL PAN DE GLORIA IS LIKE DE MALLORCA BUT INSTEAD POWDER SUGAR IS GRANULATE SUGAR, THAT'S THE ONLY DIFFERENCE
When I read your post I thought: Wow, that sounds like Ensaimadas. In the comments I read that somebody else had that thought, too! Anyway, your pan de Mallorca looks amazing! Btw, if you're interested in a bread baking group (and not only stalking the BBA people) come on and join the Mellow Bakers (group baking at an easy pace). It's a group one of the BBA bakers just started: we'll start with the book "Bread" by Hamelman. You can find the details here: http://yumarama.com/blog/2188/mellow-bakers/
Oh, and there's a forum, too: http://mellowbakers.com/
I just ordered my book, I'll be mellowing out with you guys.
Wow, nice to have you join us. Looking forward to baking with us.
Ok, so I have to try your version! Mine was wonderful, and even better split and toasted - but yours seems to take it over the top!!
They're just so good, regardless of the company they keep.
Beautiful and i loved the combination.
CAN ANYBODY TELL ME IF THIS BREAD IS WHAT WE CALLED IN CUBA PAN DE GLORIA ? I WILL TRY THIS ONE TOMORROW FOR SURE.
There are no words to express my most sincere thanks, for this particular recipe, since i was raised in the island, i always had the opportunity to try this delicious Pan de Mayorca, but i never bother to have the recipe, now after all this years , finally i had a chance to try it again , of course home made, all i can say it was fantastic, just like my grandmother used to make it. muchas gracias y le estoy muy agradecido...
Luis, all I can say is aaaaaawwhh! I can't tell you how moved I was to read your comment, this is precisely the reason I blog. In the hopes that the recipes will inspire, bring back memories and get you in the kitchen. Muchas gracias por visitar mi blog!