This crazy blogosphere is a groovy trip. Not in the same realm as the trips induced by various psychotropic mind enhancers, not that I would know about that, but a groovy trip nonetheless. I’m still befuddled by the thought that this is such a NEW phenomenon.
Seriously. I don’t remember life BWWW, but I know I was a legal adult when it got started. Nothing seems to happen without web intervention or, at the very least, web discussion. Pretty awesome, I say.
Anyway, thanks to the web and its blogs I’ve made some really cool friends. A new version of friends. A sorta Friend App type of friends. Bloggy friends. Haven’t met them face to face, but I feel like I’m in their living rooms, kitchens and offices almost every day. I laugh with them, learn from them, feel their joy and pain in the same way I do with, you know, my old version of friends.

All of this just to say I got the cutest, silliest, most giggle-inducing, dorky email this morning. It was from B over at Shutterboo, she hosts the Weekly Photo Challenge I’ve neglected for the last 2 weeks. I love this chick. She’s funny, she’s smart, she’s a smartass and she loves dogs. And photography. And food. And she’s oh so talented!
Anyway, the subject line read: I’m going to make a fool of myself… I liked the message already. Anyone doing foolish things and including me in said activities, even if after the fact, gets my undivided attention. Here’s what she wrote:
But I have to tell you, Anamaris. Note I’m a complete dork. Dork is my middle name.
Your blog name, Chef Yourself… every time I see it/read it/talk about it/you get the drift, I always hear the song “owner of a lonely heart”. The singer starts out verses with things like move yourself/lose yourself/see yourself/prove yourself and sings them very staccato. And I do that with your blog name. Occasionally, I go a step further… “Chef Yourself, you always live your life…” I know. Dork dork dork. But I had to tell you. I don’t know why. I’m just tired of laughing at myself and need someone else to laugh at me. 
Have a great day!
How sweet is that?!!! Even better that I knew the song and love it! I say that because, well, I don’t know all the songs (story for a different day). The email exchange continued and went downhill once I became involved. Something about me hating on her ‘cuz she’s like 12 and how could she have any memory of the 80s.
Then she insisted how she totally loves 80s music (ok, who doesn’t?!). But she took it too far.
She called dibs on Bon Jovi.
and I lost it.
I don’t care how cute and sweet and smart and talented and dog-loving she is. Or that she totally made my day with this very sweet, funny, dorky email.
He’s mine. She can’t have him.
She’s a kid! She was just born like day before yesterday, which means I saw him first!
ohdear. I’m such an ingrate. Bad Anamaris.
Because I was under the weather, I had not had an opportunity to finish posting all the recipes for the 24, 24, 24 event I hosted a bit over 2 weeks ago. It was an ambitious menu, to say the least. Every dish was better than the next, I would really have a tough time picking one as my hands down favorite.
This one came representing the New England region and I must admit I was surprised by the use of salt cod. I couldn’t tell you why exactly, because as I think about it, it makes perfect sense. But it still caught me by surprise. The other thing I liked about it was the way the cod was used. As a native Panamanian I’m used to seeing cod in more ‘creole’ presentations. So this was different a change, and one that I enjoyed thoroughly.
I found the recipe on Chow.com. I prepared it as instructed for the night of the event, but we had some of the cod and bean base leftover and I revisited and tweaked the recipe a few days later. So here’s my final rendition of it.
This is a 2-day dish: on day 1 you’ll soak/rehydrate the cod and beans, on day 2 you can put it all together. Plan ahead. *Also, the recipe called for Manila clams which I didn’t find and substituted with Little Necks.

1/2 lb salt cod
2 cps dried white beans (such as Great Northern or cannellini beans)
2 cloves garlic, whole
1 tbsp kosher salt
4 cps whole milk
1 tbsp whole black peppercorns
2 bay leaves
1/3 cp bacon or salt pork, chopped
2 tsp garlic, minced (about 2 cloves)
1/2 cp carrot, diced (about 1 large carrot)
1 1/2 cps leeks, chopped
1 tbsp fresh thyme, chopped
1 lb Manila clams, scrubbed*
1 1/2 cps dry white wine
1/2 tsp lemon zest, grated
3 tbsp Italian parsley, finely chopped
Extra-virgin olive oil, for drizzling
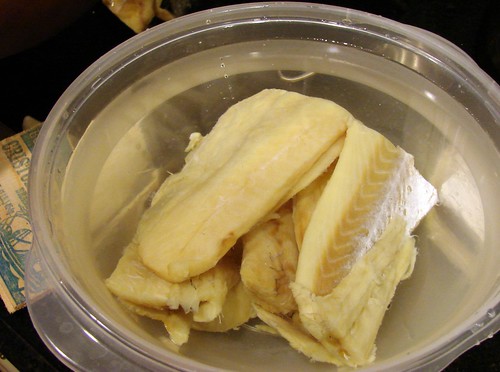
The day before, rinse the salt cod under cool water, then place it in a large glass or plastic mixing bowl with enough cold water to cover and soak overnight in the refrigerator, changing the water 2 or 3 times. Put beans in another bowl, sort and rinse them, then cover them with cold water, and let soak for 24 hours in the refrigerator.
The next day, drain and rinse beans. Transfer them to a medium saucepan and add the whole garlic cloves and fresh cold water to cover. Bring to a simmer and cook gently, being mindful not to boil them. It will take about 40 minutes for them to be cooked through. Once the beans have softened, season them with sea salt & pepper. Remove the garlic cloves and strain the beans but reserve about 1-2 cps of the cooking liquid.
To prep the cod: drain the water it’s been soaking in and transfer to a saucepan. Add milk, peppercorns, and bay leaves and simmer over medium-low heat until fish is soft and flaky, about 20 minutes. Remove from heat, strain fish from the pan, and place in a bowl. Use a fork to flake cod into bite-size pieces. Discard milk and seasonings.

Rinse the saucepan and heat it over medium heat. Add the bacon and cook just long enough to render some of its fat, you don’t want to brown it. Then add the garlic, carrots, leeks, and thyme and cook for 3 minutes, stirring occasionally.
Deglaze the pan with some of the wine, making sure to release all the drippings stuck at the bottom. Add the rest of the wine, cod, veggies and beans and allow it come to a slow boil. Add clams and wine, stir, and cover. Cook just until clams open, about 7 to 10 minutes. (Discard any clams that do not open.)

After all the clams have opened, add the lemon zest and parsley and stir; add some of the bean-cooking liquid if the stew seems too thick. Ladle stew into small bowls, drizzle with olive oil, and serve with crusty bread.

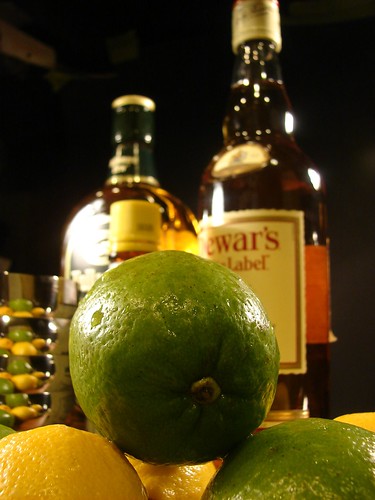
Oh, St. Patty’s Day. I remember rushing out after work and commencing a night-long celebration filled with green drinks. No longer inclined to drink dye-colored drinks, I’ve decided to acquaint myself with a few traditional, or not so much so, Irish inspired drinks.
Feel free to pop open your favorite bottle of Irish Whiskey and whip one or all of these up. I can tell you we enjoyed the research!
Irish Buck

1 1/2 ounces Irish Whiskey
1/4 oz fresh lime juice
2 oz ginger ale
Combine whiskey and lime juice pour over ice into a tumbler or Collins glass. Top with ginger ale or ginger beer. For garnish, top with a lime wheel. The Hubbs and I liked this one, it was nice and refreshing.
Wild Irish Rose
 2 oz. Irish whiskey
¾ oz. lemon juice
½ oz. grenadine, to taste
2 oz. soda water
Pour all ingredients into an old-fashioned glass filled with ice. Stir & serve. This was Hubbs’ favorite. We did add a bit more grenadine, probably a full ounce per drink. It was yummy!
Irish Kilt Martini
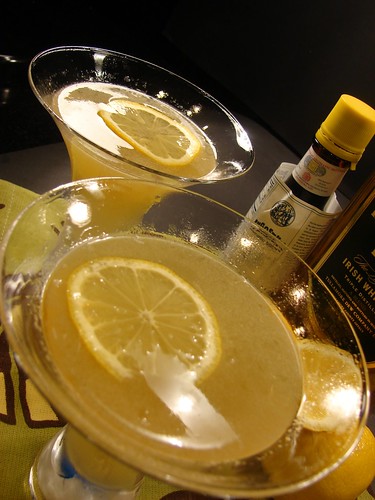 2 oz Irish Whisky
1 oz Scotch
1 oz lemon juice
1 oz sugar water
3 dashes of Angostura bitters
Combine all the ingredients in a shaker filled with ice, shake and strain into a chilled martini glass. This was my favorite. Lemony, sweet, tart and the bitters gave it a hint of clove. Oh yeah.
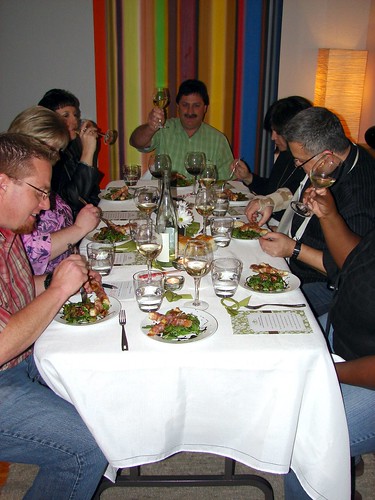
This was another dish prepared for the 24, 24, 24 event I participated in earlier this month. This salad represented California’s cuisine. The recipe comes from Chef Alice Waters, one of the chefs credited with developing California cuisine.
This is a beautiful salad. It was my first time trying figs, except for a failed attempt with Fig Newtons, I had never had figs. I was unable to get fresh ones, but reconstituted dried Kalamata figs. It was quite delicious and can’t wait to try it with fresh figs.
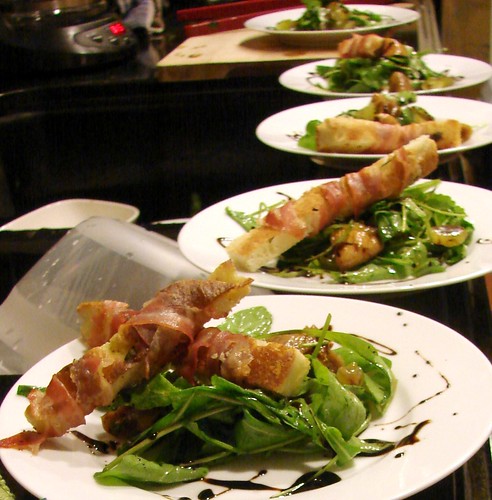
Fig and Grape Salad with Pancetta Crostini
Serves 6
3 tbsp aged balsamic vinegar*
6 thick slices bread
Extra-virgin olive oil
12 thin slices pancetta
9 ripe figs**
1 cup grapes, stemmed
6 small handfuls arugula
Salt and pepper to taste
*The recipe calls for good quality, aged balsamic vinegar. All I had was decent quality balsamic, so I went ahead and followed the instructions to reduce the vinegar to syrup. This is how:
*Add approximately 1/2 cp of balsamic vinegar to a small saucepan and allow it to slowly simmer until it reduces by a little more than half and the vinegar is thick and syrupy. This took me about 20 minutes and I stirred it often. Allow it to cool and set aside.
**As I mentioned, figs weren’t in season, to rehydrate dried figs I trimmed the stems and sliced them into quarters. Placed them in a microwave safe bowl and added just enough dry white wine to cover them(about 1/2 to 2/3 cp). Cover it with plastic wrap and zap it for 2 minutes. Remove from the microwave and allow it to cool in the wine. Remove when softened. Reserve the liquid for later use.
Preheat the oven to 375°. I had baked some focaccia a few days before, so that’s the bread I used for it. Either way, you want to cut the bread into 1-inch thick breadsticks. Trim away any crusts. Make 12 long breadsticks. Brush them lightly with olive oil and wrap with slices of pancetta-spirally, like candy canes. I actually sliced the pancetta disks in half, then carefully wrapped it around the bread. Place them on a baking sheet lined with parchment or silpat and bake for about 10 minutes or until the pancetta begins to crisp.
In the meantime, get the fruit ready. If you find fresh figs, cut them in quarters, if you’re rehydrating them, remove them from the wine at this time. Cut the grapes in half, give the arugula a good rinse and pat it dry. Toss the arugula and fruit with a pinch of salt and fresh black pepper I also added a couple of tablespoons of the wine I used to rehydrate the figs, plus 2 tablespoons of extra virgin olive oil.
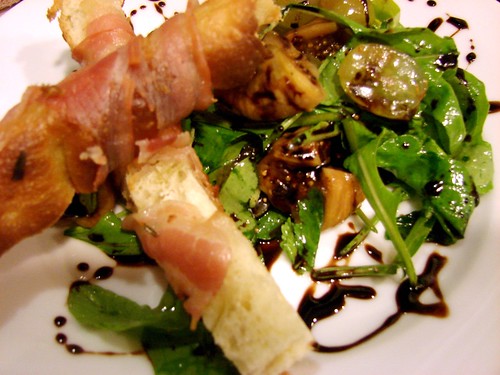
Mound the arugula and fruit on plates, drizzle with the balsamic vinegar and set a couple of crostinis on the side as garnish.
Enjoy!
Cookingly yours,
Anamaris
I’ve been bitten by the bread making bug. I mean a BIG bite. I’ve always shied away from bread making because I’ve not been successful at it. I either killed the yeast, used too much of it, added too much flour, forced the dough to bloom. Issues. I just faced a million issues when I tried making bread. I was sure my mom hadn’t shared that particular gene with me, because she’s an AWESOME baker.
Then I came across instructions for ciabatta and realized that I just had to try again. I’ve been stalking the guys over at the
BBA for months now, and though I’m not participating in their challenge, I am baking as a result of it. I must admit I’m loving Reinhart’s approach to baking and may have found a new passion in my life. But I digress.
There is another challenge I’ve been trying to participate in, but kept missing the deadlines. Joan over at
Foodalogue has a Culinary World Tour challenge. This round was all about Latin America and the Caribbean. Yep, right up my alley. And yes, I missed it every week except for the last one. Hence, this post.
This week they’re visiting Puerto Rico and enjoying its wonderful cuisine. As luck would have it, I have the inside track on Puerto Rico. You see, I’ve been there a couple of times, my bestie’s hubby is a native and Puertorrican food is pretty similar to Panamanian food. Yeah, I’m in.
Originally I was thinking about pastelón or something along those lines, but with my new baking infatuation, I opted for Pan de Mallorca. A slightly sweet, creamy, egg-based bread that is traditionally served for breakfast on the island. If you go to La Bombonera, they will slice, butter and toast it for you, and serve it alongside a café con leche. Or you can have it as a sandwich stuffed with cheese, ham, eggs, bacon, anything you love. So here’s my submission for Puerto Rico:
Pan de Mallorca
Because I’m so into Reinhart’s poolish method, I decided to implement it for this recipe as well. To get that poolish going you will need:
1 tsp dry yeast
1 cp warm water
1 cp bread flour
Dissolve the yeast in the water–I’ve been using warm water straight from the tap, it’s barely tepid. Add the flour to your mixer’s bowl, then add the yeast/water and mix until the batter looks smooth. About 3-4 minutes. Scrape the sides, cover with plastic wrap and allow it to sit on the counter for about an hour before you put it in the fridge overnight.
Next day, when you’re ready to finish the dough, remove the poolish from the fridge and allow it to sit at room temperature for at least 1 hour before mixing the rest of the ingredients.
1-1/4 tsp dry yeast
1 cp whole milk, warm
¾ cp sugar
4 cps flour
3/4 tsp sea salt
6 egg yolks, lightly beaten
1 stick butter, melted
1 stick butter, melted to brush on top
Powdered sugar
First, warm the milk, just enough to take the chill off it and dissolve the yeast into it; set aside. Into the bowl with the poolish, add the sugar, salt, yolks, milk and 1 cup of the flour and mix it until well incorporated. Then add 1 stick of the melted butter and mix evenly. Now you can start adding the rest of the flour.
Make sure you mix it well and that the dough looks smooth. It will probably need to be mixed for 4-5 minutes, the dough will begin to separate from the sides, but it will still be a very moist dough. Set aside and allow the dough to rise for about an hour or so.
Lightly dust the countertop where you will work the dough. Make sure the second stick of butter is ready to go, you will also need a pastry brush. Turn the dough onto the countertop and divide it into 15 portions.

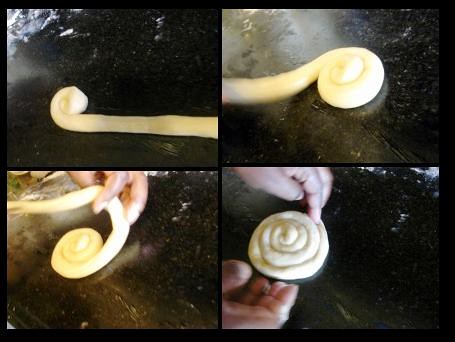
Roll each portion under your hands making it into long strip–channel your inner kindergartener and have some fun. Once you have a long strip, brush it with butter and roll into a coil.
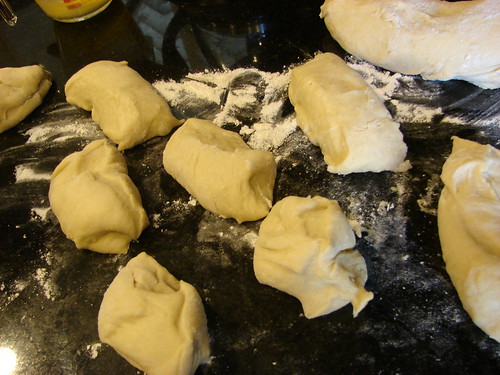
I found that the best method is to roll in one end, then pick up the length of the strip and roll it around the center. This kept the coils nice and flat. Make sure you tuck the end under the coiled dough and transfer to a greased baking sheet or one lined with silpat/parchment paper. Brush the tops with more butter and continue rolling the rest of the dough.
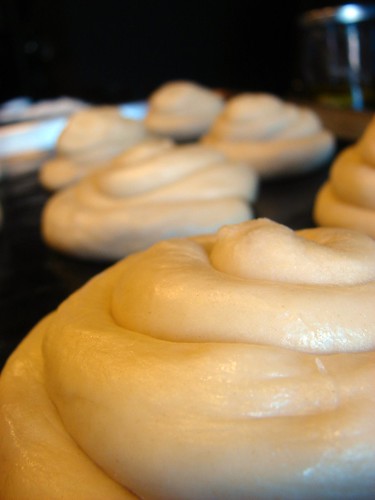
Set the tray aside and allow them to rise again until they have doubled in size. It took about 30-40 minutes for that to happen.
In the meantime, preheat the oven to 375°. Bake them for 8 minutes and rotate the tray, then bake for another 8-10 minutes.
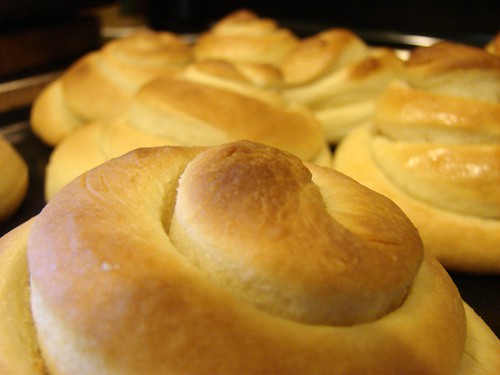
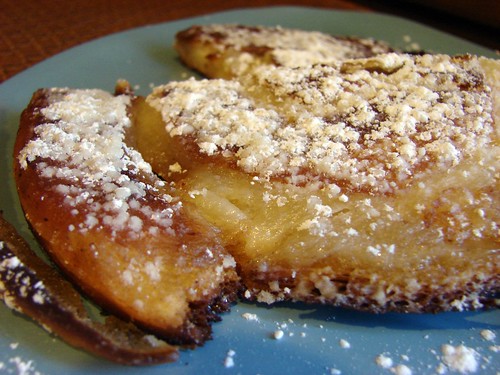
When they come out of the oven, brush the tops with a bit more butter before transferring them to a cooling rack. Dust them with powdered sugar before eating.
Now, for your personal edification, I will toast one and serve it as it is served at La Bombonera. I must admit to you, this is NOT skinny toasty bread. It IS all about the butter. Lots of it. What they do in Puerto Rico is slice ‘em in half, slather them with butter, put them together again and press them on a giant Panini press type thing. Since I don’t have a Panini, I use a more… rustic method.
After slicing and buttering ‘em I put them in a skillet that already has MORE butter melted and ready for ‘em. I keep the heat on medium low to avoid toasting it too much. Also, place the Mallorca in the butter, then flip it right away, this way you pick up butter on both sides of it. Then cover it with piece of foil and put a heavy pan over it. Press down to flatten the Mallorca.
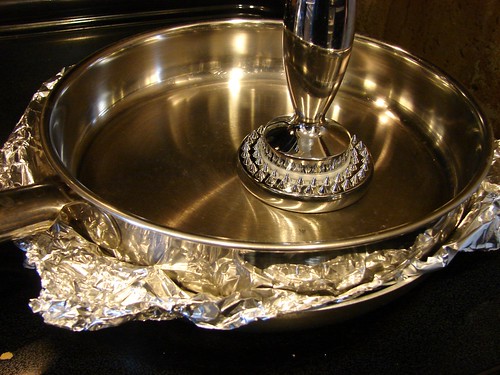
The foil creates a bit of steam in there and this allows the butter to melt through the dough. The result is almost like a cake, the bready dough gets soft and goey and oh so yummy. Make sure you flip it halfway through cooking.
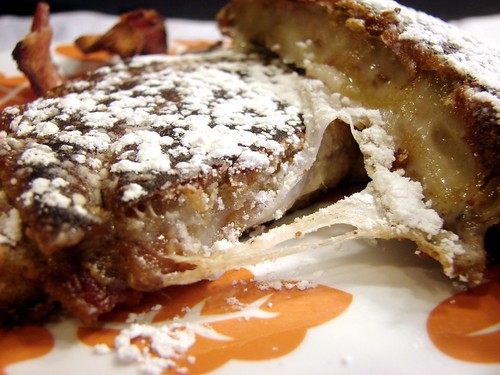
Remove from the skillet and GENEROUSLY dust it with powdered sugar. But wait, there’s more! You didn’t think I would leave it at that, now did ya? This bread makes awesome sandwiches. I didn’t have the traditional ham & cheese, but I made do with:
 Queso Oaxaca:
 Mexico’s take on a melty mozzarella
and… bacon!!!
Just make a grilled cheese sandwich: slice the mallorca in half, butter each side. Be generous, now. Layer your filling, I laid down a slice of cheese, then bacon, then more cheese. Top it with the other half of the mallorca. Into the skillet with melted butter, cover with foil, press down and toast. Listo!
And it comes out looking like this:
I know it sounds weird, but top it with powdered sugar. I don’t know what it is, but it makes it really really REALLY YUM!
Cookingly yours,
Anamaris
Ooops! I did it again. I’ve been seduced and I succumbed. Bread baking has my heart all pitter-patter. I even committed to a proper bottle of yeast! No little throw away packets for this girl. No! I’m an honest bread baker now.
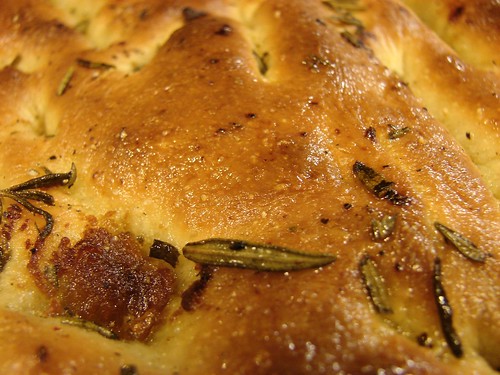
This time it was Focaccia. I needed some for a salad, so I looked at a million recipes and made a choice. Well, I settled on 2 separate versions: one is by Peter Reinhart and the other is a much simpler method by Suzanne Dunway. I really like Reinhart’s use of a poolish; I’m convinced that is the reason the bread tastes so good and not overly yeasty. He’s a bit of a Martha, though. His method is definitely on the elaborate side of things, not that there’s anything wrong with that. But, I am a novice bread maker and find myself intimidated quite easily. That’s probably why the ‘No Need To Knead’ method offered by Dunway is so appealing.
Because I was using a poolish, I followed Reinhart’s recipe and ‘day before’ preparations. Let’s get to it, shall we?
For the Poolish:
Combine
1-1/2 cps barely warm water (I measured it from the kitchen’s tap)
1/4 tsp dry yeast (like ActiveRise)
Mix in the yeast until it has dissolved and set aside for a few minutes. In the meantime, measure out
2-1/2 cps bread flour
and dump it into your mixer’s bowl. Now add the yeasty water and mix this using the paddle attachment until it is fully incorporated and smooth. You’ll probably want to beat it for about 3-4 minutes. Give it a scrape around and cover with plastic wrap. The dough will be very smooth and elastic.

Allow it to rest at room temperature for an hour or so before putting it in the fridge overnight (or longer, if you’d like).
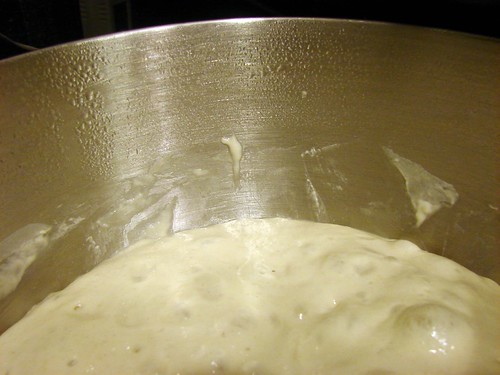
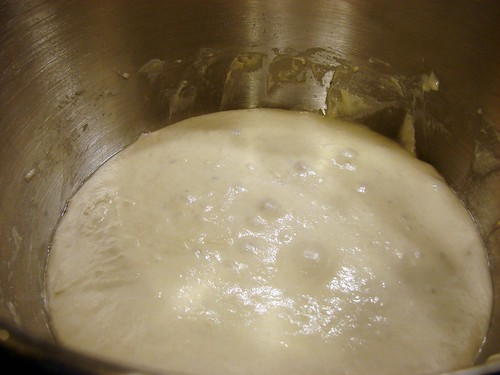
The next day or when you’re ready to bake the focaccia, remove the poolish from the refrigerator and allow it to come to room temperature at least an hour before using it. You will notice that it is bubbly and that it has expanded. This is what mine looked like after fermenting overnight.
While the poolish comes to room temperature, work on the herb oil. Here’s what you’ll need:
For the Herb Oil: in a small saucepan combine 1 cp olive oil with about 1/2 cp fresh or 2-3 tbsp dried herbs of your choice. Heat it over medium low temperature for about 20-30 minutes, you want to make sure it doesn’t get hot enough to scorch the herbs. All you’re trying to achieve is to perfume the oil.
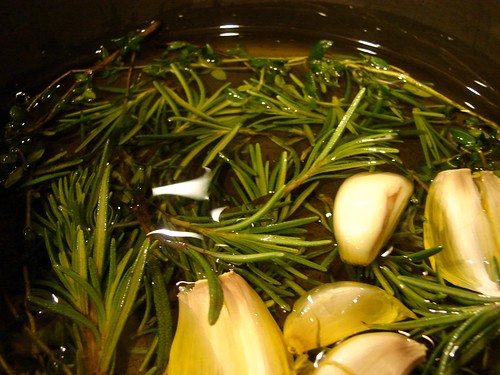
For mine I used rosemary, garlic cloves that I didn’t peel but just cut in half, and roasted garlic. Feel free to use any herbs you love, or you can add olives, sun-dried tomatoes, onions—there are no limits.
Now is time to finish the dough, for the Focaccia:
1-1/2 tsp dry yeast
3/4 cp warm water
1-1/2 tsp sugar
2-2/3 cps bread flour
3-1/2 tsp sea salt
6 tbsp olive oil
Herb oil
Dissolve the sugar and yeast in the warm water and set aside while you get the rest of the ingredients together. To the bowl with the poolish, add the flour, salt and oil, then the water/yeast mixture. Using the paddle attachment, begin beating it slowly—if you have a guard for your mixer, you may want to use it at this point. Once all the flour has incorporated, switch to the bread hook and continue beating at a medium speed for another 5-7 minutes.
You’ll know you’re done when the dough clears the sides of the bowl but still sticks to the bottom of it. You may need to add more flour or water if that isn’t happening. Remove the hook and any dough that may be stuck to it, scrape the sides of the bowl and cover it and let it rest for 20 minutes or so.
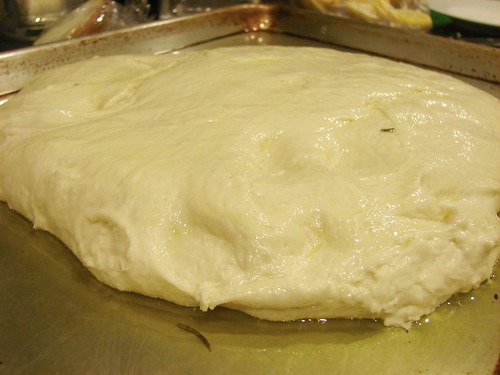
Prepare the baking sheet you’ll use to bake the focaccia. Some recipes suggest lining it with silpat or parchment paper. I did neither. Instead, I spread about 3 tbsp of herb oil, trying to avoid the herbs, on the bottom of the sheet and I smeared it really well all over and up the sides.
Dump the dough right onto the middle of the sheet, use a spatula to push out any dough stuck to the bottom of the bowl. Remember the ciabatta and how the dough is allowed to rise then it is pulled and folded? Reinhart’s focaccia follows the same principle, I followed it once and didn’t use flour.

After dropping the dough on the oiled baking sheet, I spread it to fill the sheet (as best as possible). Then I folded it into thirds, covered loosely with plastic wrap and allowed it to rest for 30 minutes.
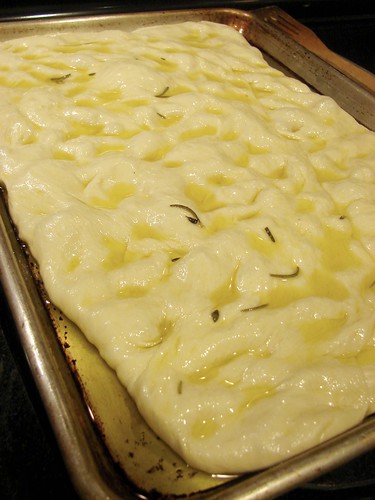
By now the dough should have swollen nicely. Dip your fingers in the oil and stretch the dough out to fill the sheet again. You may need to rotate the risen dough to better fit the sheet. Don’t worry if you don’t get dough into all the nooks and crannies, it will rise again and it will fill it up.
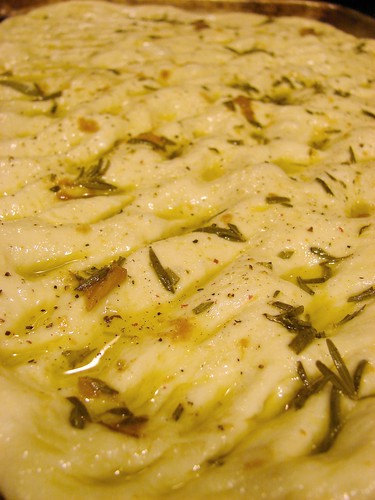
Pour more of the herb oil over the top and massage it into the dough. This will create the dips and creases characteristic of focaccia and will also allow the oil to work its magic in the dough. Feel free to allow as much or as little of the herbs to dot the top of the focaccia. Give it a sprinkling with coarse salt and freshly ground black pepper. Set it aside while you prep the oven, at least another 30 minutes or so.
In the meantime, preheat the oven to 500°. If you have a pizza stone, put it the oven as it preheats. I like leaving the stone under the baking sheet, it helps to diffuse the heat more evenly. Once the oven reaches temperature, place the focaccia sheet on top of the stone, close the oven and reduce the temperature to 450°.
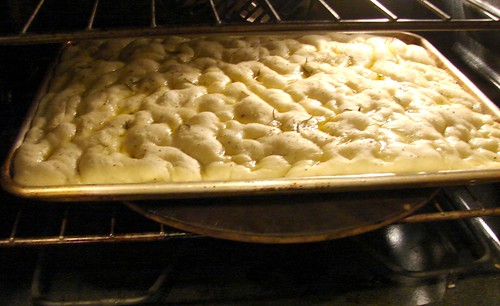
Bake for 1o minutes, then rotate the sheet to make sure it bakes evenly and bake for another 10 minutes or until golden brown.

Remove from the oven and brush with more of the herb oil. Allow it to cool for about 10 minutes before transferring to a wire rack to cool. If you’re anything like me, you will cut into it while its piping hot, who can blame you. Just look at that face!

Enjoy!

Cookingly yours,
Anamaris

Hi gang,
I have to apologize for my flakiness. I’ve been WAY under the weather with a beyond massive allergy attack that left my upper respiratory track in shreds. My doc gave me some kick-ass antibiotics and I’m on the mends.
Please stay tuned.
Difficultly breathing yours,
Anamaris
In urban slang, a ‘tool’ is generally frown upon. Gone are the days when being a ‘tool’ meant being useful. These days it just means you’re… well, a tool! A useless, undesirable, get in the way tool. That’s the way I feel about gadgets, lots of them. I cry laughing when I see all the infomercials on countless gadgets that promise to make your life easier. ‘Cuz, let’s face it, we’re ALL that much of a moron when it comes to slicing or cooking eggs, chopping onions or just using storage containers.
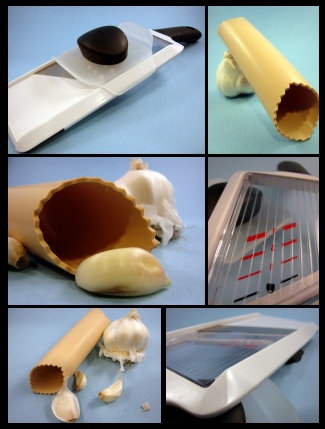
Today, I bring you 2 of my MUST HAVE gadgets, and I don’t own many. But these 2 I would rather not live without, because they ARE tools as tools were originally intended to be.
First, the Garlic Peeler. Under $10 and worth every single penny. I’m not saying you can’t peel garlic without it, or that I pull it out every time I need to peel a clove. What I am saying is that when you need to peel a few cloves at a time, or when you don’t want to end up feeling like you can ward off vampires by your scent, this IS the way to go.

I’ve had mine for at least 5 years now, and when Linz came over for dinner the first time, I used it as part of a magic trick. I’m glad he didn’t think me too silly at the time, but he was impressed by my little tool.

The other prized gadget is my handheld mandolin. I picked this up a year ago? It’s an OXO and it cost me about $20 at Williams Sonoma. I.LOVE.IT! I won’t lie to you. It’s not an item I use on a weekly basis, but it’s already paid for its investment. I use if for plantain chips, to slice potatoes and onions thinly and evenly. It gets a lot of play.

There are other, fancier versions. I imagine the ones that stand on their own would be easier to work with, but I don’t have that much storage space in my kitchen. Quite frankly, my little OXO has 3 blade settings and it does everything I’ve asked it to–and you know how much cooking I do. Proof is in the pudding, or onions, in this case.

My name is Anamaris and I approved this ad (post). 
Cookingly (and apparently sillily) yours,
Anamaris
One of the menu items for my recent 24, 24, 24 submission was an ode to White Castle burgers, at least that’s where the inspiration started. Since White Castle originated in Ohio, this seemed a fun menu item to throw into the mix as the Midwest’s representative.
First, I researched what all went into those little burgers. I remember how much I loved them while visiting Missouri. I can still picture the perfect little bread squares, the thin oniony patty and how moist it all was. From that memory, I knew I wanted to mimic the moist patty and the onion topping. I needed to decide on the bread.

I found suggestions to use hot dog buns cut in half, but I wanted more. This was the Midwest; corn is big there, isn’t it? So first I thought of cornbread, then I was hit by the lightbulb. Corn Fritters. Oh yeah. A new burger was born.
Note: This was an 8-course meal I was preparing for, so I made the onions and fried the corn pancakes ahead of time. You can do the same. Also, I served these open-faced–with a pancake at the bottom only, you decide if you want to sandwich them or not.

Burgers on Corn Pancakes with Caramelized Onions
For the Burgers:
1 lb. ground sirloin (use good quality meat)
2 tsps Worcestershire sauce
1 tsp black pepper
1/2 onion, chopped
1-2 cloves garlic, chopped
2 tsps extra virgin olive oil
Drop all the ingredients except for the beef into your blender and liquify, then add the mixture to the beef. Mix it in by hand and shape into balls just slightly larger than a golf ball. Set aside in your fridge until ready to cook.
When you’re ready to serve them, heat a medium-sized skillet until smoky. Drop 2 or 3 of the meatballs, leaving enough room between them. Flatten them out and cook for a few minutes on either side. Once you’ve flipped them, top it with one of the cooked corn pancakes. This will allow the flavor of the beef to permeate the pancake. Remove from the skillet, top with the onions before serving.
For the Caramelized Onions:
1 large red onion, thinly sliced
1 tbsp butter
1-2 tbsps extra virgin olive oil
1 tbsp brow sugar
3 tbsps sherry (or cooking wine)
2 tbsps balsamic vinegar
Sea salt & black pepper, to taste
I used my mandolin to slice the onions. I love my mandolin, it makes my life beautiful and easy when I’m facing tasks such as this one. It made slicing that onion a breeze, it took me less than 5 minutes to end up with these beautiful slices.
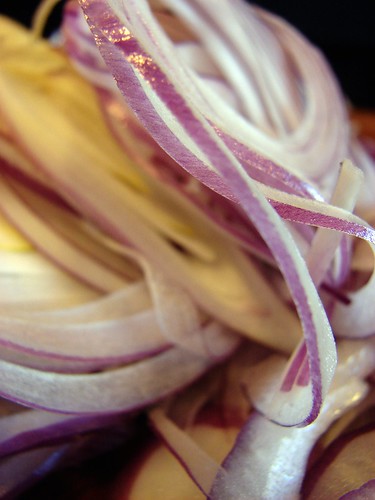
Heat up a saute pan over medium high heat and add the olive oil and butter until it melts. Then add the onions and cook them until they begin to soften.
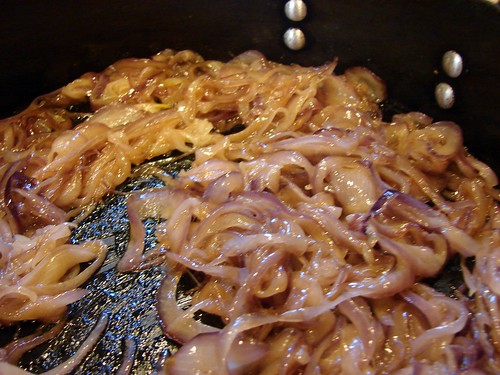
Add the sugar, this will help caramelize the onions, browning them. Once they have browned, add the sherry and vinegar. Cook until it evaporates. Check and adjust seasoning as desired. Use to top the burger patties.

For the Corn Pancakes:
3 ears of corn, shucked (about 1-1/2 cups)
 2 tbsps butter, melted
2 eggs
3 ozs whole milk
1/2 cp cheese (like Gouda, Emmentaler)
1/3 cp flour
1/2 cp coarse yellow cornmeal
3/4 tsp sea salt
1 tsp black pepper
1/2 tsp sugar
Oil for frying
After you’ve removed the kernels from the cob, add all the ingredients except the cheese and oil to your blender or food processor. Blitz it just a couple of times, you want it to be chunky. Then mix in the cheese by hand.

In a nonstick skillet, heat up enough oil to fry the pancakes, you want it to be about 1/4 inch deep. Heat the oil over medium high heat and drop the corn batter using a 1/4 cp measuring laddle or cup. Brown it on both sides, it will take about 1-2 minutes per side. Remove and keep warm.

Putting it all together: After topping the patty with one of the pancakes and allowing the pancake to heat through on the skillet, invert it onto the plate. If serving open-face: top the patty with a dollop of onions. If planning to sandwich it, place the second pancake over the patty, then top with the onions.
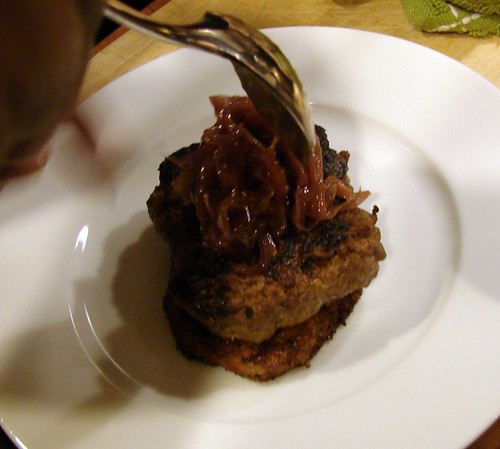
These are AMAZING. Do enjoy.
Cookingly yours,
Anamaris
Well, I don’t know what happened with my time this week. It feels like I rushed around and never caught up. I did the things I was supposed to, but the jobs were not completed.
In any case, I’m sharing this week’s photo challenge. It was suitcase, go here for more.

See ya Wednesday!

![]()


 2 oz. Irish whiskey




 Queso Oaxaca: Mexico’s take on a melty mozzarella
