I had put it off as long as possible. I had to remind myself of the advice I give my friends: ‘just try it, you may be surprised by the results’. So I did. I still have a hard time believing it. I measured. I mixed. I kneaded. I baked ciabatta and won! I mean, the last time I attempted making bread was eons ago and quite unsuccessfully.
My mom makes awesome bread. But for me, it had never worked. The yeast taste was too strong. The water I used to bloom the yeast was either too hot or too cold. I’d end up with heavy little lumps of dough and a feeling of failure. But as I’ve lurked around the Bread Baker’s Apprentice challenge pages, I kept telling myself maybe, just maybe I could try again.
First off, I read and reread Nicole’s recipe on Pinch My Salt. Her ciabatta looked so…, so… seductive. I had to try it. She used the poolish method. After I was done making jokes, I looked it up and realized that a poolish is nothing more than a dough starter, like is used for sourdough; how foolish did I feel (heh, I couldn’t help myself). I also think this might be the main reason I didn’t end up with that odd yeasty taste from past attempts. I think the poolish, since the recommendation is to make it a day ahead, allows the yeast to relax a bit and get rid of its uppity attitude.
For the poolish, I was to mix:
2-1/2 cps bread flour
1-1/2 cps warm water (from the tap)
1/4 tsp dry yeast
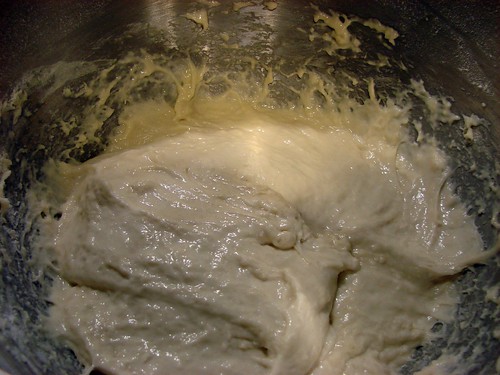
I first stirred in the yeast into the water and allowed it to hang out for 10 minutes or so. Then it all went into my trusty Kitchen Aid for a whirl until it was smooth and looked like this.
I covered it with plastic and left it on the counter for HOURS, and watched it bubble up and grow. Eventually it goes into the fridge overnight.
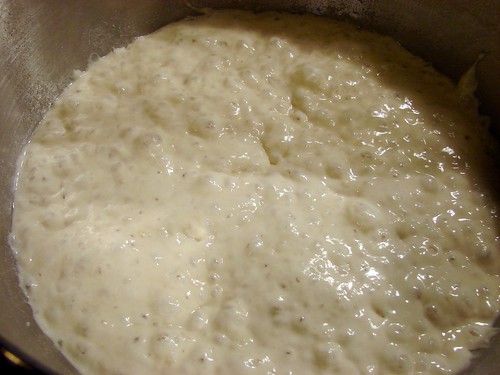
The next day, remove the poolish from the fridge at least an hour before you mix the ciabatta. See? It grew even more!
To the Kitchen Aid bowl I added:
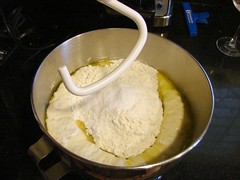 3 cps bread flour
2 tsps dry yeast
1-3/4 tsp salt (you’ll need more if using sea salt)
4 tbsps extra virgin olive oil
1/2 to 3/4 cp warm water
Then dropped the poolish right on top and let Kitchen Aid have its way with it. I started out with 1/2 cp of water, and added more to get to a wet and sticky dough. I allowed the mixer to do the heavy lifting. I beat the dough until it looked smooth and silky.
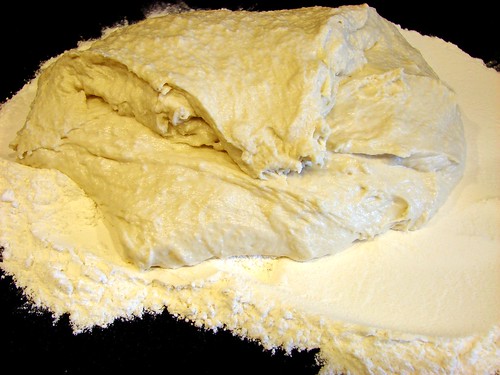
Ciabatta dough should be wet and sticky, you will not knead in any flour. Once the dough looked smooth, I floured my counter with a LOT of flour and spread it out. I then dropped the dough right in the center of the floor pool and, following Nicole’s instructions, I shaped it into a triangle… of sorts.
Cover it with plastic and let it rest for about 10-15 minutes. At the end of that time, the dough is ready to begin the stretching dance. Aside: this dough feels incredible! It feels cool and fluffy, like doughy cotton balls.
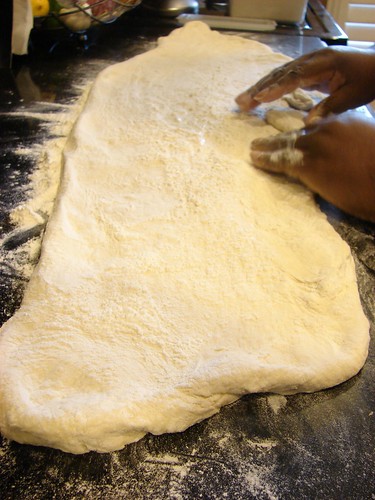
Anyway, stretch out the sides of the triangle. I stretched it out to about 2-feet wide. Remember there’s a lot of flour around the dough, you’ll want to get rid of some of the excess. I used a brush to get rid of the flour on top.
Next, fold it into thirds. Take one end and fold it over to about the center, brush off the excess flour, then take the other end and fold it over the top of the first fold. Now, cover it with plastic wrap and let it rest for 30 minutes. Walk away.
One more time. Stretch it out, brush off the excess flour, fold into thirds. Cover with plastic wrap and this time, let it rest for 90 minutes.
During this period, you should get things ready to slice the dough into  loaves and set them onto a couche to rest some more. I am not a baker, so I don’t own a fancy couche. Instead, I enlisted a few kitchen towels to do the trick.
I lined up 2 towels, then took a third one and pooled it to create a rim on one end. Left a smooth space about 4-inches wide and made another ripple. I used 2 towels to be able to create 3 spaces with rims on either side. Sprinkle flour on each space.
I also took a baking sheet and poured coarse cornmeal on the back side of it.  This will serve as your traveling suitcase for the loaves. This way you can slide them onto your preheated baking stone awaiting in the oven.
At the end of the 90 minutes, divide the dough into thirds. Stretch out each third, fold it into thirds as you did before and place the folded dough into one of the spaces of your makeshift couche. Once you have all 3 pieces tucked into their spot, cover with plastic again and allow it to rest while you get the oven going.
Hopefully you have a baking stone, if you do, put it in the oven on the middle rack. Preheat the oven to 500, it’ll take a bit longer because of the stone. You will also want to put a pan on the bottom. Ciabatta likes steam while baking, it likes to pretend it’s in the sauna room of a fancy spa–so let it. Heat up some water and keep it at a simmer. You will add this to the pan at 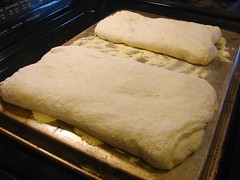 the bottom to get things hot & steamy up in der’. Nicole also recommended using a spray bottle to wet the sides of the oven while baking. Get all your gadgets ready.
Once the oven reaches temperature, it’s time to move the loaves from the cozy couche to the cornmealed pan. As you remove the loaves from the couche, stretch them out and drop them onto the pan. I have a 16-inch or so baking stone, so I was only able to fit 2 loaves at a time. Now, get ready, the next part goes kinda fast.
Slide the loaves off the back of the pan and onto the stone. You may need to help them along, but if you put enough cornmeal under it, it will slide quite easily. Push it all the way back into the oven. Then add enough water to that pan at the bottom, I added about 2 cps of already hot water. STEAM! Hurry, close the oven.
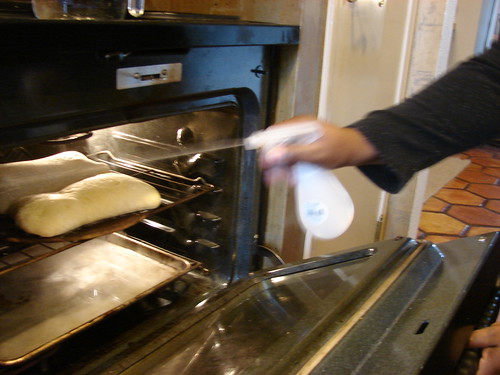
Give it a couple of minutes, then grab your spray bottle and spray the sides of the oven. More STEAM. Close the door. Wait about 30 seconds and spray again. Wait 30 seconds and repeat. Now turn down the temperature to 450. I missed this part on Nicole’s post, so my loaves were a bit too dark. They looked like my children might have. They will bake for 15-20 minutes. And you’ll have awesome bread. Hope you left some butter out.
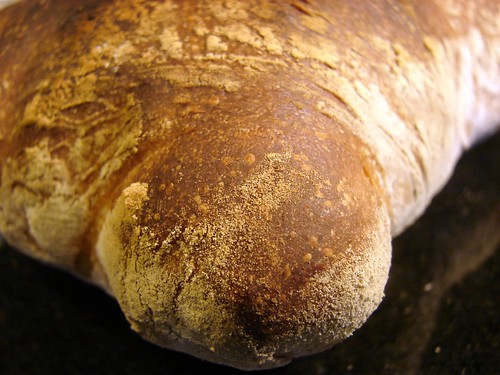
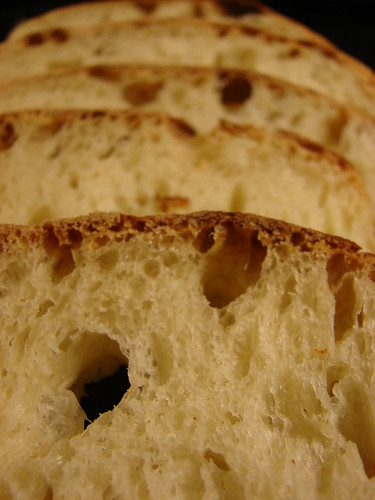
Here’s a closeup:
Now for the bragging part. I was so nervous about this. My ciabatta had holes, BABY!
But wait, there’s more…
Before I let you go, I have to thank my hubbz for the action shots. He does a really good job with those, doesn’t he?
Cookingly (and bakingly) yours,
Anamaris



Comments ( 3 )
Had a great grilled veggie on multigrain ciabatta today. I love to bake bread. I think I'll check out the KA website and see if they have a wholegrain recipe. Your holes are perfect! :)
What is KA? Bread is a bit intimidating for me, but I will try it again. Thanks for visiting!
This was so good, I couldn't help but compare it to the bread we've bought at local markets. When the veridict was in, this one had a crustier outside and softer inside. And there was something about the dough, it was aromatically fermented or something. When I read through the post, it seemed like it would be time & labor intensive, however, when I watched her make it, it didn't seem like she had to put that much effort into. A few steps, walk away. A few steps walk away. Finished bread on a cooking stone! Almost a whole loaf eaten a few minutes after it came out of the oven. You should definitely try this one.