Leeks are new to me, at least I think they are. I was updating my mom with the menu for last weekend’s Foodbuzz event and she mentioned I did use leeks in Panama. She knows everything, but I’m not sure about this little fact.

Nonetheless, I’ve quickly become a big fan of the elegant leafy… thing. I’ve used it as stuffing, in soups, but this is my first time making them an independent agent. I came across recipes for melted leeks as I conducted my research. Various methods and even more additions and omissions, in the end I settled on a recipe from the TomatoKnife. It was the simplest of them all, but the post sung its praises quite highly.
I hope you enjoy it as much as we did. This was the base for an awesome Seared Salmon with Beer Blanc.
Melted Leeks
4 cps leeks, chopped (about 3-4 bunches)
2 tbsp extra virgin olive oil
1 tsp sea salt
1/2 tsp black pepper, fresh
1 tbsp butter, optional
To prepare the leeks, first trim the bottom roots and remove the top leaves just where the stalk becomes green. You may need to peel off the first layer, as this one can be tough. Slit the stalk down the middle and wash each half under cool running water. Leeks grow close to the earth, so make sure you get in between those layers to get all the grit. Now you can chop them into half disks.
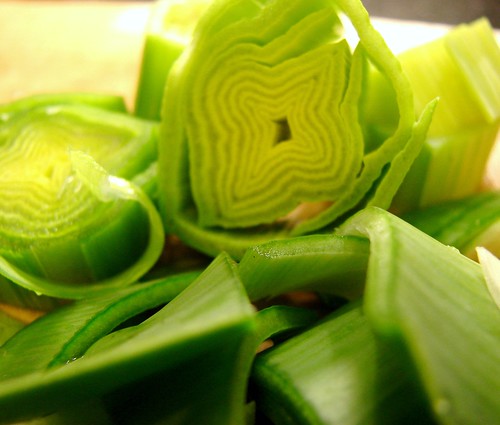
Slowly heat the olive oil in a saucepan over medium temperature, add the leeks, salt and pepper. Make sure to stir them well to coat them with the oil. Continue cooking and stirring occasionally to make sure they don’t stick to the bottom or begin to burn. You can cover them loosely in between stirs, but don’t go too far, it will take about 20 minutes for them to be.
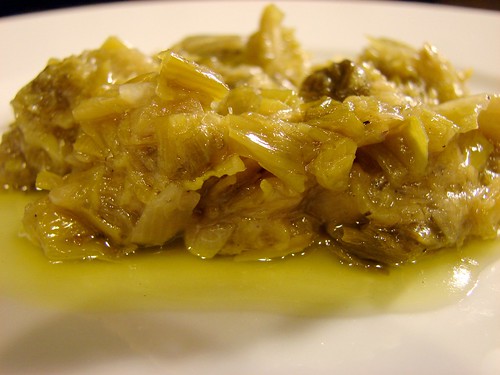
When ready, the leeks will be tender, almost pureed and beginning to brown. Add the butter just before serving, if you wish. Try these with this salmon recipe.
I know why crabs are called crabs. It’s because they’re crabby. These are some mean, vicious, unhappy, ugly little creatures. Look at that face, I don’t even think a mother could love it. Maybe that’s the real reason. Years of abandonment by the parental unit and having to live life looking…, well, like that.

But OH! How I love crab meat! Here’s some lessons learned. Blue crabs are way sweeter than the variety I got when I made my test run a couple of weeks ago. Blue crabs are also smaller, though. So getting the meat out was a SHORE! On the flip, the little blues I got this week, actually had roe in them. I guess next time it will be a call between the ease of the larger crab vs the sweetness and possible roe to be found in the blue ones. Who knows.
What I do know, is that this bisquey-chowdery-creamy soup goodness is out of this world delicious! Aside from making the stock from the live crabs, it was also a breeze. Not that the broth making was difficult, it was the crab meat pulling that proved tedious.
I did learn a little trick for dealing with the live critters. See, I’m not perturbed by their ugly little mugs. I don’t have a problem eating food that looks back at me. I can look ‘em in their beady little eyes and still eat them. But if there had been a candid camera in the kitchen the day I was trying to get these in a pot, it would’ve made for funny footage. Every time one of the little suckers moved, clawed or reared up, I had a similar and equal reaction. Plus I kept picturing them getting on the floor and scurrying around while I tried to catch them. That’s why this tip is so awesome.
If you put them in the freezer for a few minutes-30 or so, they go into a little slumber that gives you enough time to clean’em up and pot them. All I did was leave them in the bag they came, shove it in the freezer and ignored them for a while.

While the crabbies chill out, pun intended, get started on the stock. Any veggies you have laying around will do. I had onions, garlic, celery, carrots, the tops of some leek bunches. No need to get fancy with any of these, a quick rinse and rough chop is good enough. I even left the skins on the onions, garlic and carrots.
Just put the whole thing in a stockpan, add enough water to cover the crabs once you put them in (about 12 cups or so). Add a couple of bay leaves and if you have whole peppercorns, throw about 1 tbsp of those in. I put them on the cutting board and squashed them with the handle of a heavy knife, just enough to break them a bit. Add 2 tbsp of sea salt, cover the pan and bring it all to a boil for about 5-10 minutes. While this is happening, get back to your crabs.

Once you’ve gotten the crabs good and drowsy, it’s easy to remove the big front claws. You want those off before they wake up again or you may end up missing a finger. With the claws removed, you can now give them a little scrub to get any debris off. Don’t forget these are bottom-feeders.
After cleaning them, remove the little plate that protects their underbody. Don’t dispose of it, though, any and all shell matter will enhance the stock you’re about to make.
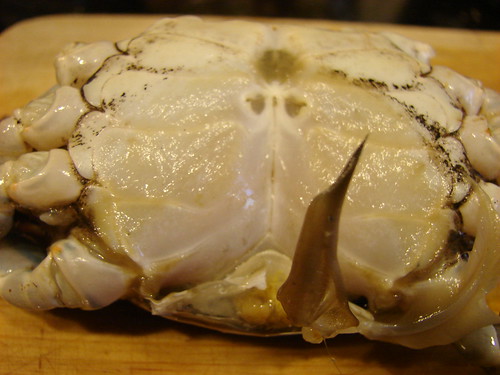
Next, take a knife and break straight through the crab. Essentially, cut the sucker in half. When you remove any pieces from the crab, there will be a bit of liquid that comes out, make sure you’re breaking the crab over a bowl and do the best you can to hold on to that liquid. I can’t be sure, but I would think it is similar to the juice you find when you open an oyster.

In any case, place the crab pieces into a bowl until you’re ready to throw them into the stock. Break apart the little legs too, there’s hardly any meat in them and you can leave those in the stock while you shell the meaty parts.
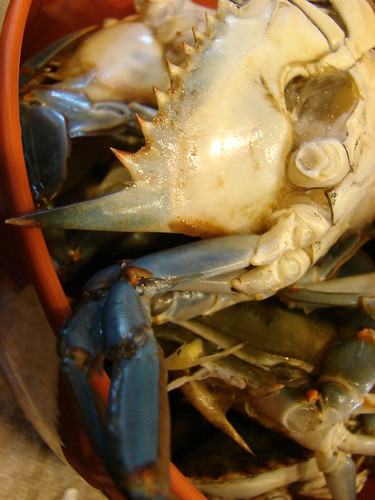
With the crab cleaned, you’re ready to cook them. While the stock is still boiling, drop all the crab pieces in and allow them to cook for about 10-12 minutes. After that time, you’ll want to remove the pieces that hold meat and shell them.
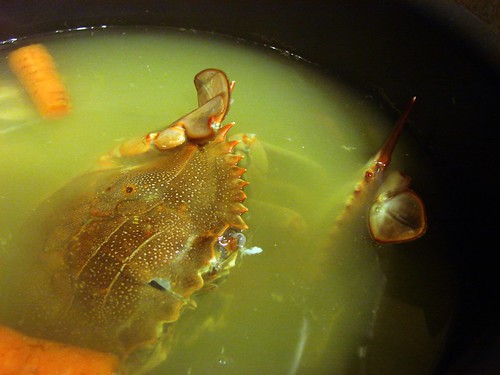
The shells will turn a pretty shade of orange. Lower the temperature on the stock, you now want it to simmer. As I mentioned, any portions that do not hold meat can stay in the pot. Allow the meaty pieces to cool before you begin handling them. As you remove the meat from the shells, throw the empty shells back into the stockpot.
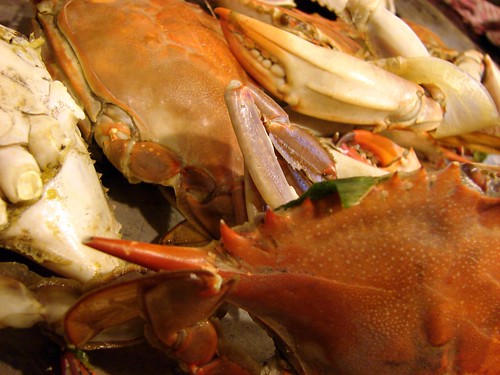
Allow the shells to cook in the stock for about an hour or so. Then turn off the heat and let it cool. Remove all the large bits out of the stock and strain it through a fine sieve. Set the stock aside. Next, we’re starting the soup.
As luck would have it, I didn’t have an actual working recipe, I found a ‘how to make it’ blurb that sounded as authentic as this soup can get and I went with that. I will share a ‘this & that’ recipe with you since I made it twice. I can tell you that it’s not one of those dishes you can mess up. Once you have the stock, it’s easy-breezy.
Back in the day, this soup was made with female crabs and their roe was harvested and added to the broth. You may have a difficult time finding crabs with roe, as crabbers are required to toss them back in the water. The little blue crabs I purchased for the second soup, had tiny bits of roe inside. Yep, I kept it and added it to the soup; I didn’t have any the first time and I couldn’t tell a difference in the taste. What I’m trying to say is, roe isn’t a deal breaker.
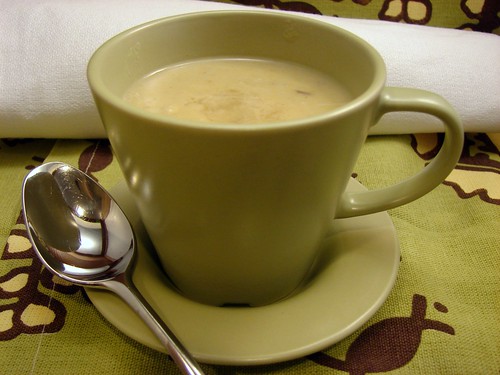
She Crab Soup
To make about 12 cups of soup:
2 tbsp extra virgin oil
1 large onion, chopped
3-4 garlic cloves, chopped
2 celery stalks, chopped
2 bay leaves
2 cps whole milk
1 cp sherry, plus more to serve
10 cps crab stock
1 cp long grain rice
1 tsp Worcestershire sauce
Sea salt & black pepper
1/4-1/2 tsp mace
1/2 cp heavy cream
About 3 cps crab meat (whatever you pulled from the live crabs, plus 1 store-bought container–approx 8 oz)
In a medium sized pan, heat the oil before adding the onions, garlic and celery, cook them until they are clear. Add 1 cp of sherry to deglaze any drippings that may be stuck to the bottom of the pan. If you found any crab roe, add it now together with the bay leaf, rice and stock. After it begins to boil, add the milk and lower temperature to a slow simmer. It will need to cook for about 30 minutes for the rice to soften. Make sure you stir it every once in a while.
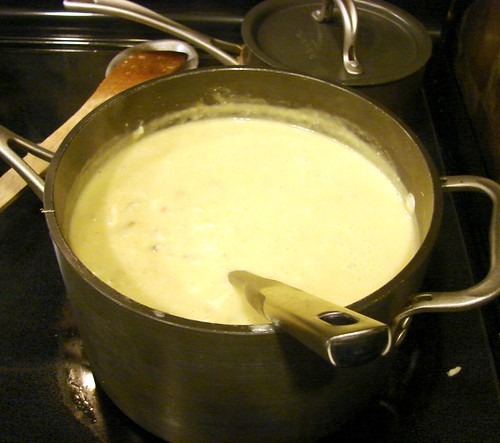
Once the rice has cooked and exploded, remove the bay leaves and ladle this broth into the glass of your blender and puree it. This part can be made ahead of time and refrigerated until you’re ready to serve it. The rice thickens this soup nicely and makes it unnecessary to add lots of cream.
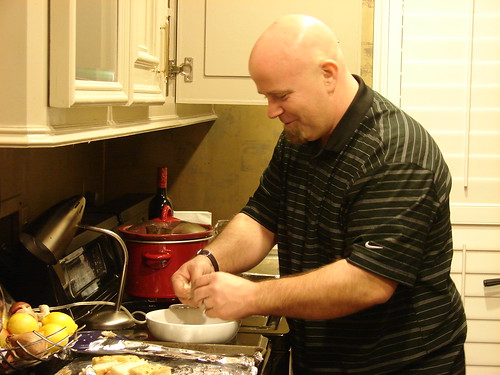
That's hubby making sure there are no shells in the crab meat
Just before serving, heat the blended broth, add the cream, Worcestershire and mace. You can add some hot sauce or cayenne pepper, if you’d like. Finally, add the crab meat and season with salt and pepper, if needed.
To serve, add about 1 tsp of sherry to the bottom of the bowl before ladling the soup. This soup saves quite well in the freezer.
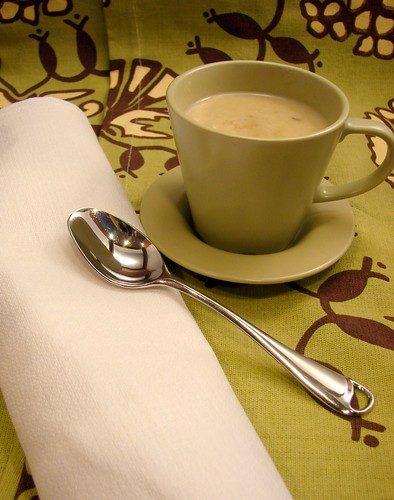
Enjoy!
Cookingly yours,
Anamaris
As a Foodbuzz featured publisher, I was given the opportunity to prepare and document a meal. The concept was to have friends over to enjoy dishes from the various US regions and pair them with US wines.
24 = 8 Foodies + 8 US regions + 8 Pairings
Food and wine pairing has always been fascinating, and daunting to me. I’m not sure how someone develops their senses to the extent necessary to accurately pair a dish with wine that enhances it. That was my goal. Hang out with food and wine loving friends, and experience how wine and food play off each other.
First, divide the US into regions:
- New England: Connecticut, Rhode Island, Massachusetts, Vermont, New Hampshire, Maine, New York, Pennsylvania, New Jersey and Delaware
- Mid-West: Ohio, Michigan, Indiana, Iowa, Illinois, Missouri, the Dakotas, Nebraska, Wisconsin, Minnesota, Kansas and Oklahoma
- West: Nevada, Utah, Colorado, Idaho, Wyoming and Montana
- Deep South: Virginia, West Virginia, Kentucky, Tennessee, Arkansas, the Carolinas, Georgia, Louisiana, Alabama, Mississippi, Florida and Maryland
- Southwest: Arizona, New Mexico and Texas
- Pacific Northwest: Oregon and Washington and Alaska
- California
- The Islands: Puerto Rico and Hawaii
After research, the menu went a little something like this.
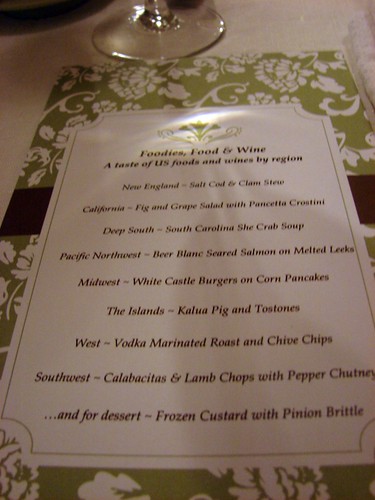
Next, to figure out the wines for these meals. The tricky part, but quite rewarding. The internet is your friend. And mine. I took full advantage of this technological advance. There are 2 sites I found especially helpful. The first one helped get in the right wine range. That is, I typed the general type of food and it gave me suggestions for the best wine pair. Wine Review Online provided choices for specific dishes/recipes as well as by ingredient. The members of the site then offer up reviews of some of their favorites bottles.
Once I knew what type of wine or grape varietal I should be aiming for, I was ready for specific bottles. I wanted all the wine selections to be under the $24 price point, preferably under $20. Good Wine Under $20 was just the right spot for me. I am SO glad I found this site. It is comprehensive and easy to follow and the blog owner provides you with clear reviews about the various wines. Just what I needed.

Menu in hand and with my pairing recommendations, this is how the evening played out. Our guests began arriving around 6:30. I printed out the menus and in the back of the card I provided space for each guests’ comments–their thoughts on the dish and how the wine enhanced it, would they ever like to try it again, etc.
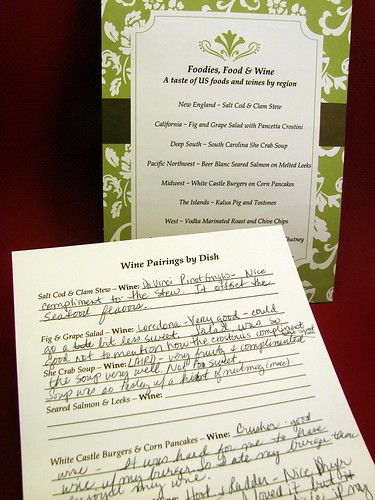
This was a pretty informal bunch, as they arrived we discussed whether to eat the dishes in the ‘proper order’ (salads, seafood, dark meats) or if they just wanted to enjoy the dishes randomly. We agreed on a random approach, none of us seemed terribly concerned with following the white then reds rule. Additionally, most of us have a preference for red wines. In any case, off to the first course we went.

First up, She Crab Soup: a specialty from the South Carolina low country and the signature dish of Charleston. This soup starts off with a crab stock, cooked onions, celery and rice to arrive at the final product. The addition of sherry and mace gave this soup a deep flavor that proved to be highly satisfying with our guests.

Pairing: Grant & Amy chose a bottle of 2008 Laird Sauvignon Blanc. On their comment card they mentioned the soup was great and light with a great nutty taste which paired perfectly with the oaky finish of the wine. Complimenting its smooth body and melon undertones’.
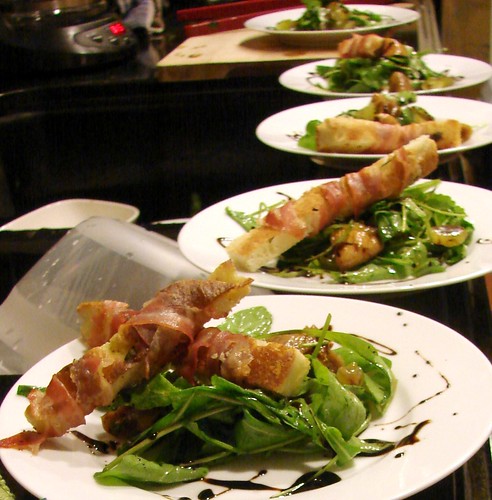
We then moved on to California cuisine with a Fig and Grape Salad with Pancetta Crostini. This was a salad by Alice Waters, one of the chefs who’s had great impact on California’s cuisine. The salad combines arugula, figs, grapes and a balsamic vinegar reduction together with crostinis– bread sticks of focaccia–wrapped in pancetta. The suggestion from my local wine specialist was for a Riesling.

Pairing: I selected a Riesling by Loredona in Monterey County. I found that this wine really balanced the peppery arugula with the sweetness of the figs and balsamic reduction. White wines aren’t my first preference, but this Riesling was not too sweet, while still being refreshing and slightly tart.
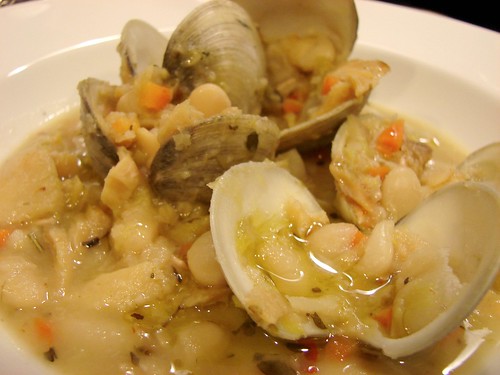
For the New England area, we served a Salt Cod & Clam Stew. The base included cannellini beans, leeks, salt cod and clams. One of the suggestions was to pair it with a Pinot Grigio. Jay and Angie brought us a bottle of DaVinci Pinot Grigio. Apple and citrus flavors helped to tone down the saltiness inherent to the cod.
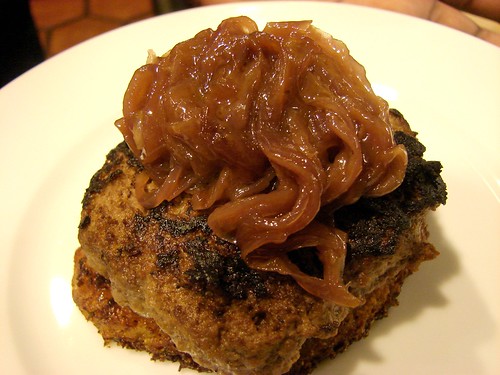
For the Midwest we took a stab at White Castle burgers and saluted the corn growers in the area. This course was an open-face White Castle inspired burger–served on a corn fritter and topped with caramelized onions. The wine recommended was a Petite Shiraz.

Pairing: GWU20 suggested a bottle of 2008 The Crusher Petite Shiraz and OMG! This is a beautiful wine! We were first struck by the color; the deepest purple I’ve ever seen in a wine. This is immediately followed by the herby and fruity aromas emanating from the glass. Someone commented on how the wine complimented the sweetness of the onions and peppery notes in the burger. This is a bottle that will always be on our shelf.

For the Southwest we had Lamb Chops with Pepper Chutney and Calabacitas. Mildly gamey, tender meat that comes alive with a sweet and spicy chutney that brought your mouth to life. The wine suggested was Cabernet Sauvignon.
Pairing: We selected a bottle of Barefoot Cabernet Sauvignon. This is definitely a budget bottle, but it tamed the heat of the chutney while bring out the sweetness and peppery notes of the dish. For a bottle under $10, it was a nice compliment.
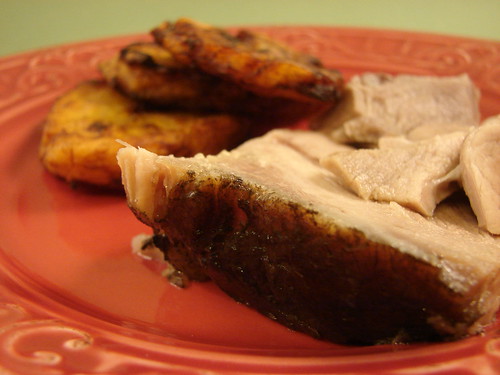
The islands: Hawaii & Puerto Rico. Kalua Pig and Plantains-I made a last minute change and included both, green and ripe plantains. This was the sleeper dish. Nothing about it was supposed to be exceptional, and yet, it was. The pork is rudimentary seasoned with Hawaiian salts and slow cooked wrapped in banana leaves. There’s no smoke and mirrors here, it was straight forward meat preparation. Meat+salt+garlic+wrapping (leaves)+ slow cooking.
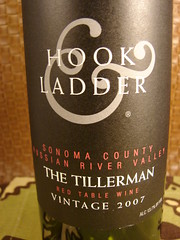
Pairing: Hook & Ladder The Tillerman. This is a nice Cabernet blend with a rich medium body. Not too boisterous to overpower the simplicity of the pork, but not shy enough to be ignored.
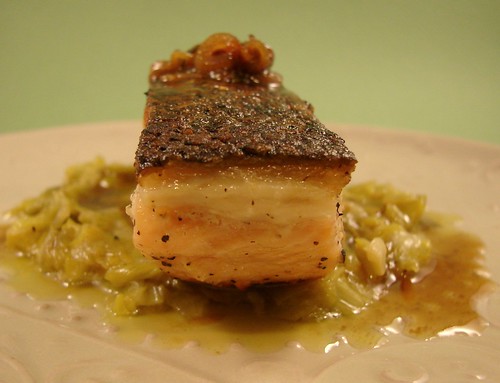
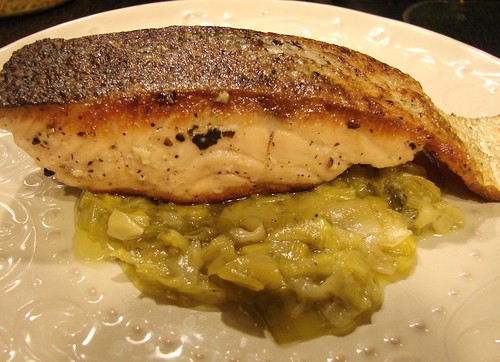
The Pacific Northwest was well represented by salmon. A pan seared Salmon Beer Blanc over Melted Leeks turned out to be a beautifuly simple dish. The salmon drippings were deglazed with a bit of shallots and red ale. And the leeks were cooked down in olive oil leaving a creamy oniony puree. The wine recommendation was a Pinot Noir.

Pairing: Toad Hollow Erik’s The Red. An awesome blend of about 18 varietals makes it an awesome house red. It was smooth and herby, which contrasted wonderfully with the leeks and oiliness of the salmon.
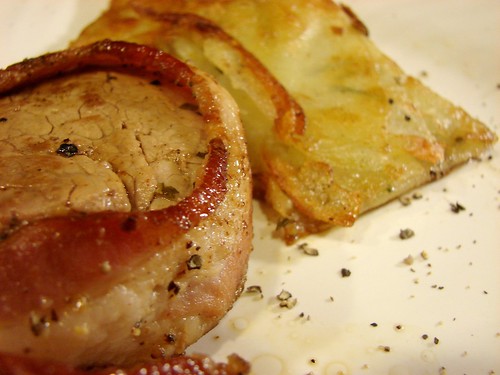
The Western United States brought us up close and personal with meat and potatoes. The last minute substitution of filets instead of roast and potato gallette instead of chips was quite well received. The wine recommendation was Zinfandel.

Pairing: The beef was marinated in vodka, salt and garlic, then seared wrapped in bacon. A side of potatoes and chives rounded up the plate. An Old Vine Zinfandel by Bogle proved to be the right wine, providing a nice spicy finish to the almost creamy, delicate texture of the filets.
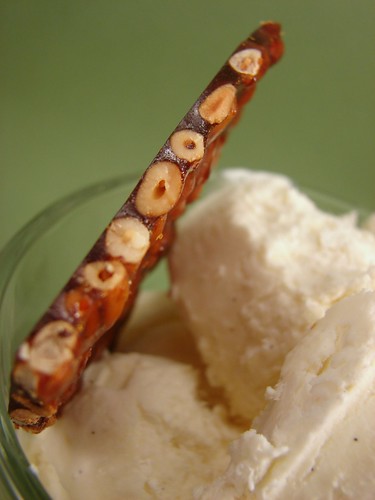
Then there was dessert. Vanilla Bean Frozen Custard with Pinion Brittle. Creamy, cold, coupled with a nutty and slightly bitter brittle. This was served with Trentadue Chocolate Amore. It’s a merlot based, chocolate flavored dessert wine. I heard no complaints.

Lessons Learned
- An evening with 8 meal courses is VERY ambitious. I don’t think they’ve invented stretchy enough pants yet. However, when you hang out with friends who love eating and drinking as much as you do, anything is possible.
- Wine and food are like an old married couple: they don’t always like each other, but they just make each other better. All that’s required is a willigness to discover each other’s secrets.
- Food & Wine Pairing doesn’t have to be rocket science. Google is your ally and so is the quirky person that answers your wine questions at the store. If you don’t know, just ask.
- It’s always about what works for you. Don’t bog yourself down with rules. Taste foods and then have some wine, you may find that it brings out something unexpected.
- Wisdom comes from experience. Play with your food and wine, experience and experiment, then document for future generations.
Thanks again to Foodbuzz for the opportunity to throw down with wine and food and to share this with friends and all of you. The various recipes will be posted throughout this week, you really don’t want to miss them. There were a lot of very surprising treats.
Cookingly yours,
Anamaris
Sides can be daunting. Veggies can be… y’know. Green. And if that’s not your favorite color, then they’re a drag. As I’ve gotten older, grown up, I’ve developed an appreciation for certain veggies. I’ve actually come to LOVE some of them. Asparagus definitely fall in that very small percentile. I L.O.V.E.me some asparagus.

A few months back I was watching a travel show, I think it was Samantha Brown in SF. She was showcasing a cooking school in town. This was the first time I saw asparagus rolled in prosciutto. These days I see it almost every time someone is making asparagus. Nonetheless, I thought it was an awesome idea and couldn’t wait to give it a try.
However, the more I thought about it, I felt the prosciutto may just dry out. That, in my book, is a serious offense against pork. Alas! Lightbulb moment. Sub prosciutto for bacon and thus it went.
This is so ridiculously easy AND delicious you won’t be able to stop making it. And if you have picky eaters, who can say no to bacon? Seriously.
Bacon & Asparagus Roll
16 asparagus spears
4 slices bacon, thick
Black pepper, to taste
Trim and peel the asparagus: Bend the bottom inch or so of 1 spear, it will break where the tender part begins. Then use that spear as a guide to cut the other spears. To peel, use a potato peeler and peel about 1-1/2 inches from the bottom. This is not a necessity, but sometimes the peel can be a bit tougher than the flesh and you’ll end up with stringy asparagus. Rinse and pat dry. Set aside.

Place the bacon slices on a cutting board and thin it out a bit to make it more pliable.

Divide the asparagus in 4’s. Tuck 4 spears together and lay them on top of a bacon slice. Wrap the bacon around the bottom of the asparagus, then continue rolling the bacon towards the top of the asparagus bundles.
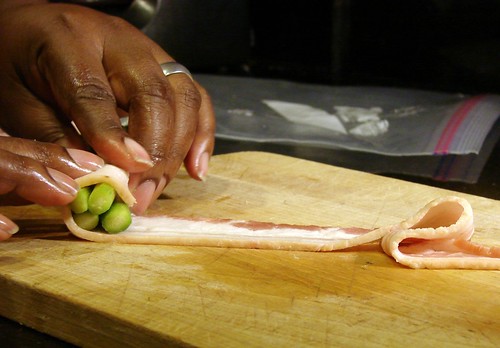
Hubby can tuck the bacon under to secure it… I must admit when he makes these, they’re way prettier than mine. I just use a toothpick and secure the bacon to the asparagus. Repeat this process for the other 3 bundles.

Heat up a skillet–preferably non-stick–over medium high heat and place the bundles about 1-inch apart from each other. Sprinkle with fresh ground pepper. Brown the bacon on all sides, about 2 minutes per side.

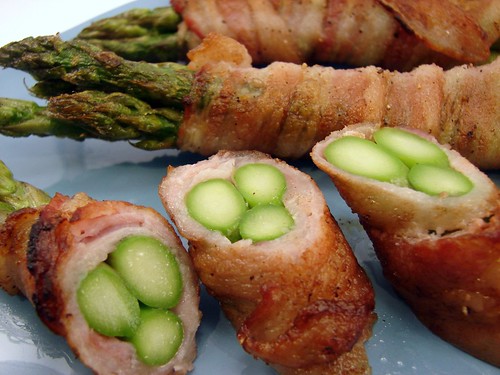
Remove from the skillet and set aside. Carefully remove the toothpick before serving. Hubby likes to slice them so they look like sushi.
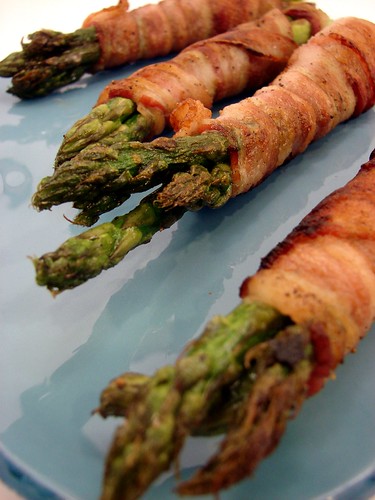
That’s it. Enjoy!
Cookingyly yours,
Anamaris
I should start by admitting my addiction to puff pastry. It’s true. My name is Anamaris and I’m a Puff Pastry Addict. There. I feel better already. Mind you. I don’t think I’ll EVER attempt making my own puff pastry (knocks on wood, throws salt over shoulder). I love homemade, but I just don’t think I can make it for less than what it costs me at the store. I’m sorry, Martha.
Pre-packaged puff pastry is God’s gift to harried hostesses. It was conceived for people who love flaky things, but don’t have the time or skill to make it themselves. Yet, they long to whip up a batch of something delicious, pull it out of their ovens with a flourish and impress their guests. Oooohs and Aaaahs ensue. Cue the violins and chirping birds. Sorry.
Anydoo, how better to impress that special someone in your life on V-day than with a dish that looks like you slaved all day over a hot stove and a hotter oven? Hmm? Hmm? I bring you a twist on traditional Chicken Cordon Bleu. I present for your consideration…

Chicken Cordon Puff
2 chicken breasts, skinless & boneless
1/2 cp Italian dressing (salad dressing)
2-4 slices bacon, thick cut
3 ozs Gouda cheese, or your choice
1 sheet of puff pastry, thawed
1 egg, beaten
First you will need to butterfly or split the breasts in half and even them out. Place the thickest side of the breast closest to you. Make sure you’re working with a very sharp knife. Place your hand over the breast and guide the knife into the flesh. Your goal is to thin out the breast so that the thickness is all pretty even. Carefully work the knife through the breast, making sure you don’t go all the way through. You’re simply opening up the breast.

Once you’ve finished both breasts, you will need to even out the thickness. The easiest way is to use a ziploc bag large enough to hold one at a time; cut the bag open on one side and the bottom. Lay the breast down on one side of the bag, top it with the other end then use a mallet or a flat heavy pan to flatten the breasts out.
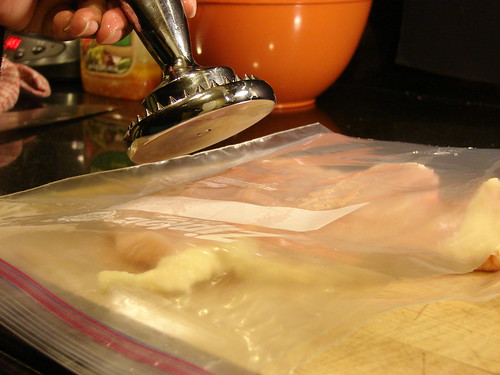
Pound it out a few times, just until it looks even. After that’s done, pour the salad dressing over both breasts, allow them to marinate while you get the other ingredients ready. Set aside.

Stretch out your bacon slices. Depending on the size of the breasts you will need 2 or 3 slices of bacon to roll each one. I used 2 for mine. Slice the cheese into 1-inch wide strips, long enough to go the length of the breast. Set aside.
Time to assemble it. Spread out the breast on your counter and place 1 slice of cheese each on one end of it.
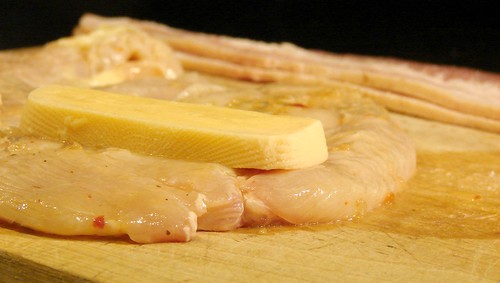
Now roll it tightly, tucking any straggling ends towards the center.
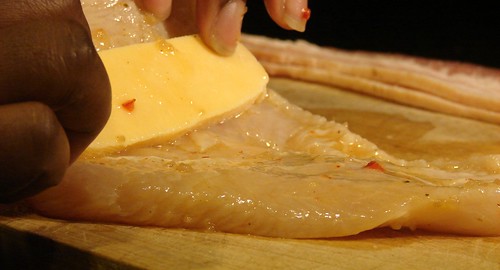
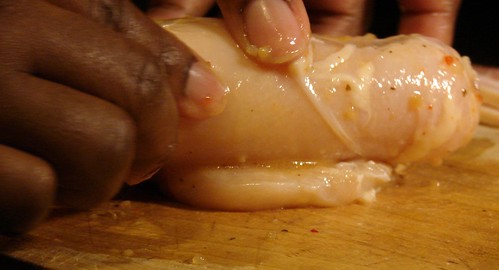
Next, roll it in the bacon. Start at one end and work yourself towards the center. Then start the second slice from the opposite end and again work towards the center.

Set aside when done.

Line a baking sheet with parchment paper and set aside. Remove 1 sheet of the pastry and spread on a cutting board. When you open the package, you will notice that the sheet is folded in thirds lengthwise. Cut the sheet in half across the thirds. Stretch the pastry out a bit; be careful not to pull on the folds. Instead, pull between the folded sections.

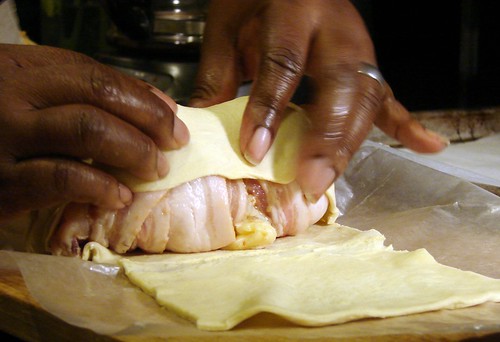
Place one of the bacon-wrapped breasts on one end of the pastry and roll it to the other end. Try tucking in the sides as you roll it. Once you get to the end, pinch the seams and try to have all the seams at the bottom of the roll. Place it on the baking sheet and repeat with the other one.
Brush the tops and sides of both bundles with the beaten egg. Using a sharp knife, score the tops of each roll. You can get creative here. Just make sure 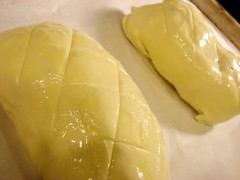 there are a couple of scores deep enough to go all the way through to the bacon. This will allow the contents to breathe without making the puff pastry go POOF!
Pop them into the freezer or fridge while the oven preheats. Preheat oven to 400°.
Bake them for 15 or until golden brown. Remove from the oven and allow them to rest for 5 minutes before cutting into them.
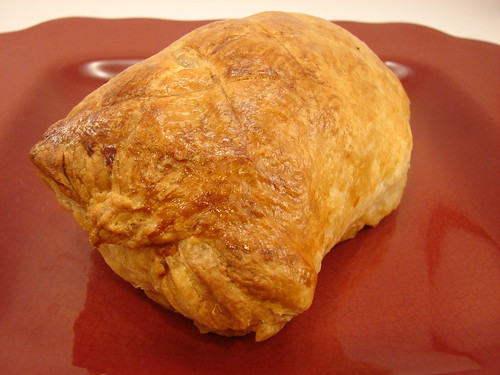
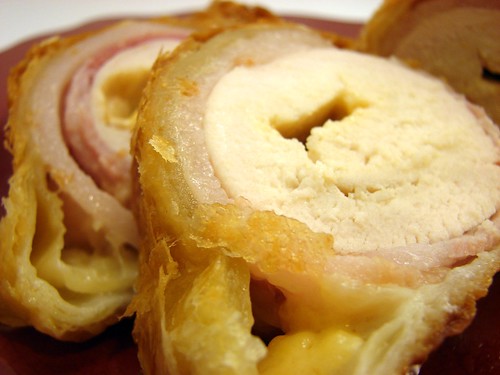
Slice before serving. Voila!
Cookingly yours, Anamaris
Yep. This is my 100th post. This came around FAST. I didn’t know what I wanted this post to be about. I toyed with the idea of making it a Best of, or maybe a My Fave recipes. In the end, I decided to go back to the beginning. The beginning of this blogging adventure.
Once upon a time… No, I won’t do that to you. I will tell you it was about 6 or so months ago. I had bought a bunch of leeks, a new ingredient for me, and decided I would stuff a pork shoulder with them. My plan was to debone the shoulder, stuff it and tie it–also a first for me. I was nervous about tackling all these firsts and I started to think about others who may feel the same way about cooking in general.
I often tell friends not to be afraid to try cooking. I truly believe anyone can cook, all you need is a desire to. So as I stared at that shoulder and the leeks, I began to wonder how I could hold someone’s hand through a similar moment. I began wondering if I could somehow provide support, or share ideas, could I inspire someone? I know, a bit grandiose, but in my heart of hearts that’s what I hoped for.
So, on I went deboning that shoulder and chopping those leeks and trussing that baby up. And I giggled at my deformed shoulder roll thing. And I licked my fingers after tasting the leeks. And I smiled when Linz mmm’d and aaaa’d. And I thought, yeah, I want someone else to feel this way. And, so it began.

I hope you enjoy the recipe as much as we did. And thanks for reading and, hopefully, eating with us.
Roasted Pork with Leeks
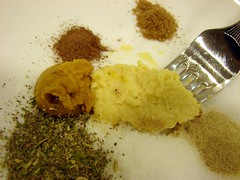 1 5-7lb Pork shoulder roast
For the rub:
4 cloves garlic, crushed
1 tbsp sea salt
2 tbsp English mustard
1 tsp cumin
2 tsp dry oregano
1 tsp allspice
1 tsp coriander
2 tbsp olive oil
If you’ve started out with a bone-in shoulder, you’ll need to remove the bone. You could also use pork belly for this and avoid dealing with a bone.
 To debone the shoulder, I started out by cutting straight through the roast, cutting down until I hit the bone. I didn’t take step-by-step pictures of this part, how about you go here for those. When done, set it aside while you prepare the rub.
For the rub, mix all the ingredients listed above, making them into a paste. Liberally rub it all over the roast on both sides. Set it aside while you prepare the filling.
For the filling:
1 bunch of leeks, chopped
1 cp mushrooms, chopped (I used crimini)
2 shallots, chopped
1/2 cp Italian parsley, chopped
1 red pepper, chopped
2 tbsp olive oil

In a medium skillet, heat the oil and add the shallots and pepper, after a couple of minutes add the mushrooms and leeks. Once the leeks begin to soften, add the parsley. You can season lightly with salt & pepper. Allow it cool for a few minutes before filling the roast.
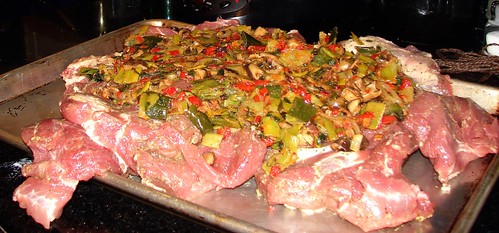
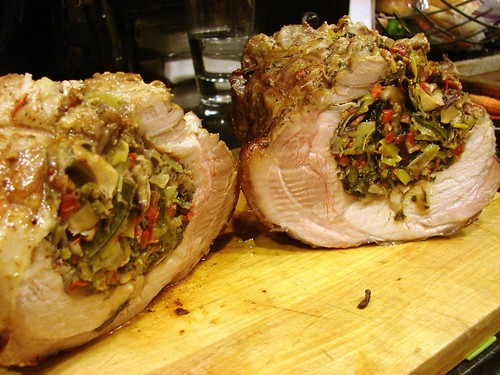
Preheat oven to 400° and get some cooking twine ready. Now for the antsy part… Spread the roast out on your counter. Top it with the leeks filling. Bring the sides of the roast together and truss it with the twine. The one thing you want to achieve, is to make the it as even as possible. That way it will cook at the same rate. Remember to soak the twine before trussing.

Once you’ve tied it up, place the roast on a roasting rack with a pan underneath to catch all the yummy cooking juices. Pop it in the oven for 15 minutes, just long enough to get some nice color on it. Then lower the oven’s temperature to 350° and roast until the internal temperature reaches 170° to 175° (about 35-40 minutes per pound).

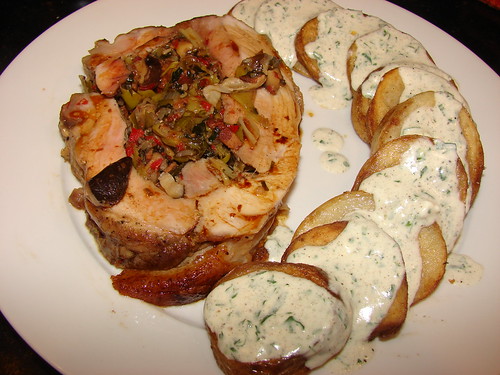
Remove it from the oven and allow it to rest for at least 10 minutes before removing the twine and slicing it. You can serve it with the pan juices or make a gravy with them.
Cookingly yours,
Anamaris
Jen, from The Leftover Queen, has a monthly contest featuring 3 predetermined ingredients. She calls it the Royal Foodie Joust. For February, the ingredients are fish, coconut milk and nutmeg. I simply had to enter. Those are 3 of my favorite ingredients.
Coconut milk is ever present in Panamanian & Caribbean cuisine, besides that, I LOVE the flavor it imparts to food.
Fish–well, I come from a country which name means ‘abundance of fish’. Need I say more?
Nutmeg. I love its smoky, sweet aroma and taste.
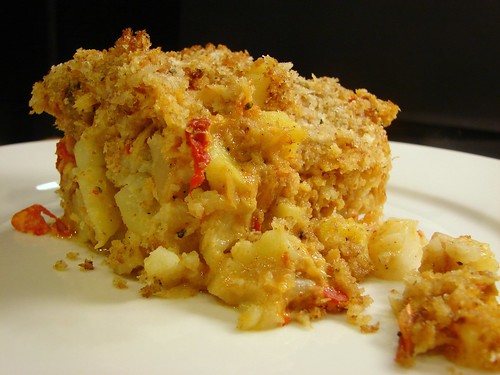
There’s a dish my mom prepares, a casserole of sorts. She recently reminded me of it and I’ve had it on my to do list for a few months. Turns out, I’ll be using my mom’s basic dish, then tweaking it to fit the joust.
Her dish calls for bacalao (salted dry cod), potatoes and a béchamel sauce. Can you guess? Instead of béchamel, I’m using coconut milk, yeah baby, yeah! So, without further, you know, babbling, here’s the recipe.
Bacalao Casserole
1 lb bacalao (dry salt cod)
1 onion, sliced
1 red pepper, chopped
3 slices bacon, chopped
2 cloves garlic, crushed
1 tsp habanero sauce (optional)
1/4 cp white wine
1 cp coconut milk
1 cp water
1/2 tsp nutmeg
6 potatoes, peeled and cubed
2 slices bacon, chopped
2 tbsp olive oil, approx
1 tbsp butter
1/2 cp panko crumbs
1/2 cp bread crumbs
First you need to reconstitute the bacalao. Reconstitute is a fancy way of saying hydrate. Put the cod in a bowl and add boiling water, let it seep for about 15 minutes. Drain water and repeat the process once more or until the fish feels pliable. Drain and shred the fish. Set aside.

I weighed the contents of a 1lb container, it only weighed 12ozs
In a medium skillet, fry the bacon over medium-high heat just enough to render the fat and give it a bit of color. Add the onion and cook until translucent, then add the red pepper. Cook until softened. Add the bacalao, garlic and habanero sauce, stir until all the ingredients are incorporated.
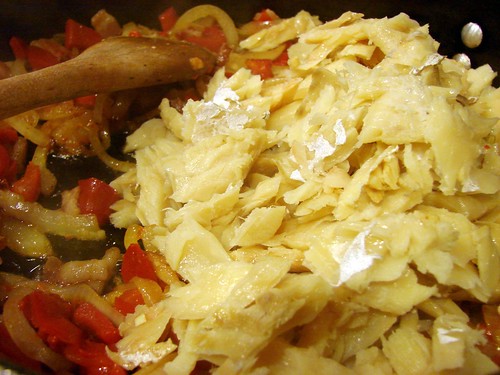
Add the wine and cook it down until evaporated, this will only take a minute or two since the pan is quite hot. Once the wine has evaporated, add the coconut milk, water and nutmeg. Stir and bring it to a boil, then turn down the temperature to a simmer and cook covered for about 20 minutes. The flavor of the coconut milk intensifies overnight, so I did this part of the recipe the day before I served the dish.

Preheat oven to 375°.
Lightly brown the bacon in a skillet, remove and drain. You want your potatoes cubed pretty small. Add enough oil to the skillet to be able to brown the potatoes. Fry the potatoes in 2 batches. Once you have browned the first batch, transfer them to an ovenproof dish. Finish the rest of the potatoes, then mix in the bacon right into the baking dish.
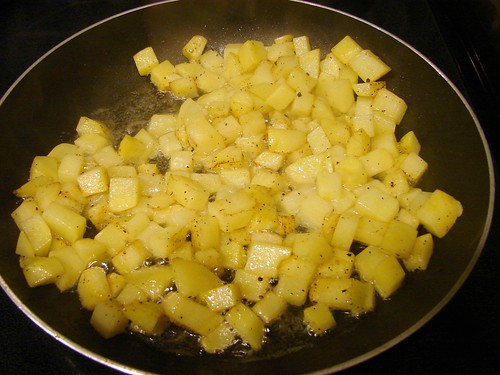
In the same skillet, melt the butter and add the breadcrumbs, stir them frequently until lightly browned. Set aside.
Add the bacalao mixture over the potatoes, then top the potatoes with the breadcrumbs. Bake for 20 to 30 minutes. Allow it to sit for 10 minutes before serving. This would go beautifully with tajadas.

By the way, come check out the other entries and vote for me!!! Rock the Vote!
That’s it. Enjoy!
Cookingly yours,
Anamaris
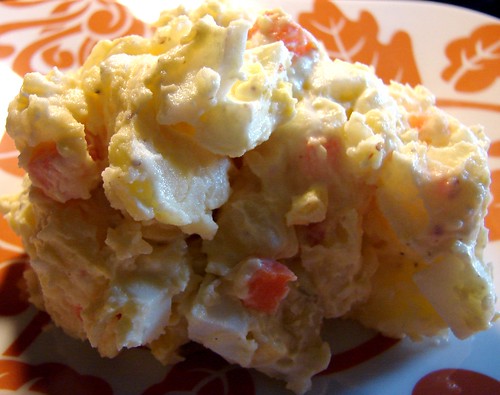
Yes, I’m going to be obnoxiously braggy about this one. I’m sorry, but I can’t help it. Well, I could help myself, but I don’t really want to. I love my potato salad. I just do. I try other potato salads, but I always come back to mine.
I object to the mustard base potato salad so popular here in Houston. I don’t really care to have bits of onions in it, because it reminds me of salads gone wrong after a day of hanging out by the beach. Don’t bother trying to make it healthy for me with bunches of carrots or celery. And please don’t be stingy with the eggs OR the mayo.
My salad is a combination of my mom’s and one of her best friend’s recipes. After my sis-n-law brought me Piment d’Espellete, I’ve incorporated it into my recipe, but it isn’t necessary. It’s creamy. It’s eggy. It showcases the potato’s sweetness. It’s just good. Grab some potatoes and go to work. You’ll see what I mean.
Mi Ensalada de Papas
Yield: approx 6 cups
 5 large Yukon Gold potatoes, peeled and quartered
1 medium carrot, halved
1 tbsp sea salt
4 eggs, at room temperature
1 cp mayo (use the real thing)
2 tsp Dijon or Creole mustard
1-1/2 tsp sugar
2 tbsp heavy cream or milk
1/2 tsp black pepper
1/2 tsp Piment d’Espellete or Smoked Paprika
Sea salt, if necessary
After you’ve peeled the potatoes, cut them into quarters. The cubes should be as uniform as possible, that way they all cook at the same rate. However, don’t cut them too small or the potato will just break apart. Place the cubed 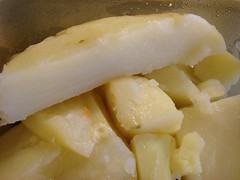 potatoes in a medium pan with the carrot and fill with enough water to pass the potatoes by about 1-2 inches. Add the salt and bring to a medium boil, cooking the potatoes for about 12 minutes or until fork tender. Drain completely and allow it to cool.
While the potatoes cook, boil the eggs. Put the eggs in a small saucepan and fill with water. Allow the water to boil for about 3 minutes, turn off the heat and let the eggs sit in the hot water for another few minutes (about 8 minutes). Drain the water and fill the pot with cold water, let them sit in the cold water for about 2-3 minutes. You’ll end up with perfect, beautiful eggs. Peel and chop the eggs, set aside.
Combine the mayo, mustard, sugar, cream, piment/paprika, black pepper in the bowl you’ll mix the salad. Make sure you mix all the ingredients very well. I usually break a piece of one of the potatoes and put a little dab of the mayo mixture on it to taste the flavors. I then adjust the salt as necessary. Set this aside.
Chop the potatoes and carrot into bite-size pieces and add them to the bowl with the mayo. Add the eggs and mix in all the ingredients, making sure the mayo is well distributed. If it seems a bit dry, mix another couple of tablespoons of mayo with cream, pepper and a pinch of sugar. That’s it.
You now have a perfect batch of potato salad. Enjoy!

Cookingly yours,
Anamaris
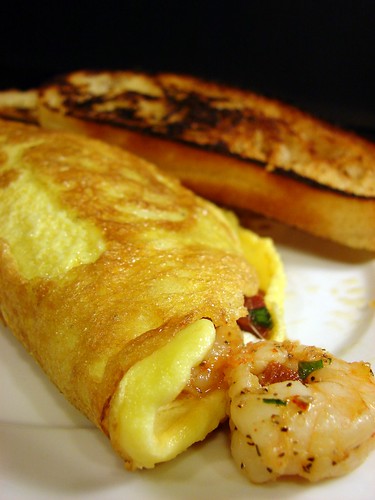
This weekend we had breakfast for dinner. Sometimes that’s just the thing you need and want. Not that you’re trying to restart the day or anything, you just want hot breakfasty foods. I had picked up a few goodies at Phoenicia Foods, namely Spanish chorizo and the best fun cheese EVAH!
Let’s talk about the cheese for a bit. It is… STRING CHEESE! Not the kid stick cheese string cheese, but a beautiful bunch of milky white strands of marinated cheese. It has a texture similar to mozzarella. There I was, pushing my little cart down the deli aisle, when I had to do a double take. I saw a vat of something, what I couldn’t tell. So I had to back up and read the tag. It read: Homemade String Cheese. CHEESE?!! SERIOUSLY?! I promptly ordered myself 1/2 lb of it and giggled and grinned all the way home.

How awesome is THAT?!
OK, back to the omelette. The other ingredient was Spanish chorizo. This is different from Mexican chorizo which is soft and crumbly. Spanish chorizo can be compared to andouille, and unlike its Mexican cousin, it is hard, cured and seasoned with dried smoked red peppers. It is delicioso!
Shrimp is the last ingredient for the omelette. So this is a Chorizo and Shrimp Omelette. Can you say Oh My! I share, cuz I’m nice like that.
Chorizo and Shrimp Omelette
1/2 cp Spanish chorizo, finely chopped
2 shallots, sliced
1 cp shrimp, peeled & deveined
1/2 tsp sea salt
Herbs d’Provence (optional)
1/4 cp white wine
5 eggs, room temperature
Salt & pepper, to taste
Butter
Season the shrimp with 1/2 tsp salt and Herbs d’Provence. Set aside. Heat a skillet to medium and add the chorizo to render some of its fat. Then add the shallots and cook until translucent.

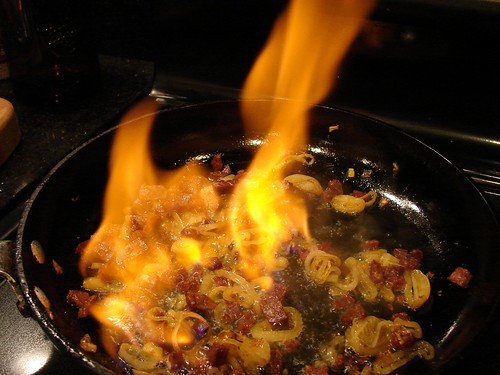
To the chorizo and shallots, add the wine. If you want to, go ahead an flame it to burn the alcohol. If you’d rather not do that, cook it on medium high until all the liquid has been absorbed.
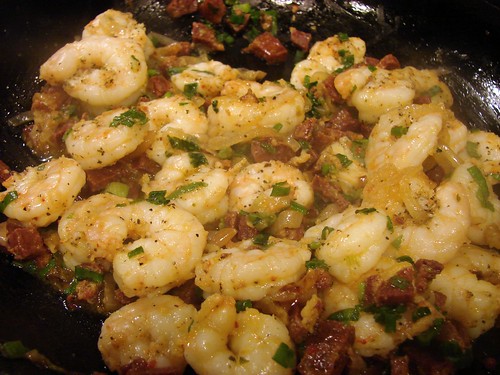
Once the liquid is absorbed, add the shrimp. Mix it in well, cover with a lid and turn off the heat. Set aside.
Whip the eggs in a bowl, add salt and pepper to taste. In a nonstick pan, melt 1-2 tbsp of butter and add the egg mixture.
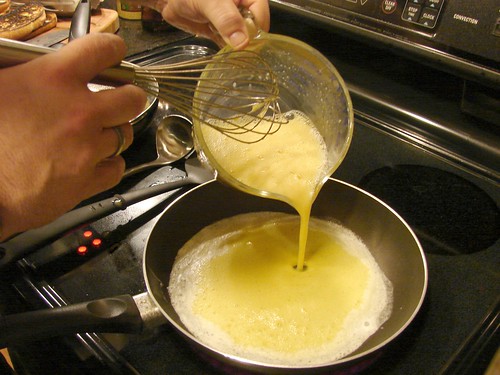
Swirl it around to cover the bottom of the pan, when the top begins to dry, flip the omelette. Now add your fillings on one side of the omelette.
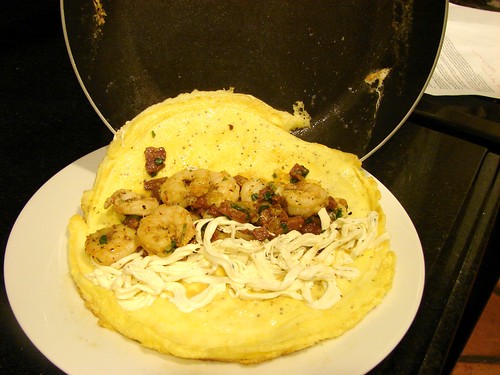
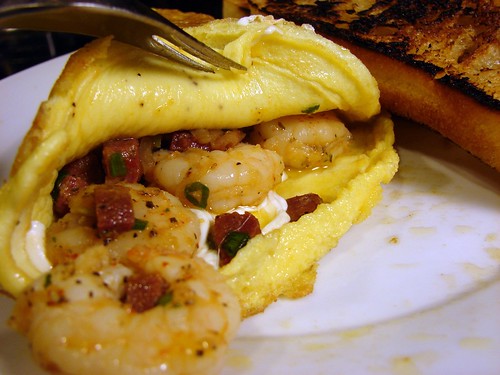
When the cheese begins to melt, slide it halfway off the frying pan and onto a plate, then flip the second half over top. Serve and enjoy!

Tia (Aunt) Doria is one of my mom’s youngest sisters. About 22 years ago, I went to stay with her in Oklahoma after a bad fall that left her leg in a cast. To this day Doria claims I made her a lasagna with like 17 different cheeses. I keep telling her that’s not possible. I know this, because I don’t think I knew 17 types of cheeses back then. But, in her honor and at her request, here’s my version of my Mami’s Lasagna. It has 4 different cheeses: Mozzarella, Provolone, Parmesan and Ricotta, and homemade meat and bechamel sauces.
Now, I feel I should mention a few things about making lasagna. I don’t believe this is a difficult dish to make. It IS, however, labor intensive and step abundant. I make my own meat sauce, just getting it on the stove took me about 2 hours. That’s from beginning–roasting peppers and tomatoes and chopping ingredients–to end, once all the ingredients are in the pot and about to simmer. I think it was another hour to assemble the trays.
 I like making the sauce a day ahead to allow all the flavors to come together. Then assemble the trays and put them in the fridge for a few hours to allow it settle in. This time I assembled the trays just a few hours after I finished simmering the meat sauce and it had come to room temperature. I didn’t bake the tray until the next day. So it hung out in the fridge for about 18-24 hours. Mind you, this step isn’t mandatory. I just picked that tip up when I worked in a kitchen.
All this said, it is a DELICIOUS recipe, well worth the effort. I hope you will try it. One last thing, yield. This recipe made enough for 1 full 9×13 tray, which gave us 12 healthy servings, and 1 more tray that only filled about 3/4 of the way. The servings from that will probably be closer to 9 or so. We’ve frozen the 2nd tray for future enjoyment. Now, without further ado, Doria, this one’s for you!
Meat Sauce Ingredients
2 lbs ground chuck
1/2 lb hot Italian sausage, casings removed
2 tbsp extra virgin olive oil
3 cps onions, chopped (about 2 medium)
1 tbsp sea salt
1 cp carrots, finely diced (about 2 medium)
1 cp celery, finely diced (about 3 stalks)
2 cps button mushrooms, diced
1 cp red bell pepper (about 2 medium)
5 Roma tomatoes
1 28 oz can diced tomatoes
3-4 garlic cloves, crushed (about 2 tsp garlic puree)
1 tsp black pepper
1-1/2 tsp Italian seasoning
1 tsp red pepper flakes
1-1/2 tsp dried basil
2 tsps sugar
3 bay leaves
1/2 cp parsley, chopped
2 cps red wine or beer
1 cp water
3 tbsp tomato paste
Process:
 Roast the reds (optional) – You can roast the bell peppers and tomatoes over a stove burner. Get the skins scorched all the way around, then dunk in a bowl with cool water and peel. Remove the seeds from both, the tomatoes and peppers before dicing.
Heat up a large saucepan and add the ground beef, sausage and salt. Stir the salt in and make sure you break the meats apart, you want it to resemble coarse meal. The moisture in the beef will come out, so initially it will cook in its own liquid. Once the liquid evaporates, you will be able to begin browning the meats.
As the meat browns over medium high heat, add the onions, carrots and celery, cook it until the onions begin to look translucent. Then add the mushrooms, garlic, black pepper, Italian seasoning, pepper flakes, basil and bay leaves. Mix all the herbs in before adding all the tomatoes, bell peppers and parsley. Stir it all very well, taking care to scrape the bottom of the pan to loosen any drippings that may be stuck. Now you can add the wine, water, sugar and paste; stir everything well and allow it to come to a boil.
Once this comes to a boil, bring temperature to low and cover it with a lid. Allow it to simmer stirring it occasionally. It will need to simmer for about an hour. Remove from the heat and let it cool.
Bechamel Sauce
Ingredients and Process
5 tbsp unsalted butter
5 tbsp flour
4 cps milk
1-1/2 tsp sea salt
1/2 tsp white pepper
1/8 tsp nutmeg
Heat up the milk in the microwave until it is very hot, you’ll be able to see vapors rising up. Keep it hot. In the meantime, in a medium saucepan melt the butter over medium heat until there is foam on the top. Add the flour at once, and stir quickly with a wire whisk. This will make a roux, however, you want to keep the mixture light in color–bechamel sauce is a white sauce.  You need to allow the flour to cook, otherwise the raw flavor will come through in the sauce. The process of making the roux, will take about 6 minutes and will be lightly golden.
Add the milk as quickly as you can, while still whisking it in to avoid lumps. Once you have incorporated all the milk, season the sauce with salt, pepper and nutmeg. Continue to stir until the sauce thickens, it will take about 15 minutes to achieve the consistency of soft yogurt. Remove from heat and allow to cool.
 Ricotta filling: Combine 2 cps of ricotta cheese with 2 eggs, 1/4 cp chopped parsley, 1/2 cp Parmesan cheese. Mix and set aside.
Lasagna Ingredients and Process:
1 lb lasagna noodles
1/2 lb Provolone cheese, sliced
2/3 lb Mozarella cheese, sliced
1 cp Parmesan cheese, grated
1/2 lb Salami, sliced

Layering the Lasagna
Fill a large pot with water and bring to a boil. Add 1 tbsp sea salt, 1 tbsp oil before adding the noodles. The oil will help prevent them from sticking to each other, but you should still stir them around a bit. Make sure you keep the water at a soft boil and cook noodles for about 8 to 10 minutes. You want the noodles to be pliable but still too firm to eat. Drain noodles and dump them into a bowl of cold water.
 You need to make sure the noodles are completely dry before layering. I usually take them out of the cool water and lay them across a kitchen towel before setting them aside.
It’s assembly time! In a 9×13 baking dish, spread about a cup of meat sauce in the bottom. Arrange 3-4 noodles lengthwise over the sauce. Depending on the length of your noodles and dish, you may need to trim the end of the noodle to fit. Spread with enough bechamel sauce to cover the noodles, then top the bechamel with chopped salami. Now add another layer of noodles to cover. Top the second layer of noodles with the ricotta cheese mixture.  Now top the ricotta with more meat sauce, be more generous this time.
Top the meat sauce with a sprinkling of parmesan cheese, then layer with provolone and mozzarella. And begin again with a layer of noodles with bechamel and salami between the 2 layers of noodles, then ricotta. The final layer will be meat sauce covered with cheeses. This is likely your last layer, so you can go a bit crazy with the cheeses.
I would recommend allowing the tray to settle for at least 3 hours in the fridge, longer if you have the time. Cover with a short layer of plastic wrap then foil.
Baking the lasagna
Preheat oven to 375. Remove the plastic wrap and cover loosely with the foil, otherwise you’ll end up with all the cheese stuck to it. Bake for 25 minutes with foil, then remove foil and bake for 25 minutes more. Allow the tray to cool for about 15 minutes before cutting into it.


 there are a couple of scores deep enough to go all the way through to the bacon. This will allow the contents to breathe without making the puff pastry go POOF!


 To debone the shoulder, I started out by cutting straight through the roast, cutting down until I hit the bone. I didn’t take step-by-step pictures of this part, how about you go


