It’s not a secret. I love rice best. It’s my first love and I never got over it. Never will. I can eat it just about every day and not tire of it. This time I will share another variation on the Holy Grain, it happens to be Linz’ favorite one. We fry it in bacon and add achiote powder for the color.
Arroz Amarillo (Yellow Rice)

Ingredients:
2 cp long grain rice (try Jasmine, you’ll be hooked for life)
2 slices bacon, cubed
Vegetable/Canola oil
1 pkt Sazón
2 1/3 cps water
Salt to taste
Put saucepan on stove over high heat and brown bacon. In the meantime, rinse the rice–easiest way is to put it in a colander and run it under cool, tap water. Let it drain; you may need to give it a quick shake to get the excess water out.
Add the rice to the pan with the bacon and drippings, stir it to make sure the grains are evenly coated. If it seems dry, add another teaspoon of vegetable oil. Stir it around every couple of minutes. Once the grains begin turning white, add the Sazón making sure you stir it evenly. Now add the water and check to determine if you need to add more salt.
It will come to a boil pretty quickly, and the liquid will begin to evaporate. At this time put a tight-fitting lid over it before it is completely dry. You should still see some bubbling at this point. Then lower the temperature to medium low. Now leave it alone for about 30 minutes.
This part is crucial. You’ll notice that most recipes suggest a 2-1 water-rice ratio. I use a lot less liquid because the steam generated in the pot at this point will.take.care.of.every.grain. Trust me. I’ve made rice this way for about 20 years now.
After 30 minutes, remove the lid and fluff the rice with a fork, you will also be incorporating the bacon that has floated to the top. It is now ready to serve. This is the perfect accompanient to beans and chicken dishes. This time I served it with lentils and this chicken.

Cookingly yours,
Anamaris
A foodie blogroll, that is! This is sooo exciting! OK, it just shows up under new/recent blogs, but it IS up there! Don’t try to steal or thwart my moment in the sun!
I’ve had new visitors because of the mention. You know who you are. THANKS FOR VISITING! And commenting, I feel so special and important. I would also like to take this moment to let you know what to look for as you visit my window of the world in 2010.

How cute is that color?!
2010. Sounds momentous, doesn’t it? The preamble to new and exciting things. I will do my best to keep you interested, entertained and engaged. I finally put my thoughts and ideas to paper as I had a pedicure yesterday, hence the feet shot. (In case you were wondering).
2010 will look a little something like this:
- Chef School: I will add a weekly post highlighting ‘chefy’ ways. It could be a cooking or preping technique, a way to simplify a task. Exploring sauces and/or cooking methods.
- Top Chef Challenge: Once a month, a dish will be inspired by 3 ingredients. My thought on this is to make one or more of them be new or unusual items. Ideally, this will include your participation.
- Photo Corner: I’ve told you about my love of photography, right? There will be a weekly theme that has been selected by Brooke from Shutterboo. My post here will include the finalists and the runnerups.
- Guest Posts: As I blog around, I will ask fellow bloggers to add a post here. This will add a new POV to Chef It Yourself.
That’s it… for now. I will eventually make some image changes to the blog, but I promise to keep you posted evey step of the way.
See yas around!
I cooked a ham and ended up with quite a bit of leftovers. Once we tired of having it the same way it had been conceived, I froze it and put it out of my mind. It was time for dinner and I had no clue what to do since I hadn’t pulled anything out. Then I remembered the ham and thought about making it into fried rice. Then I remembered how much I’ve been wanting to try Biryani: essentially Indian fried rice.
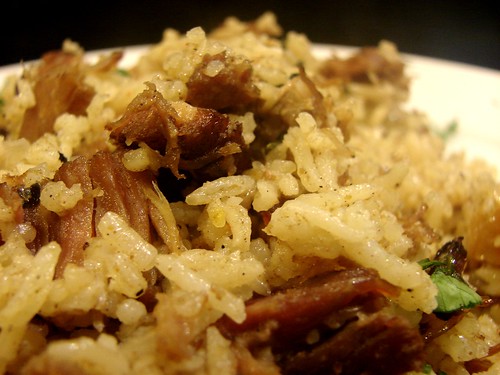
I did a search for it and found this recipe from Thas, I made a few changes, the first being the substitution of lamb for cooked ham. The link takes you to the original recipe, but below is what I did to it. You can substitute any leftover cooked meat for the ham.
Ham Biryani
First make the rice
3 cps Basmati Rice
3 cardamom pods
1 cinnamon stick
3 cloves
2 bay leaves
2 tbsp butter
1 tbsp vegetable oil
2 tsp salt
5 cps water
Rinse the rice, while it drains, melt the butter and oil in a medium pan, then add the cardamom, cloves, cinnamon and bay leaves and fry it a bit. Add the rice and fry it for a few minutes until the grains begin to turn white. Add the water and salt, allow it to boil and when it begins to dry, cover the pot and cook on low. Allow the rice to steam for 20 minutes or so, then fluff with a fork. Turn off the heat and set aside.
Prepare the ham – in a bowl, combine the following ingredients and set aside:
3 cps cooked ham, cubed
1 tbsp chilli powder (all I had was ancho chili, so in it went)
1/2 tsp Turmeric powder
1 tbsp Coriander powder
2 tsp Garam masala
juice of half lemon/lime
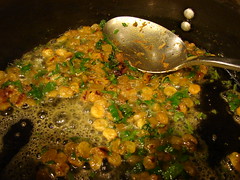 Let’s make it all happy, mmmkay?
3 tbsp butter
1 large onion, sliced
1/4 cp raisins
1/3 cp cilantro, chopped
1/3 cp white wine
2 pinches saffron strands (bloomed in 2 tbsp milk for 15 minutes)
Melt the butter in a large skillet, add the onions and cook until translucent. Add the raisins and cilantro and cook until the raisins plump. Finally, add the ham and wine, stir and cook covered over medium low heat for 5-10 minutes.
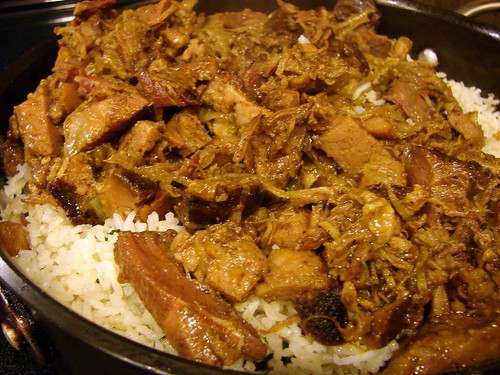
Add the rice over the ham mixture and work it in to combine all the ingredients. Once all the rice has been added, pour the saffron milk over it all. Stir, cover and lower temperature to low for 5 minutes.

aaaaaand you’re done!

I admit it. I’ve been cheating on you. My attention to you has not been undivided and, every now and then, I’ve been throwing fluff your way. I’m sorry about that, but I promise to do better.
I’ve been thinking about the direction I’d like to take you in the new year. Calm down, calm down, I don’t know what that direction is YET. I will let you know. Soon. In the meantime, have a puff, won’t ya?
I had been thinking about trying my hand at making Boston Cream Pie. When I read the ingredients I thought, there’s no reason I can’t apply this to cream puffs! So I did. Don’t be afraid of the puffs, be one with the puffs. They ARE easy to make, they REALLY are. You just need to get them in the oven pretty fast and no opening the oven while they bake. mmmkay?
These are your basic cream puffs or eclairs made better by a creme patisserie (pastry cream) filling and the addition of Nutella. You should make and cool the cream first. The hubby and I have been going through them, our spare tires are proof of it. Hope you like ‘em too.
Boston Cream Puffs
Yields 12 medium puffs
Ingredients
1 cup water
1/2 cp butter (1 stick)
Pinch of salt
1 cup flour
4 large eggs
Preheat oven to 400. In a saucepan mix the butter and salt with the water, bring it to a boil. Turn off the heat. Quickly add all of the flour and mix it in with a wooden spoon until it forms a ball.
Here’s a little trick I picked up from my mom’s pastry cook: transfer the dough to your mixer’s bowl. Now add the eggs one at a time and beat, making sure each egg is completely mixed in before you add the next. You can also do this in the saucepan, but there’s a greater chance the eggs may cook in the process.

Prepare your baking sheet by covering it with parchment paper. I used a pastry bag to pipe them on to the sheet; I piped about 1/3 of a cup for each puff. You can also do this with a spoon, same results. Make sure you drop them about 1 inch apart from each other. Try to do this part as quickly as possible.
Once you’ve got them all on the baking sheet, put them in the oven and bake for about 20-30 minutes. I baked this batch for about 30 minutes, the size of them will determine how long to leave them in.

Creme Patisserie
2 cps milk
1/2 vanilla bean
3 egg yolks
1/3 cp sugar
1/3 cp flour
1 tbsp bourbon or other liquor
1/2 tsp vanilla
Directions:
In a medium saucepan, heat the milk with the vanilla bean; you don’t want it to boil, but you will see small bubbles around the edges.
Using your mixer, whip the egg yolks with the sugar until it stretches like ribbon when you raise it with the spoon, then add the flour. Bring the mixer’s speed to low and slowly pour the boiling milk into the mixture, being careful not to drop the vanilla pod.
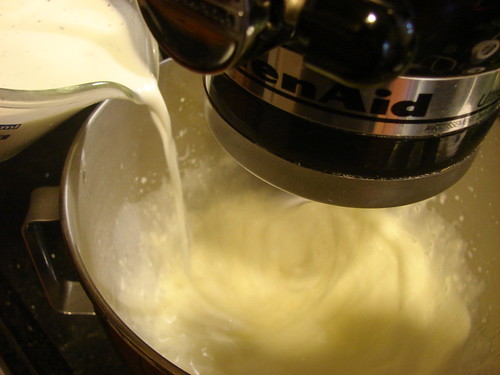
Once you have incorporated all of the milk, put the mixture back into the pot you used to heat the milk and cook over medium high heat, stirring continuously. This process will take about 20-30 minutes, once it thickens, remove it from the heat. Set aside to cool.
 Now, put it all together.
After the puffs have cooled, use a small serrated knife and slit the tops. You can remove them completely if you’re going to use a spoon to fill them, or just partially if you will use a pastry bag.
First, pipe/drop some Nutella, about 2 tsps at the bottom of each puff, then fill with the cream. Replace the tops, sprinkle with powder sugar or a dollop of Nutella. Keep cool and serve.

That’s it!
Cookingly yours,
Anamaris
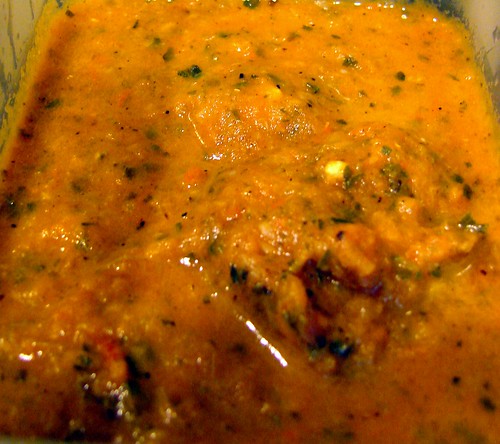
Here in Houston, TexMex food is almost as essetial as oxygen. Every time you hit a ‘Mexican’ spot, you’re received with a bowl of, hopefully, fresh salsa and chips. I can’t help you with the chips, but I can throw my hat in for the salsa bit.
We like ours a bit on the heated side and I usually make enough for about 3 cps worths. It keeps really well in the fridge.
8 Roma tomatoes, halved and seeded
2 – 3 serrano peppers, halved
2 cloves garlic, peeled and halved
½ medium onion, quartered
½ cp cilantro, coarsely chopped
½ tsp cumin powder
½ tsp sugar
¾ tsp salt
2 tbsp olive oil
Add 1 tbsp of the oil to a skillet and place over high heat. When it begins to smoke, add the tomatoes, peppers, garlic, and onion. You want to char and smoke the vegetables, but keep a close watch on them or they’ll burn. Try to get some color on both sides, then remove from the heat and put it all into your blender. Add the rest of the ingredients and puree until all veggies are a mush.
Pour the salsa back into your skillet—you can add about ½ cp water to the blender to remove all the salsa bits—allow the salsa to cook over medium low temperature for about 10 minutes. This will yield about 3 cps of salsa, it will keep in the fridge for about a month.
This is muy bueno!
Cookingly yours,
Anamaris
I’m not sure how to get into this post, except to channel the hubby.
This is not a broth, it’s a soup.
This is not a soup, it’s a stew.
This is not a stew, it’s a symphony of savory flavors that titillate on your palate and leave you wanting for more.
This is a dish I love and have loved since childhood. This is also one of those dishes I don’t eat freely just anywhere. It is something Linz vowed never to eat, but now begs for it. Preparation for this one is important and shouldn’t be taken lightly. Whenever I make it, I do so in large quantities because I’d rather get the prep done and move on, but also because we fight over every little bite of it.

The dish is Mondongo aka Tripe Stew. But see, I think tripe is an icky sounding word, which is why I had such a tough time starting this post. Let’s find out about the main ingredient.

You get tripe from an animal’s stomach; the stomach’s lining has a couple different chambers. Commercially available beef tripe is usually the honeycomb and flat tripe variety. It should be cleaned with great care and rinsed a few times, this will prevent any undesirable odors when cooking it.
Preparation and cleaning.
You need to remove any excess fat attached to the tripe. It’s easiest to buy the tripe in a large piece, this will make cleaning it much easier. I use a knife for this process. For this recipe, I used 3 lbs of the flat + 1 lb of the honeycomb tripe.
Once you have removed the excess fat, rinse it a few times. Usually I will submerge it once in water with 2 tbsp white vinegar. Rinse with clean cool 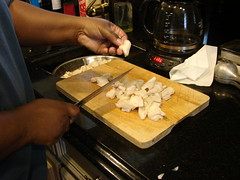 water. Then again, but this time submerging in water with the juice from 1 lime/lemon. Rinse and drain. It is now ready to cut into pieces about the size of the top of your thumb–1 inch or so.
In a large stock pan, add 1/2 of a whole onion, 4 cloves of garlic–there’s no need to peel either. Also add 5 whole cloves, 10 peppercorns, 1 tbsp salt, 2 tsps Jugo Maggi OR Worcestershire, 2 tsp crushed oregano, 4 bay leaves, 5 culantro leaves OR a good handful of cilantro, stems and all. Add the tripe over this, and a 3 inch  piece of salt pork or 4 strips of bacon. Add water to cover it all, bring it to a boil, lower the temperature to a slow simmer and allow it to cook for 1.5 hours. At this point it will still be quite al dente, not edible yet. Remove it from the heat, drain, rinse and remove all the aromatics. Set aside.
Optional: If you’d like, you can also add pig’s feet to the mondongo. In that case, you’ll want to rinse the pig’s feet by submerging them in warm water with vinegar, then giving them a good rinse with cool water. Cook them separately using the same aromatics used for the tripe, if you want to preserve the difference in flavors between the feet and tripe. OR simply add them to the same pot you’re cooking the tripe in. Cook the feet about an hour, they will still be tough. Rinse and set aside.
Now for the good stuff, this is where the stew begins. Oh joy!
Mondongo a la Culona
4 lbs cooked tripe
1 lb cooked pig’s feet
1/4 cp salt pork or bacon, cubed
2 tbsp olive oil
2 lg onions, chopped
3 cloves garlic, minced
2 cps carrots, chopped small
1 lg red bell pepper, chopped
3 bay leaves
4-5 culantro leaves OR 1/2 cp cilantro, chopped
1 tsp sea salt
1 tsp black pepper
2 tsps Jugo Maggi or Worcestershire
1 tsp beef bouillon
1 1/2 tsps sugar
1 tsp habanero sauce
1 28 oz tomatoes, diced
1 1/2 tbsp tomato paste
1/2 cp olives
1 cp beer or white wine, optional
1/3 cp Parmesan cheese, grated
In the same stock pot you boiled the tripe, heat the oil and add pork fat, onions, garlic, bell pepper and carrots. Allow it to cook until they begin to soften. Add the culantro, bay leaves, tomatoes. Then add the habanero, Jugo Maggi, sugar, tomato paste, salt, bouillon and beer. Check your seasonings, and if happy, add the tripe and pig’s feet. Make sure you stir it well and that the liquid covers the contents of the pot. Add water if necessary. Bring it to a boil, then lower temperature and allow it to simmer slowly.
Stir it every once in a while, but you can pretty much forget about it for about an hour. At that time, add the olives and allow it to simmer uncover for another 30-40 minutes or until the tripe is VERY tender. If you used the pig’s feet, you can pull them out once tender and take the meat off the bone, then add it back into the stew.
If the broth is too runny, mix 2 tbsps cornstarch with about 1/4 cp water and stir it in. Make sure you allow it to boil before turning off the heat.

Serve this with rice, you will love it.
No foodie entries today, sorry. Instead, take a look at some of my favorite shots. By ‘my’ I mean mine. Hope you like ‘em!
This was at one of the main parks in Boston. I exaggerated the colors, but no real editing done here.

Boston, Mass
This was a color shot originally, I applied the b&w effect. I love leaves.

Somewhere in SF
Somewhere along Hwy 1 around the SF coast. No editing at all.

Multnomah Falls outside Portland, OR. Powerfully beautiful.

This still is one of my favorite shots ever. Chairs in a Parisien subway station.

Rusty hardware on a gate in Puerto Rico.

Feel free to visit my photostream on Flickr. Good night, moon!
So…, this was interesting. This was scary. This was exciting. This was rewarding.
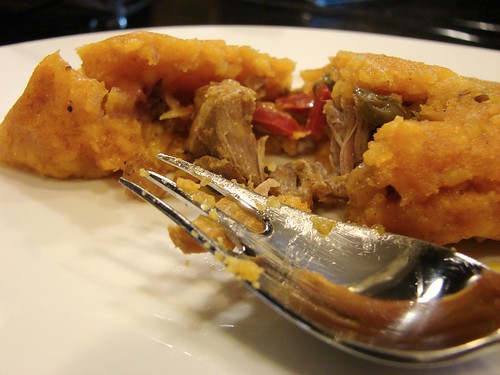
I love tamales, particularly the Mexican and, of course, the Panamanian versions; I just never tried making either. The task seems daunting and too tedious to get involved. But then, I love a challenge and I was ready to take this one on. I started with the ones from Panama ‘cuz, well. You know. That’s where I’m from.
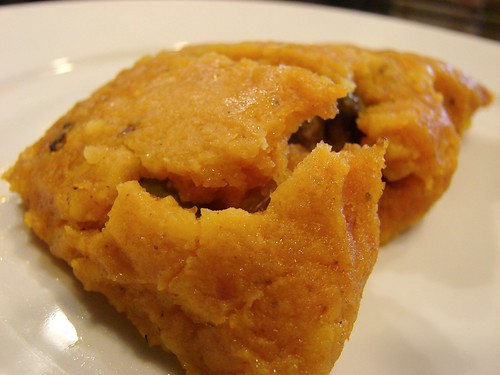
Tamales are usual fare for any celebration, Christmas, NYE, weddings, parties. In Panama, they come in a variety of sizes, but most commonly they are large enough to make it a full meal. They’re made of corn, filled with chicken, pork and more recently, seafood. Ours are different in that they are cooked in a leaf from a plant called bijao. Don’t ask me what else it produces, because I have no clue. But the leaves look a lot like bananas leaves, however the taste is quite different. You know what’s sad? I don’t remember what they taste like. That’s depressing.
Unfortunately, the leaves aren’t available stateside, so I had to improvise and replace them with foil paper. I don’t much enjoy the taste banana leaves impart on food, which is why I didn’t use those. I also forgot to get prunes, but we will survive. I promise you. You know what I found out once I made this? It ISN’T as tedious as I thought it would be, nor was it all that time-consuming.
Are you ready? Here goes nothing–well, something amazing, but that’s not the saying. Y’know what I’m sayin’? This recipe will yield about 20-25 tamales, and they will freeze quite well.
Tamales Panameños
Ingredients
2 lbs yellow corn hominy, dry
2/3 cp pork fat or vegetable oil
2 tsps sea salt
2 pkts Sazón
4 lbs pork short ribs
1 pkt Sazón
2 onions, chopped
1 large can tomatoes, diced
4 culantro leaves OR 1/2 cp cilantro, chopped
4 garlic cloves, minced
2 tsps sea salt
2 tbsp tomato paste
2 tsp dried oregano
1 bottle beer
1 tsp habanero sauce (optional)
12 oz pitted prunes, about 25
1-1/2 cp seedless raisins
1 cp pitted olives
about 1/4 cp capers
1/2 cp roasted red pepper (pimentos), sliced
Aluminum foil cut into pieces about 6 inches wide
Now for the method; Although I’ve listed all the ingredients together, I will break down the process for the different components: preparing the hominy, then the pork, and putting it all together.
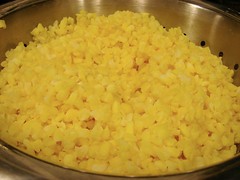
Corn time, baby!
Rinse the hominy and put it in a large pan, add the 2 tsps salt and bring to a boil. Lower the temperature and cook for about 2 hours or until the grains are tender. Once it is done cooking, strain and rinse the hominy. Allow it to cool. Once the corn cools, you will need to run it through a grinder using the finest setting. I’m not sure if using a food processor would work, but it might do the job just fine.
For the piggy part.
 While the corn cooks, prepare the pork. Cut it into 2-inch cubes and season it with salt and black pepper. Heat a medium-sized pan and add about 1 tbsp vegetable oil and brown the pork pieces and set aside. After browning the pork, add the onions, garlic and culantro and cook until the onions are softened. Then add the tomatoes, paste, oregano, Sazon make sure to remove the drippings stuck at the bottom of the pan. Add the pork back to the pan, then the beer and enough water to cover. Bring it to a boil, put a lid over it and lower temperature to a simmer; allow it to cook for about 45 minutes or until the pork is very tender.
Time to put it all together.
First off, pour yourself a glass of wine, preferably red. First, you’ll need to season the corn dough or masa. After you grind it, add the pork fat, the Sazon packets and about 2 cps of the juices from the pork, don’t be shy about the onion pieces falling in. Knead all of this very well, you want to make sure it is evenly distributed. The masa’s consistency should be soft, but not runny.
The pork, it should be chunky, but not too large, so break it apart a bit and keep some of the pan sauce. Line up the raisins, prunes, pimentos, olives and capers.

Take a sheet of foil, spread about 1/3 cp or so of the masa over 2/3s of the sheet. Put a few pieces of pork close to one of the ends of the masa, put a couple of olives, capers, a prune and a few raisins. Now fold over the foil so that the rest of the masa covers the filling. Fold the foil like an envelope: first fold the top once, then the sides. Make sure to flatten the foil, you want it to be a tight seal.

Fill a large stock pot with water, drop 2 bay leaves and 3 cloves of garlic–no need to peel them. I did this because I don’t have the bijao leaves which add flavor to the tamales. This way the water will have its own flavor and will not just draw it out from the tamales. Bring the water to a soft boil and drop the tamales in one by one. Allow them to cook for 1 hour.

Remove the tamales from the water, lay them upside down to allow any water that might have seeped through to drain out. Remove the tamales from the foil packets and serve.
 Today I find myself missing my Panamanian home. All the hustle and bustle that’s sure to be happening at my mom’s bakery scrambling to fill all the fruitcake and rum & raisin cake orders. Hovering over pots and pans to sneak a sample from the many party trays to be delivered. The smell of cinnamon, nutmeg and rum in the air.
Hanging out with my mom’s VERY large family: aunts, uncles, nieces, cousins, my Grams. Enjoying the potluck of dishes prepared by each of them. The availability of our delicious tamales, bollos and lechón. The sound of salsa, merengue and reggaeton emanating from every home on the block. The rowdy neighbors out on their patios sitting, dancing, eating, laughing, drinking and having a merry good time.
What are you missing today?

My little McGhetto sis turned me on to this drink. I enjoy the fact that it isn’t a sweet cocktail, yet the grapefruit isn’t overwhelming or bitter. It’s one of those old-fashioned, classic and classy cocktails. I can almost picture Ingrid Bergman sipping on one of these as she awaits for Bogie.
The traditional recipe, and the one Brandy shared with me, calls for grenadine syrup. I switched it for some Creme de Noyaux instead; the result is a cleaner, more grown up taste. Me thinks. I have been serving them on the rocks, but it is possible the original recipe called for it to be strained and served up. Enjoy it either way, just do!
Bourbon Blinker-Nouveau
Fill a tall glass with ice, add:
1-1/2 to 2 oz bourbon, (go for decent quality)
1/2 oz Creme de Noyaux
2 oz white grapefruit juice
Add all the ingredients and stir. Top it off with diet ginger ale (this is optional, but I find that it makes the drink light and airy).
Thanks, B. Here’s looking at you, kid!


 Let’s make it all happy, mmmkay?


 Now, put it all together.


 While the corn cooks, prepare the pork. Cut it into 2-inch cubes and season it with salt and black pepper. Heat a medium-sized pan and add about 1 tbsp vegetable oil and brown the pork pieces and set aside. After browning the pork, add the onions, garlic and culantro and cook until the onions are softened. Then add the tomatoes, paste, oregano, Sazon make sure to remove the drippings stuck at the bottom of the pan. Add the pork back to the pan, then the beer and enough water to cover. Bring it to a boil, put a lid over it and lower temperature to a simmer; allow it to cook for about 45 minutes or until the pork is very tender.


 Today I find myself missing my Panamanian home. All the hustle and bustle that’s sure to be happening at my mom’s bakery scrambling to fill all the fruitcake and rum & raisin cake orders. Hovering over pots and pans to sneak a sample from the many party trays to be delivered. The smell of cinnamon, nutmeg and rum in the air.
