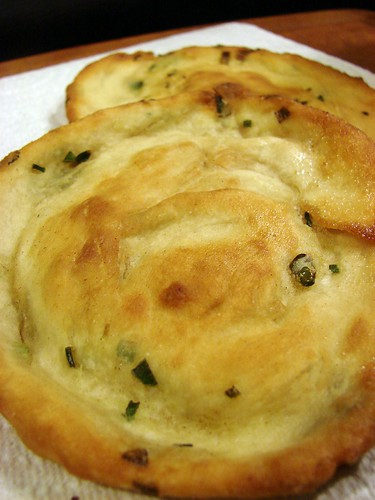
Maybe I was going through an Asian kick or maybe I just love Chinese appetizers, I don’t know. But this past Friday I made 2 different appetizers including this one. You can see the post for Scallion Pancakes–those are awesome too!

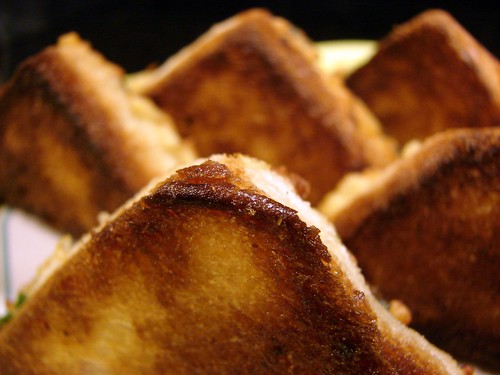
I don’t know when was the first time I had these little toasts, but I’ve been in love with them since. They’re shrimpy, toasty and soft. I know I’m not really doing them justice, but they are to die for. Again, I adapted them from a recipe I found over at Use Real Butter; you need to check Jen’s blog out, she’s quite fantastic.
 Shrimp Toast
1/2 lb raw shrimp
1 egg white
2 tbsp butter, cold
1 tsp sesame oil
2 tsps soy sauce
2-3 green onions, minced
2 tbsps ginger, minced
1/3 cp panko breadcrumbs
Sesame seeds
6 slices of bread, crusts removed
Vegetable oil for frying
Peel and devein the shrimp. If you have a food processor, use it to mix all the ingredients. I don’t own one, so instead I minced the shrimp by hand and mixed everything in my mixer using the egg beater.

Add all the ingredients: shrimp, egg white, sesame oil, butter, soy, onions, ginger and breadcrumbs. If you use the mixer, chances are you’ll have some larger bits of shrimp, that’s ok, trust me.
 I bought a little loaf of white bread from the Asian market and sliced it to about 1/4-inch thickness, trimmed the crusts, then cut them on a diagonal. I ended up with 12 cute little triangles.
Now spread the shrimp mixture on  each slice of bread: about 1/2-inch thick. Then sprinkle with sesame seeds. Set aside.
Heat enough oil to cover the bottom of a frying pan, it should be about 1/2-inch deep. You don’t want the temperature to be too high, bring it to medium high.
Drop the toasts, bread side down; this way the butter begins to melt into the 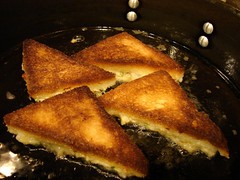 filling. The bread will brown rather quickly, so don’t go too far from the pan. Once the edges of the toast begin to turn golden brown, flip them and cook the shrimpy side until golden brown about 2-3 minutes.
Remove from the oil and allow it to drain, toast-side down on paper towels before serving. Serve warm just as they are or with the sauce below.

Dipping sauce
Combine:
1 tbsp ginger, slivers
2 tbsp soy sauce
2 tsp sesame oil
1 tsp honey
Put the whole thing in a microwave-safe bowl and heat it up for 2-3 minutes. Allow the ginger to seep for a couple of minutes before serving.
Cookingly yours,
Anamaris
I still remember the first time I had these. My good friendster AJ took me to a little whole-in-the-wall Chinese restaurant for lunch and, there, she opened my eyes to the delicious beauty and simplicity that is the scallion pancake.
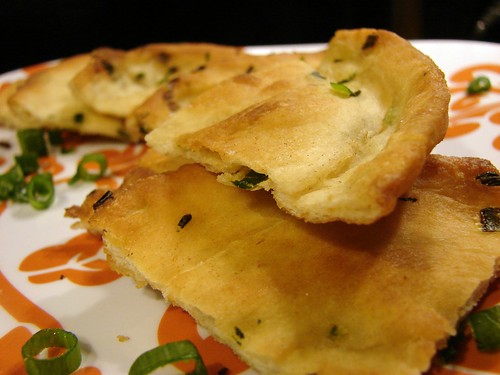
How would I describe these? Kinda like having scallions/green onions and butter sandwiched between 2 thick flour tortillas. They’re awesome. They rock. They are SO hard to find. I’ve only come across one other restaurant i Houston that serves them, so, I went on a recipe search to make them whenever the whim hit me. I found a few different recipes but settled on this one by Jen from Use Real Butter. I’ve made them a few times since, and tweaked at will. Without further ado, I bring you:
Chinese Scallion Pancakes
1 cp all-purpose flour
1 cp self-rising flour
1 tsp sea salt
1/2 – 2/3 cp warm water
3-4 scallions, finely chopped
Sesame and vegetable oil
To make the dough:
I used my mixer with the dough hook, but you could use a food processor.
Add the flour and salt in the bowl, get the mixer going and slowly add the water. I used a full 1/2 cp plus about another 1/8 cp. You want to add water until all the flour is incorporated and the dough is wrapping itself around the hook and isn’t sticking to the sides of the bowl. Continue to beat for about 3-4 minutes, to develop the gluten.

You’re looking for dough that is firm and silky without being sticky. Remove from the bowl and turn onto your counter and knead the dough a few times. Form it into a ball, return it to the bowl and allow it to rest for at least 15 minutes covered with a damp towel.
To roll the dough:
 Pretend you’re back in kindergarten and roll out the dough into a long cylinder on the countertop. The roll should be about 1-inch in diameter; cut into 12 pieces that are about 1-1/2 inch long and roll them into balls, just smaller than golf balls.
Flour your countertop and roll out one of the balls into a circle (or as close to a circle as you can get, I know I can’t roll a circle to save my life, but it doesn’t matter). Roll it pretty thin, about 1/16th inch).
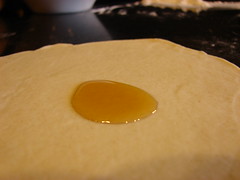 Drop sesame oil onto the center, a drop about the size of a nickel. Spread the oil evenly over the pancake (use vegetable oil if you can’t find/use sesame). Sprinkle with scallions.
To roll the pancakes:
It’s time to make a cigar and pretend you’re a kindergartener again. Fold in the edge closest to you, then roll it like a cigar until you reach the other end. Pinch the seams a bit, then curl it onto itself and into a spiral. Pinch that end again, otherwise you’ll end up with a little handle when you fry it. Set it aside and roll the rest of the dough.


Let them rest for another 15 minutes, before doing this part. It’s time to make them into pancakes. Again, make sure your work surface is well floured. Take one of the rolls and flatten it a bit with your hand. Roll it into a pancake about 1/8th inch thick. Set it aside and work your way through, separating each pancake with wax paper.
To fry the pancakes:
 Add enough oil to cover the bottom of a frying pan and heat it up over medium high temperature. Carefully slide one pancake in the oil and fry it until it is golden brown before flipping it. Remove from the oil and drain on paper towels.
Serve immediately.
PS: I have to admit it. I added about 1 tbsp of butter to the hot oil before frying, the drawback to this method is that the butter inevitable burns and the pancakes are slightly darker when done. But for the buttery taste, it’s worth it!
Is it cold where you are? It seems to be freezing almost everywhere in the US. Today in Houston the high was 32°! That’s definitely cold by Houston standards.
I’m not complaining, though. I LOVE it cold. I don’t know why, but I do. Cold makes me happy. Being able to say I’m cold makes me happier. It’s weird, I know, but it’s my thing. And I like my thing.
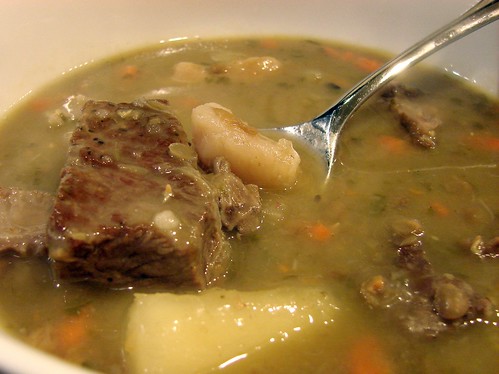
In any case, this kind of weather makes me think of hearty soups. I made a batch of my all time fave last night. Sopa de lentejas or lentil soup; Panamanian style, of course. This one is made rich with yuca and malanga (we call it otoe in Panama).
A bit about the ingredients:
 Yuca or cassava is a tuber with dark brown, thick peel and milky white flesh when raw. Once cooked–and it can be prepared many different ways, including as dessert–the flesh turns a yellowish cream, becomes quite translucent around the edges. It is quite a bit more dense than a potato and has a slight sweetness.
Malanga is also a tuber, but its peel is barely thicker than that of a potato. 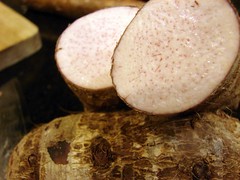 There are a couple of varietals, some will have white flesh, while others have a beautiful purplish pink flesh. Both of them are speckled by little brown dots that look like pepper. The texture of malanga when cooked is very similar to a potato.
Beef: as with any soup, bones add a great deal of flavor to the broth. In this case I opted for short ribs to take advantage of those great bones. I also used some chuck roast to ensure we had plenty of meaty bites. I suggest browning the beef before starting the soup, this will also add another dimension of taste.
Vegetables/tubers: I recommend cooking the tubers in stages. I add 1/2 of them when I start the beef and lentils, and add the rest on the last 40 minutes of cooking.
OK, let’s do it!
Sopa de Lentejas (Lentil Soup)
1 lb chuck roast, cubed
4 beef short ribs (about 1lb)
2 cps dry lentils
2 lbs yuca (about 3 cps)
1 lb malanga (about 1-11/2 cps)
2 medium carrots
1/2 whole head garlic
1 cp cilantro, leaves and stems
2 cubes beef boullion
Water
Oil
Preparation – about 30 minutes:
Beef: Liberally season the beef and ribs with salt and pepper, set it aside while you get the other ingredients ready.
Lentils: Remove any damaged lentils or debris and rinse in cool water. Add enough water to cover and allow them to soak. Set aside.
Peel the vegetables:
Yuca-as I mentioned, the peel is quite thick and I’ve noticed that here in the US they cover it with a waxy film. Cut the yuca into sections about 2-inches long.  Using a sharp knife, slit the peel of each section. You should know that the peel has 2 layers; the top layer is dark brown and not too thick. The 2nd layer is pinkish and this is the tougher one. Make sure you slit through the 2nd layer until you hit the fleshy part.
At this point, use the sharp edge of the knife and push through the 2nd layer. Rinse and cut into 1-inch pieces.
Malanga-peel using a potato peeler. Use some caution, as it tends to have a bit of slickness once the peel is removed. Rinse and cut into 1-inch pieces.
Carrots-peel and cut into rounds.
For the soup: Heat up a large stockpot and add about 1 tsp of oil, smear it around. Brown the beef and ribs on both sides. Once all the beef is browned, drain and add the lentils, 1/2 of the yuca and malanga, all the carrots, the stemmy end of the cilantro, and the boullion. Fill the pot with water, about 12-15 cps or so.
Allow it to come to a boil, and remove the foam that forms at the top when it boils. Lower the temperature to medium and allow it to come to a strong simmer. Stir it every few minutes, you want to make sure the lentils are not sticking to the bottom of the pan as that would cause the soup to scorch.
Allow it to simmer slowly for about 1-1/2 hrs for the beef to soften. At that time, remove the head of garlic, then add the rest of the tubers and cilantro. Check the seasoning and adjust at will. Allow it to cook for another 30 minutes or so. If you used boned short ribs, you can pull those out to remove the bones and cut the meat to bite-size portions.
Serve with white rice and enjoy!
Cookingly yours,
Anamaris

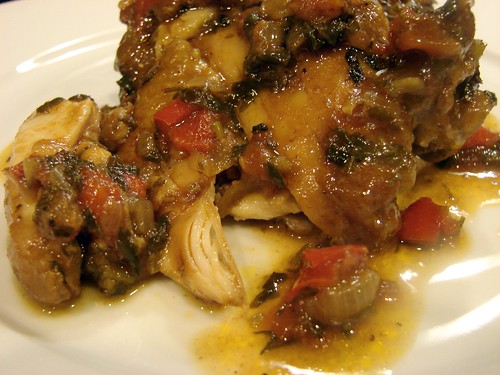
This is one of those dishes. You know the type. So very basic, so unpretentious and so incredibly delicious. This is what my mom would call ‘chicken in a hurry’.
Linz, the hubby, loves it and always asks me how I make it, what goes in it. I like to tell him it’s my Secret Panamanian Chicken. I finally had to admit to him that it was so easy, it sounded more impressive if I shrouded it in mystery. There isn’t a single fancy ingredient here. You have chicken, onions and peppers, a bit of tomato. That’s it.
This one incorporates sofrito, which is then just simmered into sublime heavenliness with some beer or wine. I will share with you, but make sure you lock your doors while reading, my special boogy men may come get you.
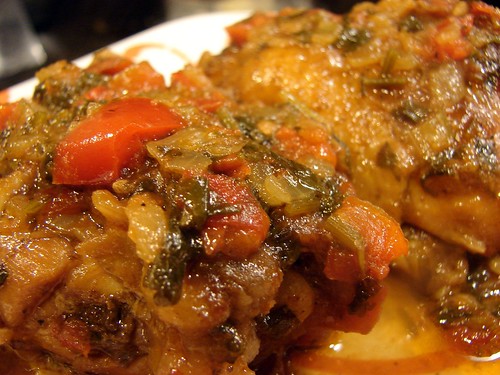
Mi Pollo Guisado (My Stewed Chicken)
8 chicken thighs, rinsed
1 tsp sea salt
1 tsp garlic, crushed (2 cloves)
1 tsp Jugo Maggi (or Worcestershire)
1/2 tsp black pepper
1 tbsp olive oil
2 cps Sofrito
1 tsp habanero paste
1.5 cps beer or white wine
3 tbsp ketchup
 Season the thighs with the salt, garlic, Jugo Maggi and pepper. Preheat a large, heavy-bottomed pan and add the oil. Brown the chicken on both sides, remove from the heat and set aside.
Discard the excess oil and add the sofrito, scraping the bits that are stuck at the bottom of the pan.
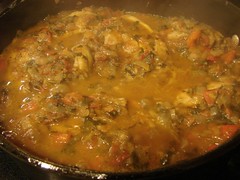 Add the habanero paste, beer and ketchup. Stir it all in, making sure it is evenly incorporated before putting the chicken pieces back in. Allow it to simmer tightly covered for 35 minutes. Remove the lid and allow it to cook down for another 10 minutes.
Serve with rice or patacones.
Variation: Last time I made this, I didn’t have beer around. I added 1.5 tbsp balsamic vinegar after putting the sofrito in and used 1 cp wine.
I know you will, so I want you to know that I know that. Also, I have eyes on the back of my head and on your computer screen, so I know when you’re not looking at the things I want you to look at.
Now that we’ve cleared that up, go check out the Photo Challenge page.
Go on.
It seems only appropriate that my first chef technique or tip is based on Latin cooking. This is the backbone of almost every Latin American sauce, casserole, stew, in reality, of most dishes. You will come across slight variations in the ingredients depending on the country. Cubans add cumin, bay leaves and oregano, while Dominicans may add achiote (annatto seeds). In Puerto Rico, you may find they add capers and olives.
I’m talking about Sofrito and I’m going to tell you how we make it in Panama. As I mentioned, it is a great base for tomato-based sauces, casseroles and complex rice dishes. I use it for beans too. It’s uses are endless. Here we go.
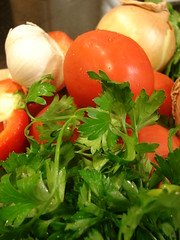
Sofrito Panameño
3 tbsp olive oil
2 medium onions, diced
1 bell pepper, diced (I prefer red, but green works too)
4 cloves garlic, minced
4 Roma tomatoes, seeded and diced
4 culantro leaves (or 1/2 cp cilantro), chopped
1/4 cp Italian parsley, chopped
1 tsp habanero paste (or 1 chili)
1/2 cp white wine
Heat the oil in a medium saute pan and add the onions.

Sweat the onions and peppers
Sweat them for about 3 minutes, then add the bell pepper and garlic–cook until all vegetables have softened.

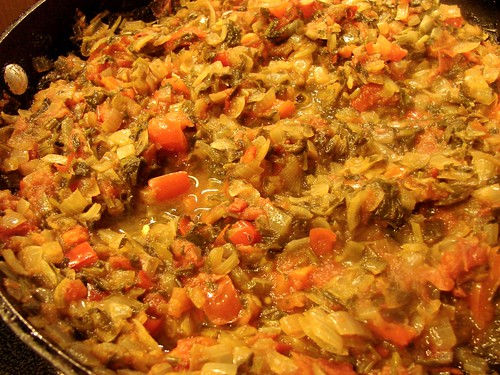
Now add the tomatoes, culantro, parsley and habanero sauce, finally add the wine. Lower temperature to medium low and cook for about 20 minutes, stirring occasionally. All the vegetables will begin to disintegrate and it will all look like a paste.
and, that's it
You’re done, add to your favorite dish. I use it as the base for stewed chicken, to top fish fillets and loads more.
I need to wipe this huge grin off my face. I’m NOT famous, at least, not by conventional standards. I did, however, get mentioned on SOMEONE ELSE’S BLOG as a blog to watch. Is it wrong that I’m THIS excited? I mean, attending the Oscars excited. NO. Being nominated for the Oscars excited. Practicing my surprise look excited.
Oh, boy!

I need to write my acceptance speech. And buy a dress. NO. Buy a gown. And shoes. And one of those cute glittery bags. I wonder if George Clooney will be the one handing me the Oscar. Sigh
You should check out the blogs recommended, I found some really cool ones. Visit TikiTiki for the full story.

If beans aren’t on your regular menu, they should be. They’re good for you, y’know. They have all that iron and fiber. They’re naturally low-fat (not by the time I’m done with them, though). They’re filling and stttttttretch, which makes them economical. Every variety has its own particular taste, so you never feel like you’re eating the same thing twice.
Any way, here’s how I cook up a pot of pinto beans, come to think about it, I cook kidney beans the same way. I should mention I started with dry beans, but you can sub those for canned if you’re looking to cut some time.
Listos?
2 cps dry pinto beans
2 cloves garlic, unpeeled
2 slices bacon or 1/4 cp salt pork
Remove any unwanted, damaged or broken beans, put them in a bowl and rinse, changing the water a couple of times. If you want to, soak in them in hot tap water for about 30-45 minutes, but this isn’t necessary.
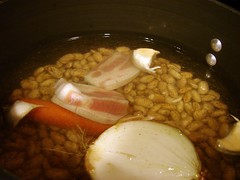 Drain the water and put the beans, garlic and bacon in a medium pan and cover it with cool water. You’ll probably want to add about 8 cups of water, bring it to a boil over high heat, then reduce the temperature to medium and cook for about one hour or until the beans are tender. You will notice that the water will evaporate considerably. Turn off the heat and set aside.
You can remove the beans from the pan and cook the following ingredients
3 slices bacon or 1/2 cp salt pork
 1 medium onion, chopped
1 garlic clove, minced
1/2 cp cilantro, chopped
Cook the bacon until lightly brown, then add the onions and garlic. When the onions are translucent, add the cilantro. Now add the back the beans, including any liquid still left and turn the heat to medium high. At this point season the lentils with salt or chicken bouillon and black pepper. Once this comes to a boil, lower the temperature to medium low and simmer for another 20-30 minutes.
That’s it, they’re ready to be eaten. I promise you will love them
Cookingly yours, Anamaris


And the reason I know this, is because my grams didn’t make grits. There is a ground corn casserole she made with coconut milk and okra, but this ain’t that. First time I had grits was about 10 years ago at Frank’s Grill here in Houston. I enjoyed them with lots of butter, pepper and salt and ate them with bits of an over medium egg. I saw recipes suggesting the addition of cheese and garlic, and that’s how I’m making these.
Mind you, this is about more than just the grits, but the other recipe, the crowning jewel part, is for the shrimp. OH.MY.GAWD! These turned out incredibly good, even if I say so myself. And the combo was just pure silliness. Hubby and I smiled through every bite we took. So here you have it Cheesy Grits and Shrimp!
Cheesy Grits
1/2 cp grits (I used quick, not instant grits)
1+ cp water
1 cp milk
1/2 cp heavy cream
1/2 tsp salt
1 garlic clove, peeled and halved
2 tbsp butter
1 cp Comte cheese (or your favorite medium strong cheese)
1/8 tsp nutmeg
1/4 tsp white pepper
1 cp panko crumbs
3 tbsp butter
1 tbsp extra virgin olive oil
Bring the water, milk, cream and garlic to a soft boil in a medium-sized, heavy bottom pan. Add the salt and whisk in the grits. Keep stirring to make sure the grits don’t get lumpy. They will begin to thicken, and you will have to decide how gritty you’d like your grits. I cooked them for about 15 minutes and added an extra 3/4 cp of water in the process.
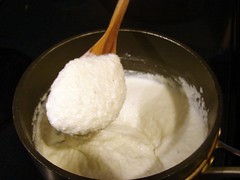 Once the texture is to your liking and the grits have thicken enough for you to be able to scrape and pile them to the side, add the butter, cheese, nutmeg and white pepper. Stir it all very well and remove from the heat. Butter the bottom of a square container (I used a rectangular baking sheet) and pour the grits in, to a depth of about 1 inch. Allow it to cool and harden in the refrigerator for about 30 minutes.
Once they have cooled, remove from the fridge and slice the grits with a butter knife. I was able to make about 12 1-inch wide sticks. Pour the panko crumbs onto a sheet of wax paper and dip the grit sticks in it, covering all the exposed sides. I literally pressed the sticks into the panko to make sure the crumbs were stuck to them. Now heat a nonstick frying pan with half of the butter and oil. Drop half of the panko covered sticks into the melted butter 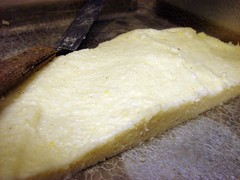 and brown on both sides–about 3 minutes or so per side. Remove from the pan and place on your plate, before browning the rest of the grits, wipe the bottom of the pan to remove the crumbs that have been left at the bottom. This ensures you don’t have burnt crumbs on the 2nd batch. Add the butter and oil, and repeat. They are now ready to serve, set aside but keep warm.
For the shrimp I wanted a creamy and spicy sauce, something that would contrast nicely against the creamy, rich grits. I started out with the concept of garlic shrimp, then added harissa and cream to round out the palate.
Harissa Cream Shrimp
1 lb large shrimp, peeled & deveined
2 garlic cloves, crushed
1/2 tsp salt
1/2 tsp black pepper
1/2 tsp Herbs d’Provence
1 tbsp extra virgin olive oil
 3 shallots, minced
3 garlic cloves, minced
2 tbsp butter
2 tbsp Harissa
1 cp white wine
1/2 cp heavy cream
Cornstarch if desired
Mix the first 6 ingredients in a bowl and set aside. In the meantime, mince the shallots and garlic and melt the butter in a medium size pan. Add the shallots and garlic to the butter and cook until they begin to soften, then add the harissa. Once you have mixed in the harissa, add the wine and, if you’d like, flame it to burn the excess alcohol.
Now add the shrimp, making sure to coat them well with shallots. Depending on the size of your shrimp, it will take about 5 minutes to cook them. Toss them to ensure they’re cooking evenly, then add the cream and turn off the heat.
Note: I wanted the sauce to be thick, so I did dissolve 1 tsp cornstarch in 2 tbsp cool water and added it to the sauce (I removed the shrimp first to avoid over cooking). Make sure you allow the sauce to come to a boil to give the cornstarch an opportunity to develop.
The beautiful fire turns into this

Finito! Serve the shrimp over the grits. FYI: I made the grits and put them in the fridge, then cooked the shrimp and left them aside, then fried the grits to serve it all.
Enjoy this one!
Cookingly yours, Anamaris

When I lived in Panama, there was this little shack that sold THE best rotisserie chicken in the world. It was flavorful and juicy and toasty and moist. It was delicious, but I guess I don’t have to say that.
After living in the US for 20 or so years, I’ve noticed this ‘style’ of chicken keeps popping up. There’s a place called Dodo’s Chicken here in Houston and theirs is pretty good. Most curiously, though, I’ve noticed references to this type of chicken on TV shows. Do you watch Flipping Out? Jeff LOVES Pollo Loco!
I’m betting you will love too, so get ready to have your chicken world rocked.
 Pollo a la Pollo Loco
1-5lbs chicken, whole
2 pkts Sazón
3/4 tsp salt
1 tsp black pepper
3 cloves garlic, crushed
1 tbsp extra virgin olive oil
12 oz beer, in can
2 garlic cloves, whole
Remove the innards from the bird and rinse it under cool water. Drain. In a small container, mix the next 5 ingredients into a paste and rub it over the chicken. Make sure to rub the inside as well as all the skin with the paste. Allow it to sit for at least an hour or longer, if possible–even overnight.
 Preheat oven to 400°. Open the beer and drop the 2 cloves of garlic in it. Stand the can on a roasting pan, then place the chicken over it. You will be inserting the can through the bottom hole of the chicken. Push it in as far as it will go, usually all the way to the top of of the chicken.
Now place the chicken in the oven and allow it to bake at this temperature for 15 minutes. Then lower the oven temperature’s to 350° and continue roastig the chicken for about 1.5 hours or until the internal temperature reads 185°. Generally, it takes 20 minutes to roast1 lb of raw chicken. Remove the chicken from the oven and cover with foil. Allow it to rest for 15 minutes.

Gently remove it from the can and carve. Enjoy deliciously moist chicken! Here it was served with yellow rice and lentils.
Cookingly yours, Anamaris
 Shrimp Toast
 I bought a little loaf of white bread from the Asian market and sliced it to about 1/4-inch thickness, trimmed the crusts, then cut them on a diagonal. I ended up with 12 cute little triangles.
 each slice of bread: about 1/2-inch thick. Then sprinkle with sesame seeds. Set aside.
 filling. The bread will brown rather quickly, so don’t go too far from the pan. Once the edges of the toast begin to turn golden brown, flip them and cook the shrimpy side until golden brown about 2-3 minutes.


 Pretend you’re back in kindergarten and roll out the dough into a long cylinder on the countertop. The roll should be about 1-inch in diameter; cut into 12 pieces that are about 1-1/2 inch long and roll them into balls, just smaller than golf balls.


 Season the thighs with the salt, garlic, Jugo Maggi and pepper. Preheat a large, heavy-bottomed pan and add the oil. Brown the chicken on both sides, remove from the heat and set aside.
 Add the habanero paste, beer and ketchup. Stir it all in, making sure it is evenly incorporated before putting the chicken pieces back in. Allow it to simmer tightly covered for 35 minutes. Remove the lid and allow it to cook down for another 10 minutes.


 Drain the water and put the beans, garlic and bacon in a medium pan and cover it with cool water. You’ll probably want to add about 8 cups of water, bring it to a boil over high heat, then reduce the temperature to medium and cook for about one hour or until the beans are tender. You will notice that the water will evaporate considerably. Turn off the heat and set aside.


 3 shallots, minced


 Pollo a la Pollo Loco
 Preheat oven to 400°. Open the beer and drop the 2 cloves of garlic in it. Stand the can on a roasting pan, then place the chicken over it. You will be inserting the can through the bottom hole of the chicken. Push it in as far as it will go, usually all the way to the top of of the chicken.