
Every year, my dad would get a turkey and a ham. He worked for the Panama Canal Commission, and that’s how they showed some appreciation. So, he’d show up, turkey and ham in hand and then he would cook them.
Cooking was mom’s territory, until recently, but Dad always handled the grill, omelets, the turkey and the ham. He would rub and rub, mix and pinch until we ended up with delicious dinners. I recently asked him about it, turns out my memory was pretty good. This is pretty much the way he did it, except I added some Herbs d’Provence… I love the stuff! Would you like me to share my dad’s recipe? I’m gonna anyway, so here goes.
Dad’s Baked Ham
1 6-8 lb cured, bone-in ham (not sliced)
4 garlic cloves, whole
1/4 cp ginger, sliced
Cloves
 It is a good idea to cook the ham for a bit to get some of the excess salt/brine out. Add the whole, unpeeled garlic and ginger to a stockpot, place the ham in it and top it with water. Just before it begins to boil, lower the temperature, there’s no need to make it boil, you want to keep it at a very slow simmer. Allow it to cook for about 45 minutes. If it’s not completely submerged, simmer it for 20 minutes on one side, then flip and simmer it for another 20 minutes. Remove it from the water and allow it to drain and cool.
 For the glaze, mix together:
1/2 cp brown sugar
1 14 oz can pineapple, crushed
1-1/2 tsp crushed chili pepper
1 tsp black pepper
1-1/2 tsp Herbs d’Provence
Preheat oven to 325°. Make a foil tent by folding 2 pieces of foil together, make sure they’re large enough to wrap the whole ham. Once the ham is cool enough to handle, score ham into diamonds and stud with the cloves.

Place the foil tent over a baking sheet and put the ham, fat side up, on the foil. Spread 1/2 of the glaze mixture all over the ham, taking care to make sure in seeps into the scores. Don’t worry if there’s liquid pooling at the bottom. Actually, that’s perfect as it will perfume the ham as it builds steam.

Tightly fold the foil around the ham, try not to squish it onto the ham or all the pineapple goodness will end up stuck to it. In the oven it goes, allow it to bake for 40 minutes. No need to check on it.

After the initial baking, remove the ham from the oven and raise the temperature to 400°. Spread the rest of the glaze over the top and sides of the ham, and place it back in the oven, only this time leave the foil open. Bake it for another 15 minutes or until it is nicely browned.

Remove from the oven and transfer the ham to a cutting board or serving platter to slice. I like to save the juices and fruit at the bottom to put over the ham when I plate it.

That’s it. You’re gonna love this one!
Cookingly yours,
Anamaris
I am lucky enough to have an artist for a husband. I’m also lucky enough that he loves me and puts up with me.
I asked him to make me a doodle to use for badges and such, and he DID! and I LOVE it! So I’ve replaced my gravatar with it. I also made some changes to it so I can use it for the Top Chef It Yourself award winner. Aren’t they cute?!

This is the brand/gravatar logo.

And this one is for the challenge. Aren’t I HOT?!
I want to take you back to the tropics and talk about another root/tuber. Let’s talk about Otoe aka Malanga, Yautia
What is it?

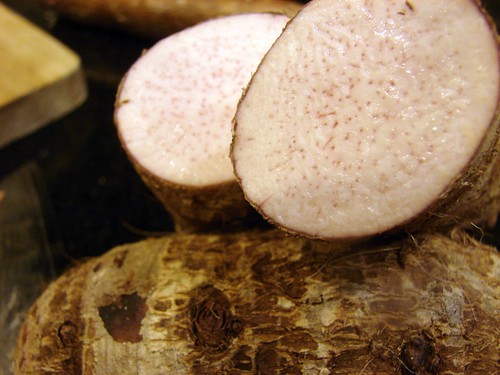
Otoe or Malanga has a brown, sorta hairy peel which is barely thicker than that of a potato. There are a few different varietals, some will have white flesh, while others have a beautiful purplish pink flesh. Both of them are speckled by little brown dots that look like pepper. The texture of malanga when cooked is very similar to a potato. It is often ground into a paste that can be made into flour.
How do I select it?
Squeeze it. Look for firm, well-formed tubers, free of blemishes. Malanga should be firm without any soft spots. It has a short shelf life, so make sure to make use of them as quickly as possible.
How do I cook it?
First, you need to peel it; a potato peeler works quite well. Use caution when peeling as the flesh tends to have a bit of slickness once the peel is removed. Trim both ends and any unsightly spots. Rinse and cube as needed.

Once cooked, otoe will still have a slightly lilac color
Last week I provided some tips for picking yuca, check that post here.
Here it is. The first post for the Top Chef It Yourself Challenge. This is exciting. So far we have 8 participants, myself included.
Since this is the first dish we prepared ‘together’, it will be a ‘getting to know you’ dish. Here are the guidelines:
JANUARY CHALLENGE: INTRODUCTIONS!
Deadline: January 20th
Prepare and blog a dish that’s all about you. There will be no ingredient restrictions for this round. Whether it is the dish you cook when you want to impress friends, or your foolproof favorite, the one that reminds you of your childhood or the one you put together when you need some comfort. It doesn’t matter. You decide what goes into this one, just tell us why you chose that one, that will be your intro to the challenge.
I am encouraging the other participants to add their dishes/posts to this one and I would invite my readers to visit their blogs and read about their dish. I hope you will.
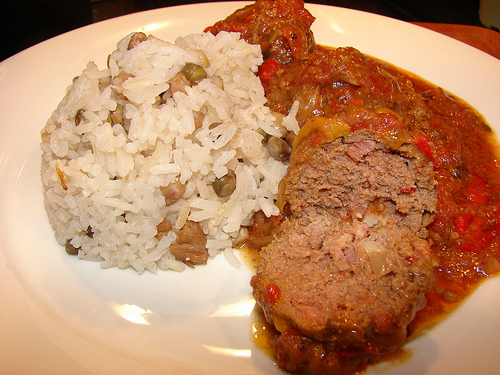 My introductory dish. I’ve thought about this one for a while and I changed my mind about the choice at the last minute. When I think about the flavors in my dishes, I think of my mom and home. I think about food that tastes 100% Panamanian. Foods I would eat on a regular basis. I chose a dish I had already posted: Arroz con Guandú. I think it is my favorite thing.
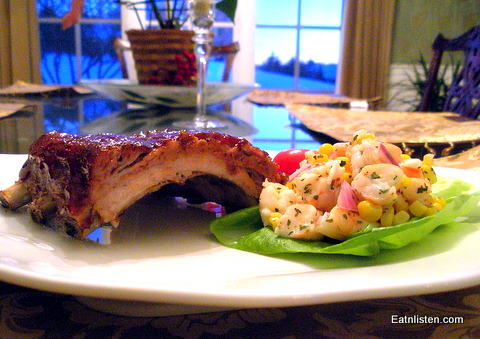 Brad’s recipe is for Ribs So Good They Make You Wanna Slap Your Belly. And I don’t think he’s kidding. He likes this recipe because it is easy, includes pork, and tastes great…what more do you need?
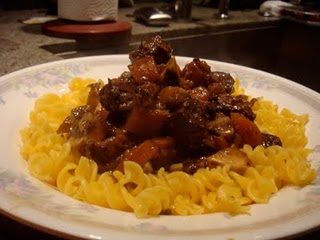 Christine’s choice was Bumble Bourgignion. This is what she said about it and herself: My dish is a dairy, egg, gluten free and low fat version of Boeuf La Bourguignon. This dish is highly popular with my families and friends, and it has incorporated my love for food and knowledge for wine.
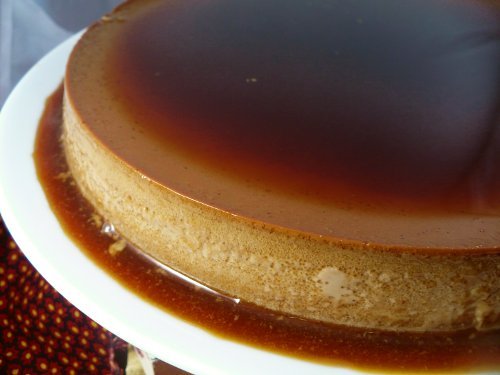 Jan made me jealous with a Choco-Kahlua Flan and I don’t have to tell you it looks like heaven. Here’s a bit about what influences her. Growing up in Southern California with a Mexican stepfather and eventually marrying into an Ecuadorian family has left a definite imprint on my cooking style. Many meals in our home reflect the Latin influences in our lives; rice is ever-present, holiday breakfasts mean tostones and panela on the table, and when it’s time to make desserts for a special dinner, that’s when I roll out the flans.
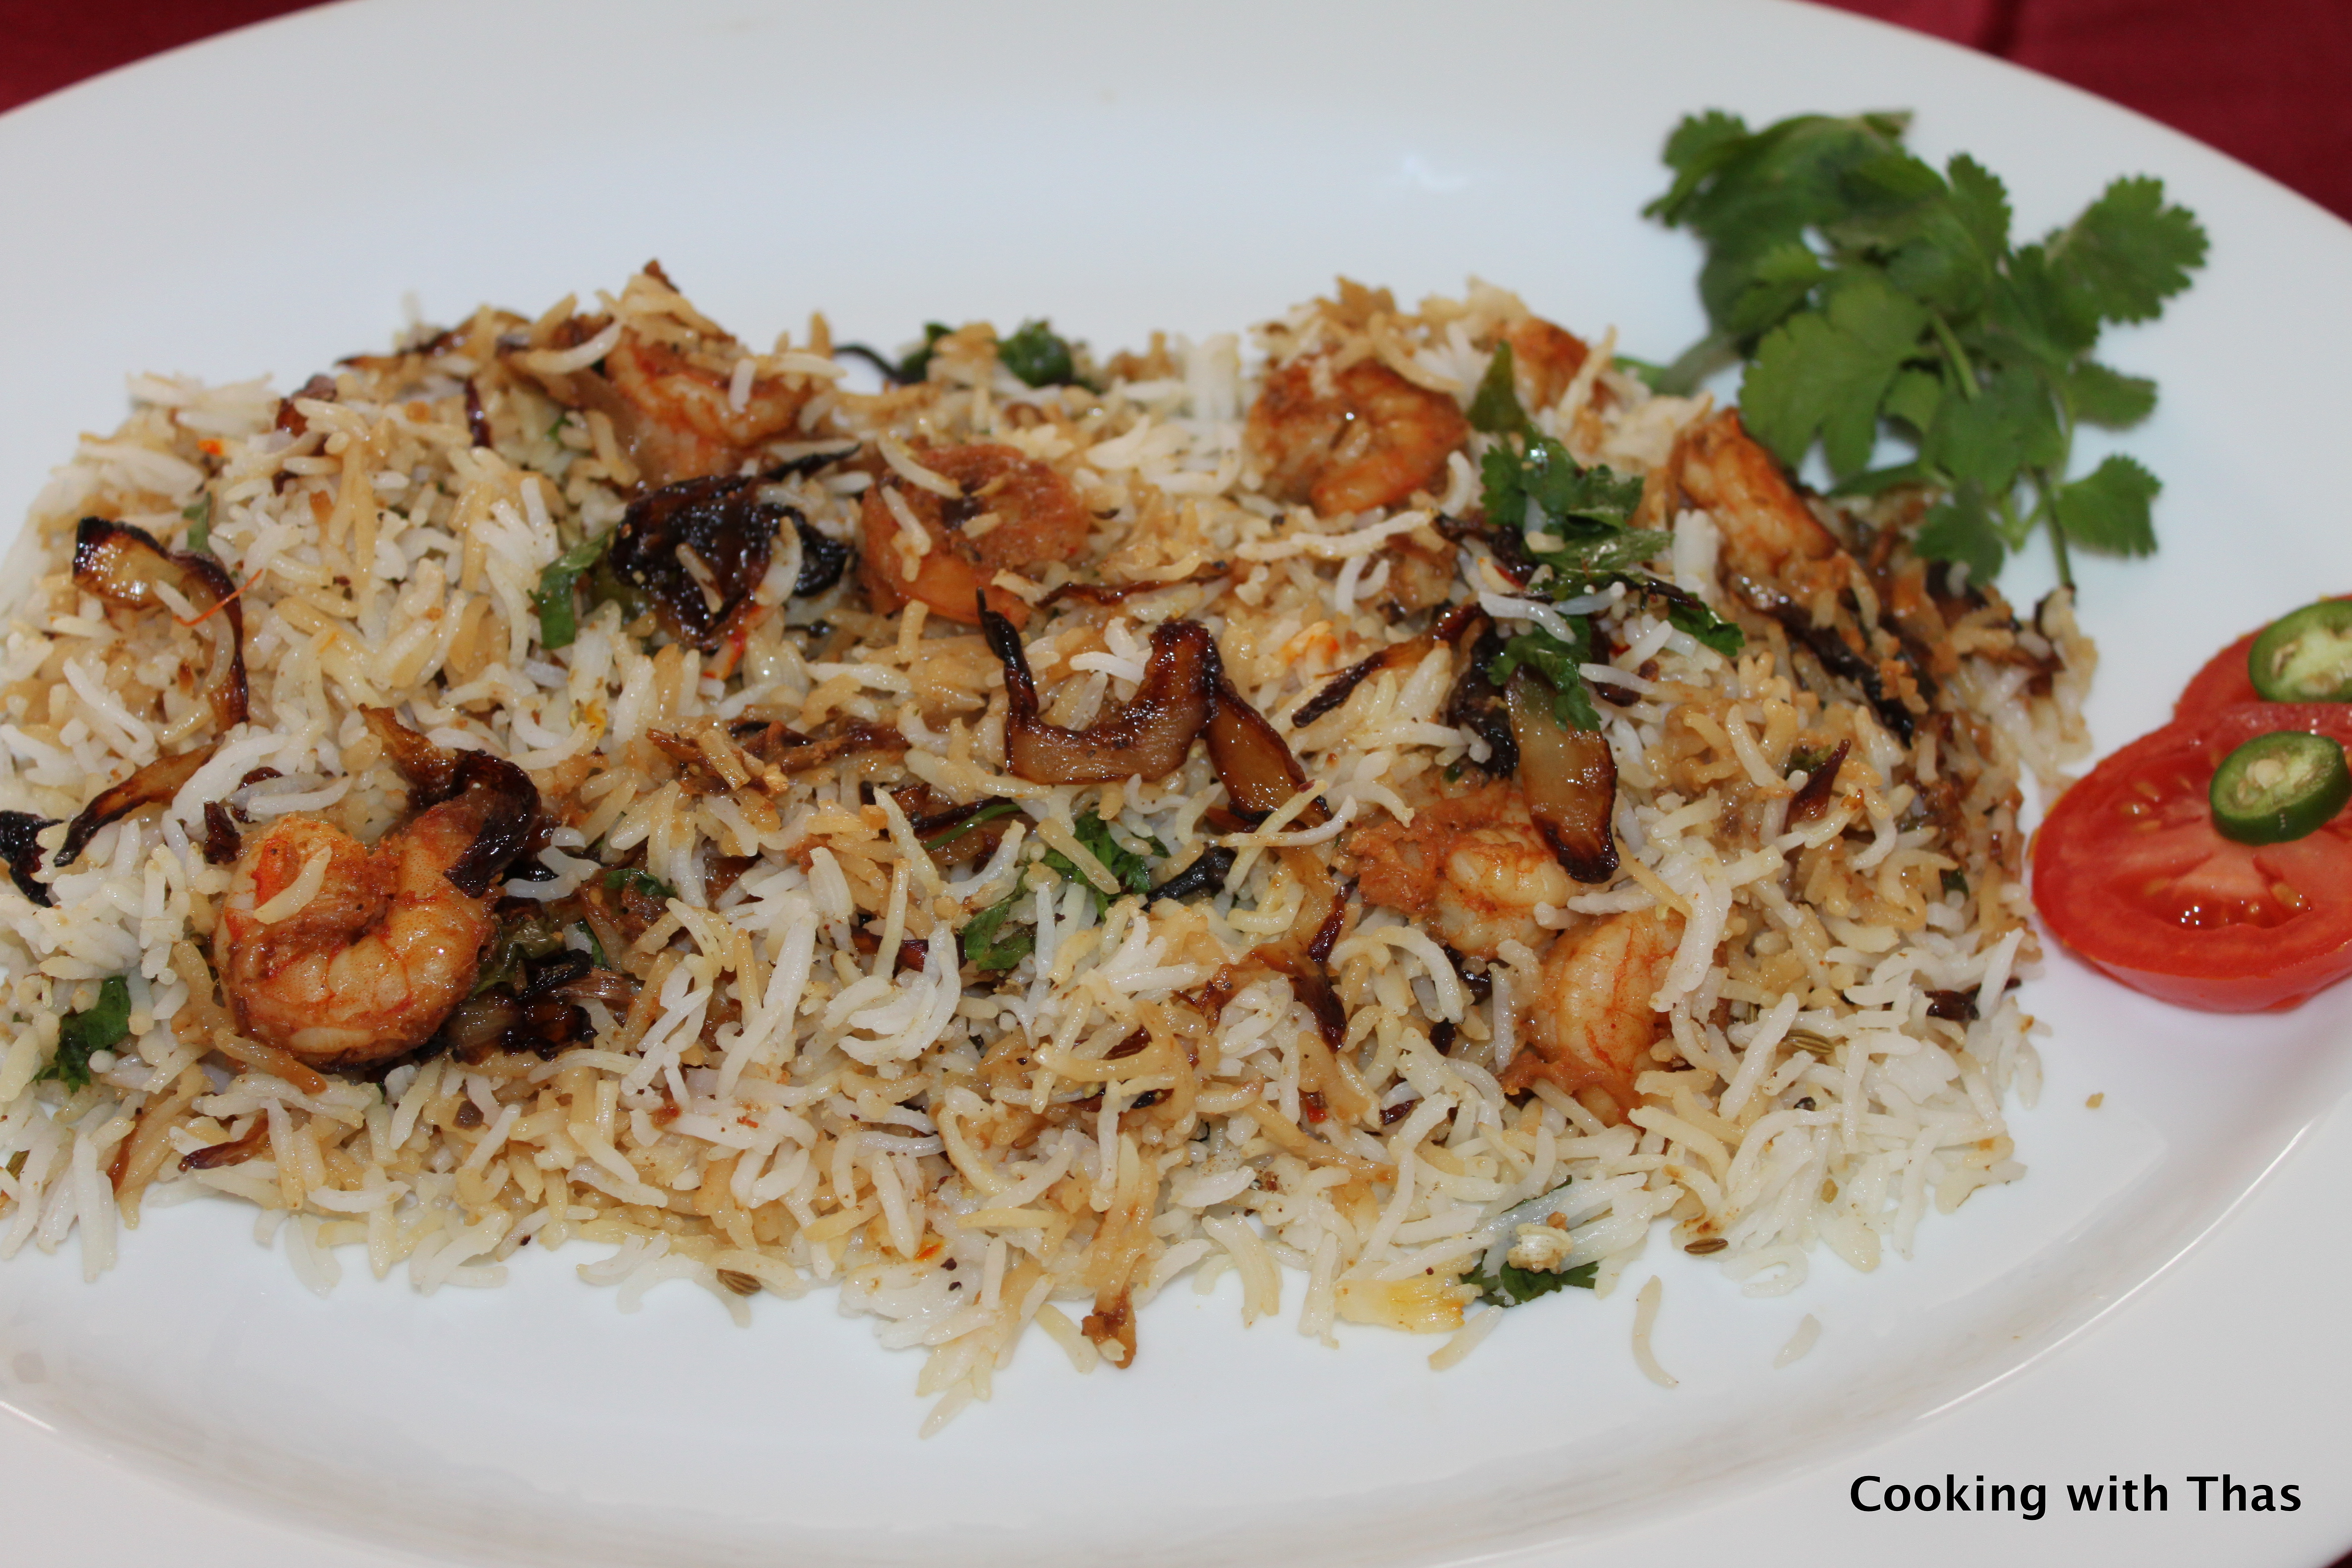 Thas, oh my! It was her recipe I used for the Ham Biryani, and she has submitted another! This time it’s Shrimp Biryani and Carrot Raita. Her inspiration comes from her first love, shrimp. This is what she has to say: Shrimp is my first love in the food world and Biryani is my favorite dish. I grew up having both of these, catch of the day shrimp and homemade Mom’s Biryani. I doubt if there would be any celebrations or special occasions without Biryani being served in India. I am a person who loves celebration and so biryani is my type of dish. When I made biryani with shrimp, this dish won over my taste buds hands down!
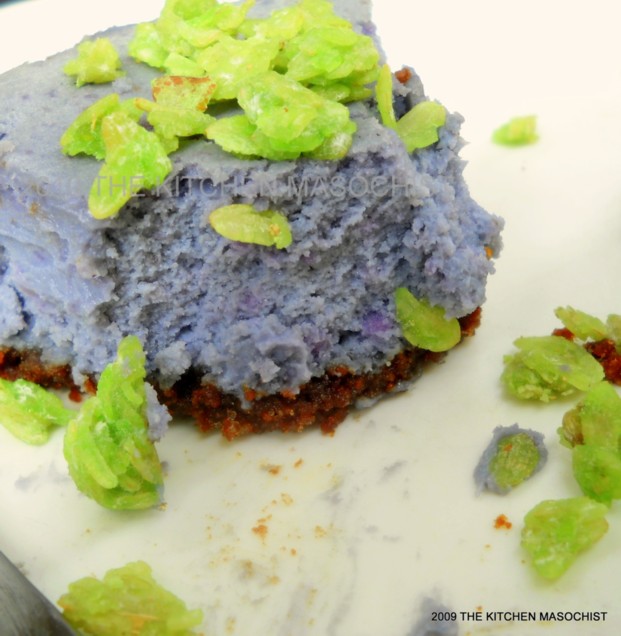 If beautiful color and exotic flavors are your thing, you’re gonna flip over The Masochist‘s dish: Purple Yam Cardamom Cheesecake. It looks divine! Why this choice? Read the commentary: I approach every dish I prepare the same way that I approach painting in that I take color, composition and texture into consideration. In art school, we were encouraged to think outside the box, to experiment, and follow the flow of our ideas even though they may not be popular or well-received by others. I apply this approach in the kitchen as well. I think of ways of what else could be done with a particular ingredient other than its traditional use. After all, ingredients are to a cook what paints are to a painter.
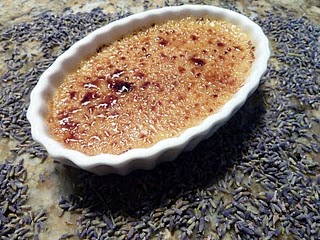
Then there’s Casey. Bringing us a Lavender Creme Brulee all the way from Bulgaria. Lavender infused Creme Brulee is my absolute favorite dessert. I first discovered it in a restaurant in Astoria, New York called “La Sans Souci”. The restaurant no longer exists, but it will always exist in my memories.
—
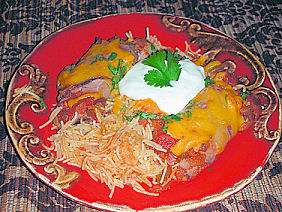 And finally, let me introduce you to Bruce & Glennis, they get busy in the kitchen… a lot. Their choice for an introductory dish is Gauchos. They took the description of a disappointing dish offered at a coffee shop on one of those worrisome nights, when a loved one has been hospitalized too long, the news isn’t good, and time is passing ever so slowly. A few months later they opted to pair the rolled and stuffed roast beef with sopa seca de fideo, and perhaps put picante sauce on the beef rather than gravy and top it with more shredded cheese. And a new dish was born!
Stay tuned as more of my friends add their delicious entries.
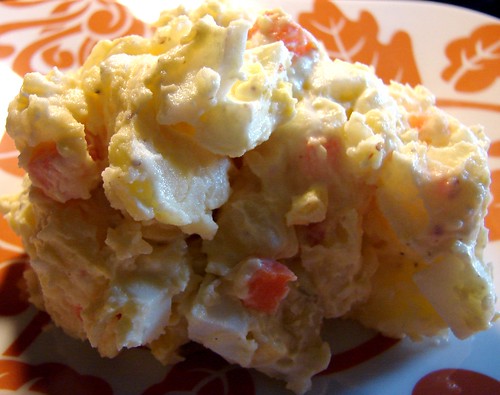
Yes, I’m going to be obnoxiously braggy about this one. I’m sorry, but I can’t help it. Well, I could help myself, but I don’t really want to. I love my potato salad. I just do. I try other potato salads, but I always come back to mine.
I object to the mustard base potato salad so popular here in Houston. I don’t really care to have bits of onions in it, because it reminds me of salads gone wrong after a day of hanging out by the beach. Don’t bother trying to make it healthy for me with bunches of carrots or celery. And please don’t be stingy with the eggs OR the mayo.
My salad is a combination of my mom’s and one of her best friend’s recipes. After my sis-n-law brought me Piment d’Espellete, I’ve incorporated it into my recipe, but it isn’t necessary. It’s creamy. It’s eggy. It showcases the potato’s sweetness. It’s just good. Grab some potatoes and go to work. You’ll see what I mean.
Mi Ensalada de Papas
Yield: approx 6 cups
 5 large Yukon Gold potatoes, peeled and quartered
1 medium carrot, halved
1 tbsp sea salt
4 eggs, at room temperature
1 cp mayo (use the real thing)
2 tsp Dijon or Creole mustard
1-1/2 tsp sugar
2 tbsp heavy cream or milk
1/2 tsp black pepper
1/2 tsp Piment d’Espellete or Smoked Paprika
Sea salt, if necessary
After you’ve peeled the potatoes, cut them into quarters. The cubes should be as uniform as possible, that way they all cook at the same rate. However, don’t cut them too small or the potato will just break apart. Place the cubed 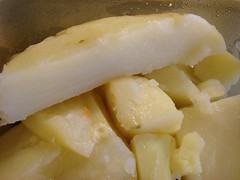 potatoes in a medium pan with the carrot and fill with enough water to pass the potatoes by about 1-2 inches. Add the salt and bring to a medium boil, cooking the potatoes for about 12 minutes or until fork tender. Drain completely and allow it to cool.
While the potatoes cook, boil the eggs. Put the eggs in a small saucepan and fill with water. Allow the water to boil for about 3 minutes, turn off the heat and let the eggs sit in the hot water for another few minutes (about 8 minutes). Drain the water and fill the pot with cold water, let them sit in the cold water for about 2-3 minutes. You’ll end up with perfect, beautiful eggs. Peel and chop the eggs, set aside.
Combine the mayo, mustard, sugar, cream, piment/paprika, black pepper in the bowl you’ll mix the salad. Make sure you mix all the ingredients very well. I usually break a piece of one of the potatoes and put a little dab of the mayo mixture on it to taste the flavors. I then adjust the salt as necessary. Set this aside.
Chop the potatoes and carrot into bite-size pieces and add them to the bowl with the mayo. Add the eggs and mix in all the ingredients, making sure the mayo is well distributed. If it seems a bit dry, mix another couple of tablespoons of mayo with cream, pepper and a pinch of sugar. That’s it.
You now have a perfect batch of potato salad. Enjoy!

Cookingly yours,
Anamaris
Winter. I love it. My friends think I’m crazy or mentally ill, then again, I guess that’s the same thing. In any case, I also love things grilled. I don’t, however, love smelling like I grilled things. Luckily, I now have a hubby who loves to fire up the grill, his only restriction is weather over 50° and we’ve not had that for a while.
I still want my ribs, darn it! So, I made them indoors and OH.MY.GAWD they were delicious. I followed my Dad’s method and tweaked his sauce to add a Mexican twist. See below for finger-lickin-goodness.
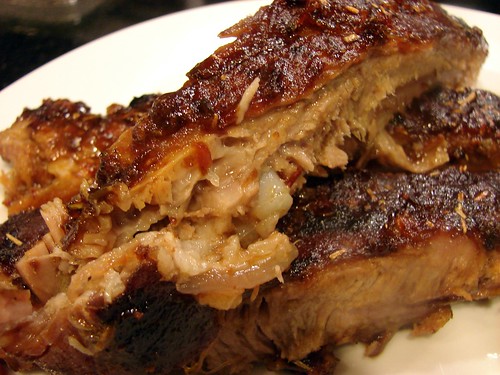
Honey Chipotle Spareribs
1 4-5lb spare rib rack, fat trimmed
Seasoned with:
2 tsp sea salt
1 tsp black pepper
 For the basting sauce:
1 7oz can crushed chipotle peppers
2 tsp sea salt
2 garlic cloves, crushed
1/4 cp honey
2 tbsp brown sugar
1-1/2 tsp Rosemary
After you have seasoned the ribs, mix the ingredients for the sauce and set it aside. Preheat oven to 350°.
In order to cook the ribs in the oven, you need a steam tent. Cut 2 pieces of foil paper the length of the rack. Line both pieces together and fold the seems together to about 1/2-in wide. Then fold again, the objective is to seal it so you have no leaks.
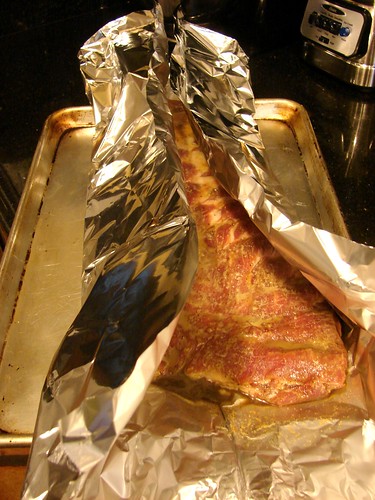
Use a cookie sheet or a baking pan, place the foil tent over it. Rub 1/2 of the sauce over the ribs–both sides. Place the rack on the foil tent, and seal the top of the tent folding it the same way you sealed the bottom. Place it in the oven and allow it to steam for 90 minutes. Now forgetaboutit!

At the end of 90 minutes, pull out the ribs and carefully open the top of the tent. Remember there’s a LOT of steam in there, don’t burn yourself. The ribs will be cooked through, but not quite falling off the bone yet.
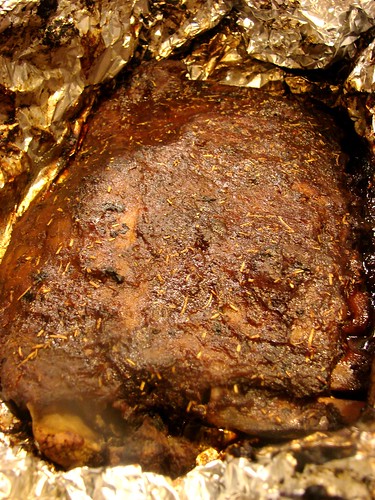
Baste the top with the rest of the sauce, loosely close the tent and allow it to cook for another 15 minutes. After that time, open the tent and allow it cook uncovered for 15 more minutes. This last step will caramelize the sauce and make the ribs nice and sticky.
You’re done! Start eating! They go divinely with my potato salad.

Cookingly yours,
Anamaris
This weekend we had breakfast for dinner. Sometimes that’s just the thing you need and want. Not that you’re trying to restart the day or anything, you just want hot breakfasty foods. I had picked up a few goodies at Phoenicia Foods, namely Spanish chorizo and the best fun cheese EVAH!
Let’s talk about the cheese for a bit. It is… STRING CHEESE! Not the kid stick cheese string cheese, but a beautiful bunch of milky white strands of marinated cheese. It has a texture similar to mozzarella. There I was, pushing my little cart down the deli aisle, when I had to do a double take. I saw a vat of something, what I couldn’t tell. So I had to back up and read the tag. It read: Homemade String Cheese. CHEESE?!! SERIOUSLY?! I promptly ordered myself 1/2 lb of it and giggled and grinned all the way home.

How awesome is THAT?!
OK, back to the omelette. The other ingredient was Spanish chorizo. This is different from Mexican chorizo which is soft and crumbly. Spanish chorizo can be compared to andouille, and unlike its Mexican cousin, it is hard, cured and seasoned with dried smoked red peppers. It is delicioso!
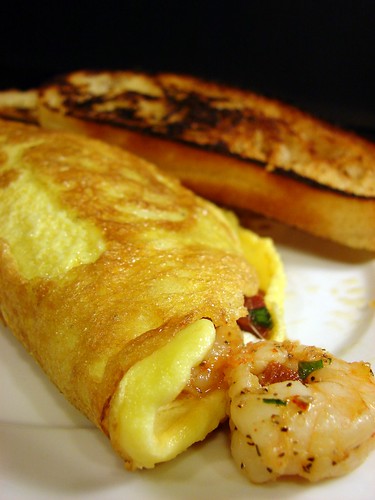
Shrimp is the last ingredient for the omelette. So this is a Chorizo and Shrimp Omelette. Can you say Oh My! I share, cuz I’m nice like that.
Chorizo and Shrimp Omelette
1/2 cp Spanish chorizo, finely chopped
2 shallots, sliced
1 cp shrimp, peeled & deveined
1/2 tsp sea salt
Herbs d’Provence (optional)
1/4 cp white wine
5 eggs, room temperature
Salt & pepper, to taste
Butter
Season the shrimp with 1/2 tsp salt and Herbs d’Provence. Set aside. Heat a skillet to medium and add the chorizo to render some of its fat. Then add the shallots and cook until translucent.

To the chorizo and shallots, add the wine. If you want to, go ahead an flame it to burn the alcohol. If you’d rather not do that, cook it on medium high until all the liquid has been absorbed.
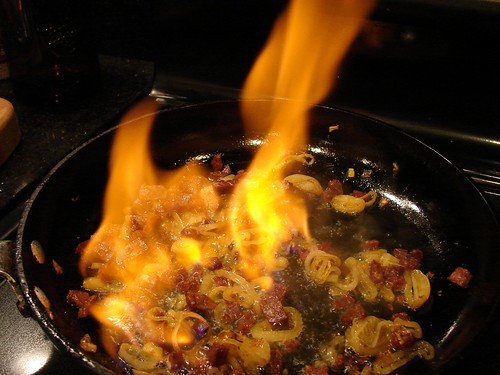
Once the liquid is absorbed, add the shrimp. Mix it in well, cover with a lid and turn off the heat. Set aside.
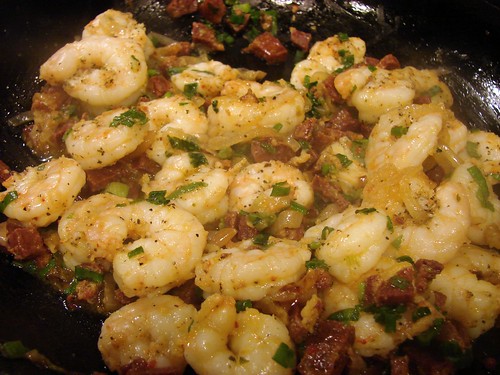
Whip the eggs in a bowl, add salt and pepper to taste. In a nonstick pan, melt 1-2 tbsp of butter and add the egg mixture.
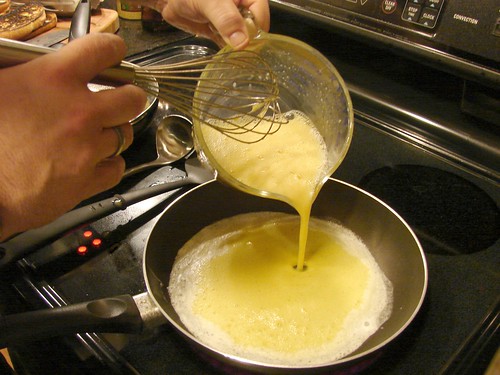
Swirl it around to cover the bottom of the pan, when the top begins to dry, flip the omelette. Now add your fillings on one side of the omelette.
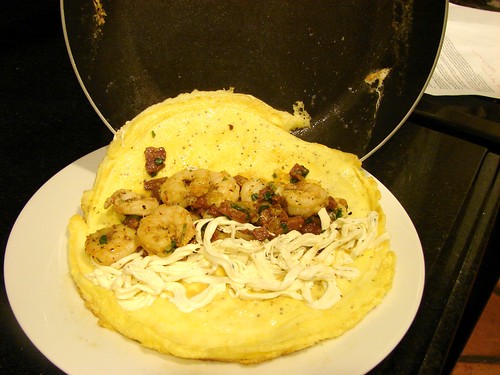
When the cheese begins to melt, slide it halfway off the frying pan and onto a plate, then flip the second half over top. Serve and enjoy!
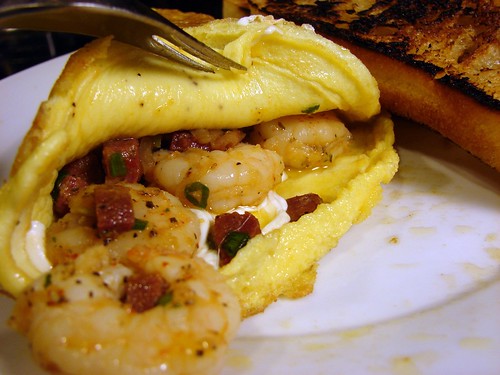
And around these parts, that means I’ve submitted a new picture to Shutterboo’s challenge. Nothing exciting on my part. But you should check out the stream.
See ya next when I’ll be shooting eyes.

Of course, the most popularly known are the French Fries, which aren’t really French, but I digress. In Panama, we eat tons of Yuca Frita (Fried Yuca). Sometimes they look like steak fries, or they may be chuncks of yuca. Regardless of how they’re cut, they’re delicious.
 Check out this post for help picking and peeling the yuca. Once you’ve peeled the yuca, all you need to do is parboil it before frying.
In a medium pan, bring water to a boil and add 1 tablespoon of salt. Then add the yuca, you don’t need to cut them to the size desired at this time. Allow it cook at a medium boil for about 8 minutes or until you’re able to pierce the flesh with a knife.
Remove from the water, drain and allow it cool before frying. Cut the yuca to the desired size. Heat up enough oil to deep fry the pieces, the oil’s temperature should be at 400°. Fry the yuca until golden brown, remove from the fryer and shake off excess oil. At this point you can reason with a little coarse salt.
Serve warm.

This week I thought I’d share some tips to keep in mind when picking and preparing some of the tubers I’ve used in my recipes. Specifically, yuca.
I mentioned some of it when I wrote about the Lentil Soup, but I became quickly aware that it may be a bit overwhelming. Instead, I will go into greater detail here. This will serve as a good reference place when you pick these up.
Let’s start with Yuca (aka Cassava or Manioc).

What is it?
- a shrub most common in Central and South America
- a highly starchy tuberous root
- a great source of carbs
- the flour produced from it is tapioca
- has a dark brown, thick peel and milky white flesh when raw
How do I pick it?
If you’re buying it fresh, not frozen, you’ll have to inspect the roots. I’m not certain why, but here in the US they cover the outer skin with a thick waxy film. Here’s what I suggest:
- check the peel–make sure it is evenly colored, without any dry or gray, ashy areas

- pick thinner roots, no more than 3-inches in diameter
- break it. You heard me. Break the root in half; you’ll feel like Superman

- look at the flesh. You want it to be milky white and without blemishes. If it has black spots that look like pepper, skip it. Put it down and move on to another root. If it looks good, take it home
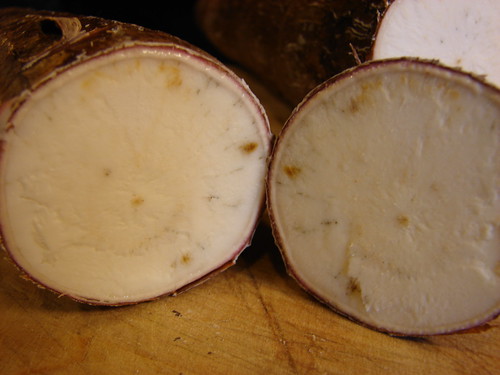
How do I peel it?
The peel is quite thick, it cannot be removed with a peeler. Here’s what you do:
- cut the yuca into manageable sections; about 2-inches long

- using a sharp knife, cut a slit from top to bottom on the peel of each section. The peel consists of 2 layers: the top layer is dark brown and thin. The 2nd layer is pinkish and tough. Make sure you slit through the 2nd layer until you hit the fleshy part

- use the sharp edge of the knife and push the peel away

- if you find any blemishes after peeling, shave them off with the knife

That’s it, you’re ready to cook it.
Check out Lesson 3, it’s all about Otoe.
 It is a good idea to cook the ham for a bit to get some of the excess salt/brine out. Add the whole, unpeeled garlic and ginger to a stockpot, place the ham in it and top it with water. Just before it begins to boil, lower the temperature, there’s no need to make it boil, you want to keep it at a very slow simmer. Allow it to cook for about 45 minutes. If it’s not completely submerged, simmer it for 20 minutes on one side, then flip and simmer it for another 20 minutes. Remove it from the water and allow it to drain and cool.
 For the glaze, mix together:


