I’m a late coffee bloomer. I didn’t discover the deliciousness of this beverage until I was 18 and got my first real job. See, my parents weren’t coffee drinkers. My mom grew up drinking tea; my Gramy used to make a huge pot of black tea , she would then sweeten and add milk to it. It ended somewhere between English and Indian tea.
On the other hand, my dad would drink Postum. Do you know what that is? At the time I just thought it was yuck, but thanks to Wiki, I now know it is a caffeine-free coffee SUBSTITUTE. Postum was made from wheat bran, wheat, molasses, and maltodextrin from corn–sheesh, that explains my utter disgust for it. Why even bother? I don’t even remember the coffee aroma which is THE closest thing to crack I can think of.
Anyway, I got my first real job with a law firm in Panama and one of the partners would have his pot brewed fresh, then disposed of after a certain amount of time. But the stuff was awesome! I got my first few cups for free and my dealer was set for life after that.
I’m not going to tell you I’m a coffee connoisseur, but I will admit to being a coffee snob. I like it strong. I like it fresh. I like it with REAL sugar and cream. I like the nice roasts, but I did have my flavored period. I’m over that now, I can’t even smell the stuff .
So, now that I’ve unleashed my coffee snobbery on you, let me tell you about this little gem I found while visiting one of Houston’s many Asian markets. Delicious is what it is! If, like me, you enjoy dark, rich, strong coffee, you should look for this one. The hubby and I are living happily ever after because of it.

When you open the bag– it is packaged in 2 air-tight baggies– you’re confronted by beautiful dark grounds that are so aromatic, you may think this is flavored coffee. And the flavor is just incredible. All bittersweet and chocolatey. Pound for pound, buck for buck, it’ll laugh that Starbucks stuff right out of your pantry. Time for another cup. Enjoy it!

Do you find artichokes interesting? I know I do. It’s like nature’s little secret hiding place. I wonder who was the first person to try to figure out if they were edible. I mean, they’re not especially ‘come hither and take a bite of me’ looking. Who do you suppose look at one and thought ‘I bet the heart of this unfriendly looking greenery is yummy’? I don’t know, I’m sure Wiki does, but I’m too lazy to look it up right now. What I DO know is that I’m glad that curious person went to town on that first artichoke and passed it on to his or her loved ones to enjoy.
When Lindsay came home with about 4 of these, my first reaction was panic. Then I remembered I had steamed artichokes about 12 years ago, so they weren’t completely foreign. The ones he picked up were different in that they had the stems attached. All 6-8″ of stems.
My first task was to find out if the stems were edible and look for suggestion on how to prepare both, stem and choke. I wanted something other than steaming and dipping them into butter, so imagine my elation when I read that the long stems were edible AND that sometimes they are fried! A meal was born.
The few recipes I found for frying the artichokes, suggested frying them in some olive oil. Nothing fancy. Just sorta pan frying. I decided to take a step further and bread them before deep-frying. I ended up with French Fried Artichoke Stems; a perfect accompaniment to the NY strip steaks in this recipe.

Now, I must admit that the preparation of this side dish took some doing. First, I separated the stems from the chokes, then trimmed the inedible bits. Finally sliced them into sticks before dipping them in buttermilk and panko crumbs in preparation for the fryer. I also breaded the chokes themselves–or tried to. They didn’t really hold on to the buttermilk very well, but they were still delicious, particularly once you got to the hearts. Here’s what I did.
4 artichokes with stems attached
1 lemon
1-1/2 cp flour
1/2 tsp sea salt
1/2 tsp black pepper
1 cp buttermilk (or regular)
1-1/2 cp panko crumbs
Oil for deep-frying
Fill a bowl with cool water and squeeze the lemon juice into it, leave the lemon halves in the water. Cut the stems from the chokes. Pare the tough peel off the stems and drop them in the bowl of water as you remove all the bark. Then trim the chokes by removing loose leaves, and snipping the points of the leaves left. Quarter the chokes and dunk in the water bowl. Slice the trimmed stems into sticks.

Preheat oil to 375°. Set up an assembly line. Combine the flour and seasonings. And put the buttermilk and panko crumbs in 2 separate bowls/containers. First dredge the sticks in the flour, then dip in milk, finally roll through panko. Repeat. The chokes will pick up some of the breading, especially on the areas where the leaves are still tight.
Fry them in hot oil until golden brown, sprinkle some sea salt as you pulled them out of the oil. Enjoy!


This is what I created with the other half of the items in the bag Lindsay brought home. I won’t bore you with the details of this challenge, you can read all about that in this post.
We’re big meat eaters, the hubby and I. So it was no surprise to find these beautiful strips in the bag. To up the stakes, I decided to season them differently than we usually do and to pair them with  something I had not worked with before. Alas, artichokes! I did have to scour the internet for ideas on how to prepare artichokes. Check out the recipe here.
My sis-n-law brought me goodies from her last trip to the South of France. She came back with this little bottle of Piment d’Espelette. I had never heard of this before and was dying to try it since I got it, so I used it to marinate the steaks. Usually I would’ve added garlic to a beautiful piece of meat such as this, Herbs d’Provence too. Different. That was my mission. I stayed away from both my favorite steak condiments and ended up with this most incredible steaks. If you do not have access to d’Espelette pepper, you could sub it with hot paprika.
Espelette Pepper Steak
NY strip steaks (about 1lb)
2 tsp Piment d’Espelette
3/4 tsp sea salt
1/2 tsp pepper
1 tsp herbs d’Provence (optional)
1 tbsp extra virgin olive oil
Mix the spices and oil, then rub on steak. Allow it to marinate for 15-30 minutes.
We cooked our steaks on the stovetop, but I’m sure this will work just as well on the grill. If cooking on the stove, use a heavy-bottom skillet; it needs to be able to get pretty hot to sear the steaks without burning them. Heat up the skillet until it begins to smoke, dab the bottom of the skillet with an oil-soaked paper towel or napkin, just enough to ensure the steaks will not get stuck to skillet. Now put the steaks in, try to avoid crouding them on the pan, otherwise they may begin steaming.
Depending on the thickness of the steaks, it will take about 3-4 minutes per side for rare doneness, don’t forget to lay them on their sides to sear the fat as well. Once you’ve cooked them to your taste, remove them from the pan and let them rest for 5 minutes. This allows all the juices to be redirected around the steak. Now eat!
I served these with Artichoke Fries, follow the link for that recipe.


Hojalda or hojaldre, it's a fried bread lovers' dream
Admit it. We all have a love affair with fried dough. Doughnuts, beignets, churros, funnel cakes, the little Chinese ones (I don’t know the name). I venture to say that every country likely has a version of this marvel. It makes sense, it is mmmm, good!
Here I share Panama’s version of this uber important discovery. Popularly known as hojaldres or hojaldas, you can’t have a decent breakfast without one. One thing I find interesting about them, is that everyone in my little country seems to have a slightly different recipe for it. Some people add eggs, other use oil, no sugar, it goes on. This is how I’ve made them for decades.
Ingredients
3 cps flour
2 tsp salt
4-1/2 tsp baking powder
1 tsp sugar
2 tbsp butter, softened
1 1/3 cp water
Approximately 1 cp flour for kneading
Plenty of oil for deep frying
Mix the flour, salt, baking powder, and sugar before incorporating the butter. You’ll want the flour mixture to look like wet sand. Gradually add water until you end up with very wet dough. I like making this by hand, it allows me to be aware of the texture and consistency of the dough; plus its like playing with your food. I’ve also used my mixer to do it and it worked just as well.

Begin to add the additional flour and knead it in. You want the dough to feel soft, but not sticky. Turn it out onto your counter-top and knead it for about 5 minutes.

Separate it into balls, whirl a bit of oil on the bottom of a mixing bowl before dumping the balls of dough in. Let it rest at room temperature for at least 30 minutes, the more they rest the more time it’ll have to bloom.

Frying the hojalda: you can roll them out with a rolling pin and stretch them out like pizza dough just before dropping them in preheated oil. They fry VERY quickly, about 2 minutes per side, so don’t wonder off too far.
They are perfect with anything you’d eat bread with. The hubby enjoyed sprinkling them with powdered sugar, I’m still recovering from this crime.
I’m not a huge pear fan. I’m not especially fond of poached things and I’m not addicted to chocolate. What I CAN tell you about this little dessert is that it makes me a believer in all of the above.
If you need a better reason: this helps keep the Surgeon General off your back. 1 fruit serving. Check. 1 Antioxidant serving. Check.
Poached Pear in Chocolate Sauce

This is a simple and delicious little treat I tried in Paris for the first time. It really would’ve have NEVER occurred to me to serve pears this way, but it works! The pictures you see are the trial run. I made them again for one of our ‘dinner parties’.
Poaching the pears:
4 Bosc or D’anjou pears
4 cps water
2 cps granulated sugar
1 vanilla bean, split
1 cinnamon stick
4 cloves, whole
Zest from half a lemon
 You’ll want to use a medium-sized saucepan, add the water, stir in the sugar and put it over high heat. Split the vanilla bean in half and scrape out the seeds, add to the saucepan together with the cinnamon and cloves.
While you wait for this to come to a boil, peel the pears. You’ll want to trim the bottoms to make sure they stand on the plate. Add them to the poaching liquid once it begins to boil, reduce the heat to medium-low. At this point it should barely simmer, don’t allow it to boil. Simmer the pears for about 15 minutes; this will vary depending on the ripeness of the fruit. Pierce it with a knife—be gentle—to determine if they’re done. Allow them to cool in the liquid.
Chocolate Sauce
1½ cp heavy cream
½ cp granulated sugar
8 oz unsweetened chocolate chips
2 tsp bourbon (optional)
1 tsp vanilla
Combine ½ of the heavy and sugar in a small saucepan over medium heat; you want to heat it up, but not boil. Add the chips, stir to melt. Put the vanilla and bourbon into your blender, add in the chocolate mixture and blitz. Heat up the rest of the cream and add it to the contents of the blender, in a slow steady stream. You’re looking for the consistency of condensed milk.

To serve, pour the sauce onto the bottom of a salad/dessert plate, swirl it around to cover. Take the pear out of the poaching liquid, let it stand on a clean towel to soak the excess liquid, and place atop the sauce. Voila!
PS: I’ve reserved the poaching liquid. Don’t know what I’ll use it for yet, but I’ll let you know when I do!
I do love me some George Michael! Are you ready for our first cooking adventure?

Hubby and I love Chinese food. We also love Japanese food, oh and Thai. Well, we have this thing for Asian food. A few months back a coworker of his invited him over for a home-cooked meal. Linz came back telling me all about the delicious lunch he’d had. About how his coworker’s wife had done her best to explain to him the different sauces and condiments she used. And so, we’ve tried our hand at making some stir fry, fried rice and other Asian inspired dishes.
This is my version of Shrimp and Pork in Pepper Sauce. Here I joined the concepts behind Pork and String Beans and served it with Bok Choy and Mushrooms.
Makes 4 small portions
For the Shrimp
Mix the next 4 ingredients and set aside
½ lb. large shrimp (about 8), halved
2 tsp. light soy sauce
1 clove garlic, crushed
1 tbsp. sesame oil
In a small bowl mix the next 3 ingredients and set aside:
3 tbsp. soy sauce
1 tbsp. oyster sauce
Dash of fish sauce (optional)
 For the pork and sauce
1-2 tbsp. sesame oil
½ lb ground pork
1 large yellow onion, sliced
4 green onions, chopped (separate tops from stems)
3 tbsp. cilantro stems, finely chopped
1 tsp. red chili flakes (optional)
¼ cup vermouth / broth OR water
3 pieces of rock sugar OR 2 tsp. granulated sugar
Heat up a wok or frying pan over high heat; add sesame oil and pork stirring until it browns. Make sure you break the pork into tiny crumbles, add yellow onions and cook until they begin to soften. Add garlic, cilantro, green onion stems and chili flakes. Cook until the onions are translucent.
Now add the soy and oyster sauce mixture, sugar and stir. If you used rock sugar, make sure it has dissolved before adding the vermouth or broth. After adding the liquid , cover and reduce the heat to medium low for another 4-5 minutes. At this point the pork will be completely cooked and tender—be sure to check it; if it’s undercooked it can take on the consistency of day old taco meat.
Add the shrimp halves, stir and cook shrimp until it just loses its translucency, about 3-4 minutes. Cover and turn off the heat. This should be the last thing you do before serving. This would be wonderful over white rice, we served it with bok choy, see that recipe below. Enjoy!
For the side dish…
Bok Choy with Mushrooms
Originally I planned on giving the bok choy a typical Asian flavor, but the mushrooms I had were not what I think of when cooking that type of cuisine so I made a last-minute change. I ended up with a simple and subtle side dish.

3 1”-pieces of ginger, peeled
A few cilantro strands
2 tbsp extra virgin olive oil
4 bok choy heads(?), washed
1 portabella mushroom, sliced
5-8 crimini mushrooms, sliced
Salt and pepper to taste

Put the oil in a pan over medium-low heat, add the ginger and cilantro, and allow it to infuse the oil for a few minutes. You won’t need to do much to this, just make sure the heat is low enough to avoid scorching it. In the meantime, prep the veggies.
Make sure you wash the bok choy, separate the stalks and rinse under running water. Chop them into pieces about 2”-long, slice the mushrooms.
Remove the ginger and cilantro from the oil, raise the temperature to medium-high. Once hot, add the mushrooms stirring constantly. Season with salt and pepper. Add the bok choy and toss to incorporate the mushrooms. Cover and reduce heat to medium low. I like my veggies with a bite, so I cooked the bok choy for 5 minutes.
I hope you like it as much as my husband did!
I admit it. It was Sunday, I couldn’t decide on dinner and I was slightly bored. My dear friendster Cindy had given us a gift card to Whole Foods when we got married (we’re still newlyweds!) and so I thought this would be a perfect opportunity to make use of those plastic dollars.
I cozied up to hubby, batted my eyelashes and said, in my most sultry voice: ‘Let’s play a game. You go to the store with this money and buy anything you want and I’ll cook it. I get no input. I’ll cook whatever you bring, even if I’ve never tried it before’.
 Yes, I was feeling brave and daring. I imagined myself a contestant in my show: a cross between the Next Food Network Star, Chopped and Top Chef. When he wasn’t back almost an hour later, I began to worry. Then he showed up with 2 HUGE bags from WF…! yeah, it was time to panic.

He produced lamb chops (virgin territory), pears, long-stemmed artichokes (never seen those before), potatoes, NY strips, ciabatta bread YUM! bok choy, pasta, and some other goodies. Definitely more than one meal. I paced, drank wine, paced some more and finally came up with a menu!
I would try my hand at the lamb chops and I would serve them over pasta with a Putanesca-ish sauce. I would also try making a pear tart. The deal was I had to do as much as possible without looking for recipes. I was able to do so except for the tart; baking is, after all, science. Here’s how the chops went down.

Aren't they beautiful?
Grilled Lamb Chops
1 lb of lamb chops (whole)
3 tbsp olive oil
2 tsp sea salt
1 tsp pepper
2 garlic cloves, crushed
First we scored the fatty side of the rack, then we marinated it.
Marinate: Then I threw the rest of the ingredients into a Ziploc bag, got the salt incorporated and added the chops. I let them hang out there for about 2 hours, turning them every so often.
Preheat oven to 375
Cook: In a very hot oven proof skillet, heat up some olive oil and place the rack fatty side down. You want to sear it about 3 minutes on each side (be sure not to burn it). Keep turning until you get all sides browned, then turn it so the fatty side is on top, and put it in the preheated oven for another 15-20 minutes depending on how you prefer to cook it.

After searing before hitting the oven
Salsa Putanesca-ish
3 slices of bacon, cubed
1 white onion, chopped
2 garlic cloves, crushed
8 crimini mushrooms, diced
1/4 cp Italian parsley, chopped
3 Roma tomatoes, diced
1 can roasted tomatoes
1/2 cp assorted olives, chopped
2 tsp anchovy paste
2 cp good beer
salt & pepper to taste
Saute the bacon to render some of the fat, but keep it soft. Add onions and cook until translucent; then add garlic and mushrooms. Once the mushrooms begin to soften, add the tomatoes, parsley and olives, stir in. Then add the anchovy paste and beer, bring it to a boil then reduce the heat to a simmer. Allow the flavors to cook in for about 30-45 minutes, stirring constantly. You may not need to add salt, but check at the end of the cooking time and adjust seasoning.
Serve: Remove chops from oven and allow to rest for about 10 minutes before slicing. In the meantime, cook, drain and serve your pasta onto a plate. Top with sauce and place a few chops over that, sprinkle with fresh parsley if desired.

When was the last time someone asked you the stranded on a deserted island question? You know the one. If you were on a deserted island, what one thing could you not live without? Or some version of that. In prehistoric times, like around the 1980s, the answers were books, walkman, tennis shoes. These days we’re talking iPhone, iPod, iThings.
Well, I have some iThings that I find essential for my cooking sanity. I am by no means saying you have to have these, nor am I supporting or advertising for any products. I’m just sharing some of my favorite gadgets, they may make your life easier too.

- That little rubber thing is a garlic peeler. I can’t tell you how much I love this thing.
- Good knives. What they say is true, if you buy good quality products, they’ll pay for themselves. It is an investmet well worth it. You want knives with good weight and sharp.
- A meat tenderizer. This one is nifty. It is reversible, so I have a prongy side and a flat surface on the other side. This one does double duty.
- A lemon juicer. ‘Nuff said.
- Good whire whisk
- Thermometer
- Wine corkscrew. If you have nothing else, you must have this.
- A stainless steel soap. It removes odors from your hands like magic!
As far as hand cranks go, those are it. In terms of kitchen electronics, there are just a few items I’d add to my couldn’t live without you list.
 A good mixer. I’ve had a basic Kitchen Aid for almost 10 years now and it is still going strong.
- A good blender. Margaritas anyone?
- A microwave. Somethings just need nuking.
- A deep fryer
Not a terribly elaborate list, is it? What are some of your kitchen essentials?
We all need them, I love them. I use them whenever they’re available. On my way to work, I take the last possible exit and make that death-defying left into the street right across from the building’s garage. Once there and working, I’m a master of the keyboard shortcuts. Life is complicated and difficult enough on its own, if there’s a chance something will make it simpler or the completion of a task can be faster, I’m all over it.
I take cooking or preping shortcuts when available too. I have 2 that I’m especially crazy about. The first one I use because it is a time-saver, the second because of convenience. Intrigued much? I’ll share with you.
Shortcut #1 is Crushed Garlic. I love the scent and taste of fresh garlic in my foods, there really isn’t anything quite like it. I don’t, however, love the smell of garlic on my hands and don’t always want to spend extra minutes mincing. I’m also not crazy about the prepackaged bottles of minced garlic. There are 2 reasons for my dislike of those little bottles: a) in order to preserve the garlic, they add vinegar to it–this changes the taste of a dish; b) it tends to be minced thicker than I care for.
Here’s what I do:

Peel 4-5 heads of garllic
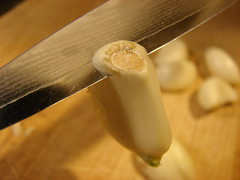
Trim the heads off each clove

- Blend about 1/3cp extra virgin olive oil and cloves until smooth
If it is too thick, feel free to add more olive oil to help the blender along.

 Shortcut #2 – Habanero Paste – Habaneros, Scotch Bonnets, Aji Chombo, whatever you call it this little pepper packs a whoping punch. My first personal experience with this devil was when I was about 18 and getting some nibbles ready for my first party. I needed to chop some for a pickled dish and I didn’t realize that mere contact with the inside of it could make for very uncomfortable times. So I chopped about 5 of them, through them into my dish then went on with the business of getting ready. I rubbed my eyes, so I removed and rinsed my contacts only to make the stinging worse. I showered, so EVERY inch of my body felt as though it was aflame. I still enjoyed my party, youth is a wondrous thing.
Now that you have that picture in your head, my first piece of advice is DON’T TOUCH ‘EM; there’s a reason they rank as one of the hottest pepper known to man. Even as I remove the stem, I handle them with a fork and knife. I’m not saying you need to fear it, just have respect for it. It really is a delicious little pepper. I love its smoky, almost sweet taste.
Usually I get about 20 of the orange to red ones, remove the stems and quarter. Put them in the blender with 1/3 cp of extra virgin olive oil, 3/4 tsp salt, 3/4 tsp sugar, 5 chopped cloves of garlic, 1-1/2 tsp English mustard, 2 tsp white vinegar. Just blitz until you end up with a smooth paste. Put it all into an air-tight container and keep refrigerated. I tend to add it to recipes about 1/2 tsp at a time for a nice little kick. 
I like to think about the original explorers. The guys commissioned by their countries to seek new lands and report back. Can you imagine what flavors Christopher Columbus, Ponce de Leon, Bartolomeu Dias, or those who went towards Southeast Asia like Henri Mouhot and Carl Bock were surprised with?
Think about it. Imagine being out to sea for weeks at a time, no terra firme in sight. Then landing in what we now know as Florida, Thailand, Borneo, Puerto Rico, Mexico or Panama. You find yourself sea-weary, possibly sick and hungry for something other than a MRE. Now visualize the locals preparing their meals of the day. What would you find? What will you love?

My top 10ish
I do my own exploratory missions in the spices and condiments aisles of my local stores. My arsenal of spices grows and grows with every visit; sometimes to refill my already favorites and others to get to know some new ones. The picture at the top is my current collection of dry spices. Well, what I was able to fit into the frame. Let me tell you about some of my favorites.

These get a lot of play at the Price household
Let me do this all professional like, from left to right. heh.
Black Pepper - of course, no spleinin’ necessary
Garlic - I use granulated garlic very seldom, but I always keep it on hand. Check out how I save time to use fresh garlic.
Italian Seasoning - for sauces and such
Herbes d’Provence - aka Anamaris’ CRACK! If you haven’t tried this stuff, do! It is aromatic, sweet and savory goodness.
Rosemary - for chicken, steaks, pork chops, veggies. Awesome!

Hablas espanol?
Equally as important, but with that Latin flava I love.
Knorr’s Sazon Culantro y Achiote - I use this for Arroz con Pollo and other rice dishes. It also makes a mean roasted chicken.
Maggi’s Salsa Inglesa or Jugo Maggi - a Latin version of traditional Worcestershire sauce
Maggi (or Knorr) Caldo de Pollo - it’s kinda like a powdered chicken bouillon

These round things off nicely. Ketchup, butter (cuz butta makes everything betta), Worcestershire, vegetable/canola oil, sea salt, and extra virgin olive oil. The 2 odd bottles next to the salt started off as snobby beers and are now great receptacles for oil.
Check out the posts about garlic and habanero sauce. Both of those are always in the fridge. What’s in yours?
Cookingly yours,
Anamaris
