It’s only natural for me to be the most comfortable cooking traditional Panamanian dishes. It makes sense for these dishes to have special meaning to me. That the mere thought of them takes me back home, to the house I grew up in on Calle L, to watching my mom busily stirring pots and pans. There are dishes that remind me of Sunday dinners with aunts, uncles, cousins.
Guandúes are also known as gandules, or pigeon peas and are commonplace in Puertorrican and Caribbean tables and generally combined with rice. In Panama it is usually made with coconut milk and rabito–salt cured pig’s tail. I don’t have the luxury of using freshly picked guandú, but I can find them in the frozen section or the Latin aisle of most of the grocery stores in my area. Goya is a well-known brand for Hispanic products, they have the frozen ones.
 Arroz con Guandú
 2 cps rice
1 cp frozen guandú (pigeon peas)
2 cps coconut milk
1/2 cp salt pork or bacon
1 tbsp vegetable oil
Sea salt
In a pot with a tight-fitting lid, brown the salt pork/bacon rendering some of its fat. Add the guandúes (pigeon peas), coconut milk and a bit of salt. Bring it to a boil, then reduce the heat until it simmers. Cook it until the peas are tender, about 40 minutes. Strain the liquid and measure, add enough water to make 3-1/3 cps of liquid, set aside.
This recipe uses the frozen peas, however, if you are using the canned variety, just skip the step above. Instead, strain the peas and measure the liquid in the can, then add coconut milk and water to measure 3-1/3 cups. Fry the salt pork or bacon just before adding the rinsed rice.
 Add oil to the pan with the peas, rinse the rice and add it to the pot stirring all the ingredients. Add the liquid, check the salt, stir this well. Make sure you remove any drippings that may have been stuck to the bottom of the pan. Bring it to a slow boil; once the liquid boils do not stir it again. Keep the temperature on medium high.
Once the liquid is almost completely evaporated, bring the temperature to low and cover with the lid. Allow to steam undisturbed for 40 minutes. When you remove the lid, all the peas will be at the top, go ahead and stir them into the rice. You’re done!
Note: The flavor of the coconut milk will intensify with time. You can cook the peas a day ahead to allow the flavors to meld together.

So, how did your pot come out?
Cookingly yours,
Anamaris
Yes, this is another post about green plantains. I wasn’t lying when I said there are many ways to prepare them. This method leaves you with beautiful plantain chips that can be eaten plain or with the dip of your choice. I made a nice Guava Chimichurri to go with these; just follow that link for that recipe.
Now for the business at hand, let’s make some plantain chips.
Preping the plantains – Give them a scrub under running water. Plantains have a milky sap that leaks once they’re harvested. I find that this sap attracts dust and debris, so take a sponge to them.
Once you’ve rinsed them, trim the ends and score the plaintain lengthwise following its ridges. You want to have about 4-5 lines going from top to bottom.
Trim both ends of the plantain.

Score the plantain top to bottom about 4-5 times
After scoring, soak them in water. I usually fill one side of the kitchen sink halfway with cool tap water. Allow them to soak for 30 minutes or so. This makes peeling them a breeze! While they soak, preheat a deep fryer to 350°.
Next, peel the suckers!
Once you’re done peeling, you can move on to slicing them. I use a handheld mandolin. It’s a gift from hubby and ILOVEIT! I place it on level 2, which pops out paper-thin slices. This is ideal for the chips that resemble potato chips. I’ve also had them a tad thicker, which is still enjoyable, but less addictive…hmm, maybe I should switch to #3.
In the absence of a mandolin, you could use the wide side of a grater, though I think the slices may be a bit thicker, closer to level 3. These are still delicious, just not as crispy.
They’re ready to fry! The thinner they are, the faster they’ll brown, so keep an eye on them. Also, you may want to drop them into the oil as close to individually as possible. They have a tendency to clump together, so drop, stir and shake your basket. Season them with salt as soon as they come out. Drain them on paper towels (if you can keep yourself from devouring them) and serve. They keep nicely for a day or two in a sealed bag.
Being from a country with quick access to both the Pacific and Atlantic waters, it’s no wonder I love fish and seafood as much as I do. I could, and believe me when I say I’m not kidding, eat from the bounties of the sea on a daily basis. I love it all, or at least I love every sea creature I’ve tasted to date. Would you like me to list them? There are the obvious, fish and crustaceans; then there’s all the shells–oysters, mussels, clams, scallops. I’ve had octopus, cuttlefish, eel, turtle, sea cucumber. Some others I only know in their Spanish names.
Believe me. I eat and love to eat lots of seafood. There are some I like much more than others, of course. There’s just never enough of them. Today my focus is on shrimp. Let me have a moment to think about that delicate, sweet, and that far away taste of the ocean. I’m hungry.

This is how I make Camarones al Ajillo (Garlic Shrimp). My favorite thing about this recipe is how easy it is and how well the natural taste of the shrimp comes through. I hope you enjoy it as much as I do.
Ingredients
1 lb shrimp, peeled & deveined
3/4 tsp sea salt
1 tsp crushed garlic
1 tsp extra virgin olive oil
Combine these ingredients in a bowl and set aside. In the meantime, prepare the following:
1 cp onion, diced
2 fresh cloves garlic, minced
1/4 cp parsley, finely chopped
2 tbsp extra virgin olive oil
1/2 cp beer or white wine
1 tbsp butter
You will need to use a saute pan with a lid. Heat the olive oil and add the onions. Cook onions until translucent and add garlic and parsley, cook for 2 or 3 more minutes.
 Add the shrimp, tossing around and incorporating the onions. When the shrimp begin to lose their transparency, add the beer/wine. Stir very well to cook down the alcohol. Turn off the heat and cover with the lid, allow the steam and heat contained in the pan to continue cooking the shrimp. Uncover and stir it once more. The shrimp are done when slightly pink.
Serve it over white rice or with crusty French bread.
Cookingly yours,
Anamaris

Do you ever watch the cooking contests on Food Network and the likes? The ones conducted at fairs or at the bequest of a brand or product? I do and have always wondered what it’s like to participate in one. How many entries are against yours, is your idea unique or interesting enough. Do you have a legitimate chance, will anyone other than family and close friends enjoy or appreciate the recipe? I imagine these are but a few of the questions swimming around someone’s mind when participating in such a contest. I say that because those are the questions swimming around my mind today.
I’ve decided to enter a recipe contest! Saveur magazine has a contest for family recipes and so I’ve picked one and entered it. I don’t know what will be of it, if anything, but it is a good recipe. Family and friends have said so. I’m not sure it is unique, but I do know it is different. I’ve sent it on its cosmic way to see what impressions it causes on those not related to me.
This contest was weird in that they’re not tasting my cooking. I guess they’ll read the recipe and and determine whether or not it sounds appealing enough to recreate. If it does, it’ll be one of the finalists they will taste test. In any case, I’m sharing it here with you. Try it and let me know your thoughts. My mom would whip this up for us. Except for boiling the pasta, this is a one-pot dish. It is like chicken & rice, but using pasta instead of rice. The Caribbean flavor comes from coconut milk and curry powder.
Pasta con Pollo Caribe (Caribbean Chicken and Pasta)

Ingredients
4 lbs chicken thighs (10-12 on the bone with skin)
2 cloves garlic, crushed (1 tsp garlic puree)
1 tsp habanero paste or your choice of hot sauce
2 tsp salt
1 tsp black pepper
1 tbs Italian seasoning
2 tbs Worcestershire
Combine these ingredients and allow the chicken to marinate for 30 minutes or longer if possible. In the meantime, prepare the rest of the ingredients:
2 onions, coarsely chopped
1 tsp crushed garlic or 2 cloves finely chopped
32 oz stewed tomatoes, chopped-liquid included
16 oz can unsweetened coconut milk
1/2 tsp curry powder
2 bay leaves, dry
4 tbs Italian parsley, chopped
1/2 cp water
1-2 tbsp butter
Sea salt
1 lb linguini pasta (or your favorite type of pasta)
Preparation
In a heavy-bottom saute pan, brown the thighs on both sides and set them aside. Because the chicken still has skin, I like to drop just a dab of vegetable oil onto the pan and spread it around with a napkin before putting the chicken in. As the chicken browns, you’ll begin to develop drippings at the bottom of the pan. Do your best to scrape these and save them; they will add lots of flavor as the chicken stews.
 When you have browned all the chicken, check the fat that was rendered. You need about 2 tbsp left on the pan, remove any excess. Now add the onions and cook until they begin to get translucent. Add the garlic, 3 tbs of parsley and tomatoes and loosen the drippings. Add the coconut milk, curry powder, bay leaves, water and stir. Adjust the salt as necessary.
Make sure there aren’t any drippings stuck at the bottom, bring it to a boil before putting the chicken back in. Turn the chicken pieces to coat them with the sauce. Lower the temperature to a slow simmer and continue to cook the chicken for 40 minutes.
Once the meat separates from the bones, turn off the heat and allow the chicken pieces to cool down in the sauce. The flavors in the sauce will intensify overnight. If you have the time to begin this recipe the day before serving, I recommend preparing it up to this point, though it isn’t necessary.
Begin boiling the water to cook the pasta. Once the chicken is cool enough to handle, remove the meat from the bones and put it back into the sauce. Keep the sauce and chicken warm, add the butter and stir until melted and well incorporated. You will have about 5 cps of sauce and chicken. Cook and drain the linguini, which should be cooked al dente. Add the pasta and remaining tablespoon of parsley to the sauce and mix well, and allowing them to cook a bit longer in the sauce, about 5 minutes. Serve!
Makes 8-10 servings

It’s that time of year again. The time when people release their fear of cinnamon, nutmeg and cloves. When I pester my friends to join me on countless patios for drinks. When I have perfect, frizz-free hair and impeccable makeup. The time when annoying kids begin minding their manners and grown-ups are on a mad dash to use up their vacation days. Tis the season for Honeycrisp Apples!

Ah. The. Perfect. Apple. Also, the best apple known to mankind. Mind you, I’m NOT an apple person. Every now and again I’ll go to town on a Granny Smith, then realize they’re super tart before I make it halfway through. I scoop apples out of my apple pie. I loathe apple juice. apple cider and applesauce. When comes to apples, I’m a faithful type. I have eyes and taste buds for Honeycrisps alone.
What is it about this apple you ask? Well, it’s everything. For some wonderous reason they’re gigantic. They hold true to their name by being sweet as honey and crisp like celery. These babies are beyond juicy. I like to put them in the fridge before eating them. When you bite into them it’s like a burst of sweet, tart, juicy apple goodness.
Original sin or not, if this was the apple Eve was tempted with, I TOTALLY understand her choice.

I’m sure I’ve mentioned how much I enjoy cooking and eating, but sometimes I just don’t want to put a whole lot of effort into the cooking part. On days like that, I like to cook meals that are easy while still being delicious.
I got this recipe from an acquaintance many many years ago. I’m not sure where she got the original recipe, but I’ve tweaked it some since. It begins with cooked chicken and ends in a luscious, creamy, slightly spicy sauce I prefer to enjoy over white rice, but would also work over pasta. You can steam the chicken as described in this method or just pick up a roasted chicken and debone it.
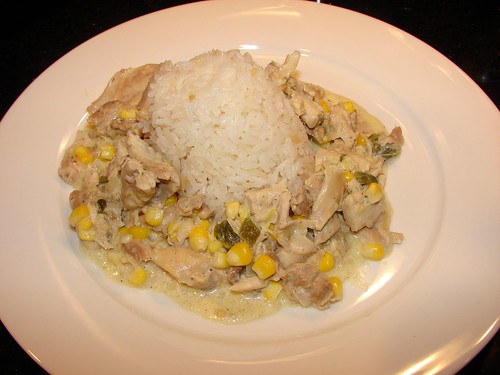
Chicken in Creamy Poblano Sauce
5 cups cooked chicken, chopped
2 tbsp extra virgin olive oil
1 large yellow onion, chopped
1 large poblano pepper, roasted & chopped
4 oz cream cheese, softened
2 cps chicken broth
1/2 cp corn kernels
1/4 cp heavy creamy (optional)
salt & pepper to taste
Roasting the pepper


When I had a gas stove, I used to put the peppers directly over the burner.This time I placed a cooking rack over the burners of my electric stove and just turned the pepper until it was black all around. Once it’s blackened, dunk in a bowl of cool water and peel. The skin will slide right off. Then rinse the outside, open the pepper and pull out the seed and veins. You decide how hot you want the dish to be by leaving some of the seeds and/or veins in.
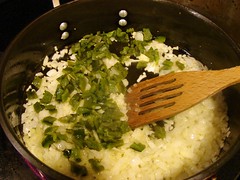 Heat the oil in a skillet and add the onions, cooking them until translucent. Then add the peppers and stir in, these are esentially cooked once roasted. Begin adding the cream cheese, I like to break it into cubes to help them dissolve. Follow this with the broth and stir until all the cheese has melted and it is heated through. Don’t allow it to come to a hard boil, but you will see the edges bubble.
Now add the corn, stir it and check and adjust your seasonings at this point. Finally, add the chicken and stir it well to coat all the pieces and heat the chicken. If it seems like the sauce is too thick, add more broth or the cream at this point. You’re looking for the consistency of cake batter. Make sure you don’t allow it to boil or it will separate.
Thats it! Serve it over white rice and enjoy.

Rice Perfection
I need your full and undivided attention for this. Don’t you dare try multitasking while you read this post; this is THE post. Ready?
I love rice. I’m Panamanian, we serve rice about twice a day and at least 5 days a week in my country. It’s the law, it’s our religion. Well, not really, but it would be if I was into politics or religion.
Here in Houston, when you walk into the Price household, we have Rice Laws and Regulations. Those who do not abide by these, pay a mighty price. Lindsay, my awesome hubby, has learned to abide by, appreciate AND understand these regulations, not to mention the sanctity of rice.
I’m not talking about ho-hum instant-not-rice-rice or the sacrilege of parboiled-not-rice-rice. I’m talking about honest to goodness, no frills, basic, beautiful LONG GRAIN WHITE RICE rice. Amen.
These days I’ve become all culty about The Holy Grain. Following the little, barely known (to me) sects of Basmati, Arborio, and… JASMINE RICE. Oh.my.GAWD. How did I not know about Jasmine rice? It is the only type of rice I buy for my basic rice needs. It’s like magic to me. It’s better than oxygen! I love everything about it. The scent. The texture. The taste. Sigh.
Here’s how I make perfect Jasmine Rice Panamanian Style. It just rocks.
Ingredients:
1 cp long grain rice (try Jasmine, you’ll be hooked for life)
2 1/2 tbsp oil (veg, canola)
1 tsp salt
1 1/2 cp water
 Perfect Rice Law #1: A quick rinse is all that’s needed, but do not begin rinsing before you start heating up the pot. Once you’ve rinsed, you don’t want the grains sitting around too long. If you do, you’ll end up with a goopy mess with hard grains in it.
Put saucepan on stove over high heat, add oil. Rinse rice–easiest way is to put it in a colander and run it over cool, tap water. Let it drain; you may need to give it a quick shake to get the excess water out.
By now, your oil should be nice and hot, so throw in the rinsed rice. Stir it around every couple of minutes; there will be enough oil to coat all the grains. *Note: When you put the oil in, it may seem like you’ve added too much oil. You haven’t! With this method you’re frying the rice before cooking it, if you don’t have enough oil the grains will scorch. Trust me on this one, try before changing.
 PRL #2: Fry it until it isn’t translucent
Once the grains begin turning white, about 5 minutes into it, you’re ready to add the water and salt.
PRL #3: Make sure you’re using just cool water, stir in the salt and test it to suit your taste. FYI, the rice will absorb the salt, don’t worry if at this point it tastes just slightly salty, the grains will absorb the water and salt and it will dry to perfectly seasoned rice. It will come to a boil pretty quickly, and the liquid will begin to evaporate.
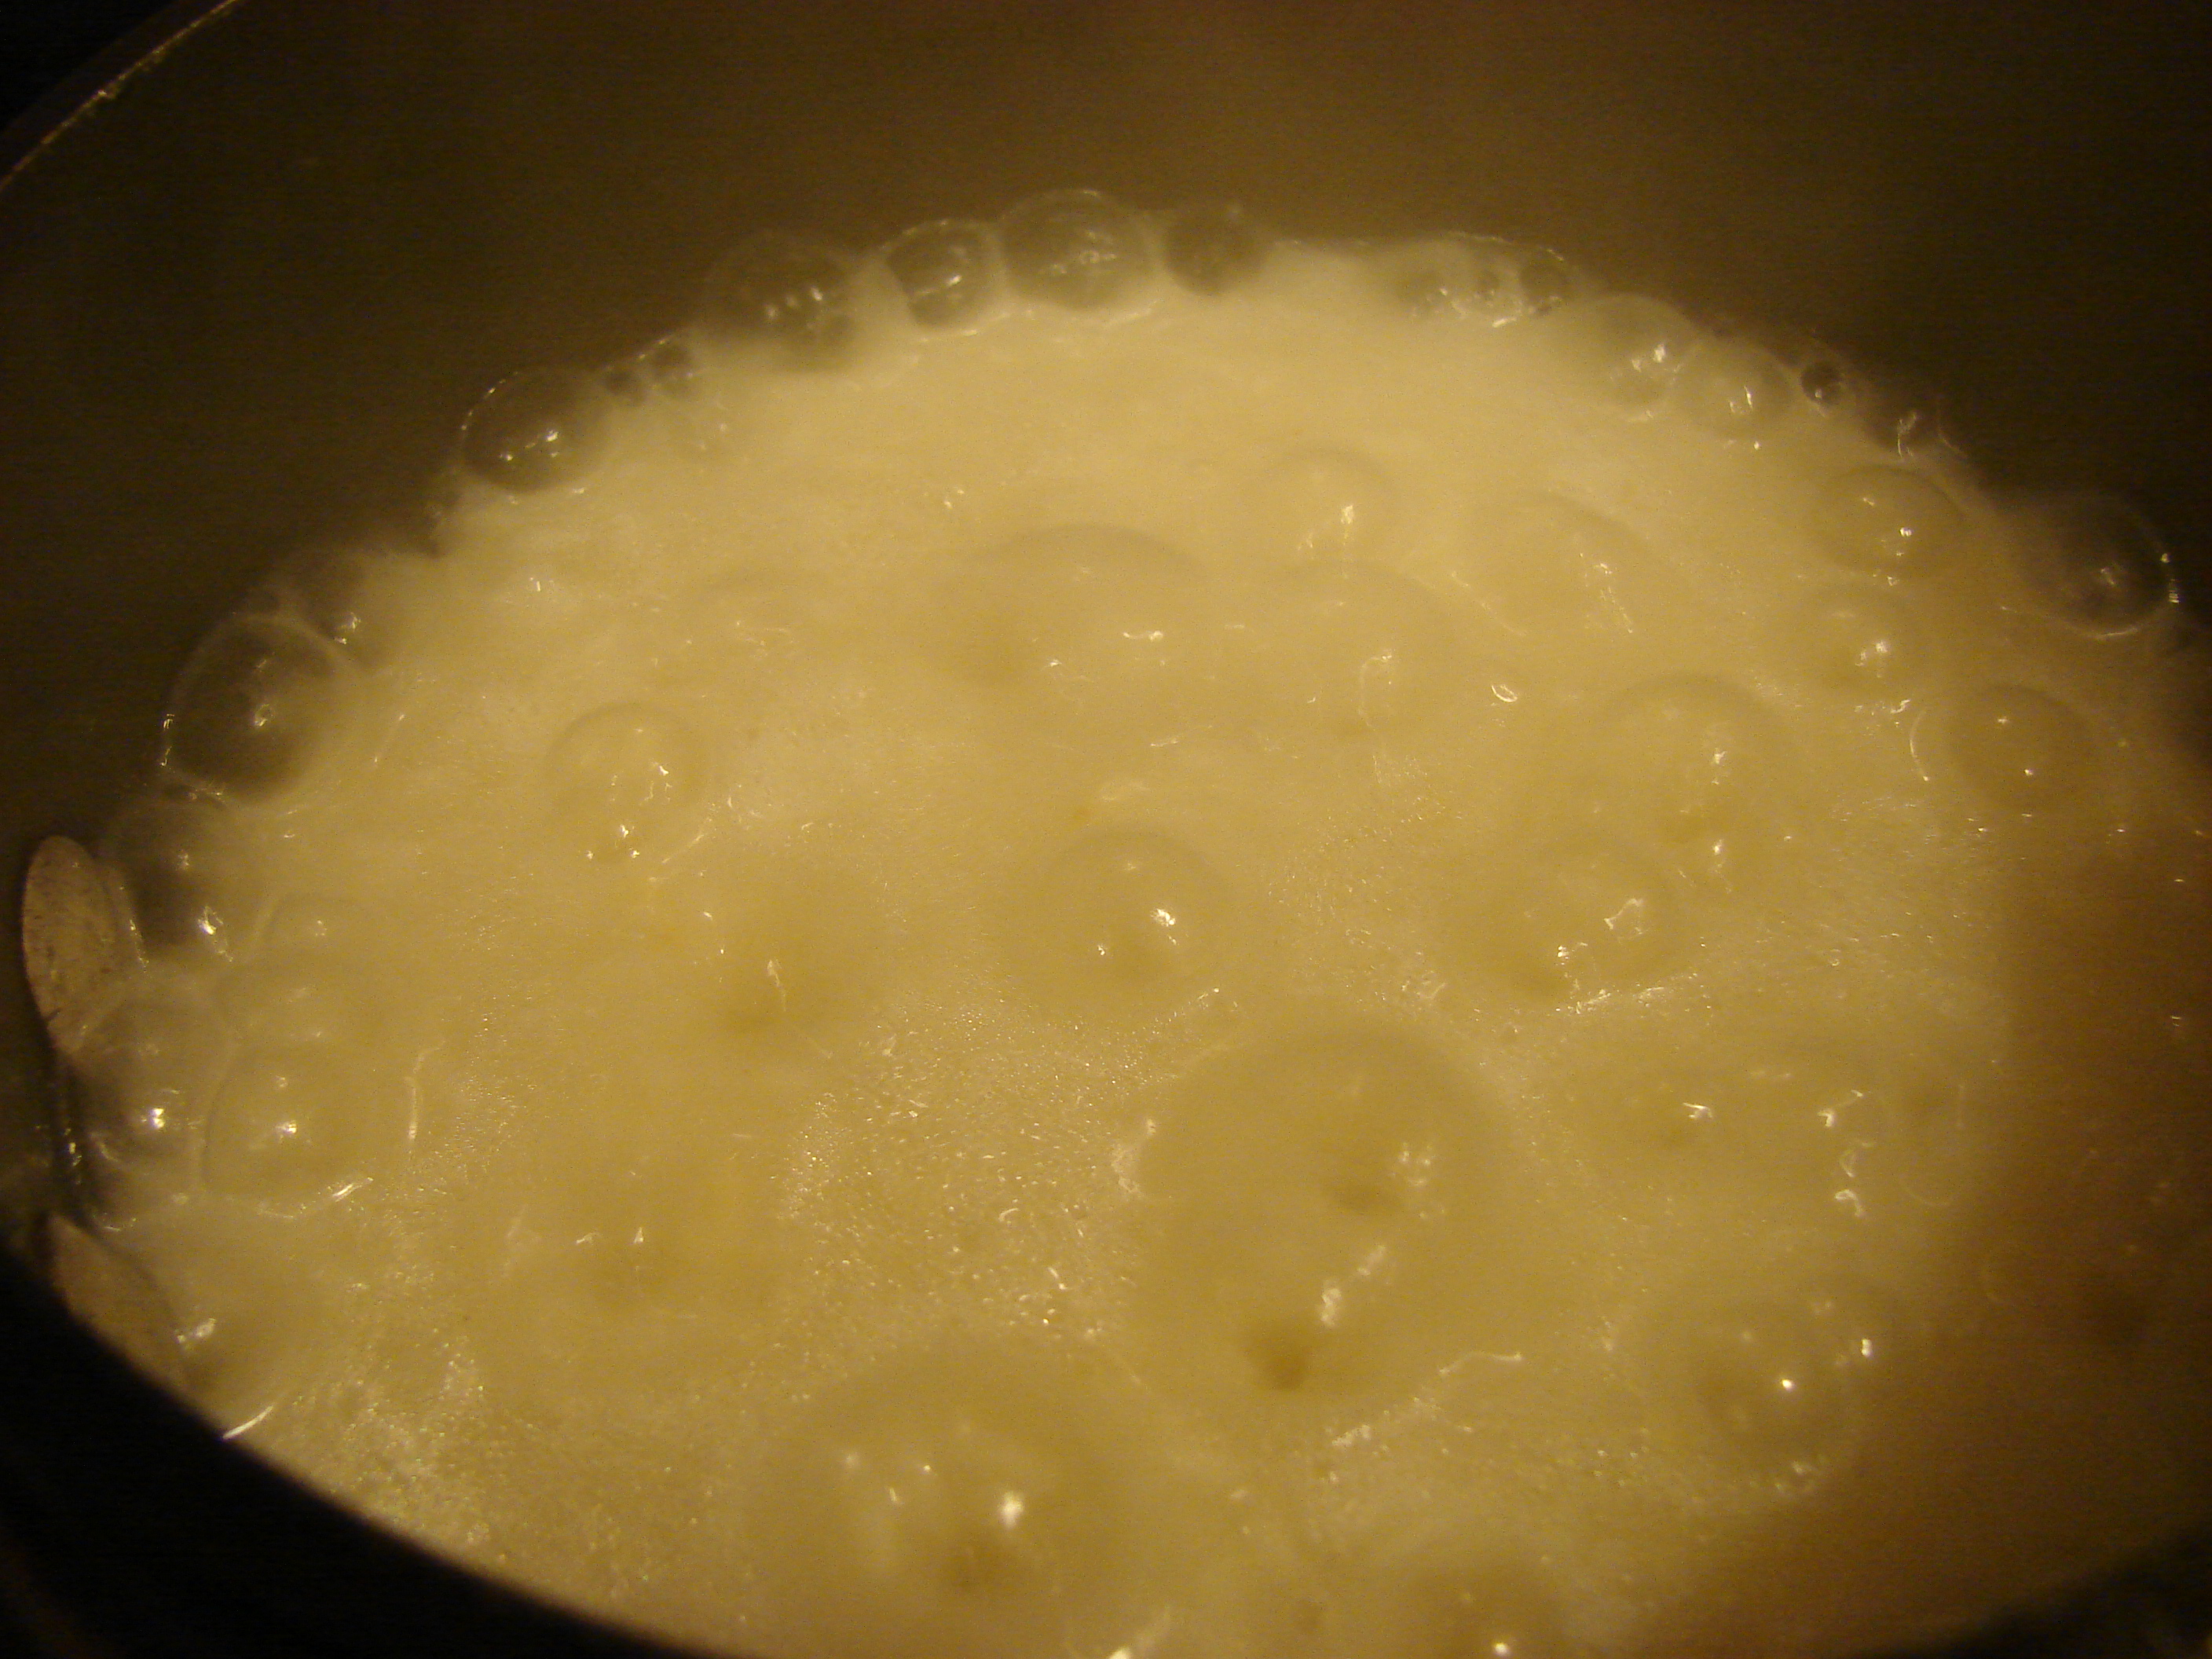
Boil it
PRL #4: Never stir your rice once the liquid begins to boil. At this time put a tight-fitting lid over it before it is completely dry. You should still see some bubbling at this point. Then lower the temperature to medium low. Now leave it alone.
PRL #5: Don’t mess with the rice.
Don’t look at it. Don’t touch it. Don’t wiggle the lid. Just let it be happy and warm for about 20-30 minutes. This part is crucial. You’ll notice that most recipes suggest a 2-1 water-rice ratio. I use a lot less liquid because the steam generated in the pot at this point will.take.care.of.every.grain. Trust me. I’ve made rice this way for about 20 years now.
PRL #6: The sticky rice at the bottom of the pot is a diamond in the raw.
Because of the oil and te time spent steaming, some of the rice at the bottom cozy up to each other and become crusty. It’s hard to describe, but this part of the pot is so special it has its own name. Panamanians refer to it as concolon, Puertoricans call it pegao. I’ll look into other countries to give you more references to it.

OK, that’s it. The Rice Nazi is done.
When I first moved to the US, cooking shows were mostly available on PBS. I would watch Julia Child, Chef Pepin, Ming Tsai, Emeril. These days I follow the likes of Bobby Flay, Tyler Florence, Giada and Ina Garten. Then there’s the British invasion: Nigella Lawson and, dot, dot, dot, Gordon Ramsay.
Thanks to my husband, Gordon is my current crush. Not meanie Hell’s Kitchen Gordon, but rather, suave F Word Gordon. I really enjoy watching him put together the most amazing AND simple dishes. He’s a believer in allowing the ingredients speak for themselves. He’s so talented and determined to get everyone in the kitchen. Apparently, he has been getting some flack for initiating a campaing to get women back in the kitchen. Must be the false feminists.
Back to the matter at hand. Do you remember the Frugal Gourmet? Before his legal troubles, it was quite interesting to watch him. It was Jeff Smith who taught me how to boil, or sorta steam, the perfect chicken! He used a whole chicken, but I find the pieces easier to manage.

Any herbs you have will add flavor. Here I added cilantro, garlic, I had some leftover radishes too.
Put the chicken in a deep pot, add cool water to cover. I like to add some flavor at this point, that way I can kill 2 birds with 1 stone and end up with cooked chicken AND a delicious broth.
I add things like garlic, bay leaves, Italian seasoning, Herbs d’Provence, cilantro, carrots for a bit of sweetness, salt, pepper. Just whatever strikes my fancy at the moment or maybe an herb I’ll later use in the dish. Once you have the chicken, water and seasonings in place, bring it to a boil over high heat.
 Once it boils, you may see some foam develop on top. If you want the broth to be very clear, go ahead and skim the foam with a spoon.
Then cover the pot, allow it to boil for 10 minutes, turn off the heat and let it sit for 30 minutes or so. It will be perfectly cooked, moist and flavorful. If I’m not in a hurry to use the chicken, I let it stay in the liquid until it cools.
Ready to eat or add to your next recipe. There is a recipe where I made use of this chicken, it’s my Chicken with Crema Poblana, check it out.
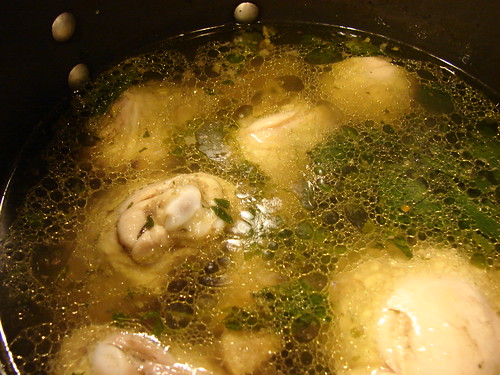
As Gordon would say. Steamed chicken. Done!
What measures between 8-10 in., is available in a variety of colors, is good for you and makes you happy and is best warm? A PLANTAIN! I hope your mind didn’t go too far in the gutter, well, I hope it did, at least a little. This side dish is so good it makes you feel naughty when you eat it.
This time I’m writing about the green ones. Sometimes referred to as machos, plantains are cousins to the banana. Unlike their cousins, plantains need to be cooked before eating and are considerably starchier. Just like a banana, a plantain starts off green and ripens over a period of about 1 week. It is a staple in Latin American and Caribbean cuisines at any stage of ripeness.
When green, you’ll see them used as chips and patacones (tostones depending on the country), as they ripen and become sweet they may be served as tajadas and even used for desserts. Believe me, there are many possibilities for this fruit and I will visit a few of them. For now, it’s time for patacones!

I will do my best to walk you through this process and I want to tell you up front, it is an easy dish BUT, it does have a number of steps to follow. It is a food of care, I won’t say love because it isn’t that involved. Think of these as making twice fried fries. Ready? Let’s do it.
Preping the plantains. I wish I had known about this method when I started making these in my teens. You get the benefit of this trick I picked up from a cooking show. I’d love to give credit where it’s due, but I can’t remember which show it was. I digress.
Ingredients
2 large green plantains
sea salt
vegetable/canola oil
You will need wax paper, a deep fryer or a pot that will hold about 4 cps of oil (you want to cook them in oil that is at least 3-in deep), something to smash them–the bottom of a glass, the flat side of a meat cleaver.
Preping the plantains (for real this time). Give them a scrub under running water. Plantains have a milky sap that leaks once they’re harvested. I find that this sap attracts dust and debris, so take a sponge to them.
Once you’ve rinsed them, trim the ends and score the plaintain lengthwise following its ridges. You want to have about 4-5 lines going from top to bottom.

- Trim both ends of the plantain

Score the plantain top to bottom about 4-5 times
After scoring, soak them in water. I usually fill one side of the kitchen sink halfway with cool tap water. Allow them to soak for 30 minutes or so. This makes peeling them a breeze!
Preheat the oil to 350°

Remove them from the water and peel the plantains beginning from one of the ends. If you can’t catch the skin, take a paring knife and pry the skin up at the corner, then peel like you would a banana.
Once the thick skin has been removed, check the plantain for any silk left behind. Sometimes the skin will separate and remain stuck to the plantain, you have to remove it all before cooking.
Cooking the plantain ~ 1st fry. Cut the plantain into rounds about 1-1/2 inches wide. You’ll get about 6-8 rounds from a regular size plantain. Toss them in a bowl with 1 tsp sea salt; you will salt them before each frying. Once you’ve salted them, drop them into the preheated oil. You’ll want to move them around to make sure they’re cooking evenly. Make sure the oil isn’t too hot, this first step is about cooking the plantain, not browning it. It will take about 10-15 minutes to get them cooked through.

I now use the flat side of my cleaver for patacones, but the bottom of a glass will do
While they’re frying, get your assembly line ready to smash them. You will need 2 sheets of wax paper and whatever you’ll use to smash them. The wax paper isn’t a must, but it makes life super easy when squishing these. The faster you smash and put them back in the oil, the flakier the patacones will be.

Remove the patacones from oil and drain. Raise the oil’s temperature to 400°. Salt the patacones and toss. See hubby’s moves.
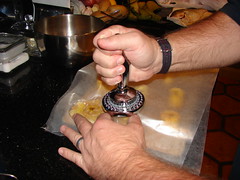
Now the fun begins or the release of the day’s tensions, whichever you need that day. After you’ve salted them, line up these puppies on one of the sheets of wax paper then cover them with the other sheet. Using a glass or another flat surface, smash them to about 1/4 inch thickness.

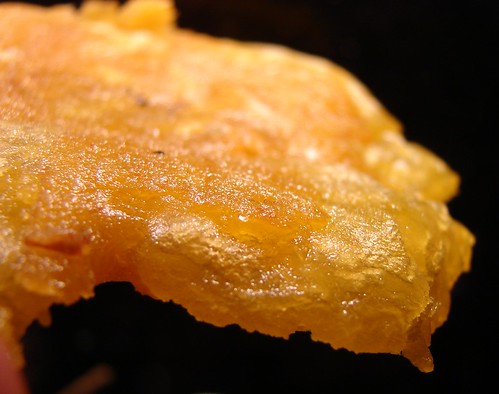
2nd fry – As I mentioned, you’ll want to do this as quickly as possible. Put them back in the oil, which should now be up to 400º, and fry them for the 2nd time. This time you’re looking to add some color, depending on the heat and how many are in, this will take another 5 minutes or so.
Drain and eat. They’re best pipping hot.
My dad says Panama will be the next world power. I know that’s wishful thinking, but we do have some pretty cool stuff going on. Beautiful beaches on 2 oceans, fun-loving people, great music, and let’s not forget what brings you here. The food.
“Puente del mundo y corazon del universo“. This phrase roughly translates to ‘bridge of the world and heart of the universe’ and it is a common phrase amongst Panamanians. Our own private slogan of sorts happens to be true in so many aspects. I think it was originally intended as a reference to the country’s geographical position, but because it is a bridge to the world, you can see the proof in its people and how they do the vodoo they do.
Melting pot doesn’t even begin to describe what’s going on with the people of Panama. This influx of cultures, ethnicities and races is most palpable and pallatable in our foods. When you eat the food there, you’ll quickly pick up on Caribbean, Spanish, Italian, Indian–influences from the world over.
Panama’s favorite, and most readily available fish seems to be the Corvina ~ Stripped Bass. Its perfect white meat, mild taste and abundance is a hit with most everyone. By no means is this dish exclusive to my little gem of the world, but it is something you will find on most every local menu. .

Feast your eyes and your palate. I bring you Corvina Apanada con Patacones (Breaded Stripped Bass with…, well, Patacones). I served the fish with an Escabeche sauce and green fried plantains known as patacones in Panama or tostones in Puerto Rico. Look for that recipe in a separate post.
The sauce is tangy, garlicky and slightly sweet, usually used as a sort of marinade for fish and allowed to macerate overnight. I took the same ingredients and made it into a quick sauce. Don’t worry, you don’t have to fry the whole fish. A couple of breaded fillets will do just fine, but if you’re in the mood for adventure, you may want to give it a whirl.
 Corvina Frita
in a Ziploc bag, combine:
2 medium stripped bass OR 2 large fillets
2 garlic cloves, crushed
2 tsps sea salt
1 tsp black pepper
If you’re using the whole fish, cut 2 or 3 slits along both sides, this will help cook the flesh when it’s fried. Toss it around to coat the fish and let rest for at least 30 minutes.
Escabeche Sauce
While the fish marinates, you can prepare the sauce.
1 large yellow onion, sliced
1 large red bell pepper, sliced
3 garlic cloves, finely chopped
2/3 cp extra virgin olive oil
1/4 cp white vinegar
3/4 tsp sea salt, to taste
1 tsp sugar
1/2 tsp habanero, crushed (optional)
Put the oil into a skillet and put over medium heat. Add onions, garlic and bell peppers, cook until tender, about 5 minutes. Once the onions are translucent, stir in the habanero then the vinegar, salt and sugar. Bring to a boil, then reduce heat to allow it to simmer for about 15 minutes. Set aside.
Frying the fish
2 cps flour
Oil for deep frying
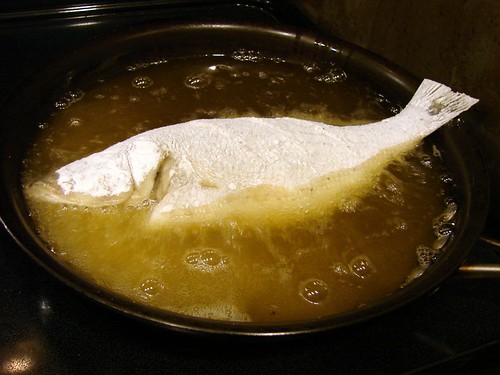 I like using wax paper or plastic store bags for this part. For the whole fish, just add the flour in the bag and dump the fish in and shake it like crazy. Make sure you get flour into the belly area. Heat up your oil to about 325 degrees, gently drop the fish into the oil. Don’t move it around, allow it to brown for about 5 minutes per side. Pull it out and allow it to rest for a few minutes. Serve with limes and drizzle the escabeche sauce over it. Enjoy!

 2 cps rice
 Add oil to the pan with the peas, rinse the rice and add it to the pot stirring all the ingredients. Add the liquid, check the salt, stir this well. Make sure you remove any drippings that may have been stuck to the bottom of the pan. Bring it to a slow boil; once the liquid boils do not stir it again. Keep the temperature on medium high.


 Add the shrimp, tossing around and incorporating the onions. When the shrimp begin to lose their transparency, add the beer/wine. Stir very well to cook down the alcohol. Turn off the heat and cover with the lid, allow the steam and heat contained in the pan to continue cooking the shrimp. Uncover and stir it once more. The shrimp are done when slightly pink.


 When you have browned all the chicken, check the fat that was rendered. You need about 2 tbsp left on the pan, remove any excess. Now add the onions and cook until they begin to get translucent. Add the garlic, 3 tbs of parsley and tomatoes and loosen the drippings. Add the coconut milk, curry powder, bay leaves, water and stir. Adjust the salt as necessary.


 Heat the oil in a skillet and add the onions, cooking them until translucent. Then add the peppers and stir in, these are esentially cooked once roasted. Begin adding the cream cheese, I like to break it into cubes to help them dissolve. Follow this with the broth and stir until all the cheese has melted and it is heated through. Don’t allow it to come to a hard boil, but you will see the edges bubble.
 Perfect Rice Law #1: A quick rinse is all that’s needed, but do not begin rinsing before you start heating up the pot. Once you’ve rinsed, you don’t want the grains sitting around too long. If you do, you’ll end up with a goopy mess with hard grains in it.
 PRL #2: Fry it until it isn’t translucent


 Once it boils, you may see some foam develop on top. If you want the broth to be very clear, go ahead and skim the foam with a spoon.


 Corvina Frita
 I like using wax paper or plastic store bags for this part. For the whole fish, just add the flour in the bag and dump the fish in and shake it like crazy. Make sure you get flour into the belly area. Heat up your oil to about 325 degrees, gently drop the fish into the oil. Don’t move it around, allow it to brown for about 5 minutes per side. Pull it out and allow it to rest for a few minutes. Serve with limes and drizzle the escabeche sauce over it. Enjoy!