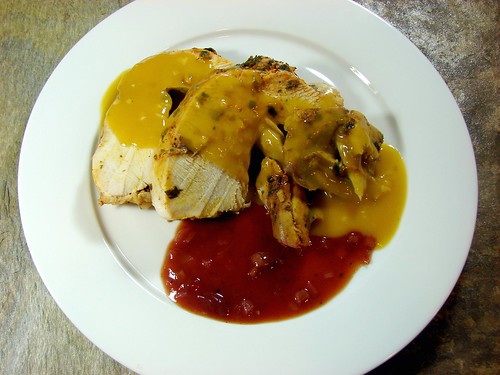
Oh yeah. It’s time to talk about the bird. And this is a very special friend. This has to be my best turkey to date. I’m sorry to gloat, but this turned out perfectly. As I’ve mentioned before, I’m a firm believer in brining turkey. It keeps it moist and juicy and adds a lot of flavor while cooking.
Different from what I’ve done before, I rubbed in an herbed butter before roasting this bird. And since I was going for that Latin flavor, I added achiote paste too. Let me tell you how this all came together.
Achiote & Herbs Turkey with Garlic Butter Gravy
First, the brine. I added a large onion, garlic cloves, bay leaves, celery, Jugo Maggi, salt, sugar and some spices to a large pot of water and brought it to a boil. Allowed it to simmer for about 15 minutes, to infuse the flavors in the water. I then allowed that to cool completely before pouring it into a cooler. Followed by the turkey (giblets removed), then filled with cool water and topped it with plenty of ice to keep it cold overnight.
If you go back a few months, you’ll remember a post I shared for roast chicken, I followed the same principles for the turkey. Incidentally, I want to give a shout out to Noelle over at Portland Palattes, she sent me a note after she followed the same post and ended up with a delicious chicken.

Back to the turkey. I combined 2 sticks of butter (I know!) with achiote paste, garlic, parsley, green onions, orange zest, salt and pepper. After draining and drying the turkey, I then squished the butter under the skin while the oven preheated to 475°. I filled the cavity with whole garlic cloves, quartered orange, celery and carrots, and threw some more at the bottom of the roasting pan.

After inserting the electronic thermometer (love that thing!) I placed the whole thing in the oven for 15 minutes, then lowered the temperature to 325° and roasted it, undisturbed until the internal temp read 185°–about 3 extra hours. No basting, no turning, no nothing. Once it was done, it got a foil blanket and took a little nap for about 30 minutes before I began carving.
The fact that *I* had to do the carving this time explains why there are no pictures of that part. Sorry, I was in a panic at the thought of it. I didn’t do too badly. Look at these shots and tell me you don’t want some turkey like NOW!
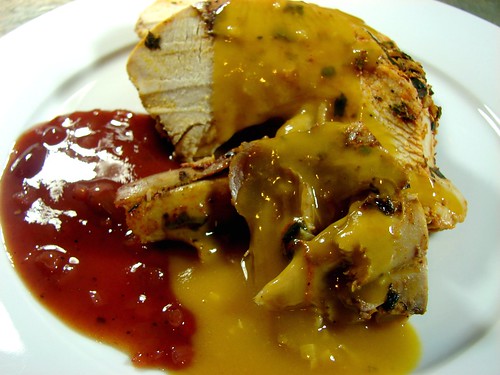
Gravy. You see that pretty gravy? Of course, you can’t have turkey without some gravy, so gravy I made. I poured the cooking liquid out of the roasting pan. Once the fat raised to the top, I scooped out about 4 tablespoons of it and heated it in a saucepan. To that I added 2 cloves of garlic finely diced, cooked them for a couple of minutes before adding 4 tablespoons of flour, stirred it in and allowed it to cook for about 5 minutes stirring constantly.
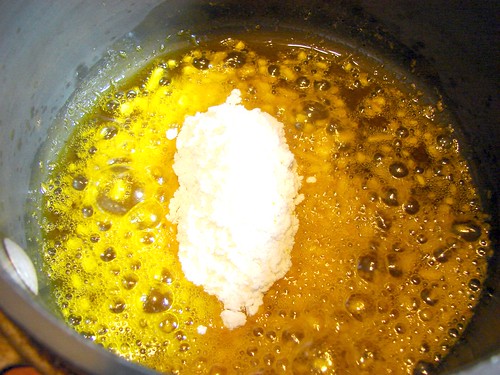
Add the reserved liquid (not the fat), be sure to keep stirring or you’ll end up with lumps and bumps. Once it boils, it will begin to thicken. At this point you can adjust the seasoning as necessary. Keep warm and pour over the sliced turkey.
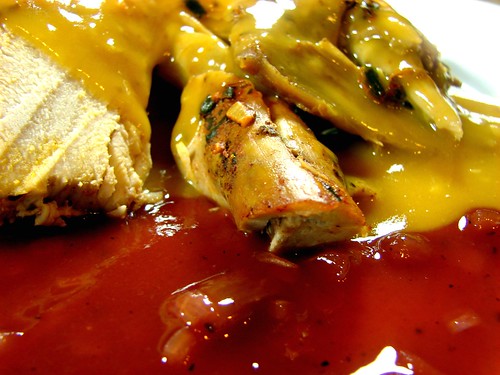
And here it is. I always always always have cranberry with my turkey. Straight out of the can, I love the stuff. But, this is a Latin Thanksgiving, so no cranberries for you. Instead…
Guayaba Sauce
Guayaba, or guava as it’s known in the US, is similar in color and temperament to cranberry. By temperament I mean they have very similar flavor profiles, they’re both sweet and tart, though guayaba doesn’t have that tangy bite cranberries do. This sauce was easy to make and DELICIOUS with the turkey.
I combined about 6 ozs of guayaba paste with the juice of 2 oranges and the zest of 1 and 1 diced shallot, brought it all to a boil and seasoned with a dash of salt just before serving. That’s it!
To see the recipes for the rest of this incredible meal, follow this link. To see the other food porn shots, click here.
Gobble gobble!
Cookingly yours,
Anamaris
 I know what you’re thinking. That doesn’t look like dressing and you’d be right. I was going for a non-traditional dressing-like dressing and this is what I came up with. Looks good, no? Let me tell you, it tastes better than it looks, seriously. I don’t know that I would call this a deconstructed dressing, but it does have all the elements of a dressing presented individually.
In Panama we eat corn tortillas for breakfast, they’re usually served with some sort of saucy protein. As you can see, our tortillas are different from what most people think of when they hear the word. Ours are made with yellow corn, not white and they’re thick, about 1/2-inch. These discs are then deep-fried until crisp on the outside while they remain nice and creamy inside.
So, with that idea in mind, I set off looking for a way to imitate my tortillas, but I didn’t want to find dry corn, cook it, grind it, shape it, etcetera, etcetera. Instead, I used polenta that I cooked in about 6 minutes then cooled and cut into discs. Frying them just before serving, provided a much needed textural contrast. Beware, polenta is feisty when being fried, because of the water content, it is very spitty!
For the topping my mind went straight to picadillo, the kind we make in Panama with olives and raisins. Instead of ground beef, I went for a traditional Thanksgiving ingredient: breakfast sausage. And I cooked fatty bacon to a crisp to have a similar texture to chicharrón. And, just like that, Polenta Tortillas with Sausage & Chicharrón Picadillo was born!

Polenta Tortillas with Sausage & Chicharrón Picadillo
serves 8-10
For the Polenta Tortillas:
5-6 cps water
1-1/2 cps dry polenta or coarse cornmeal
1 tsp salt
1 tbsp butter
1 ear of corn, shucked
1/2 cp queso fresco, shredded
Extra virgin olive oil for the pan and frying
Grease a 9×13 pan with olive oil and set aside. Bring the water to a boil in a medium saucepan, add the salt then whisk in the polenta. You’ll want to whisk briskly until the grounds have incorporated. You will continue to cook it over medium-low heat for about 5 minutes or so, stirring constantly with a wooden spoon. Turn off the heat and stir in the butter, corn and cheese.
Pour the polenta into the prepared pan and spread it out evenly. Allow it to cool and set. You can make this ahead of time. When ready to serve, unmold the polenta and cut into squares or with a round biscuit cutter or a glass.
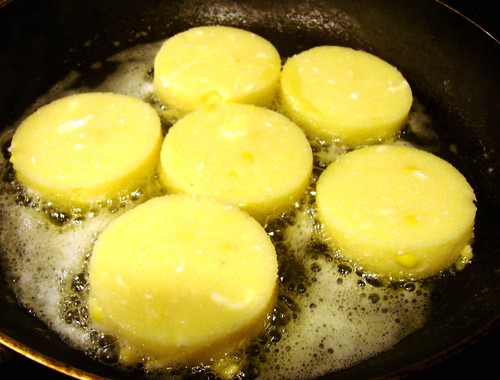
Heat some butter and oil in a frying pan, and fry the polenta disks until golden brown on each side. Set on paper towels to catch the excess fat. Set aside and keep warm until ready to serve.
For the Sausage & Chicharrón Picadillo:
1 cp fatty bacon, diced
1 cp breakfast sausage (about 1/2 of a Jimmy Dean package)
1 cp red onion, diced
1/2 cp carrots, diced
3 green onions, finely chopped
1/4 cp Italian parsley, finely chopped
1/2 cp ripe tomato, finely chopped
2 tbsps ketchup
1/4 cp green olives, finely chopped
1/2 cp seedless raisins
Cook the bacon until golden and crisp, remove from the pan and pour out the excess fat, reserve. In the same pan, crumble the sausage and cook for a few minutes until it isn’t red anymore.

Add the red onion and carrots and cook until the onions have softened, then add the tomato, green onions, parsley, olives and ketchup, stir all the ingredients and allow them to cook for about 5 minutes. Add the raisins and also about 1/4 cp of water, stir and allow to simmer covered for another 5 minutes or so. Keep warm.
To assemble the dish: place the fried polenta at the bottom, top with 1 tablespoon of picadillo, and top that with a bit of the bacon chicharron.
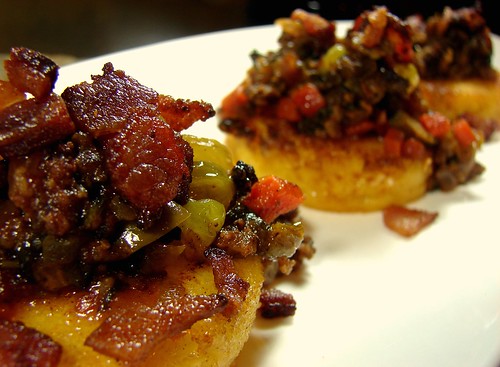
For the rest of this meal, follow the link and visit the photostream for all the shots.
Cookingly yours,
Anamaris
Every meal should have a beginning, a middle and end, just like a good story. The appetizer sets the mood and expectations for what’s to come. Consider it foreplay. You want it to make an impression, to tease but not overshadow.
When I thought about the components for this meal, I knew I wanted to incorporate the ‘traditional’ Thanksgiving ingredients. I also knew I would need to befriend the sweet potato, it’s not one of my favorites. You may recall another post where sweet potato was the star, but dressed in different wardrobe. That’s how I trick myself into liking it.
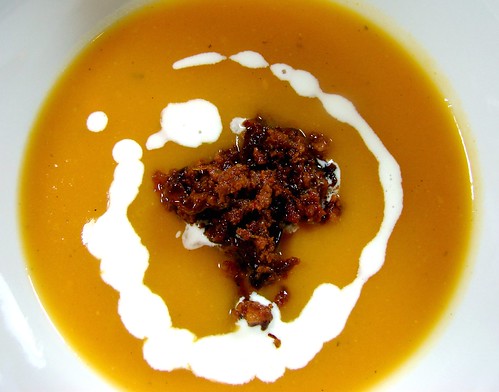
When I thought about a starter for this meal and considered using sweet potatoes, I wanted to remove most of that barely there sweetness and stay away from the common spices paired with it. The addition of chorizo made this soup even more savory and hearty. This soup is delicious! AND light AND easy. You should definitely try it. You can make the components for the cream ahead of time, then reheat and put it together just before serving.
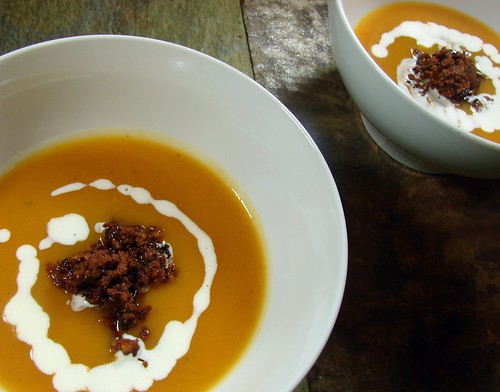
Sweet Potato Cream with Chorizo
serves 6-8
3-4 medium sweet potatoes
1 bay leaf
2 cloves garlic, peeled
Chicken stock or water
Sea salt
1 tsp cumin
Crema fresca or creme fraiche
For the chorizo:
1 large onion, chopped
1 tbsp extra virgin olive oil
2 tsps balsamic vinegar
1 tbsp sherry or wine
8 ozs Mexican chorizo
Sea salt
Sugar
Black pepper
Peel and chop the potatoes before putting them in a medium saucepan with the stock/water, bay leaf, garlic and salt. Boil and cook until tender. Allow them to cool in the boiling liquid before running through a blender. The sweet potatoes will be very dense, you may need to add additional water in order to puree.
To prepare the chorizo: cook the onions in the oil over medium high heat until softened and the onions begin to turn golden. Add the balsamic vinegar and sherry, cook until it evaporates.
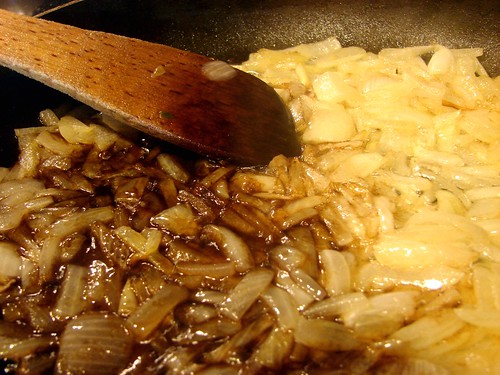
Add the chorizo into the onion mixture, making sure to break it apart so it is a crumble. Chorizo should be thoroughly cooked, but keep the temperature at medium to avoid burning it. Add a couple tablespoons of water and cover with a tight-fitting lid, lower the temperature and allow it to cook for about 10 minutes. Adjust the seasonings as necessary, if you find it to be too tart, add a pinch of sugar. Allow it to cool. Remove the excess fat once it cools down.
To assemble: Pour the hot soup into a bowl, drizzle with cream, then drop a dollop of chorizo in the center.
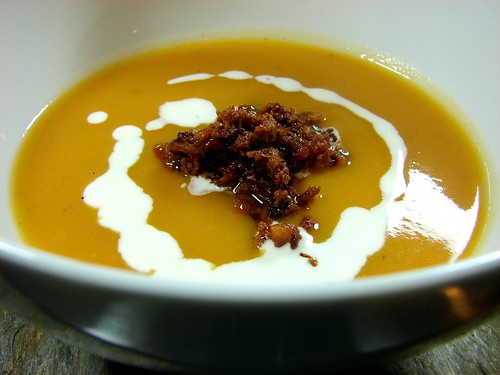
Enjoy! Check out the rest of this meal here.
Cookingly yours,
Anamaris
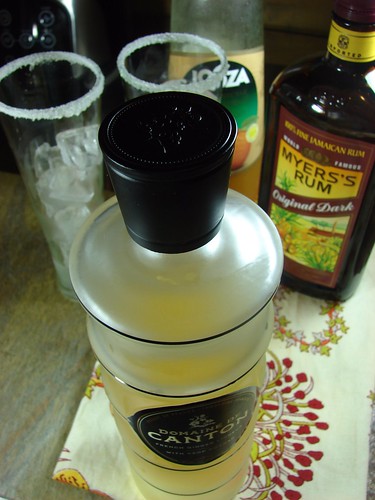
You know how the say Disney is the happiest place on earth? I think cocktail hour is the happiest hour of the day. I don’t want you to think of me as a drunken floozie, though I am, but I love a good cocktail and I wanted to bring one to the table for the Thanksgiving dinner.
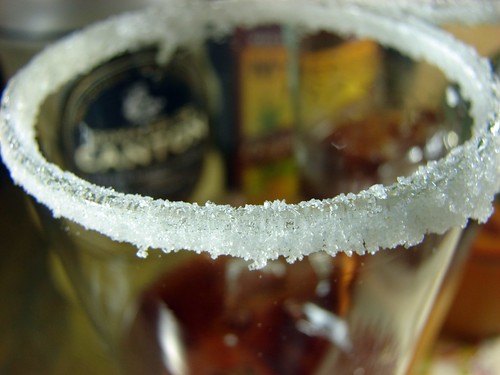
I have to say I’ve been thinking about this long and hard. I wanted to stay away from cranberries, because I wanted the drink to be in a shade of orange rather than red. I kept eyeing persimmons, but the price point is pretty high and I don’t even know what they taste like, do you? If you do, please share.
I also thought the drink should be flavorful, a nod to all the spices used throughout this holiday, but I wanted to keep it light. So, off I went to my local super liquor store and then I saw it. It was love at first sight.
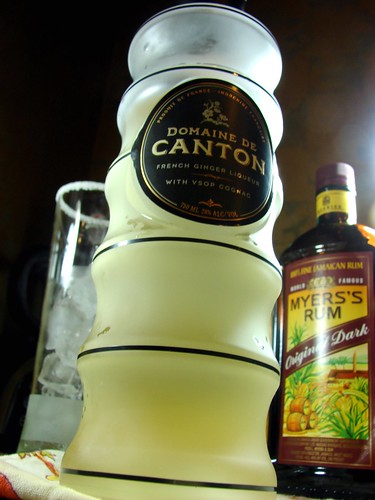
Have you ever seen a prettier bottle? And filled with ginger goodness no less! I was in love for sure. The other components fell right into place and these cocktails are very special. Enjoy!
Apricot Gingersnap
2 ozs apricot juice
1-1/2 ozs spiced rum (Myer’s)
1 oz ginger liqueur
Ginger ale
Lime squeeze (optional)
Ice
Sugar to rim the glass
After you’ve rimmed the glasses with sugar, fill with ice before layering in the rest of the ingredients. Give it a stir and enjoy!
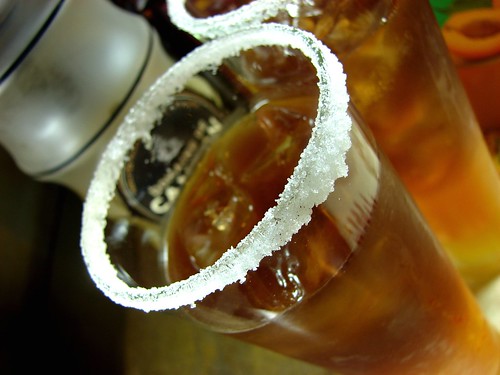
Salud! Check out the full photostream here and for the rest of the Thanksgiving meal, click this link.
Cookingly yours,
Anamaris
I told you before I would make a pre-turkey day dinner for your benefit, but I lied. Don’t get me wrong, you do benefit from this, but I didn’t make this dinner just because of you. The truth is, I love turkey and would eat it year-round, so when this time of the year comes and the turkeys are plentiful… I eat and eat and, well, eat.
So, I set out to put together a Thanksgiving meal that spoke to my Latin roots while still honoring the traditional ingredients. With a little push from The Hubbz and an abandonment of safety nets, I came with what I believe is an incredible menu.

yep, that's the beginning of the menu
Pay attention, this is where you benefit: I’m about to share all of it with you! The menu. The thought process. The planning. The execution. I’m sharing it all with you in the hopes that you’ll be encouraged to recreate one or more of the dishes or that you’ll through caution to the wind and try something you’ve been thinking about for while.
The Thought Process:
Cocktails: I didn’t want anything too heavy or pumpkiny, but I still wanted to keep Thanksgiving colors in mind. I knew it needed to be spicy/flavorful.
Appetizer: I went for a soup, but wanted to keep it light while flavorful and I wanted to work sweet potatoes in the menu.
Turkey: Moist is always my first priority, so I knew I would brine it. I wanted to pick up on subtle Latin flavors without fussing too much over the bird.
Gravy: It’s like the chicken & the egg. Can’t have one without the other.
Accompanientment: Usually cranberry and, I’m sorry but I have to admit I love the canned stuff, but I needed to kick up a notch. I immediately thought guayaba! Or guava as its known stateside.
Dressing: Cornbread dressing is my absolute favorite even if traditional. My thoughts were to have corn patties topped with the extras usually found in dressing. I wanted to recreate a sophisticated version of a Panamanian tortilla.
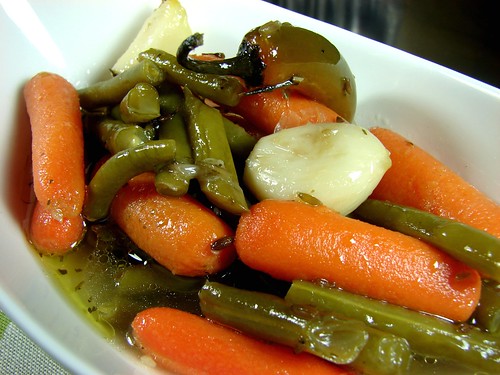
Vegetables: Indispensable, and these pickled ones help cut through the heavy meal.
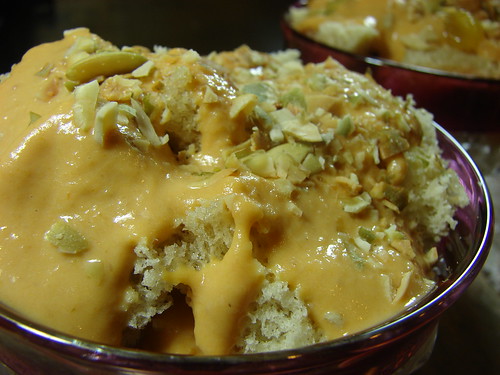
Dessert: A traditional dessert found at weddings in Panama. This is pumpkin brought to Jimmy Choo levels.
The Menu
Apricot Gingersnap Cocktail
Sweet Potato Cream with Chorizo Garnish
Achiote & Herbs Turkey
-Garlic Butter Gravy
-Guayaba Compote

Polenta Tortillas with Sausage & Chicharron Picadillo

Green Bean & Carrots Escabeche
Pumpkin Sopa de Gloria
The Planning
Putting a big meal together, particularly when you have to stick to a schedule or a set dinnertime can be overwhelming. Lists make it easier. It doesn’t matter what type of project I’m working on, a list always makes me feel at ease, like I can get it done. When I just think of the big picture or the end product I can’t help but feel a bit of anxiety, like I’m going to forget something or that I don’t have enough time to finish. Lists are good. Lists are your friend.
After I had finalized the menu, I wrote down each dish and broke it down by steps. I then prioritized the order in which to execute each step.
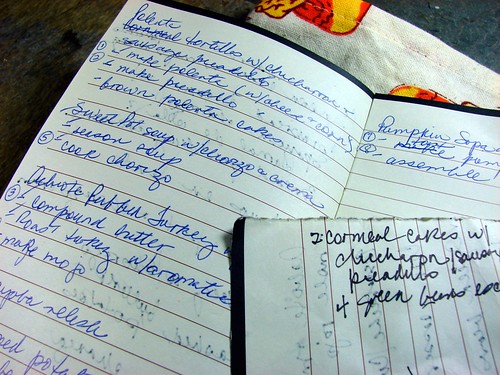
pardon my handwriting...
The Execution - for the recipes, click on the links.
Gobble, gobble!
Cookingly yours,
Anamaris
I’ve not made it yet, but I’ve been thinking about it. I can tell you that there has been some turkey action in my kitchen already. AND I will make a pre-Thanksgiving turkey turkey. It will be loved and cajoled with lots of goodness, but it doesn’t happen until later today, soooo. No post until tomorrow. Howevah (that’s a fancy Southern-drawl but) be sure to come around tomorrow, I hope to have something so sensational you’ll be happy you came.
All of this turkeypalooza is for your benefit. Yep. I do it all for you, my bloggies. I know what you’re thinking. You don’t get to eat any of it, but you could if you made it, which is why this is for you.
This post will give you a couple of ideas for the upcoming festivities. If you’ve never made turkey before, or don’t know how to spicy it up, I hope these ideas will spark the turkey fire in you.
I must first admit that I am, in fact, a briner. I am. When it comes to turkey, the birds are so large and just not fatty enough, that brining seems to be the best way to guarantee juicy plumpness. So I brine. And every year I add something new to the basic brine. But today I thought you could hear from a real Chef. I found this on CHOW yesterday, and though he doesn’t offer up a specific recipe, Michael Chiarello explains the process beautifully. I seem to be having some linking issues…, but this is the shortened link: http://bit.ly/bRwiWI
Brining does wonders for turkey, here’s what I did last year: http://wp.me/pFzw3-5V
Let’s talk a little about what I’ve been up to the last few weeks. I roasted a turkey breast. This was a little test run for the way in which I was roasting it. Wanna see?
Turkey Breast with Mexican Chorizo
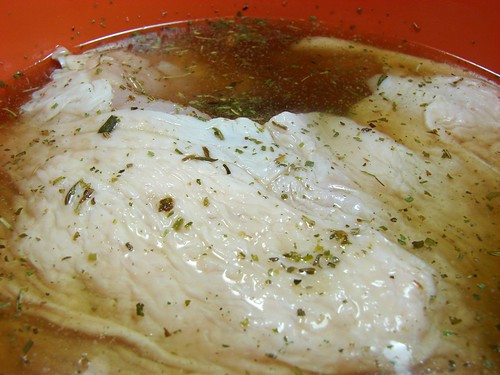
I started out with a 4ish pound chicken breast, it still had bones and skin. When brining, you decide what to flavor with, the only must haves are water, salt and sugar. Remember to exaggerate the seasonings, it will all be diluted by the water. I added 2 pkts of Sazon, salt, herbs d’Provence, some Jugo Maggi and let it hang out for about an hour.
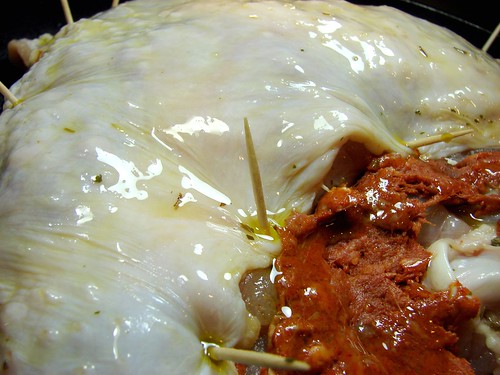
Preheated the oven to 325 and pulled out the chorizo from the casing and flattened it for easier handling. Removed the breast from the brine, dried it with paper towels and began to loosen the skin so I could squish the chorizo in. I added chorizo everywhere I could. Then drizzled the skin with olive oil and used toothpicks to secure the skin to the meat.
In the oven it went for close to 2 hours. I checked it after 80 minutes or so and based on the thermometer, it wasn’t quite ready. I would say just over 1-1/2 hours would’ve done it. At any rate, you want the internal temperature to read 185.
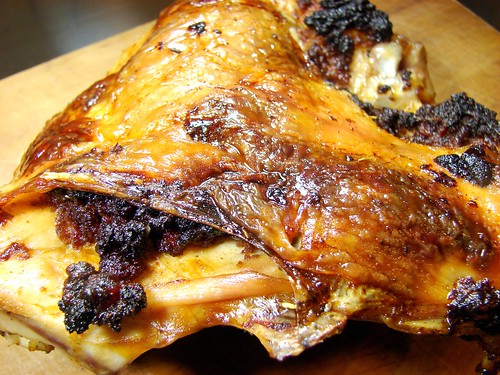
Remove the toothpicks, cover with foil and let it rest for 10 minutes or so. Remove from the bone and slice. You’ll end up with something that looks like this.
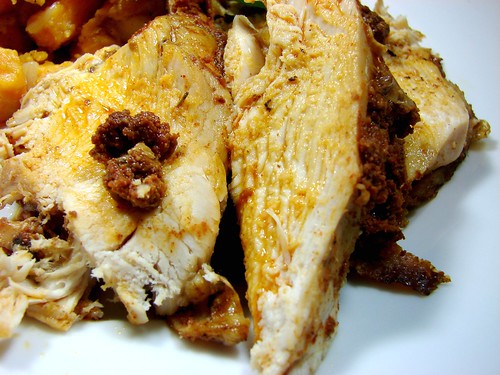
This was excellent. We paired with bacony sweet potatoes. Heaaaaaaven!

This would be a great way to make your bird, depending on the size of it, you’d probably need about 2 packets of chorizo (approx 1/2 lb).
Cookingly yours,
Anamaris
I wanted to bring you more side dishes. Don’t get me wrong, there’s nothing wrong with the traditional stuff, believe you me, but sometimes change is good. At the very least, you should explore your possibilities. I’m just sayin’.
Let’s talk green beans. I love me some of that creamy green bean casserole. I look forward to it every year. But here are a couple of other ways to have the green things, and to make it even better, these can be made ahead. AND, they got that sabor latino going on. As a matter of fact, they’re improved by resting.

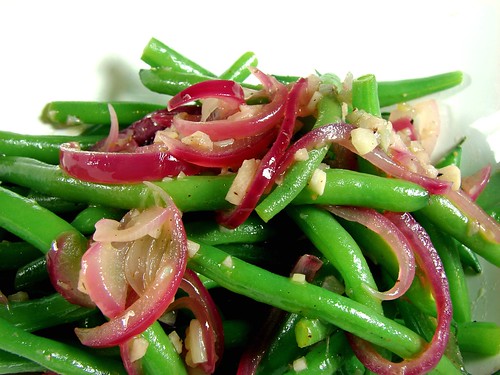
I’ll start you off with an adaptation of Rick Bayless’ recipe for Jalapeños en Escabeche. This one definitely needs to be made at least 1 day before you need to serve it. This will allow the vinegar to mellow and all the flavors to mellow.
Green Beans and Carrots Escabeche (Pickled Green Beans and Carrots)
adapted from Rick Bayless’ Mexico One Plate at a Time
1/3 cp oil (I combined extra virgin olive & vegetable)
10 cloves garlic, peeled
2 cps baby carrots
2 cps fresh green beans
4-8 serrano peppers, whole
1-1/2 cps cider vinegar
3 bay leaves
1 tsp Herbs d’Provence
1 tsp dry lavender
Sea salt
Freshly ground black pepper
Sugar

In a skillet, heat the oil over medium heat, then add the garlic. Allow the garlic to cook for about 3 minutes, making sure to turn them occasionally so they don’t turn brown. Next, add the carrots, green beans (I cut the beans to 2-inch pieces) and peppers. Keep stirring to coat the veggies and allow them to begin softening for about 5 minutes.
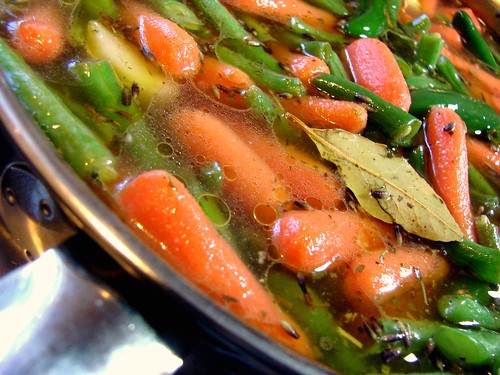
Stir in the vinegar, bay leaves, Herbs d’Provence, lavender, about 1 teaspoon salt, 1 tsp sugar, ground pepper and about 1-1/2 cps water. Allow it to come to a soft simmer, before loosely covering the pot. Simmer for about 10 minutes. Allow it cool before transferring to a non-aluminum container to refrigerate overnight.

As long as you keep them chilled, these will keep for well over a month.
Next, we are revisiting the Mojo. No, not the Austin Powers mojo, but Mojo Criollo. A few weeks ago I shared a recipe to use on yuca or potatoes. This time we’re following the basic recipe and adding some onions. Check it out.
Green Beans with Mojo Criollo
2/3 cp olive oil
3 cloves garlic, minced
1/2 cp red onions, sliced
Juice of 1 lime
2 tbsp white vinegar
Sea salt
1 tsp sugar
Fresh green beans, trimmed & blanched
To blanch the green beans: bring a pot of salted water to a boil, drop the green beans in the boiling water and allow them to cook for about 3-4 minutes. Drain and plunge the green beans in ice-cold water. This will stop them from cooking and will preserve the pretty green color.
Next, prepare the mojo. Heat up a small pan over medium temperature and add the minced garlic, make sure to stir it constantly to avoid burning it, about 1-2 minutes. Add the onions and cook until softened.
Once the onions have softened, add the lime juice and vinegar. Stir until well blended, then season with a bit of salt, black pepper and sugar. Allow it to cook for about 5 minutes over medium low temperature. Add the green beans and remove it from the heat.
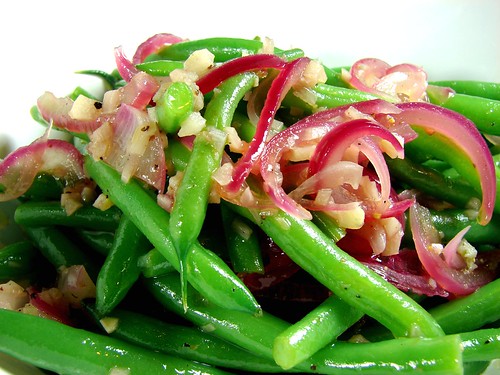
You’re done. This one will work if made a day in advance. You can make the mojo the day before, then blanch the green beans just before serving. Or, you can make the whole thing the day before and just reheat when it’s dinner time.
For more food porn shots, click the link.
Cookingly yours,
Anamaris
Well, you know what they say. That statement is definitely accurate when it refers to plantains. Yes, you heard me right. Plantains. More specifically, ripe plantains. The darker the skin on the plantain, the sweeter it will be.

If you were to purchase plantains and allow them to ripen at home, it would take about 7-9 days to get them to that dark dar stage. Now, mind you, you don’t want them to be mushy. They should feel the same way a ripe avocado does. Soft and springy, not mushy. When you fry up plantains into tajadas using very ripe ones, you end up with this kind of caramelization. Heavenly!
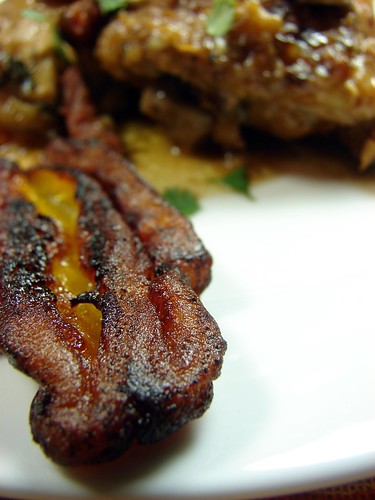
Plantains are very versatile. And this recipe may be just the thing you’ve been looking for to spice up your Thanksgiving table. Side dishes around the world can be similar, even when prepared with very different ingredients. Plátanos en Tentación (loosely translates to tempting plantains) are a popular side dish in Panama, present on every party and holiday table.
If you’re bored with traditional sweet potatoes or just want to introduce your loved ones to something exotic, you should bring home the tropics with this traditional dish.

Plátanos en tentación (Glazed plantains)
2 ripe plantains (best if peel is dark brown-to black)
1/3 cup granulated sugar
1/2 teaspoon ground cinnamon
1/8 teaspoon salt
1/2 teaspoon vanilla extract
2 tablespoons butter
Water
Peel the plantains and slice them in half, lengthwise. Then cut the halves into pieces about 2-inches long.
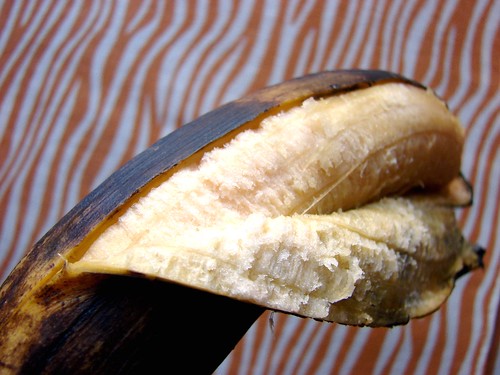
Place the plantain pieces into a medium-sized skillet (about 12-inches), then sprinkle the sugar, cinnamon, salt over the plantains.
Divide the butter into 4 pieces and drop it in the skillet. Cover the plantains with water, this will take about 2 cups of water, add the vanilla.
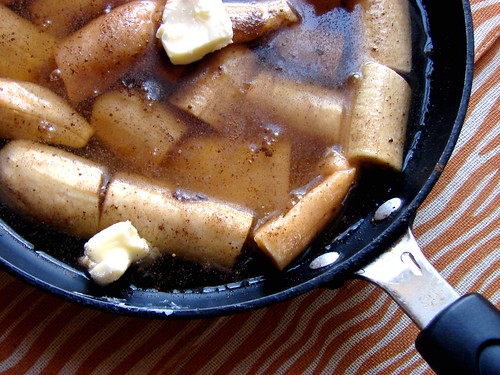
Bring it to a soft boil over medium-high heat, stirring occasionally to make sure the sugar dissolves. Allow it to cook until the water evaporates, about 20 minutes.
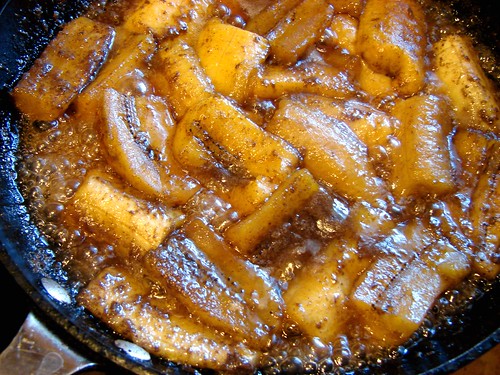
Once the water has dried, the plantains will begin to caramelize in the residual syrup. Reduce the temperature to low, and turn the plantain pieces a few times to make sure they brown evenly. Serve warm. These can be made ahead and reheated before serving.
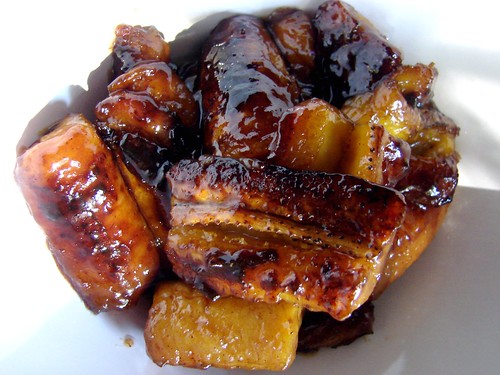
For additional delicious shots, click here.
Cookingly yours,
Anamaris
 What should I tell you about BooBoo? I should tell you her name isn’t BooBoo or Shutterboo, but Brooke. She’s got mad photog skills. She’s funny. She’s silly. She thinks she knows all about the 80s, bless her Gen XY heart. Anyway, I really dig this chickadee and I know you will too.
Here’s what she had to say about life, love and the pursuit of happiness. Not really, this is way more interesting.
What is the elevator pitch for your blog?
My name is Brooke and I live in my hometown of Louisville, Kentucky with the hubs (we call him Mike) and my two doggins (Chevy and Chase). Chevy’s deaf. It keeps things interesting. Anywho, my day job is boring so I find refuge in the creative world be it crafting, photography or writing. And I have my little blog: shutterboo.
Why and when did you decide to become a blogger?
I decided to start blogging the summer of 2009 [so I’m only a year old myself]. I was already taking pictures of everything and sharing them five different ways. And I was giving myself writing exercises at work to keep my environment more creative (I work with a lot of numbers). So after some thought went into a name, shutterboo was born. The best part of blogging are the people I’ve met along the way.
What’s next for your blog?
I really don’t know. I guess just keep doing what I’m doing. Oh, but I do plan to kick off a new Weekly Photo Challenge with the start of the New Year. I’m hoping we can get loads of people to play along this year since folks are always looking for projects at the beginning of the year.
What’s your favorite infomercial?
The Cricut. I get sucked in almost every time it’s on air. Did you know they have one that cuts out fondant now? Cool, huh?
If you had to be named after a country, which would it be?
Hmmm… if I could roll my Rs I’d say Morocco. Because it’s exotic. And I could roll my Rs. But since I can’t, Christmas Island. Because I love the holidays. I really do. A lot. No joke. For reals, yo.
What’s the most memorable thing you ever ate? It could be really good or really bad.
I had a bad episode with spiced gum drops when I was eight. The smell of them send me into convulsions. But every time I eat my mom’s sweet potato bake, my heart beats a little faster. It might also do that with bacon.
What kind of old person would you like to be?
The kind that can say whatever she wants and people don’t a) think she’s senile or b) give her the stink eye. I pretty much say what’s on my mind now [with a few exceptions because inserting the foot is never fun] but yeah, to be open and loud and full of wit. I want to be Ouiser from Steel Magnolias.
Didn’t I tell you she was uber cool? Do make sure you mosey on over to her blog and hang out, she’ll make you smile every time. Of course I had to put her to work, you don’t just get to be my friend and do nothing.
I asked BooBoo to share some photography tips with us. She got all excited and made it about food photog, which is appropriate for this blog and its perfect timing too. We have all the food madness coming fast, so sharpen your cameras and read on.
I love photography. I really do. But I’m here to tell you that I’m no expert. Far from it. I’m a hobbyist whose picked up a few pointers along the way and discovered what I liked. So while you might read this and think “this gal is a total joke!” I can only agree with you – but I can only share what I know. Now, let’s get started with what I know about photographing food.
I love my camera, whom I affectionately refer to as “the kahuna”, like I love food. I love to eat. And I’ve been known to take the stray photo of the plate in front of me. Food photography has become so popular of late. With the number of food blogs that grace the interweb and even special diets that require people to log their meals, everyone is snapping photos of their food. I blame technology – the digital age has made is so much easier to take pointless photos. But we can use this to our advantage to capture a great photo.
So while I’m neither a professional photographer nor a food blogger, I always have my camera in hand. And I wanted to share some things I’ve learned while my photography has evolved.
Color is key. – Yes. Yes, it is. Your pot roast might be the best in the county but if your meat has a green hue to it, it will not look appetizing. (Unfortunately, scratch-n-sniff photos aren’t available.) Many of the foods we eat have bland colors that don’t match their flavors but paying attention to the color can make the biggest difference. I find that browns and yellows are the most difficult to capture. Which is why the next point is very valid:
Use natural light. – Flash photography is great and all but I still haven’t figured it out. But what I’ve discovered with photographing food is that natural provides the best white balance for this particular still life. Ambient or *gasp* fluorescent light just puts a funny spin on color. Try shooting in an area that has a lot of natural light, a window that just brightens up the room. Or do what some of the West coasters do: photograph your food outside al fresco style.
Try different angles and perspectives. – I have no idea what makes a good photograph; sometimes my “eye” is just a bit off and nothing is working. So I try a difference angle. Turn the plate, shoot from the front, shoot from above, get up close and personal – but don’t be afraid to step back. Try cropping. There are so many different things to make each dish look original.
Experiment with your settings. – And not just your camera settings. Be aware of your background, the colors of your dishes, your napkins, plate your food with style in mind. Some people have a knack for food styling – this gal doesn’t, so I’ll try a couple different things before I find something I like. But be bold! Who says all your photos have to be taken inside? Take it outside, photograph on the deck, on the grass, on the sand – you don’t know how awesome it can be until you try.
And now… the list of don’ts. What? You knew this was coming, didn’t you? You didn’t? Well, it’s OK you’re late to the party. We love ya anyway.
– Don’t be afraid to try new things. We live in a digital age which means you can take as many photos as your little memory card can hold. And you can delete. Easy peasy lemon squeezy.
– Don’t take pictures of people eating. It’s unbecoming. Even if it is George Clooney – I don’t need to see him chomping away on some Frito Lays… I think… the jury’s still out on this.
– Be careful not to get too close to your food. Hot foods will steam and fog up your lens and scraping cheese off the filter never makes for a fun afternoon. Believe me, I know.
– Don’t be afraid to share. Flickr is a fun place to share your photographs and is filled with professionals and amateurs alike. And everyone loves food. Everyone. Well, normal people do.
Here is Brooke’s super tasty Flickr stream. It’s really good food porn. Also, Brooke hosts a photo challenge, I participated for a while this year before life became nutty. But stay tuned, she promises to host a bigger and better one next year. Now go forth and BooBoo!
www.shutterboo.com
the bacon flavored blog
PS: Use lots of exclamation marks in your comments. She loves ‘em. mmmmwwhhahaahahahaha.
Anamaris
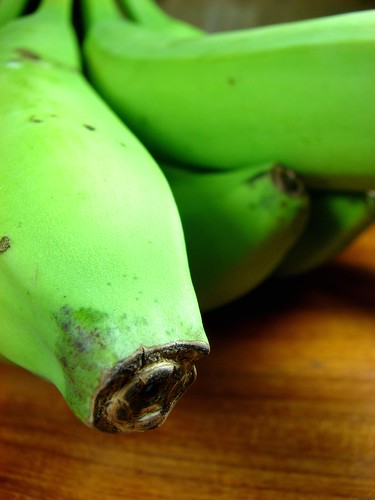
Actually, my dog almost ate the report I’ve been working on for over a week now, but her eating my post somehow seems funnier. I’ve come to believe she doesn’t appreciate my ‘working’ mode. She has attacked the laptop. Chewed printed copies. Body-slammed against me while I was sitting at the desktop. She’s a cutie, but she’s a handful!
In any case, I considered blaming her and not writing a post. Mamma’s tired. Mamma’s sleepy. Mamma’s got a buzz in honor of ‘Week Off’ week.
Aside: WHO is Ben Sargeant?!! I’m typing this and watching a new Cooking Channel show called Hook, Line, Dinner… and, Oh. eMM. Gee. Dude’s hot!
I digress. I’m taking a week off my ‘real’ job, using up my vacation time. But there will be no resting here. I’ll be working on my ‘dream’ job. Yep. Zee blog. Someone called me a blogging machine recently. Its not true, but I won’t reveal the real story, I look better in that one.

Anyway. Food. Holidays. Turkey Day. Side Dishes. That’s what we got here. I’m bringing some Latin-Caribbean sabor to your holidays with this one. This is a good replacement for the standard mashed potatoes, just giving ya some options, you see?
The Hubbz was really surprised by these. He expected them to be heavier somehow. The trick with these is to get the bananas just before you use them, they go ripe pretty quick, so timing is everything. You could pick them up the day before Thanksgiving, peel and boil them, then reheat and mash the day of. There is no need for a recipe here. Pretty easy stuff.
Green Banana Mash
Green bananas
Butter
Bacon, cooked & crumbled (reserve some of the fat)
Milk
Salt & black pepper
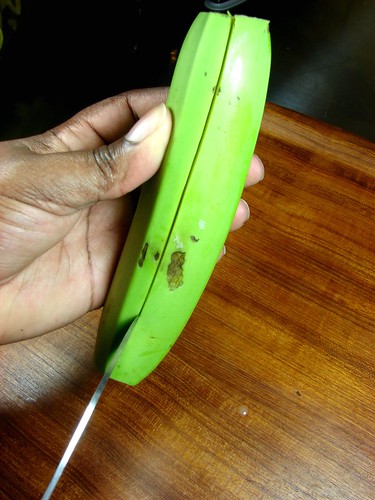
Similar to green plantains, if you soak these in water for a few minutes, peeling them will be a breeze. So trim the ends, score it along the sides a few times and let them soak in cool water for 15 minutes or so. Mind the sap, though. It will stain your hands and clothes.
Once you peel the bananas, cut them into rounds, drop them into a pot filled with water, add salt and bring it to a boil. It will take about 12 minutes to cook them to fork-tender.
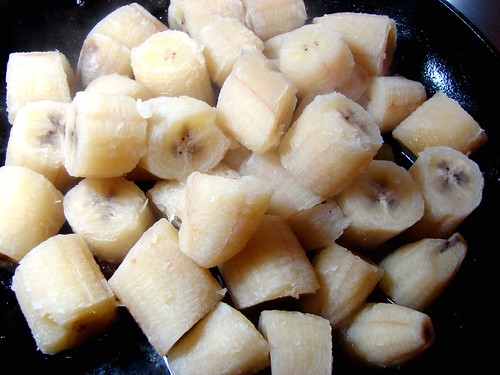
Drain the bananas, in the same pot, add milk and, if you’re not opposed to it, use some of that bacon fat, it adds amazing flavor–1 or 2 tablespoons will do. I usually do 1/2 butter 1/2 bacon fat. Return the bananas to the pot and mash away. Adjust the seasoning with salt & pepper. Mix in 2/3 of the crumbled bacon and top with some as you serve it.
That’s it folks!

For extra shots, check out the photostream.
Cookingly yours,
Anamaris


