
Gordon Ramsay wasn’t there. The end.
Ok, I didn’t really expect him to be there, but I had high hopes of it. Several friends have told me that I really need to share what the experience was like, so here it is. A mere 8 months later, but who’s counting?
The process begins a few months out; they announce the call for submissions and allow you to pre-register. I later found out that this pre-registration means you get to pick the time of day you want to show up for the audition, which can be especially significant depending on the city you’re going to. Anyway, I completed the application, about 12 pages of it, printed it and held on to it to carry it with me on audition day. You don’t submit it ahead of time.
The requirements to try out are pretty simple. No professional cooking experience, i.e., if you’ve worked in a restaurant you’re out. The availability to be their beck and call girl or boy for about 10 weeks, if selected. The completed registration. Oh, yeah, your signature dish, prepared before hand, ready to plate and be judged. No cooking, reheating, no plug-ins, nothing to be done on site. Just plating. That last bit sent me into a tissy.
First of all, signature dish? Me on a plate? I have this really, really bad habit of cooking a kickass dish, loving it, having The Hubbz rave about it, then never making it again. I’m on to something else. For weeks I deliberated over what to make, a decision made more difficult by the fact that it had to be something that would taste just as good if it wasn’t hot. Because, let’s face it, I’m not a dessert kinda chica. I didn’t decide on a dish until about a week before I was supposed to be in San Antonio. More on that later, first let me paint the picture of what was happening leading up to the audition on September 20th.
My day job was nuts and I was traveling to Oklahoma and New Mexico conducting training sessions for most of that month. Then, the weekend before the audition, I went home for this…

Auntie of the Bride - aren’t we cool?!
Yep. My gorgeous niece tied the knot and I just HAD to be there for the festivities. So, I made it back to Houston on Wednesday, to head on to SanAnton Saturday…, just a tad bit close. The last 2 episodes of the season played while I was traveling, so I caught up upon my return. In hindsight, I probably should’ve waited until after the audition because that’s when I realized that the grand prize was $250,000!!! For some reason, I had it in my head that it was 100K. That was manageable. But $250k just freaked the heck out of me. I almost wimped out. Don’t worry. I didn’t.
Once my little crisis had passed, I got busy figuring out a way to keep my dishes as hot as possible and shopping for said tools to accomplish that task. I know. I should’ve done that weeks, months earlier! I know. I bad. Finally on Friday I found what I was looking for and it was just a matter of getting my dish together. Raviolis de Otoe con Cordero Guisado. Is this my signature dish? I don’t know. Is this me on a plate? Oh, yes!
This is a dish I came up with a few months ago; I filled pasta with a mash of otoe, one of my favorite root vegetables which is also known as malanga, and a soft cheese flavored with masala spice. It is then topped with a lamb stew I made following my own recipe for Carne Guisada and pickled veggies over top to add another dimension and texture. The dish is me on a plate, without a doubt-I live to take traditional cuisines of the world and spin them a bit with the flavors and ingredients I grew up eating and the flavors on this dish are evocative of my youth in Panama.

So, Saturday morning comes, I wake up waaaay too early for my taste and proceed to cook the raviolis, reheat the lamb and sauté the veggies for the topping. I pack everything up, microwave the heck out of those jelly pouches that conserve the temperature, get dressed and off we go. San Antonio or bust!
Auditions were held at the Embassy Suites, I arrived right around 9am for the 10am group. First thing that struck me was how low key it all seemed. I expected to see a myriad of hopefuls standing in line outside the hotel, but I didn’t. Even the valet counter was readily available. Anyway, I walk in and get my official documents and I’m sent to the waiting room. There were about 100 or so people in the room and they would ‘audition’ you in groups of 20; I went in with the 3rd group.

We’re not in Kansas anymore!
In the second room, they had set up tables into a U-format and you just lined up around it in numerical order. Someone from the team walks in and gives you instructions about what is and isn’t allowed, then starts the timer and you have 5 minutes to plate and clean up your area. No pictures allowed, so the shot above is from my test run.
Round 1: a local chef, I believe, comes by and tastes your food, then asks you questions about the dish. Mine wanted to know if I’d made my own pasta: Yes, Chef, what were some of the flavors in the lamb, I mumbled them off. Then he said I should’ve cut the veggies a bit larger, as they were slightly overcooked; Damnit, Chef! I’m sorry, Chef! In the end, he complimented me on the dish, saying, and I quote, “This is very good, I really like it and great presentation.” Yup, uh huh, that’s what he said! I was very happy with my plating, but a bit disappointed in the veggies. Nonetheless, it was good enough to secure me a spot on the 2nd round; the interview with the talent people!
Round 2: The Panel of Personalities Experts. Five of us went in at once. My competition was a cute mom of a toddler, who was also an Army wife, had tried out for several endurance type shows in CA and had a penchant for wearing clothes she made herself out of Disney motif fabrics.  Then there was the guy who had taught himself how to cook in a year and documented his weight loss on Instagram and had something like 200k followers. He wasn’t sure if it was because of his cooking skills or the fact that he often took bare-chested selfies with the food he made. At least I had 1 more personality than the other 2 people in the room at the time, still, I didn’t make the cut.

He’s not Gordon, but he was super sweet!
It was a really fun experience, though. After I was done hyperventilating for weeks on end and even though my nerves got the best of me as I spoke to the various selection people, I loved it. I would do it again and will likely do so this year, if travel permits. I learned that rejection isn’t as painful as regret or wondering what might’ve been. I won’t lie and say I don’t still sell myself short, I do, but not as short as I used to.
There’s a big wide world out there and I’m part of it!
Anamaris
PS: oh, I did have a brush with celebrity…
PS2: I haven’t seen any of the people who were in my group either. There’s always next year!
On a vacation trip with the Hubbz 3-4 years ago, we found out about this little eatery in Bocas del Toro, Panama, it is called Guari Guari. We had a phenomenal 5 or 6 course meal prepared by a husband and wife team and served al fresco, in an area that was not much more than their private patio. The ‘restaurant’ seats 10 people each night and, as long as you don’t have special dietary requirements, you’re dazzled by the chef’s whim and exquisite palate.

I’ve long dreamed of having a little place, maybe a B&B with a restaurant offering limited seating and serving dinners for our guests and maybe have a table or two open for locals. I have to admit that Guari Guari certainly stayed in the back of my mind until recently, when I began my Secreto dinner series. You can come here to get a peek at what I’ve been doing over the past few months, together with a few shots-taken when I remembered to leave the kitchen and grab the dang camera! I will also offer recipes for some of the dishes I’m preparing, I mean, this is a food blog, after all!
my very first menu and the beginning of the Hubbz and my homegrown adventure.
Welcome Cocktail and Appetizer: Cava cocktail and Pasteis de Pollo (Pastry empanadas filled with chicken / Wine pairing: Spanish sparkling wine cocktail)
1st Course: Sancocho Panameño (A traditional Panamanian chicken soup with root vegetables and rice / Wine pairing: Kung Fu Girl Riesling)
2nd Course: Filet of Grouper al Ajillo with Saffron-A-Roni and Chayote Gratin / Wine pairing: Felino Malbec
3rd Course: Leg of Lamb in Star Anise Mole with a Potato and Leek Hash / Wine pairing: Chateux-Croix Mouton Bordeaux
Dessert: Passion Fruit Napoleon (Phyllo sheets topped with a passion fruit curd and pistachio brittle) / Wine pairing: Urban Uco Torrontes
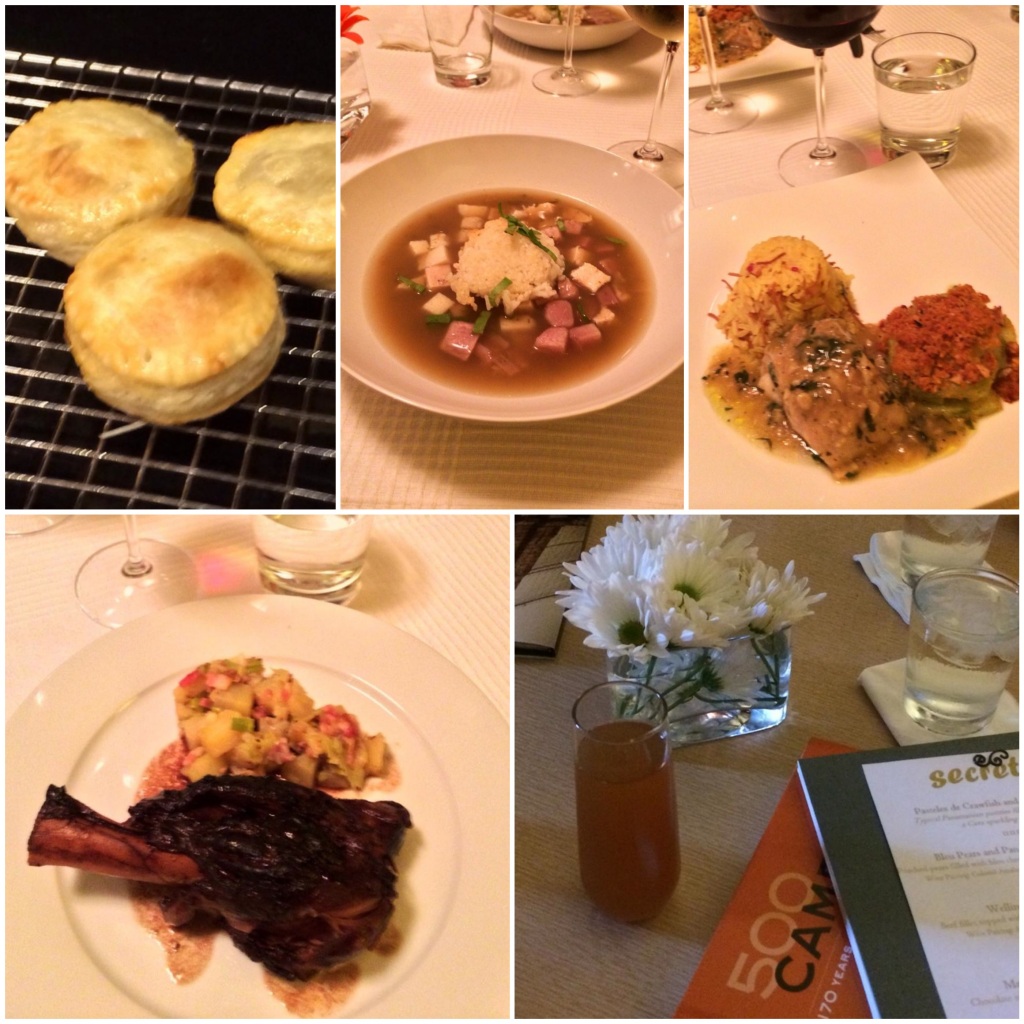
For the Passion Fruit Napoleon, which was a major hit, I baked phyllo sheets brushed with butter and with a sprinkle of sugar until golden and assembled them with passion fruit curd and topped it with candied pistachios and strawberries. Simply delicious!
Cookingly yours,

Amidst the what ifs, maybes and ultimately, not nows of my day job, I’ve found myself looking for an outlet, for a way to express my true self and take control of my future. I got back in the kitchen, inspired by the foods and spices I learned about through my travels and the Cooking Channel  I started remembering dreams I had, promises I’d made to myself and slowly a new picture dream is beginning to emerge.
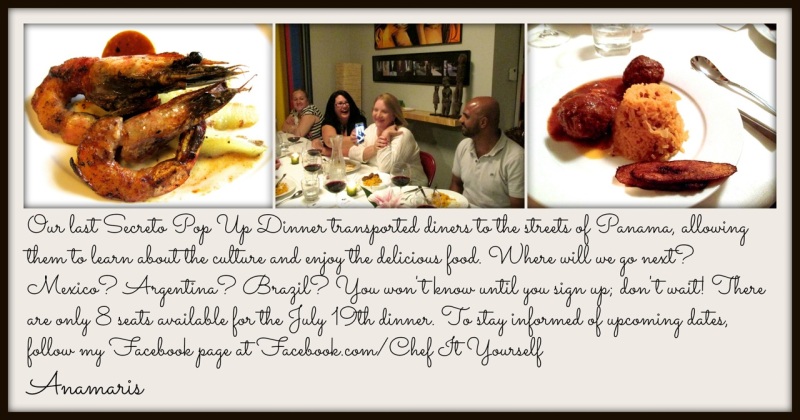
This past April I hosted my first pop up event at home, I’m calling it Secreto Pop Up Dinners. Essentially, I’m opening my dining table to 10 diners and preparing Latin focused dishes that are paired with wines from South America, Spain or Portugal. If you remember my recipes, you know that I usually take classic recipes and tweak them by adding Latin ingredients. I’m doing the same for these dinners. The menus thus far have included things like Beef Wellington using chorizo and sofrito instead of the traditional mushroom filling, otoe raviolis, lamb in a creole sauce, and a passion fruit curd napoleon. That last one was a serious hit!
I’ve been gleeful during and after the chaos of entertaining formal dinner parties and I’m slowly, though steadily, getting back on the horse. I promise to share the things I did, some of the foods I ate and the amazing places I saw, only this time I’ve also promised to be kinder to myself . What I will not offer us this time around are empty promises. think of me as that great friend you hear from every so often, but can’t wait until your next catch up session. You know the one. No matter how much time or spaces elapses, you have the certainty that the wait will be well worth it.
Ready? Go to the next post!


One door closes…
It’s been 3 years since my last post. Life got hectic, nomadic and I just lost the joy that cooking and blogging brought to it because I always seemed to be chasing the clock. The pressure I put on myself made it feel like another job, it was no longer my time to envision, create and be delighted by the dance of spices and fire. As always, life is in constant flux and things have slowed down and are different. Day job priorities have shifted, new business decisions were made and with that I’ve refocused as well.
I might’ve shared this before, but part of the reason things were so out of balance these past years, was a possible move to the South America region to grow the department I work in. That was certainly an exciting prospect, one that required a lot of travel to set the groundwork. It was crazy, I tell you! I traveled over 60k miles in 2012 and 2013, which allowed me to see some beautiful places, meet amazing people and eat incredible food. However, as it often happens, goals were reexamined, departments were restructured and new decisions were made. So no transfer for me, at least not as a result of my day job. It has taken time to get over that realization, to let go of those dreams and plans for a life in a different locale.
As I mourned that loss, I found myself slowly getting back to that joyous space, back to the solace my tiny old kitchen so kindly offers me. Between the memories of my travels and my continued obsession with food channels, programs and books, my cooking is much more inspired and inventive. I remember everything I saw and ate and experienced in the past two years, so they weren’t a loss; instead, I’ve translated it all into the flavors that now come from my kitchen. A new dream is beginning to be dreamt and defined and it has something to do with a new way to share the joy of cooking and eating and visiting with people as obsessed with food as I am. Well, maybe not AS obsessed as I am, but still avidly curious.
Two different things will be happening here: I’ll post about the places, things and foods from my travels; so if you’ve always dreamed of visiting some of the countries in South America but haven’t made it yet, or if you moved away and are feeling nostalgic about home, or if you just love to hear stories and talk about food, then this is the blog for you. The other focus is molding an emerging dream, though I’m not sure what the final destination will be yet. A few months ago I began opening my doors to ten diners and serving them the dishes I create. I’m part of the underground, the pop up dinner circuit, I’m cheffing for strangers! At least, that’s the plan. I’m about to host the 5th of these dinners and my friends keep signing up for them. I’m surrounded by an amazing and supportive group of friends and I know that as these develop, more and more people will come into my circle and I’ll be able to share with them the fascinating food from this continent.
As for you, unless you’re in Houston and can come to one of my dinners, I invite you to sit with me while I rediscover my old digital files, recollect life changing moments and tell you about the food. Oh, the food of South America and mine.
Cookingly yours, again,

Yes, I’ve been away, partly because work (the one that pays my food bills) has been CRAZY busy, partly because I’m enjoying Rose wines… A LOT. No, I’m not drunk, not yet.
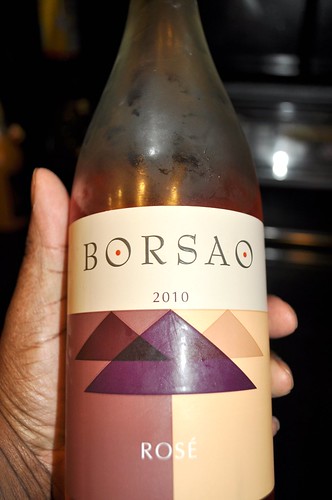
This one is yummy, nice and dry, all Garnacha grape. Great value under $10!
As I browse through my blog, I can’t help but notice how often rice seems to come up. I really can’t help it, I have a love affair with that little grain. My only hope is that I offer some variety for you. That said, this is a rice post. Yep. Mas arroz.
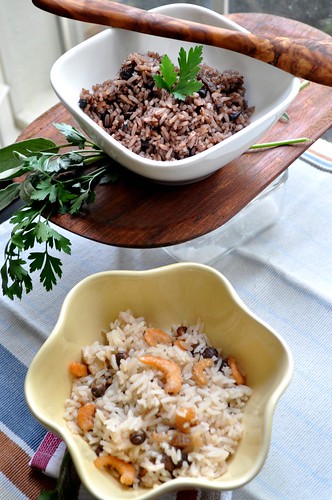
In Panama, we prepare rice in many different ways; sometimes with coconut milk, or various beans and peas. Anything you want, really. Two of my favorites are Arroz con Frijoles Negros (rice with black beans) and Arroz con Camarones Secos (rice with dried shrimp).
They’re both easy to make and follow the same process as the recipe for Arroz con Guandú. For the black beans, I used dried beans and cooked them in the coconut milk, as detailed in the recipe below, but you can use canned beans . For the one with the dried shrimp and guandú, I cooked both of those in the coconut milk first, then followed the recipe.
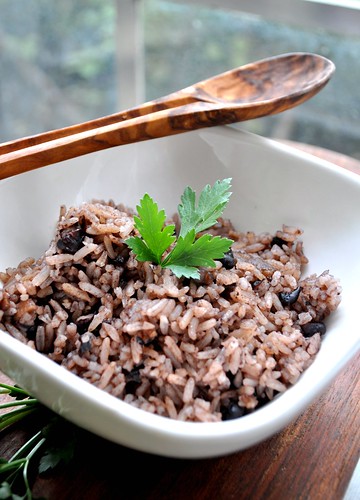
For the Arroz con Coco y Frijoles Negros (Black beans & rice)
2 cps rice
1/2 cp dry black beans
2 cps coconut milk
3 cps water
1/3 cp salt pork or bacon
1 tbsp vegetable oil
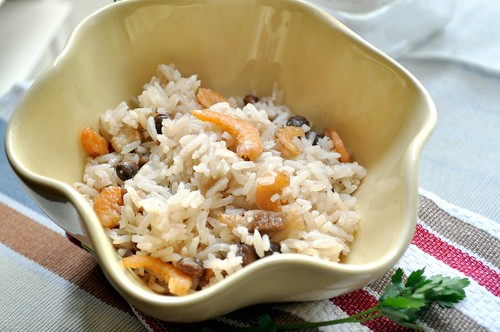
For the Arroz con Camaroncitos Secos y Guandú (Rice w/dried shrimp & pigeon peas)
2 cps rice
1 cp frozen guandú (pigeon peas)
1/2 cp dried shrimp
2 cps coconut milk
3 cps water
1/3 cp salt pork or bacon
1 tbsp vegetable oil
Method for both versions:
In a pot with a tight-fitting lid, brown the salt pork/bacon rendering some of its fat. Add the guandúes (pigeon peas), coconut milk. Bring it to a boil, then reduce the heat until it simmers. Cook it until the peas are tender, about 40 minutes. Strain the liquid and measure, add enough water to make 3-1/3 cps of liquid, set aside.
This recipe uses the frozen peas, however, if you are using the canned variety, just skip the step above. Instead, drain, rinse and strain the beans, then add coconut milk and water to measure 3-1/3 cups. Fry the salt pork or bacon just before adding the rinsed rice.
Add oil to the pan with the peas, rinse the rice and add it to the pot stirring all the ingredients. Add the liquid, check the salt, stir this well. Make sure you remove any drippings that may have been stuck to the bottom of the pan. Bring it to a slow boil; once the liquid boils do not stir it again. Keep the temperature on medium high.
Once the liquid is almost completely evaporated, bring the temperature to low and cover with the lid. Allow to steam undisturbed for 40 minutes. When you remove the lid, all the peas will be at the top, go ahead and stir them into the rice. You’re done!
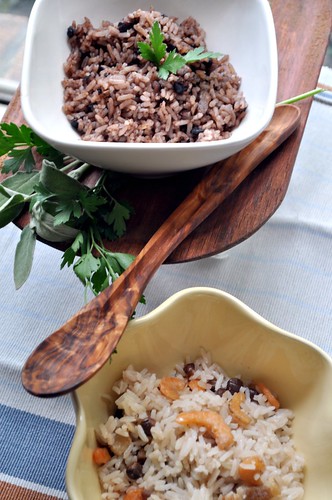
Note: The flavor of the coconut milk will intensify with time. You can cook the peas a day ahead to allow the flavors to meld together.
Do you believe soups are better suited for a specific time of the year? Maybe when it is cold and dreary or rainy outside? For Panamanians, soup is on any day of the week and year. As a matter of fact, you’ll find it on the daily lunch menu at every restaurant or Fonda around the country.
When I was in Austin a few weeks ago, I saw an advertisement for Sopa de Arroz con Pollo (Chicken & Rice Soup). Even though I’ve heard about chicken & rice soup, I never really thought about it in a Latin context until then. Chicken & rice soup doesn’t move me in any way, but Sopa de Arroz con Pollo…? Now, that’s a completely different matter. I simply couldn’t get it off my mind. The possibilities. The potential goodness. Muy rico.
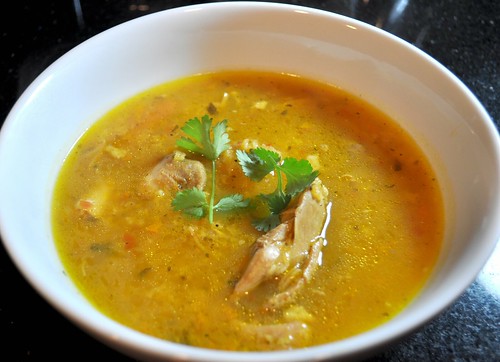
It turned out lighter than I had anticipated, even with the addition of the rice. Rich with the flavors of the chicken broth and culantro. I didn’t have any yuca at home, but next time I make it, I will use that instead of potatoes. And it was a breeze to make too!
Sopa de Arroz con Pollo
1-1/2 lbs of chicken on the bone (I prefer thighs) seasoned with 2 pkts Sazón Goya .
To your blender, add 1/2 onion, 1/2 red bell pepper, 1/4 cp cilantro or 3 culantro leaves and 2 crushed garlic cloves, add just enough water to puree all the ingredients; I ended up with about 3 cps of puree.
Put the seasoned chicken and the puree in a stockpot over medium-high heat and allow it to cook for about 10 minutes, stirring occasionally. This will allow the flavors from the pureed veggies to infuse the chicken before adding all the water for the soup.
After about 10 minutes, add enough water to totally submerge the chicken, about 6 cps, add some chopped potatoes and carrots, season with salt & pepper, and 1 bay leaf. Bring it all to a boil, then lower temperature to allow it to simmer and cook for about 20-30 minutes or until the chicken is tender.
Remove the chicken from the broth and add 1/2 cp of rice to it, allow it cook while the chicken cools enough to remove the bones. Make sure to stir the broth every few minutes, making sure to remove any rice that may stick to the bottom. In the meantime, chop the chicken, if you’d like and return it to the broth. Cook just long enough for the rice to soften.
Serve in bowls and enjoy!
Cookingly yours,
Anamaris
Every now and again I find myself enjoying what I describe as a gastronomical religious experience. I’m a food snob, I admit it. I love good food, the rest isn’t worth the calories. I recently had one of those meals in Austin, Texas.
Do you know who Tyson Cole is? Only the latest recipient of the James Beard Award for Best Chef in the Southwest, an honor that celebrates how he expresses his genius on plate after plate at Uchi and its little sister dining room, Uchiko.
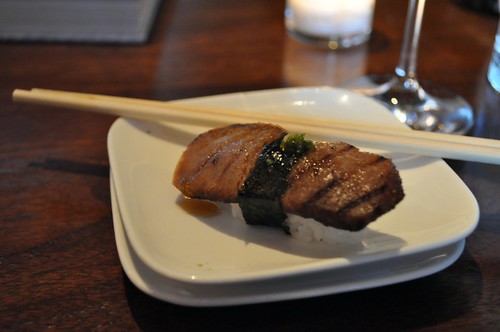
On the recommendation of a local, I had a meal at Uchiko my last night in town. You can read all about it over at Eating Our Words. I thumbed through their cookbook while I ate my Fried Milk dessert, immediately knew I had to own a copy. Armed with the cookbook featuring fantastic cooking techniques and my lingering Uchiko-buzz, I attempted a new dish inspired by Cole and his cookbook (by the way, you really should a copy of it). You can click on this link to see more of the Uchiko food porn shots.
I came across a recipe for tuna steak coupled with compressed watermelon and other fancy accoutrements I chose to skip. I don’t really have a recipe for this, I’ll simply walk you through the method. This was very easy and quick to put together. I decided to allow the tuna steaks to marinate for about an hour and at the same time this allowed me time to dehydrate the watermelon slices.
Tuna Steaks with Dehydrated Watermelon
serves 2
For the steaks:
2 tuna steaks, marinated
Marinade:
2 tbsps extra virgin olive oil
Crushed black pepper
Sea salt

Dehydrated Watermelon
4 watermelon slices (about 1/2-in thick)
Fish sauce
Cooling rack
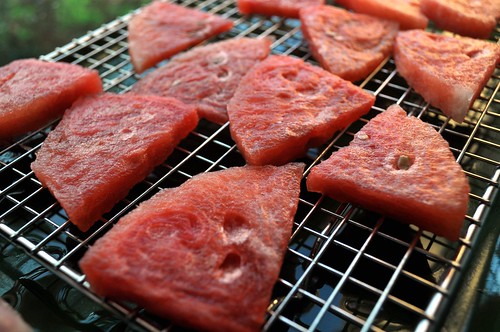
Remove any seeds and sprinkle each side of the watermelon slices with a couple drops of the fish sauce. Then place them on the cooling rack over a cookie sheet and allow some of the liquid to drain out of the watermelon.
Peach & Habanero Sauce
2-3 ripe peaches, peeled & diced
Water
Pinch of salt
Habanero sauce, to taste
Throw everything, except the water, into a small saucepan. Add enough water just to come to the tops of the peach cubes, bring it to a slow boil/heavy simmer and cook until the peaches have softened to mush. Keep warm.
Sear the steaks in a nonstick skillet, we like ours medium rare, but cook it to your preference. Lay 2 slices of watermelon, spread a bit of the peach sauce and top with the seared tuna steaks.
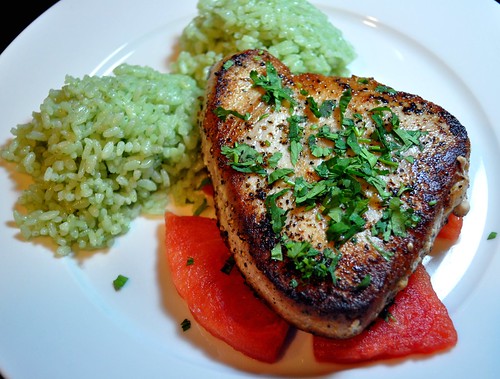
I know this combination of ingredients may sound odd, but it really works. The tuna steaks were simply flavored, so you can really appreciate their flavor. The watermelon, which is always just mildly sweet, is accented by the complex saltiness of the fish sauce and all of this balanced out by the fresh sweetness and spiciness of the peach sauce. It was a perfectly harmonized dish.
Enjoy!
Cookingly yours,
Anamaris
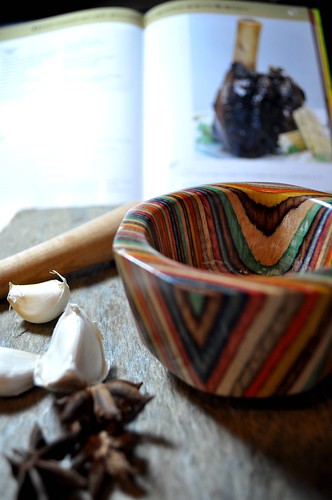
This is a recipe I found in Jorge Jurado’s cookbook, Sabores de Panamá. I should tell you it isn’t a ‘traditional’ Panamanian dish, but rather an interpretation by this talented chef utilizing ingredients commonly found in Panama. His recipe called for beef shanks, but I had just picked up some short ribs and decided to use them instead. It turned out beautifully.
The intense combination of spices, together with the deep and rich color of the final dish made this reminiscent of Mexican mole. I can’t really think of a traditional Panamanian dish that is even remotely similar to mole, but this is a rocking interpretation!
Costillas Braseadas con Cafe, Chocolate y Anis Estrellado (Coffee, chocolate and anise braised short ribs)
Marinade - a day ahead
2-1/2 lbs short ribs
1/2 bottle red wine (one you would drink)
3 garlic cloves, diced
1 tbsp instant coffee
2 carrots, sliced
1 bay leaf
12 peppercorns
2 star anise pods
2 tbsps olive oil
1 tbsp salt
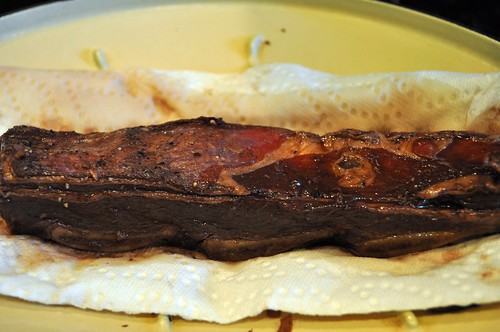
Combine all the ingredients in a ziploc bag and allow the ribs to marinate overnight or, at least for a few hours. Turn the ribs occasionally.
Braising - day of
1-1/2 onions, chopped
4 garlic cloves, chopped
Marinated ribs and the carrots
Extra virgin olive oil
Approx 2 cps broth (chicken/beef/veg)
1 tbsp sugar
1 oz bittersweet chocolate
Salt to taste
Remove the ribs from the marinade and pat dry with a paper towel. Meanwhile, heat a Dutch oven to medium-high and add the olive oil. Brown the dry ribs on all sides, remove from the pan and set aside.
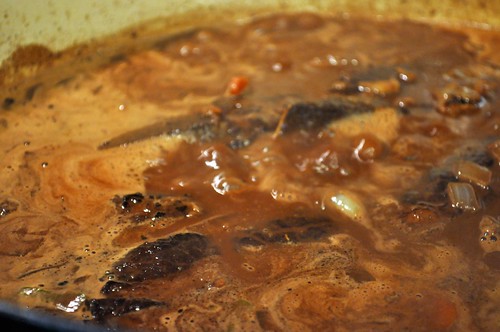
Drain the excess fat, leaving about 2 tbsp of oil/fat in the pan. Add the onions, garlic and carrots and allow to cook until they begin to caramelize. Return the ribs to the pan and add the marinade liquid, broth, sugar and chocolate.
There should be enough liquid for the ribs to be completely submerged. Bring it to a boil, then reduce the temperature to low to allow for a slow simmer. This will continue to simmer for about 2 hours, until the meat is tender and falling off the bone.
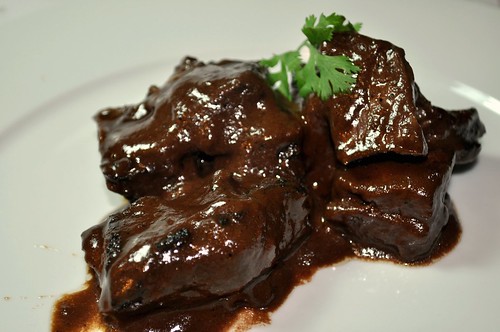
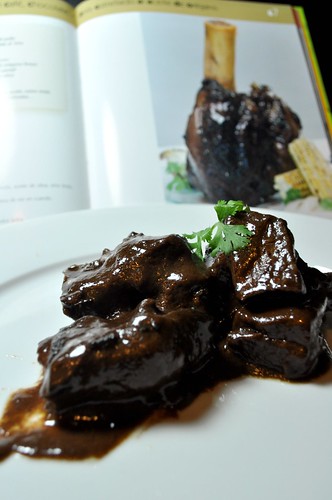
I, of course, served it over rice. I love rice, sue me! I think it would be really nice with roasted veggies too, though. For more food porn, click here.
Cookingly yours,
Anamaris

I’ve always found that to be an odd expression. The phrase itself sounds innocuous to me, but the meaning behind it makes sense. To share, to open one’s home and/or heart to another, to be welcoming. Philosophically, the idea of breaking bread is a great one. In reality, the idea of having to share my bread with someone, elicits murderous thoughts. No. Really. Don’t touch my bread!
Luckily, when I bake bread, the recipe results in enough of it that I’m able to, even if begrudgingly, share it with one or two people. Tops. You get the picture. So, a few weeks ago I made some bread. Panamanian bread, something we call Pan Micha.
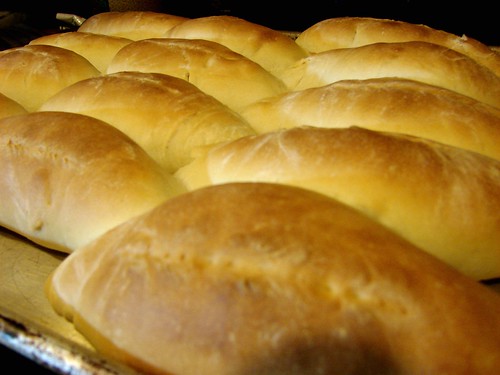
Rumor has it, this recipe was brought to my homeland by the French when they attempted building the Canal. I have no verification for that story, but I do recognize some similarities with French miche bread. Thin, golden crust and soft, light inside. What I do know for sure, if that you will find michitas anywhere there is a bakery in Panama.
I remember walking to school and stopping by the corner bakery-the aroma of freshly baked bread wafting in the air-and ordering ‘una michita con queso blanco y mantequilla‘ (a buttered michita stuffed with white cheese). Aaaaah, the bread would still be warm, the butter and local cheese melting into the center. Heavenly.
I found a recipe for it here, so I won’t retype it, just follow the link. What I want to tell you about, is how we ate them, after all, eating them is the best part.
You know I’m a traditionalist, so mine had butter and Queso Fresco. Nothing else needed. I did toast them a bit.
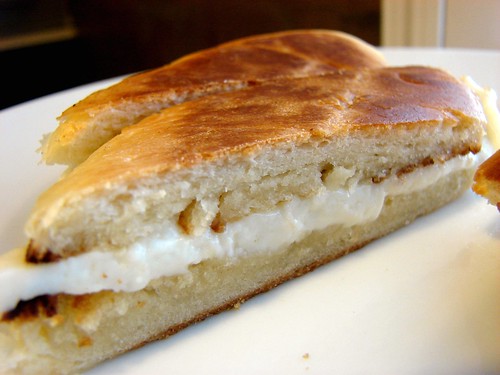
The Hubbz is a different story. He’s a man of excess, so he added some roast beef we had in the fridge. In Panama, we would’ve used ham or chorizo.

The bread was good, but not as light and airy as I remember michitas being, my quest for the perfect recipe continues.
Cookingly yours,
Anamaris
![]() Then there was the guy who had taught himself how to cook in a year and documented his weight loss on Instagram and had something like 200k followers. He wasn’t sure if it was because of his cooking skills or the fact that he often took bare-chested selfies with the food he made. At least I had 1 more personality than the other 2 people in the room at the time, still, I didn’t make the cut.
Then there was the guy who had taught himself how to cook in a year and documented his weight loss on Instagram and had something like 200k followers. He wasn’t sure if it was because of his cooking skills or the fact that he often took bare-chested selfies with the food he made. At least I had 1 more personality than the other 2 people in the room at the time, still, I didn’t make the cut.


