I hate it when I have to start a post with an apology, but I have to. See, I”ve been a bad blogger. I received an award months ago, (ok, a month ago but exaggeration is my strong suit) and I never thanked the award giver nor did I pay it forward. Until now.
I received the Versatile Blogger award from Thella over at I love, therefore I cook and I was incredibly excited about it. Unfortunately, it came at dicey time, but, ALAS! I’m woman hear me roar and all that good stuff.
OK, enough with the self-flagellation and on to the good stuff. For this award, I am to:

Dana, please show the shiny award to our viewers...
- Thank the nominator. Thank you Thella!
- Tell you 7 things about myself.
- Pass it on to bloggers I recently discovered and love.
7 things about me you wish you didn’t have to read about:
- I am hungry even as I type this post .
- I don’t get cold soups. What? Soups are supposed to be served hot!
- I love offal. Not all offal, but a lot of offal.
- I’m depressed by the thought that I won’t be able to take my DVR with me to the proverbial desserted island…, will there be electricity?
- When I eat something really good, I can’t wait to try making it at home.
- I’m a big dog lover. Anything under 45lbs isn’t a real dog, just a doggy sample.
- I am cooking show obssessed. Big surprise!
And for the last piece of bitness. Bloggers! In no particular order…
I found this one through Foodbuzz. She was in the Peace Corps and one of her assignments had been Panama. I was thrilled when I found another blogger documenting Panamanian food. Check out Foy Update.
The Joyous Bon Vivant – Norah had me at homemade chorizo.
Katie O, Katie. I’ve been following her around for almost a year now. I think she was my first blog crush, but she has recently refocused her You Are What You Eat or Reheat blog and I’m loving every minute of it. Plus, she has several obssessions that speak to me.
Monet from Anecdotes & Apples is a student working towards her dream of opening a bakery with her sis. She also looks like that French actress…
Chuck is a real life chef offering up great tips & food at Pittsburgh Hot Plate.
Joy at Joylicious lives in Dallas and is a fantastic photographer and puts out some amazing food!
Stephanie at Copycat is a fellow Houston dweller obssessed with figuring out what your fave restaurant dishes are all about.
Jorge is the brains behind Hispanic Kitchen, a site dedicated to all things Latin. Ay Bendito!
Cindy at Life in a Recipe is cooking up a storm somewhere in Canada.
Joan has taken her blog Foodalogue on tours around the world. I love her no fuzz approach to cooking.
I don’t know this girl’s name, but she sometimes refers to herself as She Who is Doomed. I think that’s enough info for you to understand my fascination with her blog, Living Dilbert.
There! I did it! I hope you’ll take some time to check out these amazing blogs, I’m pretty sure you’ll enjoy them as much as I do.
Anamaris
Remember a few months ago I posted about sofrito and about how it is the backbone of Latin cooking? Have you noticed how it seems to come up in most recipes I’ve made lately? I wouldn’t lie to you, now would I?
These yummy pork chops remind of Sunday afternoons when all my mami’s family would gather at one of the aunt’s homes for a big family-dinner-catch up session. These or the stewed chicken would show up together with some arroz con guandú and the best potato salad in the universe. YUM! Or as my bloggie Shutterboo would say, nomnomnomnom!

This is a really easy dish to put together. I used regular, bone-in pork chops, but you can use boneless or center cut chops. I like to have the fatty bits, it’s where the good stuff comes from, even if my Doc disagrees. Sidenote–this past weekend I caught one of Nigella’s Express episodes, she was making pork chops. They were similar cut as the ones I used, except they were thicker and she suggested trimming the fat. The funny thing was that she couldn’t help but explain that she would normally not trim them, but needed to for that recipe. She then said she would have to save that fat and fry it up for a late night snack. You know how they always show her sneaking to the kitchen in her jammies after she’s done cooking? Well, she did. She cooked up that fat and had it as a snack! I love that woman!
OK, back to my chops. Another non-recipe-recipe. Who needs all that structure anyway?!
Chuletas Guisadas (Stewed / Smothered Pork Chops)
6 pork chops
Sea salt
Black pepper
Crushed garlic
Olive oil
Onions, sliced
Bell peppers, sliced (I prefer red)
Tomatoes, chopped
Cilantro and Italian parsley, chopped
Habanero paste or hot sauce
White wine (optional)
Ketchup
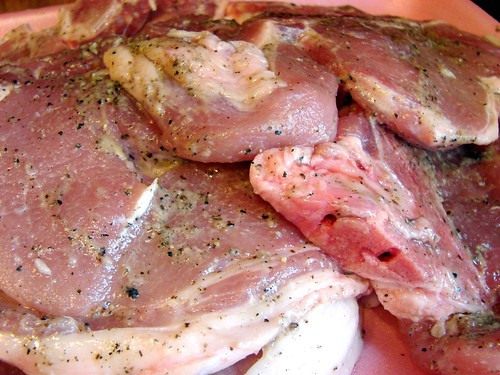
First thing, season the pork chops with salt, pepper and garlic. Set them aside while you chop the onions, peppers, tomatoes et al.
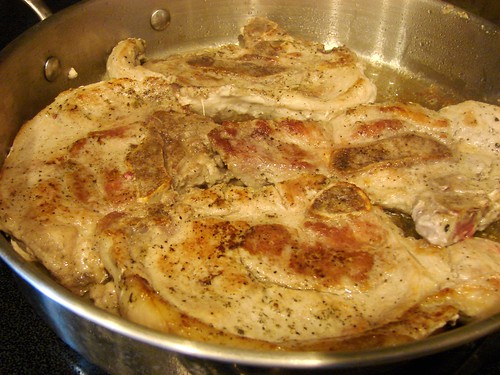
Brown the chops in a large skillet over high heat, use about 1 tbsp of oil to keep them from sticking. Flip them around 3 minutes or so. Then drain and set aside.
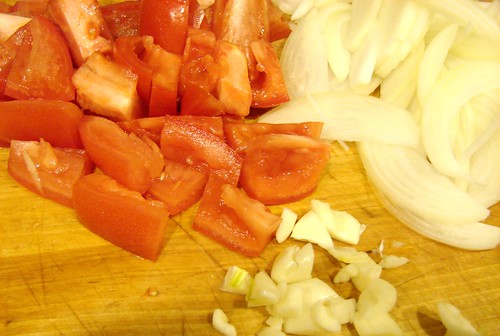
In the same pan/skillet brown the onions and bell peppers, you may need to lower the temperature to medium to keep them from burning. Once the onions have softened, add the tomatoes, parsley and cilantro. Continue cooking to allow the tomatoes to soften before adding the wine. The wine will help loosen all the yummy bits stuck to the bottom. If you don’t want to use wine, you can opt for a lager beer, broth or even water. You’ll add enough liquid to cover the onion-tomato mixture.

This is a good time to season the broth, since the chops will braise in it. Add about 3 tbsp of ketchup–yes, trust me. At this time add the habanero paste, and about 2 tsps of sugar. Check the seasoning and adjust with salt & pepper as necessary.
When this comes to a boil, add the chops back in and don’t forget to include the juices that ran off from them while resting. Reduce the temperature so that it comes to a slow simmer. You want to make sure all the chops are in the liquid, even is they’re not covered by it. Allow this to simmer covered for 30 minutes, flipping them over to make sure all sides benefit from that sauce.
Once the chops are tender, remove the lid and raise the temperature to medium high to help the sauce reduce a bit and thicken. That’s it! Hurry, go eat!

Cookingly yours,
Anamaris
I live in Houston, also known as Tex-Mex country. You can’t drive 2 blocks without spotting some sort of Mexican restaurant. I’ll admit I may be exaggerating A BIT, but I promise you, not much.
I will also admit I’m not Mexican, though I did play one for a while. See, my ex was born in Mexico and his family moved to Houston when he was 3 or 4 years old. His mother was an excellent cook and would throw down with some off the hook, authentic Mexican fo-shizzle. I was spoiled. By her, but that’s a different and boring story.
I was lucky enough to be able to spend some time with her in the kitchen as she put meals together. To this day I’ve not been able to find any Mexican tamales that can even hold the husk, not to mention a candle to hers, but I’ll keep trying them. I learned to cook Mexican food the way she did it, so even though I wasn’t Mexican at birth, I got a pretty good education in their cuisine for about 11 years.
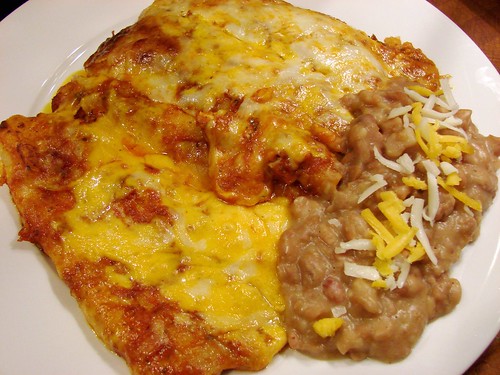
That said, I’m going to share with you one of the dishes she made. These are chicken enchiladas with a red sauce, sometimes called ‘salsa ranchera’. I’m sharing the easier version here–meaning you won’t need to steep the chipotle peppers and all that goes with that. We’re going to use the canned stuff, believe me, it works. The other shortcut we’ll take is using a roast chicken or any leftover chicken meat you may have. Pay attention, this is gonna go pretty fast.
Enchiladas de Pollo a la Ranchera
For the Ranchera Sauce:
1 medium onion, chopped
2 cloves garlic, chopped
2-3 tomatoes, seeded and chopped
1/2 cp cilantro, chopped
1 can chipotle peppers
Vegetable oil
Salt & black pepper
For the enchiladas:
12-15 corn tortillas
2-3 cps chicken meat, cooked and shredded
3/4 cp cheddar cheese, shredded
3/4 cp queso quesadilla, Oaxaca or Jack, shredded
2 cps ranchera sauce, approx
Vegetable oil

Preparing the sauce: In a medium pan heat 1-2 tbsp of oil. Add the onions and cook them over medium high heat until they have soften. Add the garlic, tomatoes, cilantro and about 1 cp of water. Allow this to cook for about 10-15 minutes until the tomatoes begin to soften and disintegrate and the liquid has reduced. Allow this to cool for a few minutes before running it through the blender with the can of chipotle peppers. Puree until smooth, set aside while you roll the enchiladas.

Preparing the enchiladas: Preheat oven to 375°. Heat a medium skillet over medium heat and add about 1/3 cp of oil. Once the oil is hot, cook the tortillas one at a time.

The goal here is to soften the tortillas enough to be able to roll them without breaking. As they hit the oil, they will bubble up a bit; cook them for about 1 minute on either side before removing them to paper towels to drain. Continue this process until you have softened all the tortillas. Set aside.

Prepare your assembly line: Lay out the shredded chicken, the cheeses and the tortillas. Spread enough of the sauce on the bottom of an oven-safe pan. For this I used a pie Pyrex pan and spread about 3/4 cp of sauce. Just enough to serve as a bed for the enchiladas.
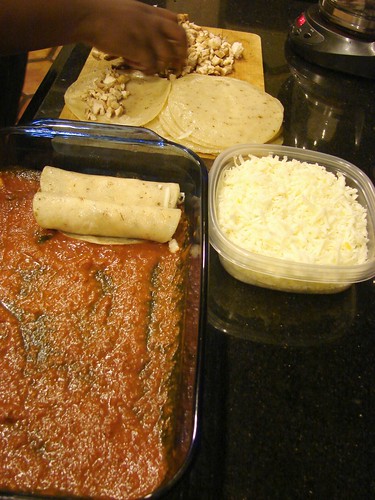
Place a bit of chicken and a bit of cheese on one end of a tortilla and carefully roll the tortilla so you end up with a fat cigar. Don’t put too much filling or you’ll have a hard time managing these babies. Once rolled, place the enchilada seam-side down in the sauced baking pan. Repeat until you’ve used all the tortillas and/or chicken.
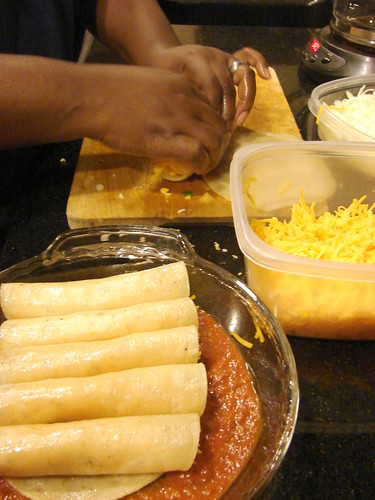
If you happen to have some chicken left, sprinkle it over the top of the enchiladas just before topping them with more of the sauce. About 1 more cup. Then top with cheese and put them in the oven for 15-20 minutes.
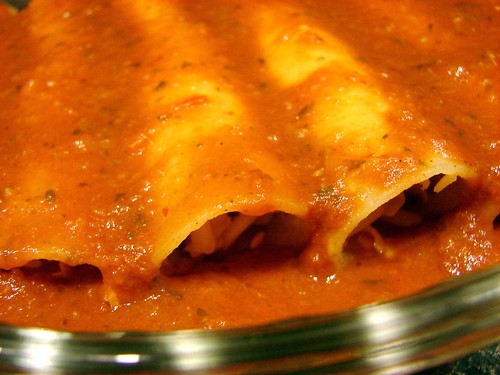
They will be bubbly and the cheese will be completely melted. If you want to brown the cheese, switch the oven to broil and brown for 2-3 minutes. Remove from the oven and allow to cool for a few minutes before serving.

Slap them on a plate with some good refried beans and have a margarita to wash it down and you’re golden!
Cookingly yours,
Anamaris
It’s Monday. Well, it’s not Monday yet, because that would make me a magician or something. I’m typing on Sunday, but I can feel Monday creeping in almost the same way I can feel an allergy flare up. What I meant is that by the time you read this it will, in fact, be Monday. Boo Monday. I wish I could ban it from the universe, the week at the very least, but then I’d have to hate Tuesday. I think you get how this rant ends.
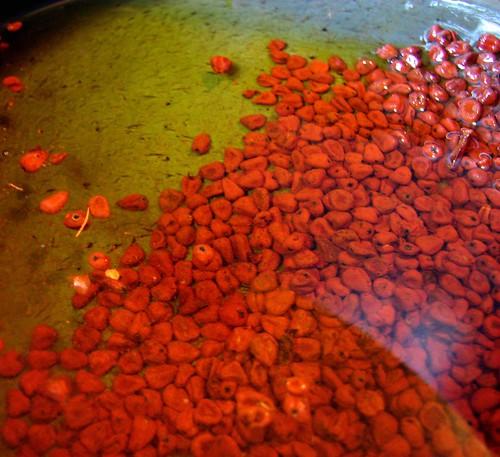
aaaAnyway. It’s Monday and that is sucky enough, so I won’t make this Complicated Monday. This will be Easy Monday. Easy Monday made better by easy shrimp. Easy, delicious shrimp. No recipe shrimp. Remember I shared some achiote goodness? Well, this little dish makes use of that beautiful achiote oil. OK, I’ll shut up and dish.
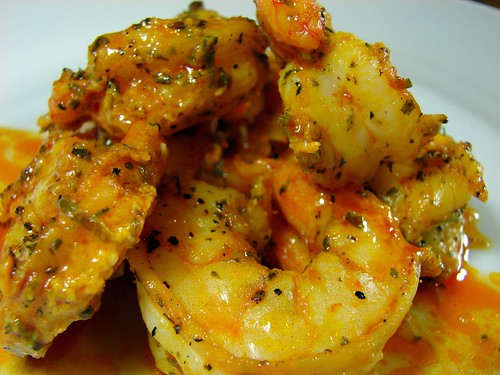
Achiote Shrimp
Shrimp, peeled & deveined (1 lb)
Achiote oil (2 tbsp)
Sea salt
Black pepper, ground
Oregano
Garlic, crushed
Lime juice
Note: If you cannot find achiote (annatto seeds), you may substitute them with Spanish (smoked) paprika.
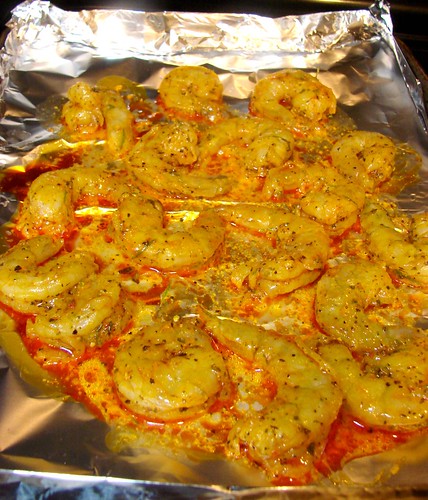
Combine all ingredients except for lime juice and set aside for 10-30 minutes. Preheat oven to 475°. Line a baking sheet with foil, this also minimizes clean up. Once the oven reaches temperature, add the juice from half a lime to the shrimp and layer out the shrimp on the foil lined sheet, making sure they’re not overlapping, but rather in a single layer. Place them in the oven and cook for about 8 minutes (depending on size).
Remove them from the oven as soon as they stop looking translucent and begin to curl and turn chalky white. Squeeze the other half of the lime and bring the sides of the foil together, creating a heat and steam pocket. Allow them to rest for about 3-5 minutes before serving.
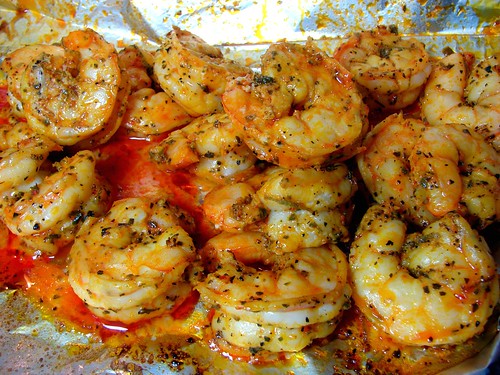
Done! See? I told you this was an easy one. If we share a love of shrimp, and I hope we do, you will really enjoy this dish. The achiote adds a warm earthiness that plays beautifully with the shrimp’s natural sweetness. This method of cooking the shrimp delivers incredibly plump and juicy shrimp.

Cookingly yours
Anamaris
Well, not really, but they are yummy beans. I have to begin by telling you that I’m not intimately acquainted with white or navy beans. We just don’t have these in Panama, at least *I* didn’t have them. We have the prepared cans of pork & beans, which I believe are made with these, but that’s it.
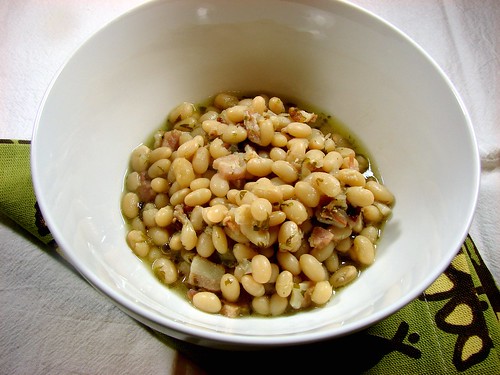
I had never really seen them until I saw Martha Stewart cook them down and add mussels to it. I was so intrigued by the recipe that I had to try it and ended up loving the beans. I’ve made them since, but rarely, and always as a base for something seafood, such as this delicious Salt Cod & Clam Stew.
Considering how much I’ve enjoyed these little beans, I’ve been trying to add them more and more often to my repertoire. Hence this pot o’beans. I made them the same way I make all my beans, and WOW. Why did I wait so long?!
No need for a recipe here, let the beans move you.
White Beans a la Latina
White / Navy beans
Garlic
Bay leaves
Bacon, diced
Onions, finely chopped
Cilantro, finely chopped
Sea salt & black pepper
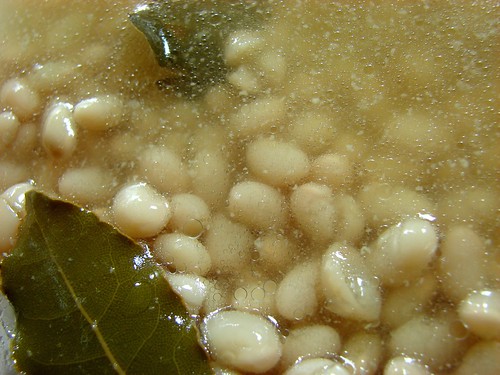
Rinse and soak the beans in hot water for about 30 minutes. Drain and rinse again before putting them into a medium size pan. Add 1-2 whole cloves of garlic, peel and all, and 1-2 bay leaves and 1-2 slices of bacon. Cover with water and bring it to a boil, then reduce the heat until the water comes to a hard simmer. Cook for about an hour, or until the beans are fork tender.
*Note: Do not add salt to your beans before they soften, season them after they are tender.
In a small skillet, cook the bacon to render the fat, it doesn’t have to be crisp. Add the onions and cilantro, cook them until the onions have soften and are translucent.

Once the beans have cooked, drain some of the liquid reserving just enough to see some just under the top of the beans. Depending on the amount of beans you cooked, this would be close to 1 cup of liquid. Discard the bay leaves and add the bacon & onion mixture. Bring it to a simmer, check the seasoning and adjust with salt & pepper. Simmer it for another 10 minutes or so before serving.

We served these alongside some lamb & rice.
I hope you enjoy it too!
Cookingly yours,
Anamaris
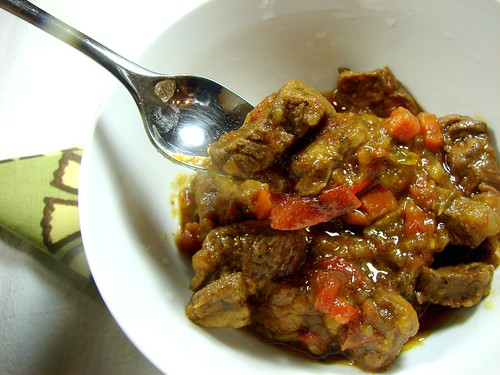
A guiso is one of those universal, one-pot dishes that exists in every cuisine/culture I can think of. Stew, cassoulet, kho, cocido, caldeirada, goulash–whatever the name and the main ingredient, it is a hearty soupy dish, slowly braised until the various ingredients are incredibly tender. There’s usually a meat/protein involved, though not always, as is the case in ratatouille. Stews or guisos will usually have a beef base, but lamb, chicken and seafood are common ingredients depending on the culture.
In this case, I decided to switch up my usual beef version or carne guisada and opted for lamb instead. I was at Phoenicia Market, my local grocer for all things Middle Eastern, when I spotted some beautiful lamb roasts. They were calling my name. I swear it! I could hear them say ‘Anamaris! Cook me. Eat me. Love me.’ And being the softy that I am, I did.
Instead of using the customary spices that accompany lamb, I went for my Latin roots. I introduced that roast to achiote, comino and habanero paste. The end result was delicioso. A rich, gamey, earthy and vibrant dish that seemed to waltz around our little kitchen as the aroma wafted around the room. As a good Panamanian, I served it with white rice and beans. The rice was the perfect backdrop to the saucy lamb, allowing us to savor the flavors from the guiso even without a bite of lamb.
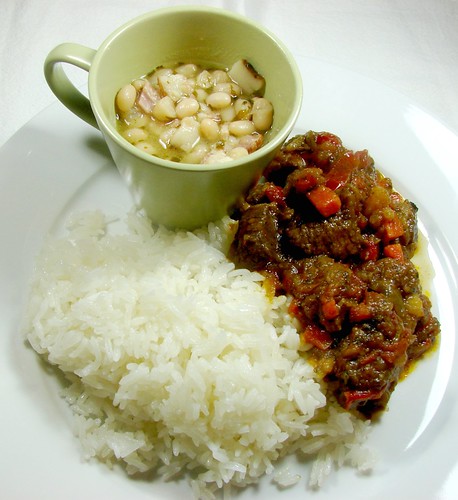
This is not to say that the rice was boring, remember my feelings on that subject. I’m just saying that the rice was a perfect partner for the very flavorful and soulful lamb guiso. And check out the beans too, I made it my mission to combine ingredients that don’t always meet each other. Guess what? It worked!
Lamb Guisado (Cordero Guisado)
3 lbs boneless lamb roast (shoulder or leg), cubed
Achiote (annatto seeds)
Vegetable oil
1 tsp garlic, crushed
2 tsp sea salt
1-2 tsp black pepper
1 tsp Jugo Maggi or Worcestershire sauce
1 tsp cumin powder
1-1/2 cps broth or beer
1 onion, chopped
1 red bell pepper (or green), chopped
2 – 3 ripe tomatoes, seeded and diced
1/2 cp cilantro, finely chopped
5-6 fresh mint leaves, finely chopped
2 medium potatoes, cubed
1 large carrot, cubed
1/2-1 tsp habanero paste

Achiote or annatto seeds are common in Latin-Caribbean cooking. It is the poor man’s saffron, used to infuse a similar color to dishes. It has a sweet peppery scent and taste, earthy; quite unique. To render its flavors and colors, we warm vegetable oil and add the seeds, then allow it to steep for a few minutes. In Panama, you’ll find a little bottle with this oil, seeds and all, sitting next to the stove. Every so often, it gets topped off with more oil until the seeds stop coloring it. Then you start over again.

You can make enough achiote oil for this recipe (about 3 tbsp vegetable oil + 1 tbsp achiote seeds) or a big batch as I do (about 1 cp oil to 1/4 cp seeds), or you can skip this altogether and just use plain or extra virgin oil.
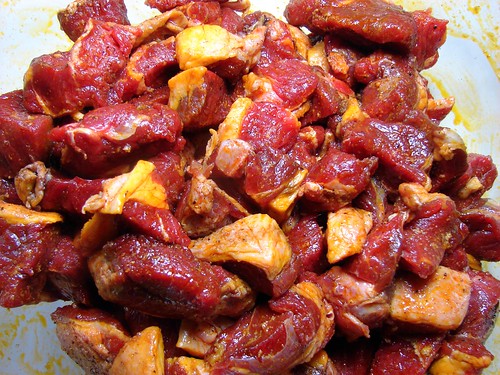
After you’ve cubed the lamb, season it with 1 tbsp achiote oil, salt, pepper, garlic, Jugo Maggi, and cumin. Mix it all in and set aside while you get the veggies and aromatics ready.
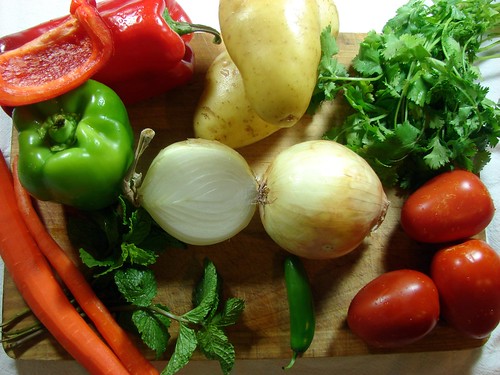
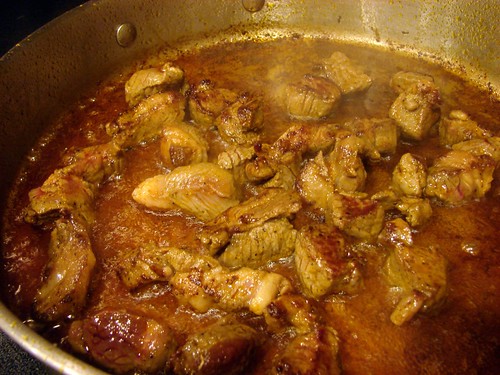
Add the rest of the achiote oil to a large pan, preferably one with a fitting lid, and get it hot enough to sear to cubes of lamb. Brown the lamb in batches, trying not to crowd the pan so that you sear and not steam the meat. Remove from the pan and set aside.
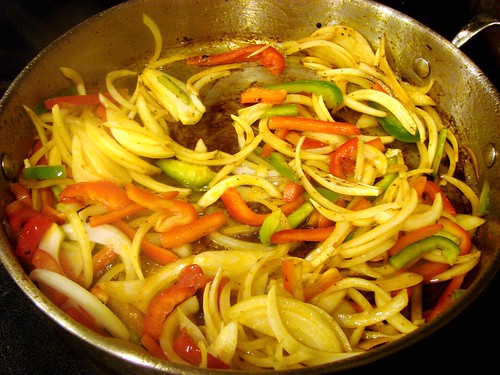
Next, you will sweat the aromatics–add the onions, bell pepper and cook until the onions have soften and are translucent. Add the tomatoes after a few minutes, stir them in before adding the mint and cilantro.
Deglaze the pan with the broth or beer, use a wooden spoon to scrape off all the yummy bits that have gotten stuck to the bottom of that pan. This will not only enhance the flavor of the dish (so long as it isn’t burnt), but it will add an incredible depth of color to it.

Stir the lamb back in, then add the habanero paste, potatoes and carrots. Reduce the heat so that it simmers slowly. Allow it to cook covered for about 45 minutes or until the lamb is very tender. If the juices seem too runny at this time, remove the lid and allow it to cook down for another 10-15 minutes. Serve with rice and beans.

That’s one happy little lamb!

Cookingly yours,
Anamaris
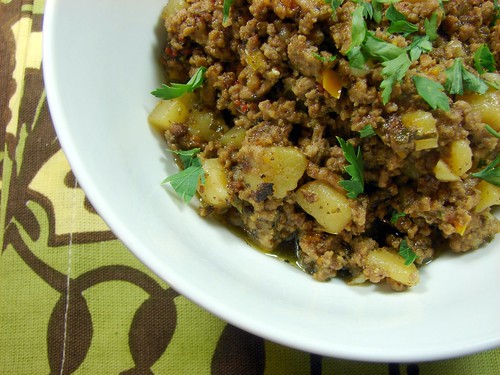
Picadillo is well-known, even if slightly different, in all Latin countries. It always begins the same way, with ground beef that is increased with local vegetables and aromatics. In Panama, we add tomatoes or tomato sauce, capers, olives and sometimes raisins. Puerto Rico’s and Cuba’s version is similar to ours.
The Hubbz loves his picadillo Mexican style and I do too. I have to admit that I prefer it when he makes it, and it has nothing to do with being cooked for. I don’t exactly know why, but his tastes different than mine. My mami says it’s in the hand. At least that’s what she used to say about cake batters. Maybe we all have our own inherently unique ‘flavor’ that is somehow infused into the things we cook. Seriously. Have you ever mimicked a recipe from someone you know and not been able to get it to taste quite the same? It happens. I don’t know how, but it does.
Anyway, I made this batch following The Hubbz directions. It was very good, just not Hubbz good, maybe you’ll hit the spot.
The Hubbz’ Mexican Picadillo
2 lbs ground beef (avoid lean beef)
1-1/2 tbsp fajita seasoning
2 tsps Herbs d’Provence
1 large onion, diced
1/2 each red and yellow bell pepper, diced
1 or 2 serrano peppers, finely diced
2 cps potatoes, peeled and finely diced
Cilantro, finely chopped
Heat up a large pan, make sure it has a tight-fitting lid, over high heat and add the beef. Break it up as you drop it in the skillet. Once you’ve got it all in, season it liberally with the fajita seasoning and herbs d’Provence. Don’t be shy with the fajita seasoning; even though it has salt and you may be worried about over-salting, remember you’ll be adding potatoes and other veggies that will soak up the salt.
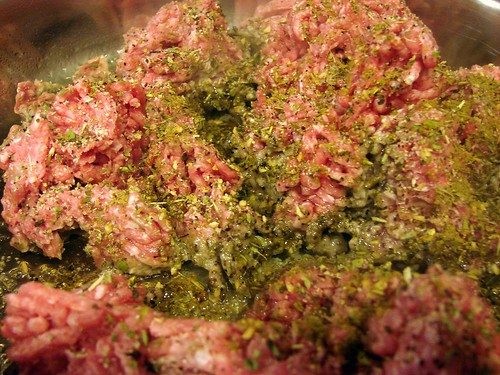
Crumble the beef as you work the seasoning in. Keep the temperature high, to help brown the beef a bit. The moisture in the ground beef will sweat out, once it evaporates, the beef will begin browning.

Add the onions and peppers. Make sure to stir it constantly to avoid too much from sticking to the bottom. Cook until the onions are translucent before adding the potatoes.

Once you add the potatoes, add about 1 cp of broth or water cover and reduce the temperature to medium-low. Come back and stir it every so often, check the seasoning and adjust as necessary. Allow it to simmer for 30 minutes or so, until the potatoes are tender and falling apart. As a matter of fact, the potatoes will be almost impossible to spot once this is cooked all the way.
We like to serve it with flour tortillas or rice.

Ay que rico!

Cookingly yours,
Anamaris
I admit it. I just had an Austin Powers/Fat Bastard flashback. “I’m higher on the food chain. Get in my belly!” LOL
Ok, I digress. Pork belly seems to be all the rave these days. It is another cut of meat that used to be reserved for the commoners, but that the elite have found out about and want to claim as their own. It’s ok, we’ll share because we, the people, are generous that way.

This preparation method may not seem Latin inspired, but believe me when I tell you we love our fatty piggy. In Panama we eat chunks of pork that have the crunchy, crisp skin/rind, the ooey gooey fatty butter, and lightly seasoned meaty parts. It is often fried into chicharrón or cooked in its own fat, preserving some of its moisture. That’s what I did with this baby. I was so excited about it too. I did my happy piggy dance. Yep. I did.
I opted to roast it in the oven because I’m chicken and I’m afraid of the angry stove top piggy. It sizzles, sputters and splatters everywhere, me included. Not wishing to sport third degree burns, I ovened it. I started out a day ahead with a dry rub to infuse it with flavors. There isn’t a ‘recipe’ here, you can really add just about anything you like and you will end up with crazy deliciousness. Look at him, ain’t he a beaute?

Rubbed Pork Belly
Pork belly slab (this was about 4lbs)
Allspice
White pepper
Sea salt
Sugar
Rosemary sprigs
Fresh ginger, slivers
Garlic cloves, whole
Onions, halved
Carrots
Day before prep: Since this cut includes the outer skin of the pig, you’ll want to check it for residual whiskers. I usually take the flame from a lighter to any hairs that may still be around. Trust me, you want to get rid of these, they’re not pleasant to find when you’re eating. Rinse and pat dry.

Take a pairing knife and score the slab ever so often, about 2 inches apart. Do this on both, the skin and meaty sides. Piercing the skin will allow it to stretch instead of puffing up like a balloon.

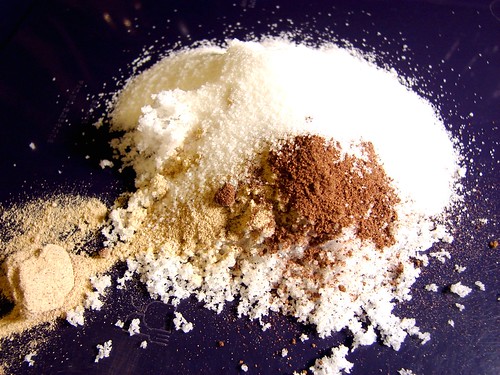
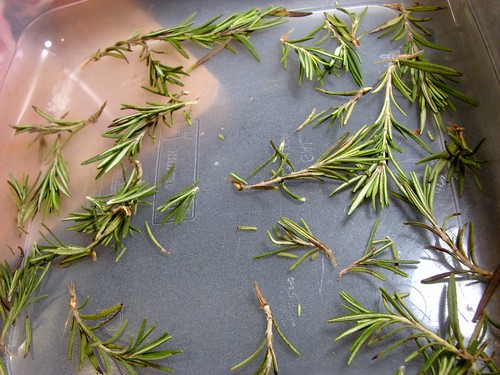
In a small bowl, combine the allspice, pepper, salt and sugar. Sprinkle half of the rosemary sprigs at the bottom of a sealable container large enough to hold the belly in a single layer.
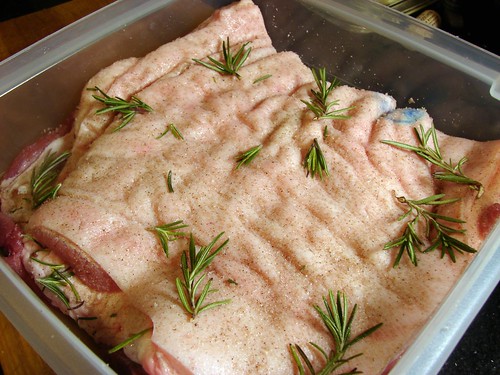
Now rub your belly. Your pork belly, I mean. Use that salt mixture and work it into the rind and meaty sides. Don’t be afraid of the salt, you will rinse it off before cooking, so be generous. Place it rind-side up into the container it will marinate in. Then top with the remaining rosemary sprigs. Cover and refrigerate overnight.
Day of prep: Preheat oven to 375°. Instead of using a rack, I used the vegetables to elevate the slab from the bottom of the baking sheet. I halved the onions, cut the carrots in 2-inch pieces and left the skin on the garlic cloves. I spread all of these, including more rosemary and the ginger slivers, on an aluminium lined sheet, I was thinking ahead to the cleaning stage.

Remove the pork belly from the fridge and rinse under cool water. Pat dry and lay it over the vegetables. Place it in the preheated oven and forget about it! After about 30 minutes, you’ll notice that the skin begins to develop bubbles.
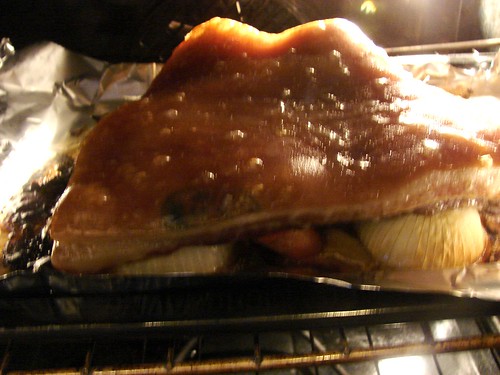
I roasted this one for about 1-1/2 hours, before turning up the heat to 475° to crisp the rind. I allowed it to cook at this temperature for another 15 minutes or so, or until the skin was nicely golden brown. Remove from the oven and allow it to rest for about 15 minutes before slicing.
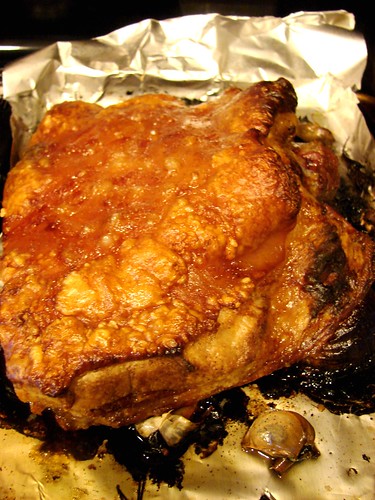
Slice and see if you’re able to stay out of this. Oh my. I want more!
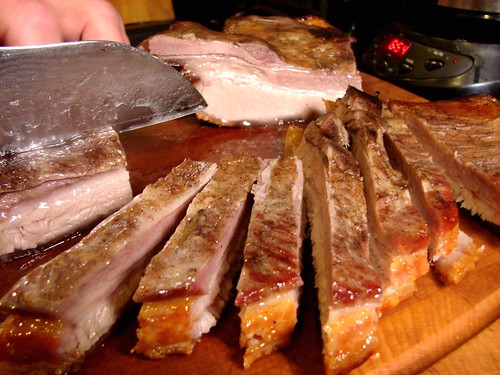
GET IN MY BELLY! It’s like bacon on steroids!

Cookingly yours,
Anamaris
There is a post I’ve been wanting to bump to the front. It was one I did on the very early days of Chef It Yourself. It was kinda funny to go back and look at the way it was formatted. I’ve come a long way, baby.
Anydoo. There are several things about that post that I was, and still am, quite proud of. Good pictures, good content, good how-to directions for one of the most popular bites of Latin Caribbean cuisine. A staple really. Can be found all along the Caribbean islands, on to Panama, Colombia, Venezuela and Ecuador. As incredibly delicious and easy to make as these are, they seem daunting and intimidating if you’re not familiar with the main ingredient.
Since I’m not savvy enough to figure out how to bring that original post into this screen, I’m going to ask you to follow the link. The original post was titled Cut & Smash. I really hope you’ll like it as much as I do. I give you….drum-roll….. PATACONES!
Again.

Go forth and smash!
Cookingly yours,
Anamaris
make some roast chicken salad!
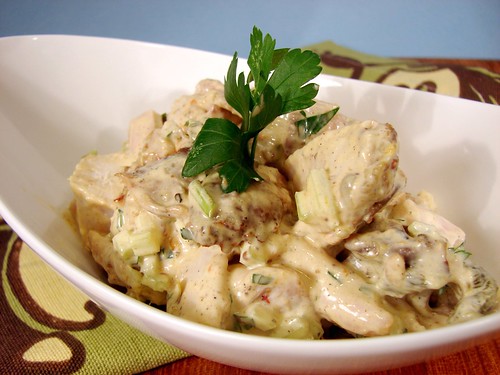
There are so many variations for this classic salad, but my favorite is from H-E-B, one of the largest grocery stores in Texas. The first time I tried theirs, I was hooked. It is pretty simple really, but the chicken is incredibly tasty because they use rotisserie chicken meat. To that they just add some celery and a bit of hot sauce to spice things up.
Since I had some leftover roasted chicken, I went ahead and used the leftovers to make a similar salad to HEB’s. I added some spice with roasted poblanos and Piment d’Espellete, but you can add or omit at will.
Roasted Chicken Salad
Makes about 4 cups
1/3 cp celery, finely chopped
1/3 cp roasted poblano pepper, finely chopped
Finely chopped Italian parsley
1/2 cp mayo (use the real thing)
1/4 cp sour cream
1/2 tsp Piment d’Espellete or cayenne pepper
Sea salt
Freshly ground black pepper
3 cps chicken meat, roasted and cubed
Combine the first 6 ingredients until well incorporated. Taste it and adjust the salt & pepper as necessary.

Mix in the chicken.
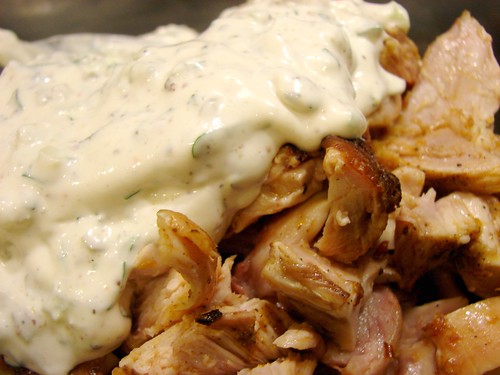
And…, see if you can keep your fork out of it long enough to serve it.

Go on. Serve.
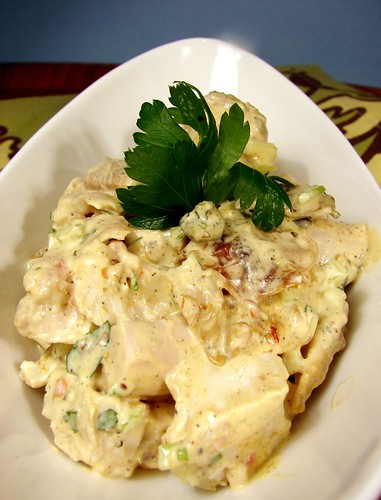
Cookingly yours,
Anamaris


