My mom was an extraordinary cook and hostess. Some of my most cherished memories involve her, cooking and friends filling a room. It is only appropriate her cookbooks and notes would become my priceless inheritance.

While my sister and I cleaned out the house and determined what would stay and what would go, we came across books and notebooks and loose notes Mami wrote through the years. Selfishly, I claimed most of them.
As I find my way back to blogging, I will share a dish I found in one of her notebooks. Arroz con Guandú (Rice with Pigeon Peas) is a staple in Panama. That’s probably the reason this recipe caught my attention immediately. It is generally prepared with cured pigs tail and coconut milk. I haven’t been able to find pigs tails here in Houston, at least not the cured ones, so I sub’d with salt pork. Does the trick just as nicely. As for the guandú, I used frozen, but you could use canned and skip the cooking step. The Hubbz and I loved this dish, I’m sure you will too.
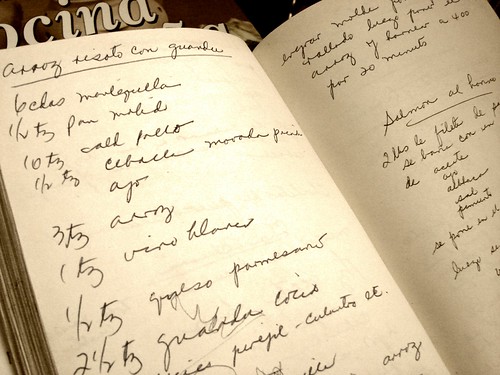
Risotto con Guandú
2/3 cp guandues (pigeon peas)
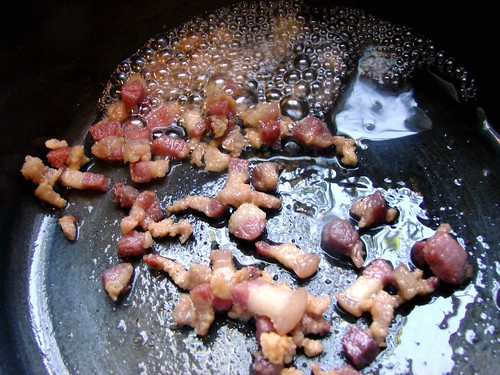
1/2 cp salt pork, chopped
1 can coconut milk (make sure it is unsweetened)
2/3 cp white wine
5 cps water
2 cps Arborio rice
Butter
Sea salt & black pepper
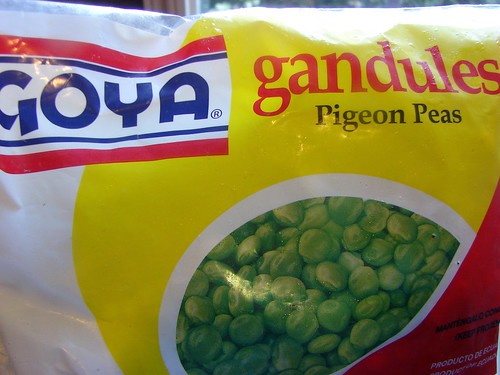
If you will use frozen peas, your first step will be to precook them in the coconut milk (a can will usually be about 14 0z) + 1 cp water. Add just a little bit of salt and a dash of sugar and allow it to cook for about 20 minutes or until the guandues are tender, but not mushy. Strain the guandú out of the liquid and add enough water to measure at least 7 cps. Keep the water on warm.
You will want to use a skillet with a tight-fitting lid to cook the risotto. Add the salt pork to the skillet, cooking it over medium high heat to render the fat.
Add the rice, if there isn’t enough fat to generously coat all the grains, add a bit of extra virgin olive oil. Continue toasting the rice until the grains are milky white. Add the guandu and stir well.
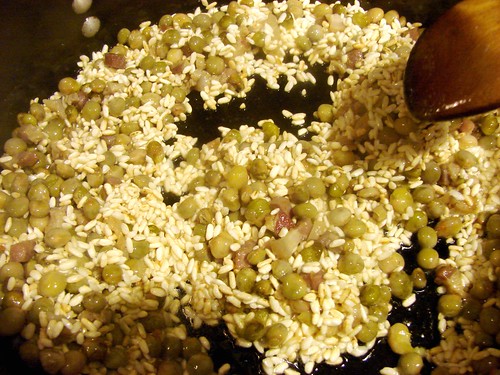
Add the wine, stirring constantly. Once the wine evaporates, begin adding the coconut water about 1 cup at a time. Once the water evaporates, add another cup. Continue doing this until the rice is tender and creamy.
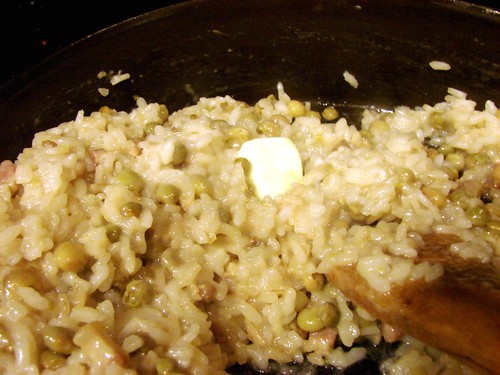
Add 2 tbsp of butter, stir it into the rice. Serve immediately and enjoy!

Cookingly yours,
Anamaris
Hello my blogies! It’s been a long time, hasn’t it? I’m still trying to figure things out, wishing there was a template or an established procedure for the grieving process. Alas! There isn’t one, I’ll just have to wing it.

Needless to say, going back home was very difficult. The only thing that helped was the knowledge that my Mami’s brave fight with cancer was finally over. She’s no longer in pain, no longer uncomfortable, she’s done putting on a brave face for us. She lived an amazing life. She loved and was deeply loved. She was caring to a fault and was cared for like a queen.
Mami was generous too. I like to think she decided this was the right time so I could be home when so many of my favorites fruits were in peak season. No mangoes, but what was available, I haven’t had in decades and I’m going to share them with you. I’m going to give you a look at what I ate while I was in Panama. Check it out.
Pixbae or Peach Palm Fruit.
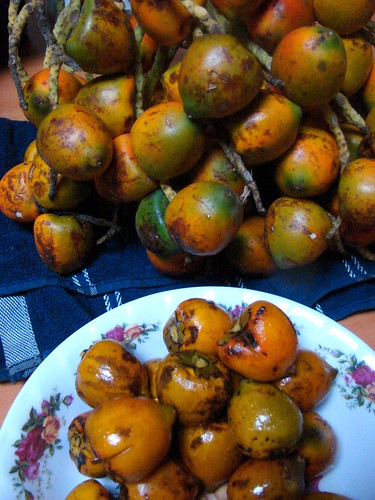
How do I describe the flavor of this one??? It isn’t sweet, let’s start with that. It is dense, has the density of a potato and kinda tastes like one. Maybe a Yukon gold, it has a slight hint of sweetness in the background. It is also a bit nutty and has a pit that, when cracked, has a little edible nut.
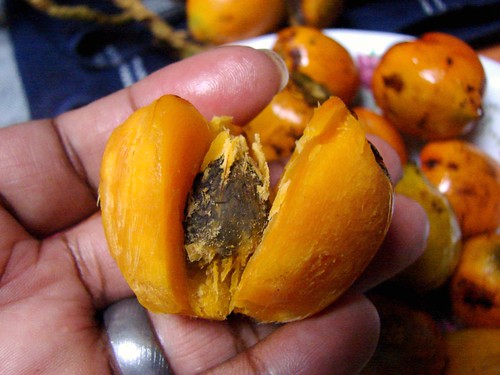
The pixbae has to be cooked before eating. This was my first time cooking them with instructions from my Tia Lidia. The fruits need to be washed, then the bottoms are scored with an X, they’re then boiled in salted water with a bit of vegetable oil. It takes about 45 minutes to cook.
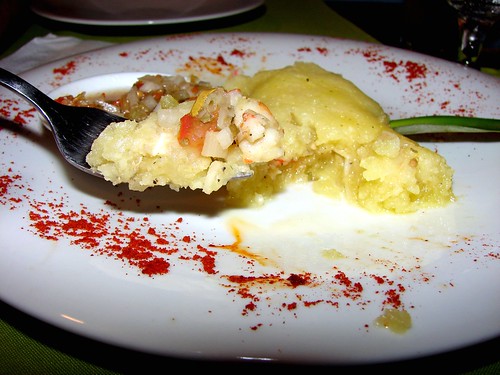
It’s then peeled and eaten just like that or made into soups, salads, puree and, more recently, tamales.
Moving on… Nance, sometimes known as wild or yellow cherry. Also a fruit, it is very tart and not generally eaten whole.

Nance has a black pit and the pulp needs to be squeezed off it–either by hand or pulsing it in a blender. It is then strained and used to make chicha. In Panama we make chichas or fruit drinks that are served with every meal. Unlike Mexican aguas frescas, our chichas are 70% fresh fruit juice, 20% water and 10% sugar. We make chichas with almost any fruit.
The other common use for nance is Pesada, a pudding-like dessert made with nance, fresh corn and sometimes coconut milk. This is then served with crumbled queso blanco (white cheese similar to queso fresco).

Pesada de nance con queso
One of my mom’s friends made a batch just for me and it was de.li.cio.so!
Look at this spread…

Can you tell how happy I was? Here’s the whats.

Maracuya or passion fruit

Naranjilla, also known as Lulo in Colombia

Guayaba
This one needed to ripen a bit more. When they’re ready to be eaten, the flesh turns a beautiful coral color. This is what Guava paste is made from, of course, I don’t know why they call it guava paste…
Finally, tomate de árbol. I had not seen this one before, but it is very pretty.

Fear not, I didn’t just eat fruits.
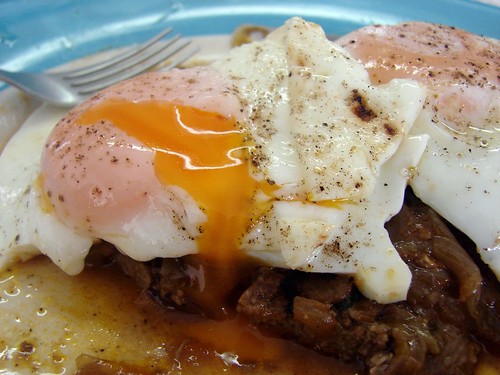
I had some Bistec a Caballo, of course.
My dad took me to one of his favorite Fondas, a road-side full-service food stand.

can you see the prices?
The 3 of us ate for a grand total of $7.50. I had fried fish with patacones, my aunt had a side of patacones and dad had the chicken soup. Oh, and 3 nance chichas.
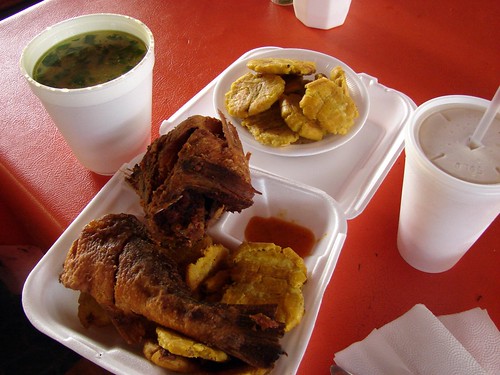
Follow this link to see the details. That bowl of soup is filled with chicken and veggies and that fish… was pure perfection!
Good cooks run in the family. This was the spread my Aunt Bubbles (Irma) put together for us. She makes the best bacalaitos, cod fish fritters!

Hats off to the cook! Tia Irma sitting in the middle with the blue top.
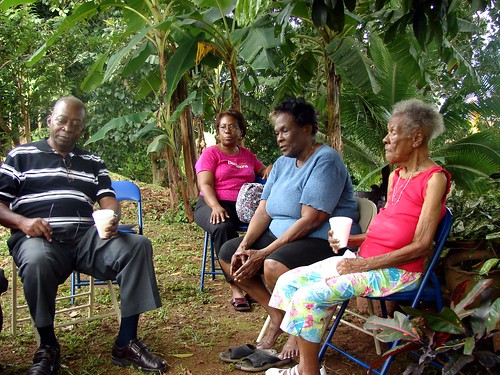
I was able to spend some quality time with dad and my siblings, the aunts and cousins. We ate, laughed, cried and remembered my mom.
Anamaris

I am slowly finding my way back here, I have the yearning to blog, I’m just working on the other stuff that gets it done. First, I want to thank all of you for your kind words and support, for not throwing me out with the bath water and for all your patience and love.
Since the main focus of this blog is food and cooking, I probably should keep the puppy shots away from the main page. Something about food and pets might offend some sensibilities. But I had to tell you about her, so here she is. Go on! Follow that link!
In puppy love,
Anamaris

Hello my blogies,
I am sorry to say I will have to take a break from the blog for a few weeks while I go back home and mourn my mom’s passing with the rest of my family. I will be back here soon, with more recipes and tips I learned from my Mami.
Anamaris
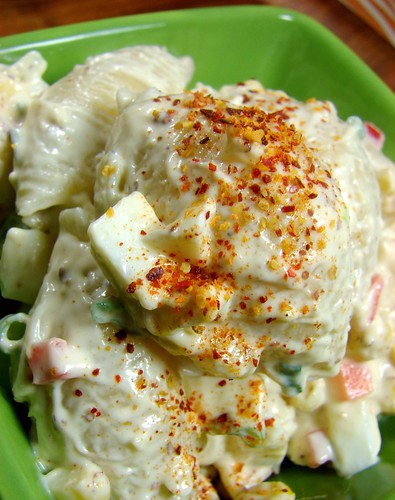
Ensalada de Coditos (Macaroni Salad) is a common side dish at family BBQs and beach outings in Panama, trumped only by potato salads. I love them both, but have to admit I most frequently go for potato salads.
Boy, was I happy last week when I found no potatoes in the fridge and was too lazy to go to the grocery store for some. I didn’t have elbow macaroni either, just large pasta shells. Lucky, really, because the salad was too delicious for words. The Hubbz and I are still thinking and dreaming of it today.
It makes for a great side with grilled meats. I cannot stress how easy it is to put together. Feel free to add or remove ingredients at will. Use shells or elbow or penne, fresh or frozen corn, green or red bell peppers, or…, you get the drift, use what you like or have available. This is another non-recipe recipe.
Anamaris’ Excellent Pasta Salad
Pasta shells, cooked and cooled
Eggs, boiled and diced
Fresh corn, chucked and cooked
Red bell pepper, diced
Carrots, cooked & diced
Green onions, finely diced
Mayonnaise, about 2/3 cp
Cajun or Dijon mustard, 1-2 tbsp
Heavy cream, 2 tbsp
Sugar, 2 tsp
Sea salt & black pepper
Piment d’Espellete or cayenne, to taste
In a bowl combine the pasta, eggs, corn, bell pepper, carrots and green onions, set aside.

In a small bowl, combine the rest of the ingredients until smooth, adjust the salt & pepper as necessary before mixing it into the pasta.
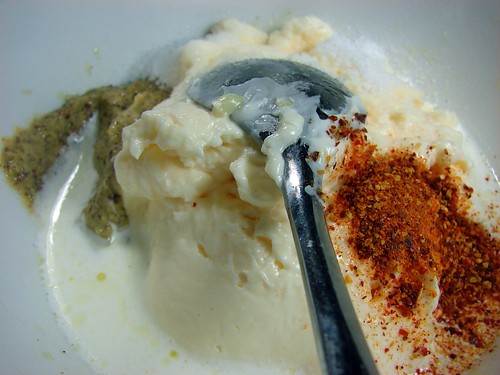
Stir until well incorporated, serve cool or at room temperature.

Enjoy!
Cookingly yours,
Anamaris
Fiesta is a popular grocery store here in Houston, it caters to almost every culture of the world. We have a very large Mexican-American population here in Houston, so it makes sense to find a lot of Mexican influences throughout the store, including the parking lot. Yes. The parking lot.
I think my first experience with a food truck, was outside my neighborhood Fiesta. There was a truck that served roasted corn on the cob. Let me tell you about this delicious little treat. They roast it, husk and all, then smear it with butter, crema fresca and chili powder. Insert dramatic pause here. . O. M. G. I still remember the first time I had it. A real thing of beauty.
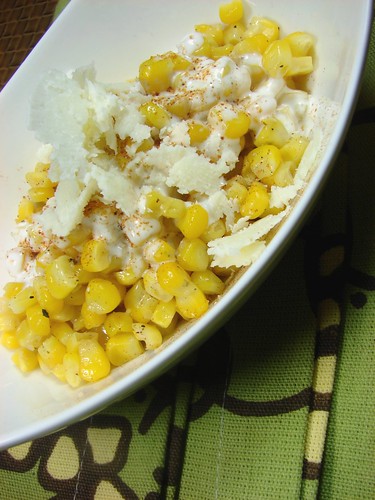
Fast forward some years later and here we are. I made minimal changes to the concept, but the resulting side dish is absolutely. divinely. cornily. DELICIOUS. And fresh. A true Summertime side dish. Super fácil (super easy).
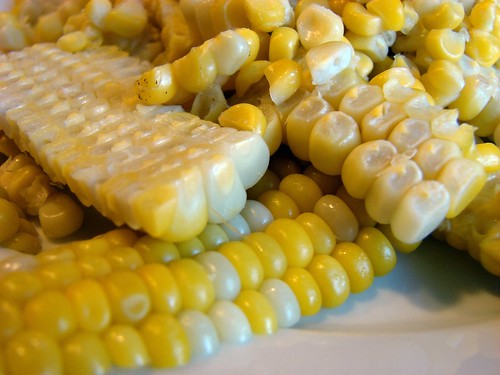
There’s no need for a recipe. I used crema fresca, creme fraiche, but if you can’t find it in your area, sour cream will work or a bit of cream cheese loosened with milk. In addition, I threw the corn onto a burning grill, but you can chuck the corn and cook it on the stove top or you can use frozen/canned corn.
Elote con Crema (Corn with Creme Fraiche)
Corn on the cob, roasted & chucked
Sea salt & black pepper
Crema fresca
Queso Cotija or Fresco, shredded
Chipotle pepper powder
Once you have removed the corn from the cob, simply mix all the ingredients and serve warm. Sprinkle extra cheese on top.

Cookingly yours,
Anamaris
Some months ago I posted a recipe for tamarind ribs. It was hit with many of you and I was excited to share as much insight as I could. One of the many questions was what else would the tamarind marinade and sauce make better. I’m here to tell you it is KILLER on chicken.
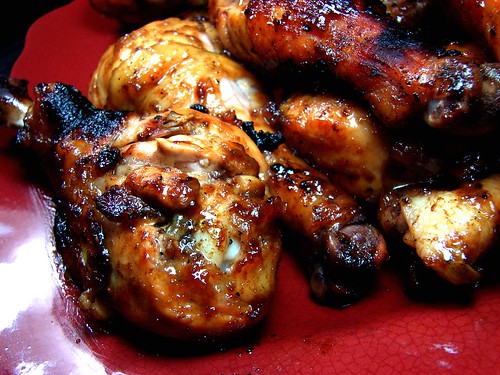
I followed the same recipe and marinated the drumsticks overnight. Instead of cooking them in the oven, which would work just as well, I opted to have The Hubbz grill them. I have to say, the smokiness gives it another delicious layer.
Other questions were regarding the tamarind pulp. Here’s a picture of packaging, pulp and, in the background because it doesn’t ‘look pretty’, the process of dissolving said pulp in water.

I hope you start your grill this weekend. I know I will.
Cookingly yours,
Anamaris

Summer is the time when people start thinking about firing up their grills. When you have block BBQs. When you picnic. Depending on where you live, Summer may be on its way out. For me, living in Hell’s Waiting Room aka Houston, TX, Summer is still in full swing and will be for another 3 months or so. No kidding.
The Hubbz is in charge of the grill in our family. That’s because I’m unwilling to stand in the heat and then take on the heat and smoke from the grill. I don’t enjoy smelling like hickory or maple or any kind of smoke, for that matter. So he does it because he loves, but mostly because he loves grilling. And since I love him, I try to keep him from the grill while Hell’s Waiting Room is in the triple digit range.
I’ve rambled on. Heat does that to my brain. So do delicious, falling-off the bone, tangy sweet pork spareribs. Yep. That’s what this is all about. Pork. Isn’t that what it’s always about? I’ve shared other recipes for spareribs: oven-q’d and tamarind glazed. This time we’re talking grilled and basted with my Dad’s secret recipe. It won’t be secret after this post, sorry Dad.
Spareribs tend to have more meat and fat than baby back ribs, they’re also not as tender but they ARE much less expensive than the skinny little baby ribs. Besides, who wants to be accused of eating baby parts? I say, if you’ve not tried spareribs, give them a chance.
Dad’s BBQ Spareribs
For the ribs
1 spare rib rack, fat trimmed (approx 5 lbs)
2 tsp sea salt
1 tsp black pepper
2 garlic cloves, crushed
2 tbsp brown sugar
Mix all the ingredients into a dry paste, and rub it into the ribs. Allow them to marinate for a few hours or overnight if you have the time. Keep them refrigerated until 30 minutes before cooking. In the meantime, prepare the bbq sauce.

Dad’s Awesome BBQ Sauce
2 tbsp olive oil
1/2 onion, finely diced
2 cloves garlic, pureed
3 thyme sprigs, chopped
1-1/2 cp ketchup
1-1/2 tbsp English dry mustard
1 tsp allspice
2 tbsp white vinegar
2 tbsp honey
1 tbsp brown sugar
1/2 cp water
Salt & pepper
Hot sauce, to taste
Heat the oil in a small saucepan and add the onions, cooking them until translucent. Then add the garlic and thyme, cook for just a couple of minutes, be careful not to burn the garlic. Add the next 7 ingredients and stir well. Allow them to simmer for about 20 minutes or so, until it thickens nicely. Adjust the seasoning as necessary, to include some hot sauce for a bit of a kick. Set aside to cool.
Cooking the ribs:
The secret to great spareribs is to cook them slowly, at low temperatures. We use one of those Lil Smokey grills, nothing fancy, but gets it done every time. The Hubbz builds the fire and let’s it cool down to low on the Lil Smokey gauge. You want to cook them at a temperature no higher than 325. While your grill reaches the right temperature, get the ribs ready for their tan-time.
Create a steam tent by measuring out 2 pieces of heavy foil paper to the length of the rib rack. Align both pieces together and fold the seams together to about 1/2-in wide. Then fold again, the objective is to seal it so you have no leaks. Now you should have one long and wide piece of foil.

Place the ribs in the middle of the foil tent, then join the edges together and seal them closed. Carefully place the foil-wrapped ribs over your preheated grill, put the lid over and let them cook undisturbed. You’re looking at about 1-1/2 to 2 hours, so keep an eye on the heat and add a bit more charcoal as needed.
At the end of 90 minutes, remove the tented ribs from the grill, don’t panic, they’re not done cooking. It’s time to heat up the fire a bit. Add more charcoal and, if you like the smoky flavors of bbq, add some wood chips–hickory, apple, maple.
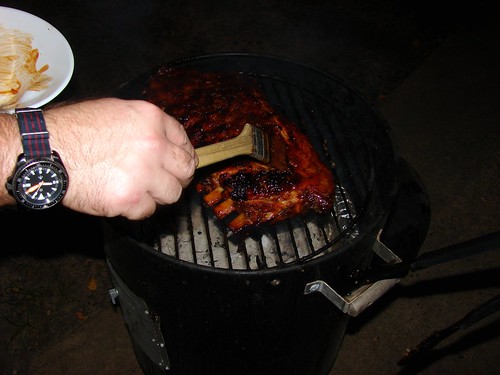
Remove the ribs from the foil and baste both sides with the sauce. Once the heat has come up, place the ribs back on the fire. You will need to stay close by, because the sauce will begin to caramelize and can burn if you’re not paying attention. Give the ribs a flip and baste. If you do this at about 5 minute intervals, you’ll be able to bake on that sauce after 2 or 3 flips. Believe me, you want to bake it on.
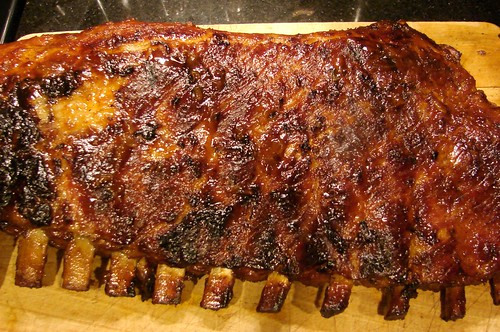
Notice how the meat has shrunken away from the bones? That’s prove positive you’re about to eat some ‘fall off the bone ribs’. Alternatively, you could cook the ribs tented in the oven for the first 90 minutes, then transfer to the grill to add some of that smokiness and char marks. This goes great with potato salad and roasted corn on the cob!
Cookingly yours,
Anamaris
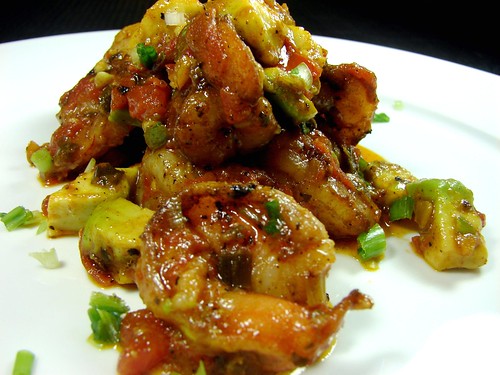
Shrimp, shrimp, shrimp. I cannot get enough shrimp. I could eat them in the morning, I could eat them in the dark, I could eat them all day long. That was kinda corny, wasn’t it? I didn’t promise musical abilities or poetry, I can cook, that’s the gift the muse saw fit to bestow upon me. It’s a good gift, I’m not complaining.
Back to the shrimp business. They’re good for you, they’re easy and quick to make. They are INCREDIBLY delicious, don’t you think? I love shrimp, did I mention that already?
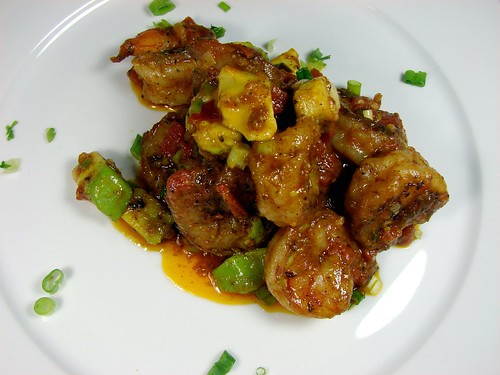
Camarones Entomatados (Shrimp in Spicy Tomato Sauce)
1 lb shrimp, peeled & deveined
1 tsp oregano
1/2 tsp cumin powder
1-1/2 tsp Jugo Maggi (or Worcestershire)
Extra virgin olive oil
Sea salt & black pepper
4 green onion sprigs, finely chopped
1 small serrano pepper, finely diced
3 Roma tomatoes, seeded & chopped
Cooking wine/sherry
1 avocado, cubed
Season the shrimp with the oregano, cumin, Maggi, about 1 tbsp olive oil and S&P and set aside for a few minutes while you chop the rest of the ingredients.
In a medium-sized pan, heat another tablespoon of olive oil over medium. Add 2/3 of the green onions and serrano, cook until the onions soften a bit, be careful not to burn the onions. Add the tomatoes and cook them for a few minutes, they’ll begin to soften. Add the wine, about 2/3 cp, and allow it to come to a boil to get some of that alcohol to burn off. Lower the temperature and simmer them down for about 15 minutes. Remove from the pan.
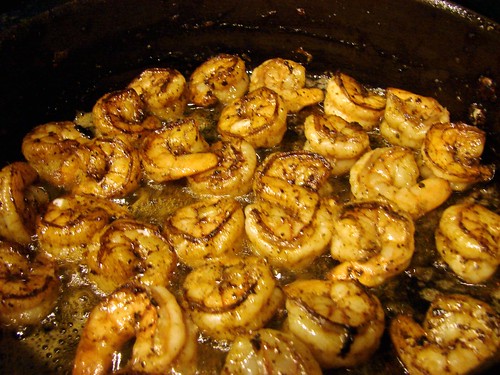
Add about 1 tbsp of butter and olive oil to the same pan, heat to medium high and brown the shrimp, you may need to do this in batches. Once the shrimp are browned, add the tomato mixture and the avocado, stir it in, cover and turn off the heat. Allow it to steam in for a few minutes before serving.
Cookingly yours,
Anamaris
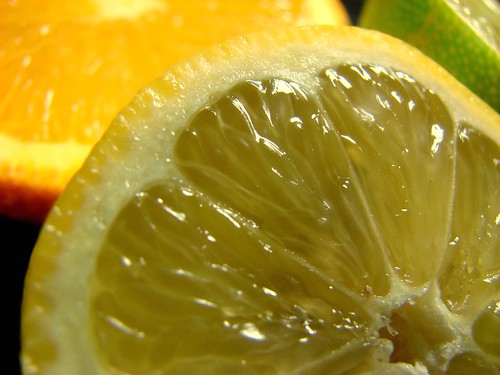
No, I’m not a Jimmy Buffet fan, come to think of it, I don’t think I’ve ever heard the whole song. I just thought this would be a catchy title. It was all about drawing you into my bloggy web.
Living in Houston means, among other things, that you live in Tex-Mex country. It also means sweltering heat 9 months out of the year. Luckily, those 2 little facts make a Margarita a necessity. Simple as that. Margaritas are how we quench our thirst and cool down from the heat in Houston.
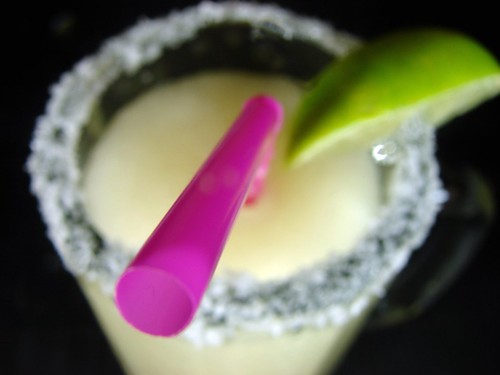
You know I like my cocktails, so I’ve dubbed myself something of a Margarita connoisseur. I’ve had good ritas and awful ones. Sometimes they taste great, but don’t have a punch, while others are all punch with absolutely no flavor. Personally, I like mine to be tart and sweet and punchy. Frozen with salt. That’s what I’m talking about.
Some places, most of them, really, will offer the top shelf margaritas. I say go for the house Margarita first, if that’s not good, don’t waste your time or money on the rest. Top shelf ingredients are supposed to make a basic better, but if the basic recipe sucks…, you catch my drift.
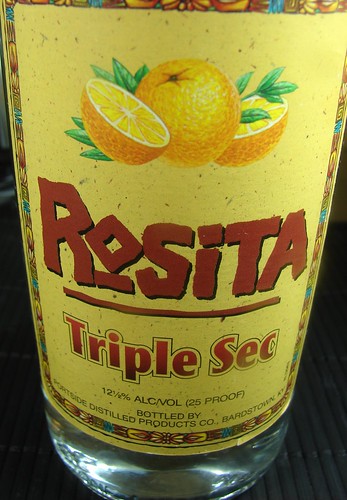
Here I’m sharing my ‘recipe’ for basic Margaritas. No fancy ingredients, but this is a very good ‘rita. So if you feel you must use top-shelf liquors instead of some Sauza Gold and Triple Sec, you can do so without any reservations, but don’t skimp on the fresh fruit juices.
Margarita YAY YAY!
Orange juice, 1/2 oz
Lime juice, 1 1/2 oz
Lemon juice, 1/2 oz
Tequila (I use Sauza Gold), 2 oz
Triple Sec, 1 oz
Sugar, to taste (2 tbsps)
Ice
Coarse salt for the rim
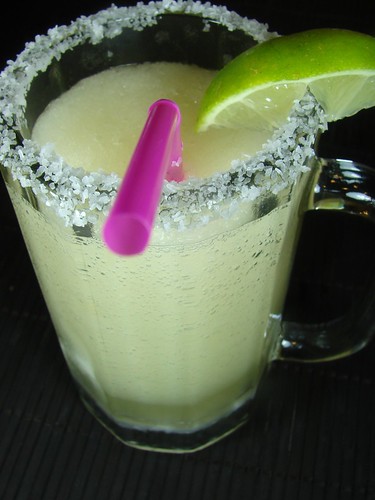
This is how it goes, for 2 large glasses: Mix the juices and liquors with sugar, until it dissolves. Put it into the blender with ice and crush.
Rim the glass with a lime wedge, then dip it into the salt. Pour the frozen goodness into the glass, drop a straw in it, and guzzle it down. How could you resist? See that straw beckoning for you?
Cookingly yours,
Anamaris


