Aside: Something weird happened this morning and it explains why this post is just coming now. See, I dutifully woke up around 5:45 am, put the post together and hit ‘Publish’. When I was at work, I checked in and noticed there was no new post. I looked and looked to no avail and, because The Man has decided is time for me to earn my keep, I couldn’t do anything about it. The long and short of it is, I have a ‘test’ blog, I accidentally clicked on that and THAT’s where this post was. All day, all by its lonesome. So here you go. Pretend its 6am.
—-
Yes, of course I’m looking back at more Thanksgiving goodies. In the weeks to come, I’ll share some new recipes for the meal of excess, but I wanted to remind you of what I shared with you last year. My blogging was in its infancy, but I can assure you my cooking was not.
Maybe you’d like to offer a little appetizer to your guests as they arrive. I love this little recipe which I submitted for a Pepperidge Farm contest. It says Autumn and it says eat me.
Aaaah, yes. The Meal. This one chronicles all the eating. Oh my. I’m so ready for a repeat.
No meal is complete without dessert, right? Especially when it addresses my love affair with Honeycrisp apples.
Thanksgiving meal
Sweet Potato pastries
Apple Squares
Fear not, my bloggies. There will be pie. Or something, but there will be plenty more.
Cookingly yours,
Anamaris
Remember the poll? The one from last week asking about side dishes you’d like to see redone. Well, it seems you want to inject some life into sweet potatoes, followed by dressing. So here we go. A fresh look at sweet potatoes. Well, fresh for me anyway.
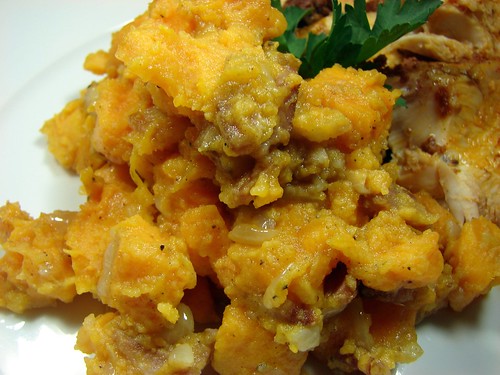
Sweet potatoes are not my favorite. There’s something about the mildly sweet taste made into super-sweet, cinnamony side that just doesn’t do it for me. But since you guys wanted sweet potatoes and because they’re supposed to be so good for us, I’ve been thinking about how to ‘like’ them. I’m here to tell you that I loved these!
While am at it, I should say that I essentially applied very similar ingredients to the ones I used a few months ago for those Bacon Potatoes. By the way, if you want to change up regular potatoes, that’s a good way to go. Two medium-sized sweet potatoes will yield enough for about 6 generous servings.
Bacony Sweet Potatoes
2 sweet potatoes (approx 4 cps cubed)
3-4 bacon slices, diced
1 medium onion, chopped
3/4 tsp sea salt
3/4 tsp ground black pepper
1/2 tsp cumin powder
1/4 cp water
Peel and cube the potatoes. Saute the bacon in a large saute pan–make sure it has a lid. It’s up to you if you want to crisp the bacon, we prefer it a bit on the soft side, cooked long enough to render the fat. Add the onions to the bacon & fat, cook until they begin to soften.

Add the sweet potatoes and stir in the salt & pepper. Stir so everything is well incorporated. Add the water, lower the temperature and cover with the lid. Allow the potatoes to steam for about 20 minutes, stirring it occasionally.

Serve warm. That’s all she wrote.
Cookingly yours,
Anamaris
Are you as excited as I am about this? Here’s my first Guest Appearance post to commemorate my Blogiversary. I’ve been reading the guest posts as they come in and, wouldn’t you know it? I picked some awesome people, indeed! Not that I had any doubts whatsoever!
 OK. Today’s guest is my dear Norma from Plátanos, Mangoes & Me. Of course I was gonna love her, she listed all my faves as part of her blog name! Brilliant! Then I started reading her posts, and I love her wit and her apartment. Yep, I want it. But then we get into her cooking and that’s all she wrote! She brings together Latin and Spanish flavors, she allows us to take a peek in her Personal Chef window and shares dishes learned from her mom and the ones she prepares with her granddaughter. It’s a family business for sure.
OK, enough of me jabbering. I asked my guests to answer a series of questions, except for the first 3, they all got different ones. Let me introduce you Norma.
As I have said in the past you get close to the people you meet through this venue and we end up caring for each other – our little family. You asked me to share one of my posts that speaks of my blog and that it may relate to yours. Puerto Rico and Panama are part of a grand melting pot. We have so many things that bond us through our food and culture. You gave me 7 questions to answer and I want you to know that some were not easy. I even lost some beauty sleep, but here goes:
What is the elevator pitch to your blog? My cooking rises to the top floor of your taste palate or my cooking elevates the spirit. I consider myself a “foodie”. The love of cooking, creating and still keeping with the old ways of Puerto Rican traditional cooking is my goal. Not only will I concentrate on Puerto Rican dishes, but I will also bring dishes from my childhood days in Venezuela, Spain and the Canary Islands. I have travelled to many wonderful places and we will also journey there. Along the way I’ll bring new and old recipes to the table.
Why and when did you decide to become a blogger? It started in February of 2010. I have always wanted to write a cookbook for my family including all their favorite dishes and what a better way to start than by blogging. After seeing what my friend, Joan of Foodalogue did with hers, I was inspired and with her help and the bloggers I have met, I am achieving my goal.
What is next for your blog? A change for the better.
What do you order when you go to a Chinese Restaurant? Dim Sum – Duck – Sticky Rice – Egg Drop Soup with lots of homemade crispy noodles.
Who would play you in a movie? Angelica Houston
What is your least favorite word?: CAN’T
Write a story with 6 words: Mi cocina canta canciones de amor – My kitchen sings songs of love
I am giving you a few posts to choose from.
I ended up picking this post because it ties into today’s assigned tips: setting the mood for a dinner party. This was to be Norma’s Foodbuzz Challenge entry for Hosting a Soiree! I think she was robbed!
I hope you’ll add Plátanos, Mangoes & Me to your blogroll, you’ll thank me for me it!
Panamá, being the proverbial melting pot, has an incredibly abundant Chinese presence. You can’t walk more than a few yards before stumbling into a Chinese restaurant or a corner tienda, a little neighborhood store where you can buy everything from fresh bread to pigs feet and a hammer. That means Chinese food has been influenced by the local’s taste buds and available produce. Chinese food in Panama is completely different from Chinese food in Houston and Houston’s is nothing like Chinese food in NYC. Adaptability. I often wonder if I would enjoy Chinese food in China. But I digress.
I’ve shared with you a recipe for roast chicken very popular in Latin America. This is pretty much the same thing with a few changes and the addition of this ketchupy sauce added to chicken in Panamá. I don’t know what it is about this simple sauce, but it would probably fall under the Chino-Latino category. Almost every Chinese restaurant in Panama will offer some version of this rotisserie chicken and BBQ pork, which is absolutely divine.
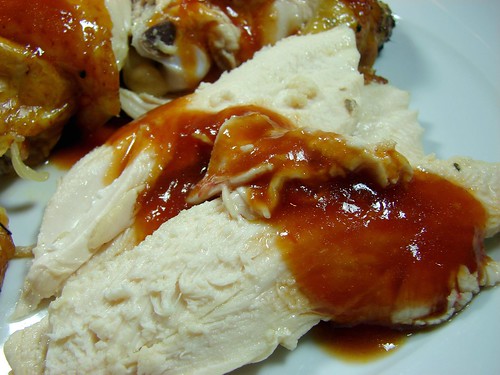
The chicken is seasoned pretty much the same, then roasted to golden perfection and served with the yummy sauce all over it. To ensure the chicken is super juicy, I brined it for just over an hour, ideally, I would’ve allowed it to brine longer, but it was still delicious. It occurs to me that this would also work brilliantly with turkey, I may just give it a try. Here’s what you’re looking for.
Pollo Panamá
1 whole chicken, approx 4-6 lbs
For the brine:
2 Sazón packets
4 garlic cloves, crushed
4 tbsp soy sauce
2 tsp sea salt
2 tbsp Italian seasoning
2 tbsp sugar
Water
Chino-Latino Ketchup
1/2 cp ketchup
1-1/2 tbsp soy sauce
1-2 tsp sugar
1/4 cp water
Habanero hot sauce, to taste
1 garlic clove, halved
2 tsp extra virgin olive oil
For the chicken: Heat about 1/2 cp of water and add the garlic, salt, Italian seasoning and sugar for the brine, allow it to come to a quick boil, then turn off and transfer to a bowl large enough to submerge the chicken. Or you can use a large ziploc bag. Give it just a couple of minutes to cool, then add the rest of the brine ingredients.
In the meantime, remove the giblets from the chicken’s cavity and rinse the chicken under cool water. Drain and place the chicken in the bowl with the brine concentrate and fill the bowl with enough water to submerge the chicken. Allow the chicken to marinate in the brine for about an hour, longer if you have the time.
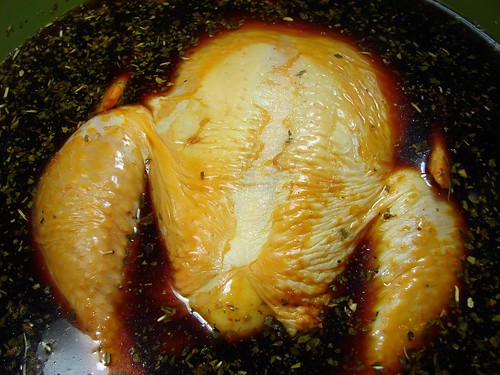
Preheat oven to 350°. Prepare a roasting pan and rack large enough to hold the chicken. Drain the chicken and pat it dry. Rub it with extra virgin olive oil and place on the rack breast side down. I prefer to roast whole chickens and turkeys with the breast down to make sure it is juicy, since breast isn’t my favorite meat. If you’d rather have pretty skin on the breast, then roast it breast side up. Place the chicken in the preheated oven and allow it to roast for about 20 minutes per pound, for a 5-pounder, you’re looking at just under 2 hours.
Note: I will usually roast the chicken or turkey at 375° for about 10 minutes, then lower the temperature to 350° for the remainder of the roasting time, but I was being very lazy with this chickie. You know what? It was still perfect!
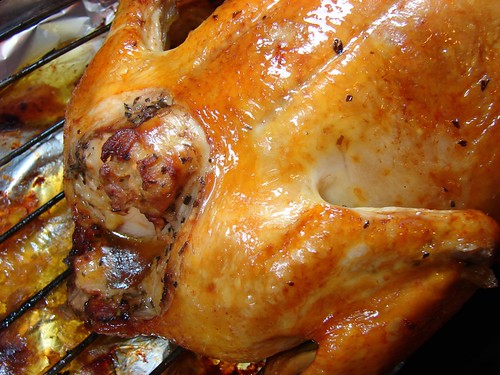
Once the internal temperature reads somewhere around 180°-185°, remove the chicken from the oven and cover loosely with foil. Allow it to rest to allow the juices to redistribute and make Ms. Chickie very happy. This is a good time to put the sauce together if you haven’t already.
In a small saucepan, heat a bit of olive oil and add the garlic halves allowing them to permeate the oil for a minute or two. Add the rest of the ingredients, tasting it after the first teaspoon of sugar, this should be to your taste. Adjust the seasoning with salt, if necessary, but the soy should take care of it. Bring it to a slow simmer for 5 minutes or so, keep it warm and spoon over the chicken to plate.
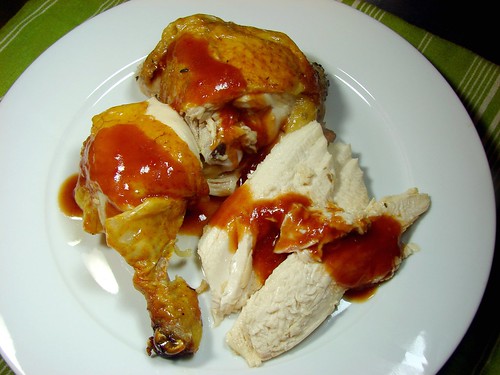
Check out the photo set for more juicy shots.
Cookingly yours,
Anamaris
Here we go, bloggies! Remember I mentioned offering up tips for your holiday cooking madness? Well, it begins today. There’s a catch, though, in order to find out all about these fab tips, you’ll have to follow me on Twitter and/or Facebook. Yes, I’m sneaky like that. It’s why you like me.
I do want to let you know what to look for. My thought was to have a focus for each day of the week, the work week, that is. I will tweet tips throughout the day, then post those on my FB page at the end of the day. Go on, do the clickety on the Tweety or the FBty badges and follow me so you don’t miss out on any of the scoops.
Here’s the weekly line-up:
Monday – We’ll start off the week with planning & organization tips to get you thinking about the festivities and to avoid freakouts.
Tuesday – We’ll look at the set up; here’s where my entertaining hat will come in. We’ll talk about making your home look like a Colin Cowie set.
Wednesday = The sides, you guessed it. Recipes and ideas for memorable side dishes.
Thursday = The Day – The Main Man – All about The Bird.
Friday = Morning after – Oh my! I got turkey coming out of my ears! What to do with those leftovers.
Don’t miss out on a single tip, make sure to follow me on Twitter and like my Facebook page. It’s gonna be good.
Anamaris

On this my blogiversary month, I’ll host my own version of Oprah’s Favorite Things show. No, no. I won’t be giving away a car, not unless you’re interested in picking up the payments for my humpty. I just mean I plan on keeping it exciting, entertaining and fun. I bet you’re curious about the lineup, right?
Here are your November/December listings:
Tips galore: with the holidays right around the corner, I’ll be supplying you with cooking and planning tips to get you ready for the festivities. There’s a twist, though. These tips will be shared daily on Twitter and Facebook beginning today. Be sure to follow me @chefityourself (on Twitter) and Chef It Yourself (on FB). Because I like you so, I’ve made your life easy by providing you with buttons that’ll take you straight there. Now go forth and follow.
Guest appearances: I’ll call this Tuesdays with…, and yes, you guessed it, every Tuesday through December 13th I will have a guest post by one of my blogging buddies. Personally, I’m uber excited about this one.
Holiday recipe makeovers: Starting with the side dish you choose on the poll, I will attempt to improve side dishes, at the very least, get them out of the proverbial rut. This being the Latina-Caribbean blog, the recipes will have some sabor.
Q&A: I want to open up the lines and answer questions you may have about cooking, entertaining, meal planning, Panama, my puppy, whatever! You ask, I’ll answer. Each week I’ll open up a post for you to ask away. As a bonus, a question will be randomly selected and that person will receive a little gift from me.
New digs: Yep, Chef It Yourself will be moving to it’s own piece of Internet real estate. I don’t have set date for this, I’m OCD’ing on layout and the like.
That’s it. I think. That’s it for now. I hope you’re looking forward to all of it.
Impatiently yours,
Anamaris
Sometimes I feel guilty about what I share with you, rather, what I don’t share. See, I don’t have much of a sweet tooth, which is unusual when you consider desserts are my family’s business. Maybe it’s because I could smell the scent of baked goods wafting through the house almost every day of my life since age 12 or so. Or maybe I just didn’t get that gene, I don’t know. What I do know, is that I don’t share desserts with you guys very often.

I will try to pay more attention to your sweet tooth, starting with this post. It’s cake time. It’s really good cake time. This is again my mom’s basic recipe for vanilla cake, this time, though, I added some guayaba paste (known stateside as guava paste) and a frosting that includes Nutella. What else could you ask for?
Whenever I go back home to Panama I make a grocery store run, picking up all the goodies I cannot find in the US. On this last trip, I found some guayaba preserve that came in a pouch. I was transfixed by the sight of the magical, colorful pouch. Pourable guayaba preserve? Oh my.
If you have purchased this delicious paste in the US, you’ve likely found it in a round tub or a long brick. The consistency of it would’ve been pretty thick, sticky and solid. Nothing wrong with that one, it is the one I’ve purchased most of my life. But being able to pour it out… Think of how you felt the first time you saw mayo in those new squeeze bottles. Heaaaavennnn.
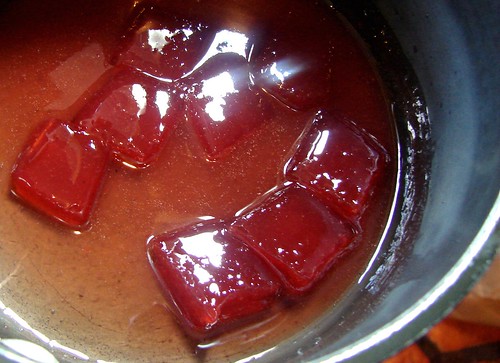
OK, back to the guayaba business. If you are dealing with the tub or brick of guayaba paste, all you’ll need to do for this recipe, is dissolve the paste so it is liquid. I used some of the paste so I could give you some guidance. For about 1-1/2 cps of cubed guava paste, add 1/4 cp of pineapple juice, melt it over medium heat, stirring occasionally. Let it cool.
Pastel de Guayaba con Glaseado de Nutella
1-1/2 cps butter (3 sticks), softened
1-1/2 cps sugar
4 eggs, room temperature
1 cp pineapple juice
1 tsp vanilla
1/2 tsp almond extract
1/2 tsp nutmeg
3 cps flour
3 tsps baking powder
1 cp guayaba paste, melted
Preheat oven to 350°. Prepare a 9×13 baking pan: use the butter wrappers to grease the cake pan, then add a bit of flour to coat. Set aside. Combine the milk, vanilla and almond extracts. In a separate bowl, combine the flour, baking powder and nutmeg. Set aside.
Combine the butter and sugar in a mixer bowl and beat until the sugar grains are dissolved and the mixture is smooth and light in color. If the butter is at room temperature, this will take about 10 minutes. Add the eggs one at a time, making sure to beat each one in completely.
Add 1/3 of the flour and mix until incorporated, then alternate with 1/2 of the juice. Then another 1/3 of the flour, followed by the rest of the juice and end with flour. Take care not to overbeat, just mix long enough to get all the flour evenly incorporated.
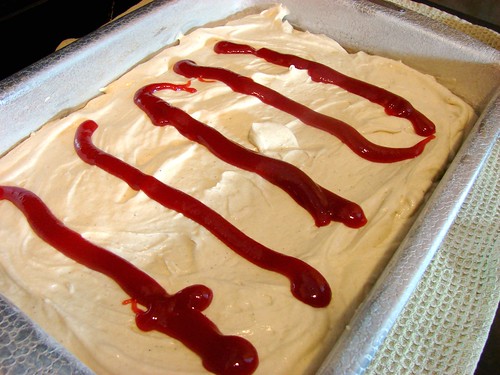
Spread half of the batter on the bottom of the baking pan. Then drizzle half of the the guayaba and top with the rest of the batter. Drizzle the rest of the guayaba paste over the top, going in the opposite direction you did the first time.

Use a knife or spatula to swirl the guayaba into the batter. Try not to push all the way to the bottom of the pan, otherwise you’ll have problems unmolding it. Pop it in the oven and bake for about 25 minutes or until a toothpick comes out clean when you pierce the center of the cake.
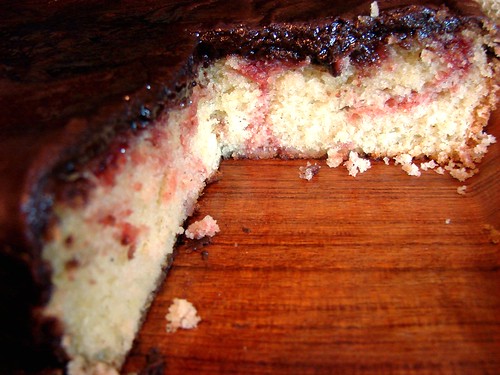
Allow it to cool for a few minutes, while you make the frosting. See recipe below. Unmold the cake onto a platter and spread on the frosting while it is still warm.
Nutella Buttercream Frosting
1/4 cp butter, softened
1-1/2 cps powdered sugar
3 tbsp cocoa powder
1/3 cp heavy cream
1/2 tsp vanilla extract
1/2 tsp almond extract
1/2 tub Nutella, approx 1-1/2 cps
In a large bowl, cream the butter, sugar, cocoa and extracts until smooth. Add the Nutella and mix until smooth and completely incorporated.
Add enough cream to thin out the frosting, it should be about the consistency of yogurt or sour cream. Not runny, just thin enough to smooth it easily over the cake.
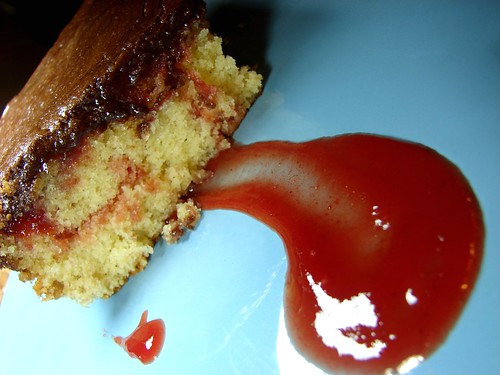
You’ll need a glass of milk to go with this one.
Cookingly yours,
Anamaris
I think I messed up, but I’m going with the better late than never philosophy. About a week ago I submitted one of my recipes for consideration to the 30 Best Recipes of 2010 contest. This one is being hosted by 4 fabulous bloggers, Thasneen, Alka, Chacko and Smita. When I received the invitation, I had to participate, you know me.
The idea is to submit a recipe that I, the blogger, consider to be a good one AND one that you, my bloggies, might’ve enjoyed as well. How would I know you enjoyed it, you ask? Well, based purely and scientifically on comment love.
This one landed me on Foodbuzz as one of the 9 featured publishers for the day, so, yeah, it got a lot of comment love. Which recipe you ask? Bacon-Wrapped Asparagus Rolls. Yep. Bacon and veggies. What’s not to love. If you missed this post, click on the photo for the details. Believe me, you want to.
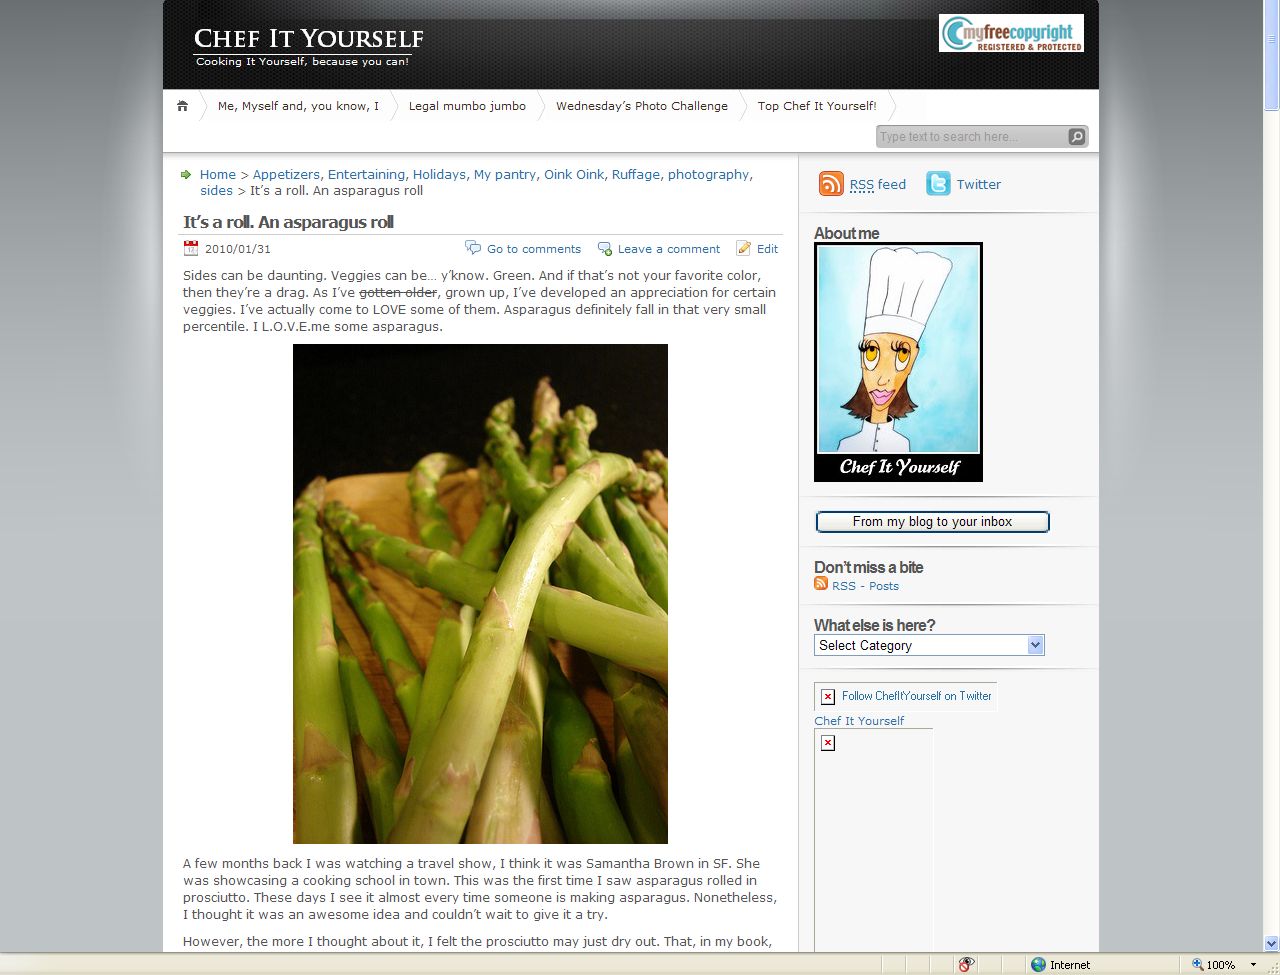
Now I have to wait in anguish to find out if I made the cut or not… It’s a good thing I’m not a nail-biter.
Stay tuned.
I hope I’ve tantalized your tastes buds with my previous posts about this lovely root. #1, #2
I hope it has made you curious enough to go forth and find some in your grocery store or market.
I hope you’ve scoured the web looking for more yuca recipes.
I hope you are ecstatic to find out it works for desserts too.
Those are a few of my hopes where yuca is concerned. Well, no. I really REALLY hope you’ll give it a try. Really.
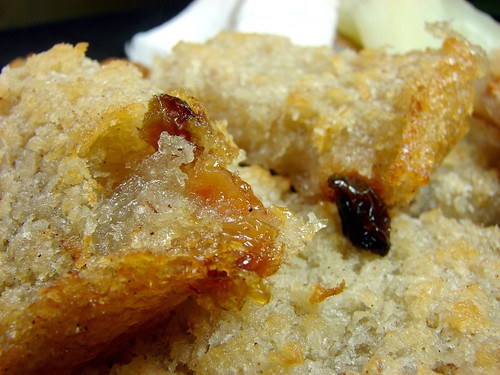
Now, let’s talk about Enyucado, or as any good Panamanian would say it ‘Enyucao’. I’m not sure I’ll be able to adequately describe the delicious piece of earthly goodness. As I mentioned, it is a dessert. It has yuca and coconut and butter. Not just butter, but buttah! It is sweet and gooey. See, yuca is very starchy. In fact, its starch is used to make tapioca, I think that starchiness contributes to the gooeyness of the dessert. Then the buttah and sugar make the edges caramelize and it all becomes a mess of sticky goodness.
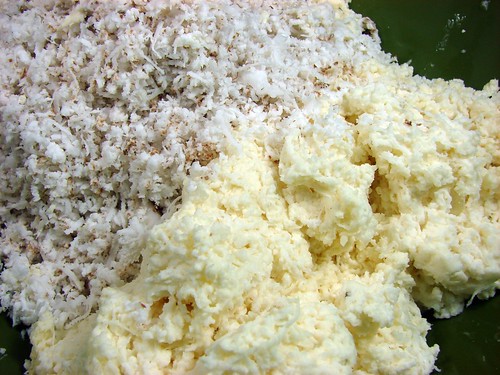
For the Enyucado, the yuca and coconut are shredded, which means there’s a bit of effort that goes into the dessert, but that is it. Once you have that part taken care of, the rest is a zinch. I promise. And it is oh so good!
Enyucado (Yuca Cake)
2 cps yuca, shredded
2 cps fresh coconut, shredded
1-1/2 cps sugar
1/2 cp butter, melted
1 tsp vanilla essence
1/2 tsp cinnamon
1/4 tsp nutmeg
2/3 cp raisins
2 tbsp anise liqueur or extract (I used Galliano)
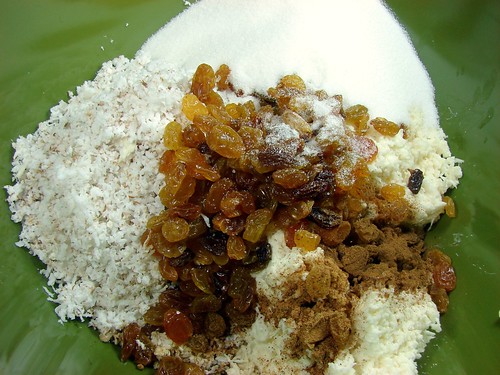
Preheat oven to 350° and generously butter a 9×13 baking pan; set aside. Combine all the ingredients and stir until the sugar has dissolved and everything is well incorporated. Pour into the baking pan and pop it in the oven. It will bake for 30-40 minutes, or until golden brown on top.
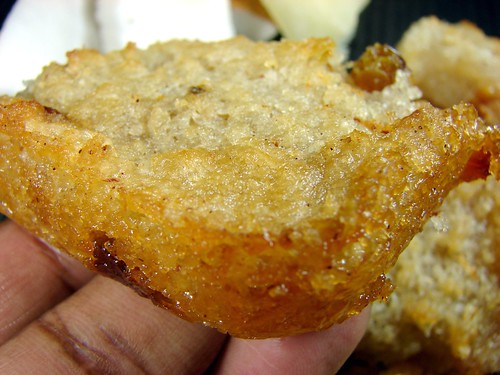
Allow it to cool before slicing into squares. For more shots, check out the set here, and to figure out how to shell a coconut, click here.
Cookingly yours,
Anamaris
I just realized I haven’t done one of these in months! My apologies. I like sharing the tips and tricks I’ve picked up along my cooking journey. We’ve covered how to pick and prep tubers like yuca and otoe, we’ve made plantains less daunting, Latin cooking basics, even some of the fancy sounding cooking methods such as coulis. This time will be all about the mighty coconut.
Earlier this week, one of my friends commented, or lamented, on Facebook about how difficult it was to find fellow coconut lovers. Her status generated a great deal of comments listing the pros and cons of this fruit. Here’s what I had to say on the subject.
As foods seem to break across more and more borders, ‘exotic items’ become more readily available. That’s wonderful, but it also means we may not utilize them simply because we don’t understand them. So let me introduce you to Mr. Coconut or Señor Coco as it is known in my world.
This fruit goes through a few different stages and is edible throughout most of them. Once it grows to a decent size, the young/green coconut can be harvested, cracked open and the water in it can be consumed. The water is slightly sweet and incredibly refreshing. In Panama and many other Central American countries, you’ll find them chilled and sold at corner stores.
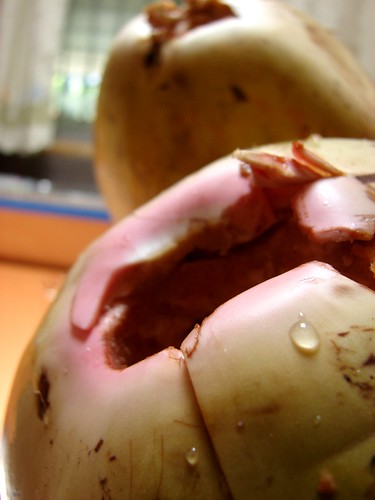
As the fruit matures, the meat will become more and more dense. First you will find a gelatinous meat that has to be eaten with a spoon. At this stage, the meat tastes much like the coconut water, only sweeter.
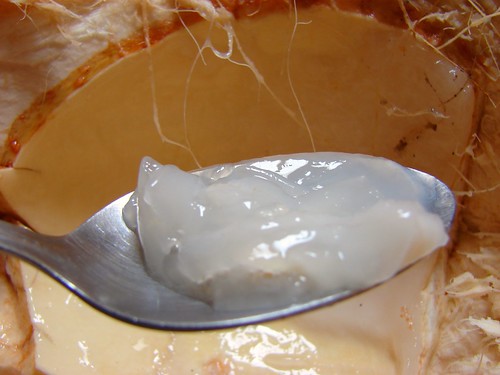
The more mature the coconut, the more dense the meat, until you arrive at the very thick and milky meat that is usually shredded into foods.
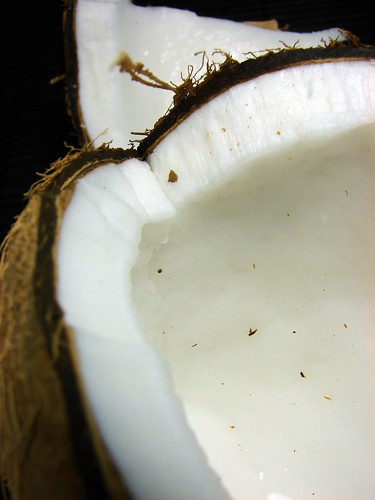
So how do you crack it? Let’s get to that.
I like using a hammer to crack the outer shell enough to drain the water out.
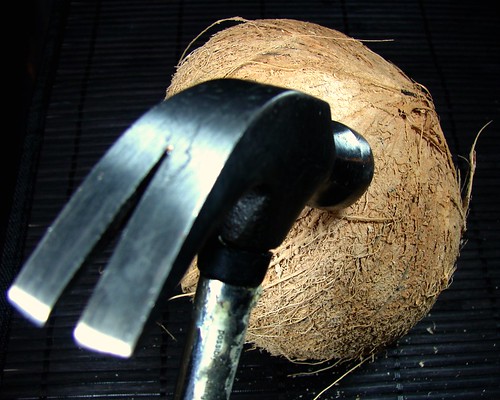
Once drained and the water has been reserved, I continue hitting it with the hammer to break into manageable pieces.
Then begins the ‘peeling’. Use the tip of a knife to separate the meat from the hard shell. Gently push the knife through, and the meat will pop right out of the shell.
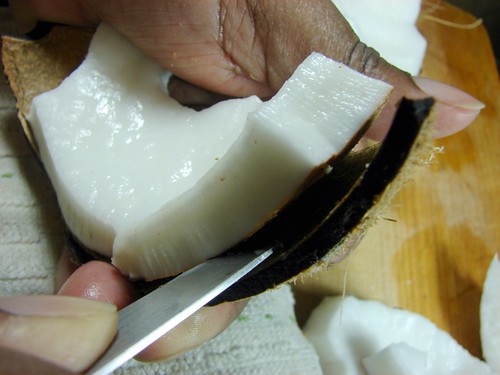
That really is all there is to it. Discard the shell, rinse the coconut pieces and use them at will! Check out the step-by-step shots here.
Cookingly yours,
Anamaris


